
Related Manuals for Crestron GLS-OIR-CSM-EX-BATT


Summary of Contents for Crestron GLS-OIR-CSM-EX-BATT
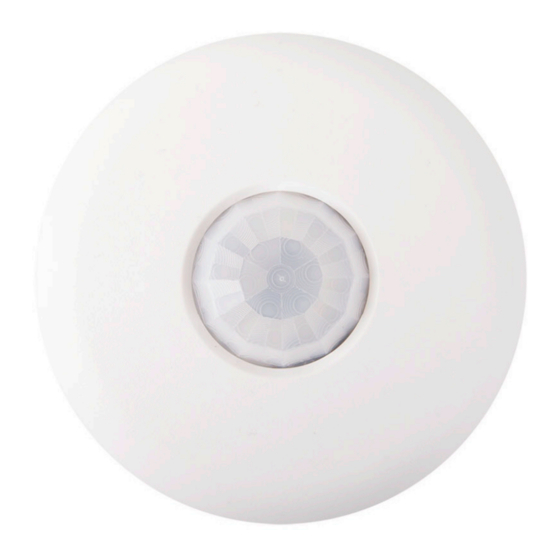
- Page 1 GLS-OIR-CSM-EX-BATT Wireless Passive Infrared Occupancy Sensor, Battery Powered Product Manual Crestron Electronics, Inc.
- Page 2 Other trademarks, registered trademarks, and trade names may be used in this document to refer to either the entities claiming the marks and names or their products. Crestron disclaims any proprietary interest in the marks and names of others. Crestron is not responsible for errors in typography or photography.
-
Page 3: Table Of Contents
Verify the Sensitivity Settings TEST Button Test Mode Set the RF ID Replace the Battery Wireless Communications Firmware Upgrade Troubleshooting Resources Crestron Support and Training Programmer and Developer Resources Product Certificates Related Documentation Product Manual — Doc. 9239A Contents • iii... - Page 4 iv • Contents Product Manual — Doc. 9239A...
-
Page 5: Overview
500 sq ft (47 sq m). It communicates wirelessly with a Crestron® control system via the infiNET EX® wireless network, allowing for quick installation without running any wires. -
Page 6: Features
Vacancy Only Mode with Grace Occupancy The GLS-OIR-CSM-EX-BATT can be configured via the control system program to sense vacancy only. In this mode, lighting and other equipment is shut off automatically when a room becomes vacant, but can only be turned on manually. - Page 7 Practices” guide. Ceiling Surface Mount Installation The GLS-OIR-CSM-EX-BATT includes hardware for mounting to a typical drywall or drop-tile ceiling. When installed, it achieves a discreet appearance against a white ceiling, and the body may be painted to blend with other surfaces.
-
Page 8: Specifications
Specifications Product specifications for the GLS-OIR-CSM-EX-BATT. Product Specifications Sensing Motion Detection Passive infrared (PIR) motion detection Technology Coverage Area 500 sq ft (47 sq m) Coverage Pattern 360° (half mask and perforated mask included) Major Motion Area 150 to 500 sq ft (14 to 47 sq m) - Page 9 1.19 in. (31 mm) Diameter 4.38 in. (112 mm) Weight 0.4 lb (170 g) Compliance Regulatory Model: GLS-OIR-CSM-EX-BATT CE, IC, FCC Part 15 Class B digital device To search for product certificates, refer to support.crestron.com/app/certificates. Product Manual — Doc. 9239A GLS-OIR-CSM-EX-BATT • 5...
-
Page 10: Dimension Drawings
Dimension Drawings 6 • GLS-OIR-CSM-EX-BATT Product Manual — Doc. 9239A... -
Page 11: Installation
Installation This section provides the following information: • Determine the Mounting Location • Mounting Product Manual — Doc. 9239A GLS-OIR-CSM-EX-BATT • 7... -
Page 12: Determine The Mounting Location
30º perforations from the full mask for a custom detection area. The following images provide typical illustration examples. Occupancy Sensor Mounted in a Corner 8 • GLS-OIR-CSM-EX-BATT Product Manual — Doc. 9239A... - Page 13 Occupancy Sensor Mounted in Center of Room, Perforated Mask Used to Block Doorways Product Manual — Doc. 9239A GLS-OIR-CSM-EX-BATT • 9...
-
Page 14: Motion Detection Range
Motion Detection Range The detection pattern for the sensitivity settings are shown in the illustrations that follow. Top View - 8 ft (~2.5 m) 10 • GLS-OIR-CSM-EX-BATT Product Manual — Doc. 9239A... - Page 15 Side View - 8 - 12 ft (~2.5 - 3.5 m) Product Manual — Doc. 9239A GLS-OIR-CSM-EX-BATT • 11...
-
Page 16: Mounting
Mounting Install in a drop ceiling or drywall, or into an octagon electrical box. The following items are included with the GLS-OIR-CSM-EX-BATT for installation. In the Box Qty. Description Plastic Wall Anchors Phillips Head Screws 1/2 Solid PIR Mask 360 degree 12 section perforated PIR mask... - Page 17 3. Twist the sensor cover counterclockwise to separate it from the sensor base. 4. Connect the battery to the two terminals in the sensor and secure the battery into the housing. Product Manual — Doc. 9239A GLS-OIR-CSM-EX-BATT • 13...
- Page 18 5. Using the Phillips head screws and screwdriver, mount the base of the sensor to the plastic wall anchors. 14 • GLS-OIR-CSM-EX-BATT Product Manual — Doc. 9239A...
- Page 19 6. Align the arrows on the sensor cover with the arrows on the sensor base and then place the sensor cover on the sensor base. Twist clockwise until the sensor cover clicks into place. Product Manual — Doc. 9239A GLS-OIR-CSM-EX-BATT • 15...
-
Page 20: Configuration
Firmware Upgrade on page The GLS-OIR-CSM-EX-BATT detects motion in a room to determine if the room is occupied or vacant and then relays the occupancy or vacancy state to the connected control system. If the sensor no longer detects motion, the timeout triggers. The length of the timeout is set using the TIMEOUT knob under the cover. - Page 21 The tables below show recommended settings for commercial and residential applications. NOTE: The GLS-OIR-CSM-EX-BATT can also be used as a vacancy sensor. When used in this manner, the sensor turns lights off upon vacancy but does not turn lights on upon occupancy.
-
Page 22: Verify The Sensitivity Settings
Green indicates that the battery health is good. Red indicates that the battery health is bad, and that the battery needs to be replaced. To replace the battery, refer to Replace the Battery on page 18 • GLS-OIR-CSM-EX-BATT Product Manual — Doc. 9239A... -
Page 23: Test Mode
Toolbox™ to set the RF ID of the device. To set the RF ID: 1. Wake the device by pressing the TEST button. 2. Set the RF ID of the device using Crestron Toolbox. The RF ID must match the RF ID specified in the Crestron Studio™ or SIMPL Windows program. -
Page 24: Replace The Battery
EX gateway: NOTE: A device can be acquired by only one gateway. 1. Put the infiNET EX gateway into Acquire mode from the unit itself or from Crestron Toolbox, as described in the gateway’s manual at www.crestron.com/manuals. - Page 25 EX network. Ensure the gateway is in Acquire mode and within range before attempting the acquire process again. 3. Take the infiNET EX gateway out of Acquire mode from the unit itself or from Crestron Toolbox, as described in the latest version of its manual.
-
Page 26: Firmware Upgrade
Firmware Upgrade NOTE: Before using the GLS-OIR-CSM-EX-BATT, ensure the device is using the latest firmware. Check for the latest firmware for the GLS-OIR-CSM-EX-BATT at www.crestron.com/firmware. Load the firmware onto the device using Crestron Toolbox™ software. To upgrade the firmware on the GLS-OIR-CSM-EX-BATT, follow the procedure below using Crestron Toolbox (v. -
Page 27: Troubleshooting
The control system is incorrectly Verify the program in the control programmed. system. The lights remain The timeout setting is too high. Reduce the timeout one step at a time. on for too long. Product Manual — Doc. 9239A GLS-OIR-CSM-EX-BATT • 23... -
Page 28: Resources
Resources The following resources are provided for the GLS-OIR-CSM-EX-BATT. NOTE: You may need to provide your Crestron.com web account credentials when prompted to access some of the following resources. Crestron Support and Training Crestron True Blue Support Crestron Resource Library Crestron Online Help (OLH) Crestron Training Institute (CTI) Portal... - Page 29 This page is intentionally left blank. Product Manual — Doc. 9239A GLS-OIR-CSM-EX-BATT • 25...
- Page 30 Product Manual — Doc. 9239A Crestron Electronics, Inc. 15 Volvo Drive, Rockleigh, NJ 07647 01/19/23 Tel: 888.CRESTRON Specifications subject to Fax: 201.767.7656 change without notice. www.crestron.com...
Need help?
Do you have a question about the GLS-OIR-CSM-EX-BATT and is the answer not in the manual?
Questions and answers