Crestron GLS-ODT-C-CN Product Manual
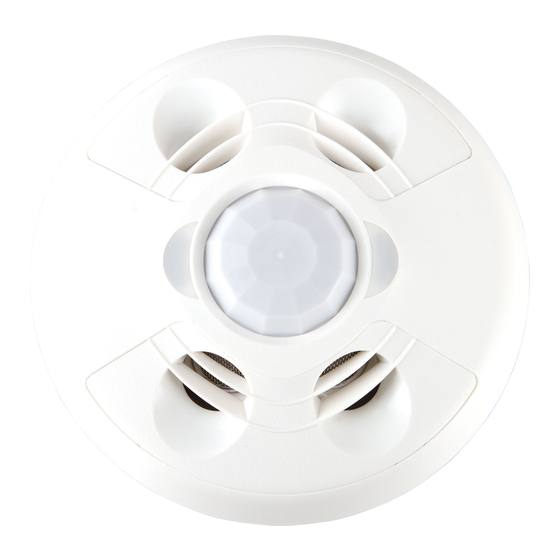
Occupancy sensor, dual technology, ceiling mount
Hide thumbs
Also See for GLS-ODT-C-CN:
- Installation manual (2 pages) ,
- Manual (2 pages) ,
- Installation manual (2 pages)

Related Manuals for Crestron GLS-ODT-C-CN


Summary of Contents for Crestron GLS-ODT-C-CN
- Page 1 GLS-ODT-C-CN and GLS-ODT-C-NS Occupancy Sensor, Dual Technology, Ceiling Mount Product Manual Crestron Electronics, Inc.
- Page 2 Crestron disclaims any proprietary interest in the marks and names of others. Crestron is not responsible for errors in typography or photography.
-
Page 3: Table Of Contents
Wiring the GLS-ODT-C-NS Testing Configuration Timeout Duration Short Timeout Grace Occupancy Mode LEDs Sensitivity PIR and US Sensors Internal Photocell (GLS-ODT-C-CN Only) Net ID Factory Reset Troubleshooting Resources Crestron Support and Training Programmer and Developer Resources Product Certificates Related Documentation Product Manual —... - Page 4 iv • Contents Product Manual — Doc. 9341A...
-
Page 5: Overview
The GLS-ODT-C-NS sensor connects directly to a contact closure in a standalone lighting system to provide occupancy and vacancy status. For integration with a Crestron control system using the Cresnet® network, add a sensor integration module (GLS-SIM, sold separately). -
Page 6: Specifications
Specifications This section provides the following information: • GLS-ODT-C-CN Specifications • GLS-ODT-C-NS Specifications 2 • GLS-ODT-C-CN and GLS-ODT-C-NS Product Manual — Doc. 9341A... -
Page 7: Gls-Odt-C-Cn Specifications
GLS-ODT-C-CN Specifications Product specifications for the GLS-ODT-C-CN. Product Specifications Sensing Motion Detection Passive infrared (PIR) motion detection; Technology Ultrasonic (US) (40 kHz) Ambient Light Built-in photosensor (0-1000 lux) Recognition Coverage Area 2,000 sq ft Coverage Pattern 360° LED Indicators (1) Red LED;... - Page 8 Projects 0.97 in. (25 mm) from the surface when installed Weight 0.4 lb (200 g) Compliance UL® Listed in the US and Canada, CE, FCC Class B, CAN ICES-3(B)/NMB-3(B) To search for product certificates, refer to support.crestron.com/app/certificates. 4 • GLS-ODT-C-CN and GLS-ODT-C-NS Product Manual — Doc. 9341A...
-
Page 9: Dimension Drawings
Dimension Drawings Product Manual — Doc. 9341A GLS-ODT-C-CN and GLS-ODT-C-NS • 5... -
Page 10: Gls-Odt-C-Ns Specifications
US sensitivity (High, Med, Low, OFF), with the option to set separate occupancy and vacancy settings US detection (Side A only, Side B only, Both) ID of sensor Factory Reset Force Vacancy (4) Custom buttons for future additional features 6 • GLS-ODT-C-CN and GLS-ODT-C-NS Product Manual — Doc. 9341A... - Page 11 After initial occupancy is detected, either PIR or US detection will trigger the 24V signal to maintain the occupied state); Short circuit protected; Connects to a GLS-SIM Integration Module (sold separately) on any Crestron® control system Unused Ground...
-
Page 12: Dimension Drawings
Compliance UL® Listed in the US and Canada, CE, FCC Class B, CAN ICES-3(B)/NMB-3(B) To search for product certificates, refer to support.crestron.com/app/certificates. Dimension Drawings 8 • GLS-ODT-C-CN and GLS-ODT-C-NS Product Manual — Doc. 9341A... -
Page 13: Installation
Installation This section provides the following information: • Determine the Mounting Location • Mounting • Wiring • Testing Product Manual — Doc. 9341A GLS-ODT-C-CN and GLS-ODT-C-NS • 9... -
Page 14: Determine The Mounting Location
30º perforations from the full mask for a custom detection area. The following images provide typical illustration examples. Occupancy Sensor Mounted in a Corner 10 • GLS-ODT-C-CN and GLS-ODT-C-NS Product Manual — Doc. 9341A... - Page 15 Occupancy Sensor Mounted in Center of Room, Perforated Mask Used to Block Doorways Product Manual — Doc. 9341A GLS-ODT-C-CN and GLS-ODT-C-NS • 11...
-
Page 16: Motion Detection Range
Motion Detection Range The detection pattern for the sensitivity settings are shown in the illustrations that follow. High Sensitivity Detection Range Side View A 12 • GLS-ODT-C-CN and GLS-ODT-C-NS Product Manual — Doc. 9341A... - Page 17 Side View B Product Manual — Doc. 9341A GLS-ODT-C-CN and GLS-ODT-C-NS • 13...
- Page 18 Top View - 8 1/2 ft (2.6 m) Ceiling Height 14 • GLS-ODT-C-CN and GLS-ODT-C-NS Product Manual — Doc. 9341A...
- Page 19 Medium Sensitivity Detection Range Side View A Product Manual — Doc. 9341A GLS-ODT-C-CN and GLS-ODT-C-NS • 15...
- Page 20 Side View B 16 • GLS-ODT-C-CN and GLS-ODT-C-NS Product Manual — Doc. 9341A...
- Page 21 Top View - 8 1/2 ft (2.6 m) Ceiling Height Product Manual — Doc. 9341A GLS-ODT-C-CN and GLS-ODT-C-NS • 17...
- Page 22 Low Sensitivity Detection Range Side View A 18 • GLS-ODT-C-CN and GLS-ODT-C-NS Product Manual — Doc. 9341A...
- Page 23 Side View B Product Manual — Doc. 9341A GLS-ODT-C-CN and GLS-ODT-C-NS • 19...
- Page 24 Top View - 8 1/2 ft (2.6 m) Ceiling Height 20 • GLS-ODT-C-CN and GLS-ODT-C-NS Product Manual — Doc. 9341A...
-
Page 25: Mounting
Mounting Install in a drop ceiling or drywall, or into an octagon electrical box. The following items are included with the GLS-ODT-C-CN and GLS-ODT-C-NS for installation. In the Box Qty. Description 1/2 Solid PIR Mask Full Perforated PIR Mask Hole Cut Out Template... -
Page 26: Electrical Box Installation
2. Use a Phillips screwdriver to turn the preinstalled screws counterclockwise until the plastic wings are removed, then remove the screws. 3. Wire the occupancy sensor. For details, refer to Wiring on page 22 • GLS-ODT-C-CN and GLS-ODT-C-NS Product Manual — Doc. 9341A... - Page 27 5. Align the arrows on the sensor cover with the arrows on the sensor base and then place the sensor cover on the sensor base. Twist clockwise until the sensor cover clicks into place. Product Manual — Doc. 9341A GLS-ODT-C-CN and GLS-ODT-C-NS • 23...
-
Page 28: Wiring
Wiring Wiring the GLS-ODT-C-CN Connect to the Control System Use Cresnet® cable (not supplied) to connect the control system to the GLS-ODT-C-CN. Make connections to the 24V, Y, Z, and G ports on the GLS-ODT-C-CN. Connect an External Photocell Use Cresnet® cable (not supplied) to connect the GLS-ODT-C-CN to an external photocell. Make connections to the 24V, G, and EXT ports on the GLS-ODT-C-CN. -
Page 29: Wiring The Gls-Odt-C-Ns
Connect the GLS-ODT-C-NS to a standalone lighting system such as a Zūm wired or wireless, GLPP, GL-IPAC-SW8, or GLPAC. To integrate with a Crestron control system, use a GLS-SIM interface module. To connect the GLS-ODT-C-NS, make the 24V, OCC, GND, and IR connections as shown in the following image. -
Page 30: Testing
4. If the occupancy sensor detects motion (beeps) when it should not, lower the sensitivity of the PIR or US sensors. 5. Repeat these steps until motion is not detected. 26 • GLS-ODT-C-CN and GLS-ODT-C-NS Product Manual — Doc. 9341A... -
Page 31: Configuration
Configuration The GLS-ODT-C-CN and GLS-ODT-C-NS detect motion in a room to determine if the room is occupied or vacant and then relay the occupancy or vacancy state to the connected control system. Use the GLS-REMOTE-ODT/OIR remote (sold separately) to set up or adjust the settings on the occupancy sensor. -
Page 32: Leds
The GLS-ODT-C-CN has a built-in photocell that allows for complete daylight harvesting using the Crestron lighting system. The control system can use the photocell to dim the lights or to not turn lights on at all if sufficient natural daylight is present. -
Page 33: Factory Reset
Factory Reset To reset the occupancy sensor to the factory settings, press and hold RESET for 3 seconds. NOTE: Press the setup button on the sensor to acknowledge Cresnet identification. Product Manual — Doc. 9341A GLS-ODT-C-CN and GLS-ODT-C-NS • 29... -
Page 34: Troubleshooting
The control system is incorrectly Verify the program in the control programmed. system. The lights remain The timeout setting is too high. Reduce the timeout one step at a time. on for too long. 30 • GLS-ODT-C-CN and GLS-ODT-C-NS Product Manual — Doc. 9341A... -
Page 35: Resources
Resources The following resources are provided for the GLS-ODT-C-CN and GLS-ODT-C-NS. NOTE: You may need to provide your Crestron.com web account credentials when prompted to access some of the following resources. Crestron Support and Training Crestron True Blue Support Crestron Resource Library Crestron Online Help (OLH) Crestron Training Institute (CTI) Portal... - Page 36 This page is intentionally left blank. Product Manual — Doc. 9341A GLS-ODT-C-CN and GLS-ODT-C-NS • 32...
- Page 37 Product Manual — Doc. 9341A Crestron Electronics, Inc. 15 Volvo Drive, Rockleigh, NJ 07647 10/12/22 Tel: 888.CRESTRON Specifications subject to Fax: 201.767.7656 change without notice. www.crestron.com...
Need help?
Do you have a question about the GLS-ODT-C-CN and is the answer not in the manual?
Questions and answers