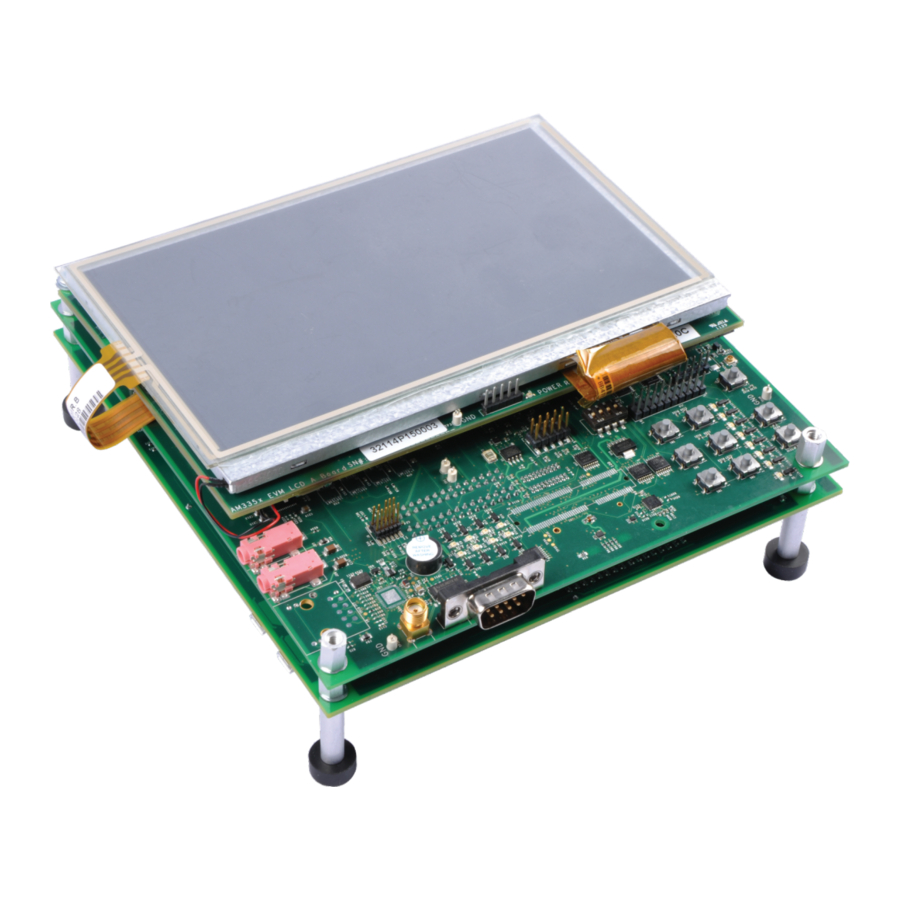
Texas Instruments AM335x - Evaluation Module Quick Start Guide
- Technical reference manual (4161 pages) ,
- Design manual (39 pages) ,
- Quick start manual (6 pages)
Advertisement

Introduction
Welcome to the AM335x Evaluation Module (EVM) Quick Start Guide. This guide is designed to help you through the initial setup of your EVM.
This EVM allows you to experience both Linux™ and Android™ operating systems that showcase the AM335x Cortex™-A8 processor, 3D graphics, Wi-Fi™/Bluetooth® based on WL1271, and much more. The AM335x EVM contains the following:
- Hardware
- AM335x general-purpose baseboard with:
- AM3358 processor
- TPS65910 power management IC
- WL1271 Wi-Fi/Bluetooth module
- AM335x general-purpose daughtercard with:
- additional I/O
- audio
- navigation
- 7" WVGA LCD touchscreen daughtercard
- USB and serial cables
- Stylus
- Universal power supply with regional adapter
- USB SD card reader
- AM335x general-purpose baseboard with:
- Printed documents
- AM335x EVM Quick Start Guide (this document)
- Android and Linux SDK SD card contents sheet
- Software license agreement
- Software and soft copy documents
- AM335x Linux Software Development Kit (SDK)
- AM335x Android Development Kit
Overview


*2 SW6 switch is located beneath the flap
Default setup (OS boot from SD card)
- Verify SW3/SW4 DIP switches are set as shown. SW3/SW4 are located on the back of the AM335x EVM.
![Texas Instruments - AM335 Series - Default setup (OS boot from SD card) - Step 1 Default setup (OS boot from SD card) - Step 1]()
- Ensure SW6 DIP switch is set as shown (OFF). SW6 is located on the AM335x daughtercard.
![]()
- Connect the supplied serial cable to the UART DB-9 (J12) connector located on the AM335x baseboard.
NOTE: There are five additional UARTs for development but cannot be used for demo purposes.
![Texas Instruments - AM335 Series - Default setup (OS boot from SD card) - Step 2 Default setup (OS boot from SD card) - Step 2]()
- Connect the Ethernet cable to the RJ-45 jack located on the AM335x baseboard. Connect the other end of the cable to an Internet-enabled router or Ethernet switch.
![Texas Instruments - AM335 Series - Default setup (OS boot from SD card) - Step 3 Default setup (OS boot from SD card) - Step 3]()
- Remove the protective plastic from the LCD touchscreen.
![Texas Instruments - AM335 Series - Default setup (OS boot from SD card) - Step 4 Default setup (OS boot from SD card) - Step 4]()
- Choose the OS demo of interest and insert the appropriate SD card into the AM335x EVM as shown.
![Texas Instruments - AM335 Series - Default setup (OS boot from SD card) - Step 5 Default setup (OS boot from SD card) - Step 5]()
- Connect the power cable to the power jack on the baseboard.
![Texas Instruments - AM335 Series - Default setup (OS boot from SD card) - Step 6 Default setup (OS boot from SD card) - Step 6]()
- Set SW1 on the AM335x EVM baseboard as shown.
NOTE: Power is on when switch is nearest the power cable.
![Texas Instruments - AM335 Series - Default setup (OS boot from SD card) - Step 7 Default setup (OS boot from SD card) - Step 7]()
![Texas Instruments - AM335 Series - Linux™ demo Linux™ demo]()
![Texas Instruments - AM335 Series - Android™ demo Android™ demo]()
- You are now ready to explore the corresponding OS demos which include various example applications and demos. Using a stylus, click on any icon to start the demo and click "exit" (if available) to quit the demo.
![Texas Instruments - AM335 Series - Default setup (OS boot from SD card) - Step 8 Default setup (OS boot from SD card) - Step 8]()
- Next Steps
(Prepare your workstation for software development)
To prepare your workstation for software development, power off the kit, remove the SD card and insert it into the included SD card reader. Follow the instructions below for the corresponding OS.
Linux Software Development Kit
From a Linux host PC, insert the reader into any unused USB port and from the START HERE folder, run setup.htm.
Android Development Kit
If the Android SD card is connected to your host PC, locate the START HERE folder on the SD card and view setup.htm.
For more information on AM335x or to download the latest software, please visit www.ti.com/am335x.
For information regarding the WL1271 solution, visit: www.ti.com/connectivitywiki.
For support questions, please contact: support@ti.com or www.ti.com/e2e.
Important Notice: The products and services of Texas Instruments Incorporated and its subsidiaries described herein are sold subject to TI's standard terms and conditions of sale. Customers are advised to obtain the most current and complete information about TI products and services before placing orders. TI assumes no liability for applications assistance, customer's applications or product designs, software performance, or infringement of patents. The publication of information regarding any other company's products or services does not constitute TI's approval, warranty or endorsement thereof.
Trademarks in this issue: The platform bar is a trademark of Texas Instruments. All other trademarks are the property of their respective owners.
© 2011 Texas Instruments Incorporated
Printed in U.S.A. by (Printer, City, State)
For more information: www.ti.com/am335x

Documents / Resources
References
Download manual
Here you can download full pdf version of manual, it may contain additional safety instructions, warranty information, FCC rules, etc.
Download Texas Instruments AM335x - Evaluation Module Quick Start Guide
Advertisement


Need help?
Do you have a question about the AM335 Series and is the answer not in the manual?
Questions and answers