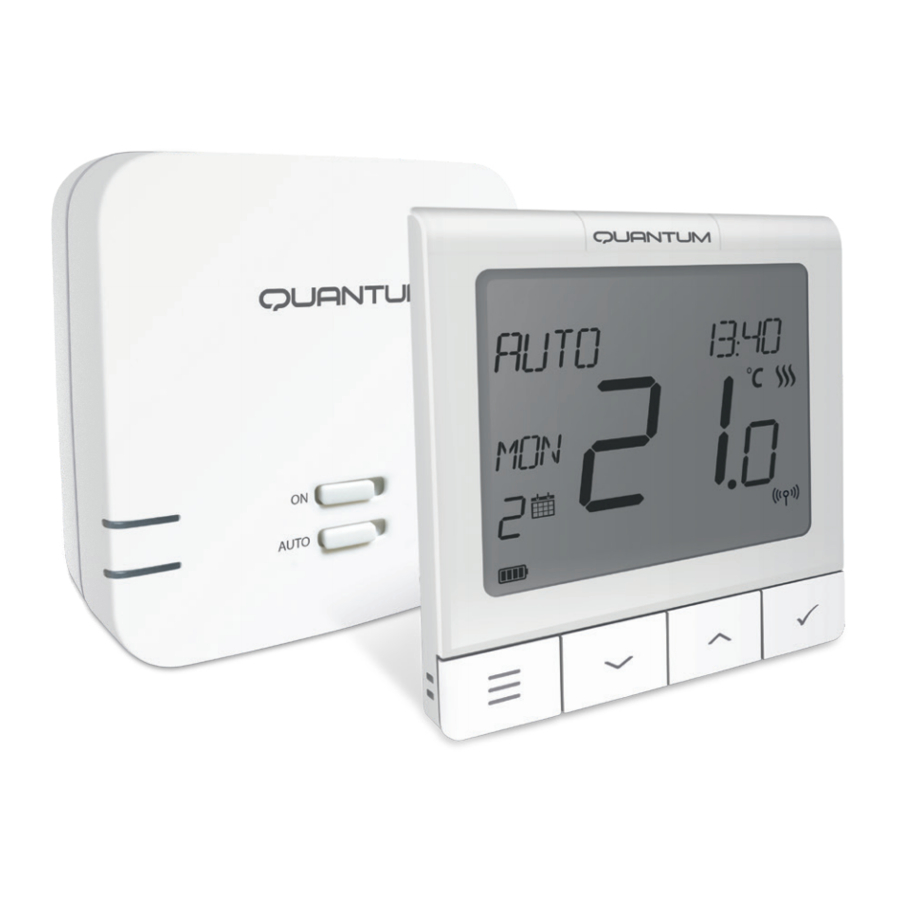
SALUS WQ610, WQ610RF - Thermostat Installer Quick Start Guide
- Quick manual (2 pages) ,
- Full user manual (30 pages)
Advertisement
- 1 Introduction
- 2 Product Compliance
- 3 Safety Information
- 4 Technical Specification
- 5 Button Functions
- 6 LCD Icon Description
- 7 WQ610 Thermostat Terminals Description
- 8 WQ610RX Receiver Terminals Description
- 9 WQ610 Wiring Diagram
- 10 WQ610RF Wiring Diagram
- 11 Power Up and Configuration
- 12 Accessing Advanced Settings Menu
- 13 OpenTherm: Configuration
- 14 Temperature Values for Opentherm
- 15 OpenTherm related errors
- 16 WQ610RF: Pairing with the Receiver
- 17 WQ610RF: Testing Link
- 18 Additional installation notes for WQ610
- 19 Documents / Resources
Introduction
The SALUS Quantum WQ610 and WQ610RF thermostats are Boiler Plus compatible thermostats, designed specifically to control central heating boilers and also in the case of the RF versions, electrical panel heaters. They have our new load compensation (ITLC) software with Volt free switch and also Opentherm 4.0 connections, so you can choose the method of control to suit your boiler / installation. Please note that the Boilers need to have an OpenTherm Association license to be fully compatible with WQ610 range(should you wish to connect to the OpenTherm terminals A and B). Please verify if this requirement is met with your Boiler Manufacturer.
Product Compliance
This product complies with the essential requirements and other relevant provisions of the following EU Directives: RED:2014/53/EU and RoHS 2011/65/EU. Full text of the EU Declaration of Conformity is available on: www.saluslegal.com; WQ610RF: 2405-2480MHz; <14dBm
Safety Information
 Use in accordance with national and EU regulations. Use the device as intended, keeping it in a dry condition. Product is for indoor use only. Installation must be carried out by a qualified person in accordance with national and EU regulations.

Always ensure the AC mains power is switched off before installing or working on any components.
Technical Specification
| WQ610 Thermostat | WQ610RF Thermostat | |
| Thermostat supply | 230VAC | Lithium Battery (Rechargable) |
| Thermostat rating max | 3 (1) A | - |
| OpenTherm terminals | A / B | - |
| Outputs | Voltage free NO / COM terminals | - |
| Temperature range | 5°C – 35°C | 5°C – 35°C |
| Thermostat display accuracy | 0.5°C | 0.5°C |
| ErP control class | Class V | Class V |
| Radio Frequency | -- | 2.4 GHz |
| Dimension [mm] | 86 x 86 x 27 [mm] | 86 x 86 x 11[mm] |
| WQ610 Receiver | |
| Receiver supply | V AC |
| Receiver rating max | (5) A |
| OpenTherm terminals | A / B |
| Outputs | Voltage free NO / COM terminals |
| Radio frequency | 2.4 GHz |
| Dimension [mm] | x 98 x 32[mm] |
Button Functions

- MENU - enter the menu options, press and hold for 3 seconds to return to main screen without saving changes.
- DOWN - decrease the temperature and move through the menus.
- UP - increase the temperature and move through the menus.
- TICK - confirm changes and enter menus. Press and hold for 3 seconds to exit User Menu and save changes. Press and hold to cancel BOOST feature or temporary override (whilst in normal screen).
- ON - When in Manual Mode, ON will turn the boiler on.
- OFF - When in Manual Mode, OFF will turn the boiler off.
- AUTO - Receiver operates in automatic mode according to the thermostat.
- MANUAL - Receiver output is controlled by the On/Off slide switch.
LCD Icon Description
![]()
- Menu/Settings description
- Clock 24hr/AM/PM
- Temperature unit
- Heating indicator (icon is animating when there is heating demand)
- RF Connection indicator
- Current Temperature / Setpoint Temperature
- Holiday mode indicator
- Temporary override mode
- Settings icon
- Battery indicator
- Schedule program number
- Schedule mode icon
- Day indicator/ SET information
WQ610 Thermostat Terminals Description

| Terminal | Description |
| A/B | OpenTherm Communication Wires only |
| NO | Volt free connection (Switch) |
| COM | Volt free connection (Common) |
| L;N | Supply (230 V AC) |
WQ610RX Receiver Terminals Description

| Terminal | Description |
| B / A | OpenTherm Communication Wires only |
| NO | Volt free connection (Switch) |
| COM | Volt free connection (Common) |
| L; N | Supply (230 V AC) |
WQ610 Wiring Diagram
 DO NOT connect to OpenTherm terminals unless your boiler is OpenTherm Association approved and has the OpenTherm Logo.

WQ610RF Wiring Diagram

Please ensure the boiler has 230 V switching before wiring in this way.
Power Up and Configuration
The WQ610RF thermostat contains a re-chargeable Lithium battery. When the battery level is below 10%, the thermostat will display "PLEASE RE-CHARGE BATTERY". Please re-charge for a full 24 hours using a standard Micro USB charger. Thermostat operation will not be affected during the charging period
- To activate thermostat, press TICK button for 3 seconds (RF version) only.
![]()
- Language "ENGLISH" is flashing, press UP or DOWN, choose your language, then TICK to confirm.
![]()
- Using UP or DOWN, choose the time format between 24 hr and 12 hr format.
![]()
- Using UP or DOWN, set the hour and then press TICK, which will then move to minutes, that can be changed in the same way
![]()
- Using UP or DOWN, set the year and then press TICK.
![]()
- Using UP or DOWN, set the month and then press TICK, which will then move to days, that can be changed in the same way.
![]()
- If you select NO, thermostat will use dafult settings and revert to normal screen.
![]()
- Once you have properly connected your thermostat with the OpenTherm terminals the OT message will be shown on the screen. For more Opentherm details, go to the Opentherm: Configuration section.
![]()


Accessing Advanced Settings Menu
Advanced Settings allow the installer / landlord to adjust the thermostat to suit individual installation requirements. Do not adjust the settings unless you are competent to do so. The Advanced Settings may be locked by the creation and activation of a 4 digit PIN code. Please keep your PIN safe and secure.
- Press MENU.
![]()
- Using UP or DOWN, navigate to Advanced submenu and press TICK.
![]()
- Press TICK to enter Daylight Saving Time Menu.
![]()
- Using UP or DOWN, select ON or OFF. Press TICK to confirm.
![]()
- Press TICK to select the type of heating control you prefer.
![]()
- ITLC helps to improve system efficiency and end user comfort. Default is ITLC Radiators (disabled if Opentherm connected). Press TICK to confirm or DOWN to see the next option.
![]()
- This option is only for electrical radiators. Press TICK to confirm or DOWN to see the next option.
![]()
- This is a simple ON/OFF algortihm control based on the set point. Using UP or DOWN, you can select the SPAN value. Press TICK to confirm or DOWN to go to next option.
![]()
- Using TICK, then UP and DOWN you can select FROST value. (5 - 17 degrees C). Press TICK to confirm or DOWN to see the next option.
![]()
- Using TICK, then UP and DOWN you can set the maximum and the minimum room temperature.
![]()
- If you think that the temperature displayed on the thermostat is not accurate due to its location, you can calibrate it using this menu with values between -3.5 / +3.5 degree.
![]()
- This will start your boiler early to improve energy saving.
![]()
- This will stop your boiler early to improve energy saving.
![]()
- Press TICK to allow installer or landlord to set service reminder and lock temperature level
![]()
- Using UP or DOWN, you can select YES and press TICK to confirm, or you can select NO and go to point 20.
![]()
- Using UP or DOWN, select the number of days service alert should last for.
![]()
- Using UP or DOWN, select the warning period before the service alert will be activated, then press TICK.
![]()
- Using UP or DOWN, select the lock temperature and then press TICK.
![]()
- Press TICK and enter installer's phone number using UP and DOWN buttons.
![]()
- Allows you to create a PIN which may be used to limit access to your settings. Using UP or DOWN, create your PIN access, then TICK to confirm.
![]()
- This option will allow you to lock your advanced settings using your access PIN. Using UP or DOWN, create your lock advanced settings, then TICK to confirm.
![]()
- Using UP or DOWN, enter the PIN code number. Press TICK to confirm every digit.
![]()
- Use your created PIN to lock access to advanced settings menu.
![]()


Temporary Manual Override
For overriding the schedule to bring the HEAT on, use the UP button to increase the temperature and press TICK to accept the change.
This setting will be valid until the next scheduled program.
OpenTherm: Configuration
This menu will only be visible if your boiler is OpenTherm compatible and you have connected to terminals A and B.
OpenTherm is a method of control used by modern heating systems. Instead of switching a boiler on and off at intervals, modulating control allows the amount of heat provided by the boiler to be controlled to match the varying demand from the thermostat. This means the customer has greater system efficiency, energy saving and room comfort from our heating controls.
Temperature Values for Opentherm
Please note that below values can be manually set only if the boiler allows it.
| CH (Central Heating) | HW (Hot Water) |
| MIN TEMP: 25°C | MIN TEMP: 40°C |
| MAX TEMP: 80°C | MAX TEMP: 80°C |
| DEFAULT TEMP: 75°C | DEFAULT TEMP: 60°C |
- This screen display will be displayed Using UP or DOWN, navigate to HW when OT is connected. To change the SETPOINT and press TICK. settings for DHW and/or CH - press MENU and go to ADVANCED SETTINGS.
![]()
- Using UP or DOWN, navigate to HW SETPOINT and press TICK.
![]()
- Using UP or DOWN, adjust the temperature and then press TICK.
![]()
- Press TICK to enter menu. Using UP or DOWN, set the maximum opentherm central heating temperature.
![]()
- Using UP or DOWN, set the value then press TICK for 3 sec to confirm and exit to main screen.
![]()


OpenTherm related errors
- SERVICE REQUEST ERROR
![]()
- LOCKOUT RESET ERROR
![]()
- LOW WATER PRESSURE ERROR
![]()
- GAS FLAME FAULT ERROR
![]()
- AIR PRESSURE FAULT ERROR
![]()
- WATER OVER TEMPERATURE ERROR
![]()


If an Opentherm fault is detected on the boiler, the thermostat will display the above messages. These errors are not related to the thermostat.
WQ610RF: Pairing with the Receiver
The pairing between the thermostat and the receiver is already done at the factory. However, should you need to re-pair the units then this can be done using the User Menu. The link may also be tested from the User Menu to show pairing link has been successful. Before pairing, the Receiver should be unplugged, then plugged back in. During the pairing process, the distance between the Thermostat and the Receiver should be at least 1m.
![]()
- Turn the receiver OFF and ON twice to reset. Ensure receiver switches are ON and AUTO. Red LED should be flashing. Enter thermostat MENU and scroll down until you will see "PAIR WITH RECEIVER" option. Select YES to proceed with Pairing.
![]()
- Now your thermostat is looking for the receiver. A 10 minute counter will appear on the screen.
![]()
- Upon connecting to the receiver, the thermostat will display the message "PAIRING SUCCESSFUL" and return to normal operation afterwards. The red LED will stop flashing when the pairing is successful.
![]()


WQ610RF: Testing Link
- Enter MENU and scroll down until you find „TEST LINK" option. Press TICK button to continue.
![]()
- Now your thermostat is sending a TEST message to the receiver with the expectation of receiving a response. While testing, both red and green LED will be intermittently flashing.
![]()
- Your thermostat will indicate that the connection has been tested successfully and will return to normal operation.
![]()


Additional installation notes for WQ610

SALUS Controls plc
SALUS House
Dodworth Business Park South,
Whinby Road, Dodworth,
Barnsley S75 3SP, UK
E: sales@salus-tech.com
E: techsupport@salus-tech.com
www.salus-tech.com

SALUS Controls is a member of the Computime Group.
Maintaining a policy of continuous product development SALUS Controls plc reserve the right to change specification, design and materials of products listed in this brochure without prior notice.


Documents / Resources
References

Download manual
Here you can download full pdf version of manual, it may contain additional safety instructions, warranty information, FCC rules, etc.
Download SALUS WQ610, WQ610RF - Thermostat Installer Quick Start Guide
Advertisement


Need help?
Do you have a question about the Quantum WQ610 and is the answer not in the manual?
Questions and answers