Table of Contents
Advertisement
Quick Links
SHIMADZU OPTICAL EMISSION SPECTROMETER
INSTRUCTION MANUAL
Read the instruction manual thoroughly before you use the product.
Keep this instruction manual for future reference.
* Refer to the following document for detailed operation of software.
Data Processing Software PDA for Windows Operatioin Manual
Data Processing Software PDA for Windows Installation Manual
ANALYTICAL & MEASURING INSTRUMENTS DIVISION
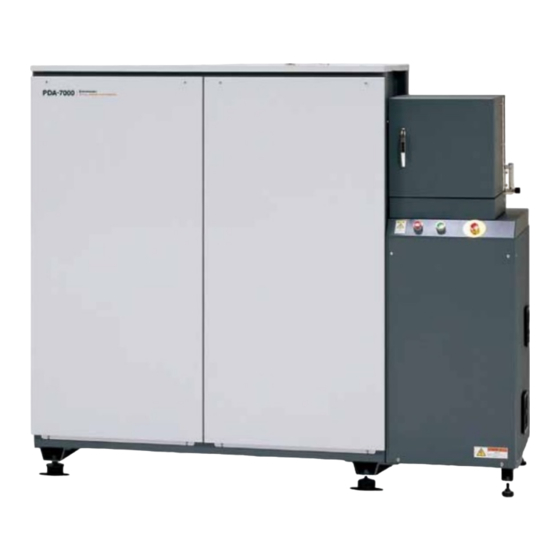
PDA-7000
P/N 211-54796
P/N 211-78114
211-78001E
Jun. 2018
Advertisement
Table of Contents
Troubleshooting

Related Manuals for Shimadzu PDA-7000


Summary of Contents for Shimadzu PDA-7000
- Page 1 211-78001E Jun. 2018 SHIMADZU OPTICAL EMISSION SPECTROMETER PDA-7000 INSTRUCTION MANUAL Read the instruction manual thoroughly before you use the product. Keep this instruction manual for future reference. * Refer to the following document for detailed operation of software. Data Processing Software PDA for Windows Operatioin Manual...
- Page 2 (This page is intentionally left blank.)
-
Page 3: Introduction
Introduction Read this Instruction Manual thoroughly before using the product. Thank you for purchasing Shimadzu optical emission spectrometer PDA-7000. PDA-7000 is a PDA photoelectric-photometric optical emission spectrometer which simultaneously and quickly carries out analyses of multi-elements in metal with a high precision. - Page 4 Shimadzu representative to request a replacement. • To ensure safe operation, read all Safety Instructions before using the product. • To ensure safe operation, contact your Shimadzu representative if product installation, adjustment, or re-installation (after the product is moved) is required.
-
Page 5: Indications Used In This Manual
Indications Used in This Manual Dangers, Warnings, Cautions, and Notes are indicated using the following conventions: Note Dangers, Warnings, Cautions, and Notes are indicated using the following conventions: Warning Indicates a potentially hazardous situation which, if not avoided, could result in serious injury or possibly death. -
Page 6: Warning Labels
Warning Labels Front Panel of Excitation Unit Warning Electric Shock Before removing the excitation unit front panel, be sure to turn OFF the power of the excitation source unit. Never remove other panels. -
Page 7: Safety Instructions
When installing PDA-7000 near apparatus generating a ferromagnetic field such as an electric arc furnace, contact your Shimadzu representative. Installation To ensure safe operation, contact your Shimadzu representative if product installation, adjustment, or re-installation (after the product is moved) is required. -
Page 8: Operation
Operation PDA-7000 generates high voltage based on the measurement principles. If it is correctly used, no problem will occur. If not, it may cause an accident and damage. For safety operation and dangerous accident prevention, strictly observe the following precautions. - Page 9 2. Restriction of operators Warning The inside of the instrument should only be repaired by personnel specially trained by Shimadzu Corporation since it is dangerous. Do not disassemble or modify the instrument without permission as it may compromise the safety of the instrument.
-
Page 10: In An Emergency
ON the AIRCON switch again. If the buzzer gives a warning sound even after that, turn OFF the AIRCON switch and contact your Shimadzu representative. ● Safety measure for other emergency occurrences If an unpredictable happening like an earthquake, fire, etc. occurs, first press the emergency stop switch, and then turn OFF all the power of the distribution panel. -
Page 11: Handling High-Pressure Gas
Handling High-pressure Gas PDA-7000 requires the use of high-pressure argon gas. Note that the following points regarding the handling of high-pressure gases in Japan: 1) By law, permission is required to use cylinders containing more than 300m 2) When using gas of a pressure that exceeds 980.665kPa (10kgf / cm... - Page 12 Note Do not use the argon gas cylinder until it is empty. Otherwise, the inside of the cylinder will be contaminated. For the exchange procedures of the cylinder, refer to “5.13 Replacing argon gas cylinder”...
-
Page 13: Warranty
3. Limitation of Liability: (1) In no event will Shimadzu be liable for any lost revenue, profit or data, or for special, indirect, consequential, incidental or punitive damages, however caused regardless of the theory of liability, arising out of or related to the used of or inability to use the product, even if Shimadzu has been advised of the possibility of such damage. -
Page 14: After-Sales Service And Availability Of Replacement Parts
Note, however, that the availability of parts not manufactured by Shimadzu shall be determined by the relevant manufacturers. If Shimadzu receives notice of the discontinuation of units or parts, the necessary quantity for the above period is immediately calculated and secured. However, such units or parts may cease to... -
Page 15: Disposal Precautions
Disposal Precautions Dispose of this product using a qualified industrial waste management company, in compliance with the applicable laws in the country where it is used. xiii... -
Page 16: Table Of Contents
Contents Introduction ........................i Indications Used in This Manual ................iii Warning Labels ......................iv Safety Instructions...................... v Installation Site .......................... v Installation ..........................v Operation ........................... vi In an emergency ........................viii During a power outage ......................viii Handling High-pressure Gas ..................ix Warranty ........................ - Page 17 Read-out unit ....................... 1-9 Photo detector (PMT) ....................1-9 Photo detector sensitivity controller (Attenuator) ............ 1-9 Integrator ......................... 1-9 Data processor system ..................... 1-10 2 Specification......................2-2 Spectrometer ....................... 2-2 Excitation unit ......................2-2 Spark stand ......................2-2 Excitatiion source unit ..................... 2-2 Read-out unit .......................
- Page 18 Maintenance and inspection items ................5-2 Periodical Maintenance ................... 5-2 Other Maintenance ....................5-2 Work required after maintenance service..............5-3 Maintenance service by Shimadzu service engineer ..........5-3 Maintenance Flow ....................... 5-4 Maintaining the spark stand ..................5-5 Maintenance cycle ....................5-6 Maintenance procedure ...................
- Page 19 7 Troubleshooting ....................7-2 Basic items to be checked ..................7-2 Troubleshooting ......................7-3 Installing the software....................7-4 xvii...
-
Page 20: Definition Of Terminology
Definition of Terminology Emission analysis Quantitative analysis method using the emission spectrometer by measuring the intensity of emission of atomic spectral line obtained by vaporized excitation by means of discharge of the analytical object element contained in a sample. Photoelectric photometric method Spectrum intensity measurement method using the photomultiplier Same as “Counter Electrode”. -
Page 21: Parts List
Parts List Checking of parts PDA-7000 is provided with the following parts. After unpacking, check that there are no missing parts and no damage is given to each of them. Emission spectrometer, main unit 1 set *2 Computer 1 set... -
Page 22: Consumables And Maintenance Parts
Replacement interval varies depending on the frequency of analysis. 1 month is a typical value. There are three No.3 Fans used in PDA-7000. The one used in excitation source unit has to be replaced once every two years. The other two attached on the right side panel have to be replaced once every three years. -
Page 23: Repair Parts
Repair parts Part name Notes Spark stand – Sample holder 211-52482-91 Cable 15C 080-68536-01 Flowmeter F900 211-75818 Flow meter、RK1650 Spark stand 211-74517 Valve V1 Assy argon gas purge line 211-74517-01 Valve V2 Assy 040-21333-57 Valve、2400L-B-N1-1/4 016-31330 Vinyl hose 9x2.5 CL (2MT) Spark stand argon gas exhaust line 211-51930... -
Page 24: How To Distinguish Similar Parts
080-80202-04 Temperature controller E5CN-Q2T-W 066-19180-02 Timer H3Y-2 AC200V 3M Switch panel 072-01122 Fuse F-7165 10A 250V 072-01412-52 Fuse FGB01 20A 250V 042-60474-01 Fan 4715MS-10T-B50-B00 Air conditioning unit 078-29503-02 Heater PTWHC3AF800Y140D00 211-50411 Exhaust solenoid valve assembly 042-00126-33 Vacuum pump GDH-162-200KF Spectrometer exhaust line 018-31550-09 Super sun spring hose (1.7MT) There are two types of condenser lenses, and which one to use depends on the... -
Page 25: Configuration And Function Of The Instrument
Chapter 1 Configuration and Function of the Instrument... - Page 26 The configuration of the instrument is shown in the figure below. Data processor Spark Stand Excitation unit Spectrometer Read-out unit Switch panel Configuration of PDA-7000...
-
Page 27: Switch Panel
1 Configuration and Function of the Instrument Switch panel ① ⑤ ② ③ ④ ⑥ ⑦ ⑧ ⑨ ⑩ Switch panel ① MAIN Main power switch Supplies power to the entire instrument. ② SOURCE Excitation unit power switch Supplies power to the excitation unit. ③... - Page 28 1 Configuration and Function of the Instrument Note ● Never touch any switch other than the power switch. ● Never change the set temperature of the spectrophotometer system; this may cause deterioration of analysis precision. The set temperature is 40°C. ●...
-
Page 29: Spark Stand
1 Configuration and Function of the Instrument Spark stand The excitation unit consists of a spark stand which generates spark discharge between a metal sample and electrode and an excitation unit which controls high voltage for discharge. Spark stand ① Condenser lens (inside the flange, so not directly visible) ②... - Page 30 1 Configuration and Function of the Instrument The spark stand door is provided with a safety switch. The safety switch prevents emission from being started by mistake at the time of maintenance and inspection of the spark stand. Opening the spark stand door activates the safety circuit, cutting off the emission start signal.
-
Page 31: Spectrometer
1 Configuration and Function of the Instrument Spectrometer The configuration of the spectrometer system is shown in the figure below. Diffraction Grating Entrance Slit Condenser Lens Light Source (Spark Stand) Rowland Circle Evacuation System Exit Slit Mirror Detector (Photomultiplier) Configuration of the spectrometer The light coming out of the light source goes through the condenser lens and the entrance slit, then diffracted by the diffraction grating and focused on the Rowland circle based on each wavelength. -
Page 32: Lamp
1 Configuration and Function of the Instrument (3) Lamp The lamp is used as a monitor light source at the time of the read-out unit inspection. (4) Evacuation system The light at the wavelength of 200 nm or less which is called the vacuum ultraviolet area is absorbed by oxygen in the air. -
Page 33: Read-Out Unit
1 Configuration and Function of the Instrument Note When the vacuum pump is OFF, confirm that the vacuum status inside the spectrometer is “OK” on Instrument Check screen of the data processing software at least once a day. If it is “Air”, turn ON the vacuum pump and wait until the vacuum status becomes “OK”, and then continue to run the vacuum pump at least three more hours. -
Page 34: Data Processor System
1 Configuration and Function of the Instrument Data processor system Data processor system (rear side) ① CPU Cont. UNIT ② Communications connectors ③ Power cable for CPU Cont. UNIT ④ SCSI card ⑤ SCSI cable ⑥ Display cable ⑦ Keyboard cable ⑧... - Page 35 1 Configuration and Function of the Instrument Printer ① Power switch (on the lower part of the left side face) ② Switch to enable printing Note ● Do not print when the switch to enable printing is turned OFF. Attempting to print when the printer is in a state where it is unable to print (switch to enable printing is OFF, or there is no printing paper, etc.) causes the print data to accumulate in the printer buffer, resulting in abnormal printing when print operation is restarted.
- Page 36 1 Configuration and Function of the Instrument (This page is intentionally left blank.) 1-12...
- Page 37 Chapter 2 Specification...
-
Page 38: Specification
2 Specification Specification Spectrometer • Mounting Paschen-Runge mounting of concave grating • Focal length 600 mm • Wavelength range 121 to 589 nm • Evacuation system Vacuum pump Rotary vacuum pump • Temperature control Set temperature 40°C Control precision Set temperature ±1°C (Under room temperature of 10 - 28°C) •... -
Page 39: Read-Out Unit
2 Specification Read-out unit • Number of channels 64 maximum • Measurement method > PDA measurement > Digital integration • Integrator Single pulse integrator Miller integration (With sample hold) • High voltage supply -1100V maximum Data processor system (1) Hardware Specifications required for the data processing PC •... -
Page 40: Software
2 Specification (2) Software • Number of elements 64 elements maximum (Including internal standard elements) • Number of channels 64 channels maximum (Including internal standard element channels) • Number of PDA channels 64 channels maximum (including internal standard element channels) •... - Page 41 2 Specification • Analysis functions > Number of analyses 21 maximum > Measurement sequence 3 maximum > Cancel of analysis results > Immediate calculation (Average value calculation before the end of multi-time analysis) > Recycle calculation > Supplementary analysis > Abnormal burn monitoring >...
- Page 42 2 Specification • Report > Number of results processed at one time 15000 maximum > X-R control chart > Histogram > Daily report > Multiple data transmission > Data conversion to CSV format > Database support (Microsoft Access) • Maintenance >...
-
Page 43: Starting And Stopping The Instrument
Chapter 3 Starting and Stopping the Instrument... -
Page 44: Inspection Before Using The Instrument
3 Starting and Stopping the Instrument Starting and Stopping the Instrument Inspection before using the instrument Caution ● Check that the room temperature is within the range of 10 - 28°C. ● Check that the power cable is correctly connected to the control panel and the switch on the distribution board which supplies power to the instrument is ON. -
Page 45: Starting The Instrument (Daily Use)
3 Starting and Stopping the Instrument Starting the instrument (Daily use) The routine procedure to start the instrument is described below. Turn on the SOURCE switch on the switch panel. Confirm that the temperature control indication on the switch panel is 40C. Confirm that the vacuum pump is operating. -
Page 46: Starting The Instrument After It Has Not Been Used For A Long Time
3 Starting and Stopping the Instrument Starting the instrument after it has not been used for a long time The procedure to start up the instrument after it has not been used for a long period of time is described below. Turn on the MAIN switch on the switch panel, and then turn on the AIRCON, CONSOLE, and SOURCE switches. -
Page 47: Shutting Down The Instrument (Daily Use)
3 Starting and Stopping the Instrument 12 Carry out master curve recalibration when necessary. (See "4.8 Master curve recalibration".) 13 Carry out check analysis using the sample for checking. (See "4.9 Check analysis".) Shutting down the instrument (Daily use) The routine procedure to shut down the instrument is described below. Turn off the SOURCE switch on the switch panel. -
Page 48: Shutting Down The Instrument For A Long Time
3 Starting and Stopping the Instrument Shutting down the instrument for a long time The procedure to shut down the instrument for a long period of time is described below. Turn off the photo detector on Instrument Check screen on the data processor system. -
Page 49: Emergency Stop And Recovering
3 Starting and Stopping the Instrument Place an analysis sample for blank analysis on the sample plate of the spark stand and prevent air or debris from entering into the emission chamber. 10 Clean the spark stand and exchange the electrode. (See "5.3 Maintaining the spark stand".) Emergency stop and recovering Caution... -
Page 50: Recovering From Emergency Stop
3 Starting and Stopping the Instrument (2)Recovering from emergency stop Turn OFF the AIRCON, CONSOLE, SOURCE and then MAIN switches on the switch panel. Turn on the MAIN switch on the switch panel, and then turn on the AIRCON, CONSOLE and SOURCE switches. Turn on the PC. -
Page 51: Operation
Chapter 4 Operation... -
Page 52: Argon Gas Bubbler
4 Operation Operation Argon gas bubbler An argon gas bubbler is installed on the argon gas exhaust line. The water in the argon gas bubbler works as a resistance to suppress the pressure fluctuation in the spark stand. Keep the water level in the argon gas bubbler at 8 to 10cm. Replace the water if it is heavily contaminated. - Page 53 4 Operation Note ● When the water level in the bubbler lowers, the analytical value varies. ● Connect a vinyl hose or something similar to the outlet of the bubbler to discharge the exhaust air from the bubbler out of the room.
-
Page 54: Checking Gas Flow Rate
4 Operation Checking gas flow rate (1) When the instrument is in operation Confirm that argon gas is flowing at the following rate: 10L / min during analysis (discharge) and 1L / min during the standby, by a flow meter. To adjust the flow rate during analysis, use screens such as Manual Scanning, on which continuous discharge can be made. -
Page 55: When The Instrument Is Not Used Or At Nighttime
4 Operation (2) When the instrument is not used or at nighttime When analysis is not carried out for a long time or at nighttime, argon gas flow rate can be reduced to 100mL / min - 200mL / min by adjusting the valve for no use instrument or nighttime. -
Page 56: Turning On / Off Photo Detector
4 Operation Turning ON / OFF photo detector The light emitted from the spark stand can be detected by the photo detector (photomultiplier) by turning the detector ON. Follow the procedures below to turn ON / OFF the detector. Select Instrument Check on Maintenance menu. Instrument Check window appears. -
Page 57: Sample Pretreatment
4 Operation Sample pretreatment Analytical samples need to be ground or polished before analysis. If samples are not ground or polished properly, correct analysis results cannot be obtained. The following shows the grinding/polishing methods according to the type of metals. Steel, nickel, cobalt, titanium, and their alloyed metals : Belt sander (grain size #60 to 80) Cast iron... - Page 58 4 Operation Note When using a belt sander for sample pretreatment, follow the instructions below. ● Use the belt sander dry. ● Regularly replace the belt sander. If the belt is worn, samples cannot be polished properly, which results in lower analytical accuracy.
-
Page 59: Setting The Sample
4 Operation Setting the sample Sample holder Sample Sample plate Spark stand Note Be sure to tightly cover the hole of the sample plate with the sample. A clearance between the sample plate and sample allows the air to flow into the stand, causing abnormal discharge. In the same manner, rough sample surface or flaws on the sample surface may cause the air to flow into the stand. -
Page 60: Content Analysis
4 Operation Content analysis The contents of each element in the sample can be measured on this screen. Select Analysis - Cont. on the menu bar. Input the name of the analytical group in the Group textbox or select it by pressing S4:Group key. -
Page 61: Recalibration
4 Operation Recalibration To calculate the recalibration coefficient, carry out the recalibration analysis. Select Analysis - Recalibration on the menu bar. Input the name of the analytical group in the Group textbox or select it by pressing S4:Group key. Select the name of the recalibration sample to be analyzed in the Sample combo box. - Page 62 4 Operation Note After recalibration analysis, check the intensity of the internal standard element and also recalibration coefficients α, β and k to make sure that they have not changed considerably from the values before recalibration. Note After recalibration, carry out check analysis using the sample for checking (see page 4-14).
-
Page 63: Master Curve Recalibration
4 Operation Master curve recalibration To calculate the master curve correction coefficient, carry out the master curve recalibration analysis. Select Analysis -Master Curve on the menu bar. Input the name of the analytical group in the Group textbox or select it by pressing S4:Group key. -
Page 64: Check Analysis
4 Operation Note After master curve correction, carry out check analysis using the sample for checking (below). Check analysis Confirm whether the content percentages of the elements are correctly measured, using a sample with known composition. Select Analysis - Cont. on the menu bar. Input the name of the analytical group in the Group textbox or select it by pressing S4:Group key. -
Page 65: Maintenance
Chapter 5 Maintenance... -
Page 66: Maintenance And Inspection Items
5 Maintenance Maintenance To use the instrument correctly and safely, provide maintenance and inspection regularly. Maintenance and inspection items Items that need to be maintained or inspected are listed below. For the flow of maintenance service, see "5.2 Maintenance Flow". For detailed procedure of each maintenance service, see the applicable section described in the “Reference”... -
Page 67: Work Required After Maintenance Service
Recalibration 4.8 Recalibration Master curve correction (only when necessary) 4.9 Master curve correction Check analysis using the Sample for checking 4.10 Check analysis (4) Maintenance service by Shimadzu service engineer Maintenance Item Cycle Reference Periodic inspection Annually 5.14 Periodic inspection... -
Page 68: Maintenance Flow
5 Maintenance Maintenance Flow After maintenance service, works described in “(3) Work required after maintenance” in "5.1 Maintenance and inspection items" may be necessary. The table below shows the work necessary after each maintenance service. Waste Master curve Check Maintenance Item Recalibration correction Analysis... -
Page 69: Maintaining The Spark Stand
5 Maintenance Maintaining the spark stand After analysis using the optical emission spectrometer, evaporated sample accumulates inside the spark stand. Evaporated sample sticking to the tip of the electrode changes the analysis gap distance and in turn fluctuates analytical values. To prevent this and keep appropriate conditions for correct analysis, perform maintenance service on the spark stand regularly. -
Page 70: Maintenance Cycle
5 Maintenance (From left to right)Sample plate, Dust cup, Gap gauge and Electrode removal tool (1) Maintenance cycle To remove evaporated sample from the tip of the electrode, either of the two methods listed below is usually used. The maintenance cycle for the spark stand depends on the method selected. - Page 71 5 Maintenance Note ● To recondition the electrode, select either reverse discharge or using the brush. Do not perform both on one electrode. ● When cleaning the tip of the electrode using the brush, remove the evaporant from the entire circumference of the electrode. Brush the electrode from the lower section (blackish area) to the top.
-
Page 72: Maintenance Procedure
5 Maintenance (2) Maintenance procedure Turn off the SOURCE switch on the Open the BYPASS needle valve on the switch panel for safety. back of the stand cover and feed 5L/min to 10L/min of argon gas. Warning Electric Shock Never carry out maintenance operations on the spark stand unless the SOURCE switch on the switch panel is turned OFF. - Page 73 5 Maintenance Wipe off the grease on the stand base Remove evaporant in the dust cup surface with gauze. using a vacuum cleaner. Caution Before using the vacuum cleaner to clean the emission chamber, be sure to remove the vinyl hose. If the vacuum cleaner is used without removing the hose, water in the gas bubbler may rise into the stand, and thus could damage the instrument.
- Page 74 5 Maintenance Clean the argon gas exhaust outlet with a cotton swab or gauze and then a vacuum cleaner. Blow off the evaporant in the vinyl hose outside of the room and clean the inside of the hose. If the hose has hardened, replace it with a new one. After cleaning, attach the vinyl hose.
- Page 75 5 Maintenance 10 Pull out the tungsten electrode straight 11 Wipe off the grease on the electrode. up using the electrode removal tool and remove it. Caution ● Prior to pulling out the electrode, be sure to clean the emission chamber following steps 1 through 9.
- Page 76 5 Maintenance 14 After sharpening the electrode, apply a 15 Using the electrode removal tool, insert small amount of grease (just enough to the electrode straight down until its prevent damage on the O-ring when bottom contacts the electrode holder. inserting the electrode as described in step 15) on the lower part of the electrode.
- Page 77 5 Maintenance 17 Wipe off fingerprints on the dust cup and place the cup onto the stand using care not to directly touching the cup. Place it so that the light-guide (concave part) is on the spectrometer side. Light-guide Light-guide Note If the dust cup is mounted in the incorrect direction, spectral light cannot go into the spectrometer, inhibiting analysis.
- Page 78 5 Maintenance 19 Detach the sample plate and confirm that the grease covers the entire joint surfaces of both stand and sample plate. Confirm that the grease is not on areas around the sample plate or the light-guide hole of the stand. Light-guide hole Note ●...
- Page 79 5 Maintenance 22 Insert the electrode into the holder using the electrode removal tool and press in the electrode using the gap gauge. Note Oil has been applied to the gap gauge to prevent rust generation. Be sure to wipe the oil off before use. 23 With the gap gauge placed on the 24 Press down the gap gauge and confirm spark stand, tighten the adjusting bolt...
- Page 80 5 Maintenance 25 Tighten the lock nut and fix the 26 Place an analytical sample on the electrode position. spark stand and tighten the BYPASS needle valve to return the argon gas flow rate to the original BYPASS rate. 27 Turn on the SOURCE switch on the switch panel and turn on the power of the excitation unit.
- Page 81 5 Maintenance 28 In order to even out the tip of the electrode that has been sharpened, recondition the tip using discharge by following the procedure below. With this setting, discharge lasts for approximately two minutes. (i) Place a sample on the spark stand, select Preparation - Waste Discharge in the menu to open the Waste Discharge screen, and set the condition below on Condition 2 tab.
-
Page 82: Exchanging The Electrode O-Ring
5 Maintenance Exchanging the electrode O-ring Electrode O-ring deteriorates due to the temperature rise caused by discharge and also by repeated removal and insertion. Although the deterioration level differs according to the usage frequency, replace it with a new one monthly. The electrode should be replaced when it is pulled out. -
Page 83: Cleaning The Condenser Lens
5 Maintenance Cleaning the condenser lens The condenser lens gradually becomes contaminated due to ultraviolet light. Clean the condenser lens following the procedure below. If you do not provide cleaning at a proper interval, contaminant deposited inside will cause errors in analysis results. Disconnect the vinyl hose for exhausting argon gas from the spark stand following step 3 described in "5.3 Maintaining the spark stand". - Page 84 5 Maintenance Place the condenser on a clean paper and detach the O-ring (1A P34). Apply ethanol on gauze and clean both sides of the lens using care not to rub the joint part of the holder and lens. In case of heavy contamination, rub the lens with gauze with toothpaste. Then, remove the toothpaste with gauze soaked in ethanol.
- Page 85 5 Maintenance Apply a small amount of silicone grease to the O-ring and place it on the lens holder. Note Be sure that silicone grease does not stick to the condenser lens, since it is difficult to remove. Be sure your hands are not dirty when cleaning the lens.
- Page 86 5 Maintenance 11 Press in the handle of the condenser lens unit to place the lens at its original position. Caution Do not press in the condenser lens unit without the condenser lens or without the O-ring (1A P34). It may break the vacuum inside the spectrometer and contaminated water in the spark stand or bubbler may enter the spectrometer.
-
Page 87: Adjusting The Control Gap
5 Maintenance Adjusting the control gap Carry out maintenance for the control gap following the procedure described below. Turn OFF the SOURCE switch on the switch panel for safety. Warning Electric Shock Never carry out maintenance operations unless the SOURCE switch on the switch panel is turned OFF. - Page 88 5 Maintenance Loosen the fastening screws on the electrode holder of the control gap in the upper part of the excitation unit to remove the electrode. Control gap Upper Part of Excitation Unit Electrode holder Electrode bar Fastening screws Control Gap The used electrode should be polished with sandpaper (#240) or machined in a lathe.
- Page 89 5 Maintenance Place a gap gauge between the electrode holders so that the left side of the gauge would contact the electrode holder. Insert a new electrode (or reconditioned one) into the electrode holder so that the tip would contact the gap gauge. Then, tighten the fastening screw. Gap gauge How to Adjust Control Gap 6 Take off the gap gauge.
-
Page 90: Replacing Pump Oil
5 Maintenance Replacing pump oil Replace the vacuum pump oil following the procedure described below. Turn OFF the power switch of the vacuum pump. 2 Open the pump leak valve, allow the air into the suction hose.(Refer to 3.5) Loosen the drain cock to drain the oil. While doing this, rotate the vacuum pump for a short time (repeat a few seconds of ON and OFF several times) to prevent contaminated oil from staying in the pump. -
Page 91: Manual Scanning
5 Maintenance Manual scanning The position of the peak of each spectrum may shift during the long term of operation, due to the changes of the environment or the instrument itself, such as the drift of the temperature inside the spectrometer. On Manual Scanning screen, the peak position can be adjusted at the right position by moving the entrance slit using the scanning dial. - Page 92 5 Maintenance Repeat procedure 7 until the intensity matches the background intensity. Press 2: Stop to stop the discharge. 10 Calculate the number to set the scanning dial at, from the profile curve on the screen. For example, the calculation in the case of the profile on the previous page is as follows.
-
Page 93: Lamp Test
5 Maintenance Lamp test To check if the read-out unit works correctly, perform Lamp Test. You can get the stability of the entire read-out unit, including the photomultiplier (photo detector), by Lamp Test, based on the reproducibility of the measured intensity. The following describes the procedure of Lamp Test. -
Page 94: Waste Discharge
5 Maintenance 5.10 Waste discharge After the maintenance of the instrument, carry out waste discharge to stabilize emission. Select Prepare - Waste Discharge on the menu bar. Screen 5.3 Waste discharge Set the sample on the spark stand and hold it by the sample holder. Start the discharge by pressing 1:Start or the start button on the spark stand. -
Page 95: File Utility
5 Maintenance 5.11 File utility Important data stored in the computer may be lost due to an unexpected accident. If this happens, only the data processing software PDA-Win can be recovered with the installation CD, which is provided with the instrument. Information files (analysis information and other information) and data report files (analysis results) that were made or changed after the shipment from the factory cannot be recovered. -
Page 96: Loading (Restoration)
5 Maintenance Note ● Usually, the backup process is completed within one minute. ● Put a label indicating the contents on the backup media. (2) Loading (Restoration) The procedure of how to restore the backup data is described here.. Select Maintenance - File Maintenance on the menu bar. Screen 5.5 File Maintenance (Restore is selected) Select Restore in the upper left area on the screen. -
Page 97: Replacing Recalibration Samples
5 Maintenance 5.12 Replacing recalibration samples When the recalibration sample gets deteriorated and analysis cannot be performed, replace it with a new one following the procedure described below. Select Inf. - Analytical Inf. and open Recalibration Information screen. Then, print out the recalibration information of the analytical group with which recalibration samples will be replaced. -
Page 98: Replacing Argon Gas Cylinder
For the details of the periodic inspection, contact your Shimadzu service representative. 5.15 Cleaning the temperature control fan heater The temperature control fan heater needs cleaning depending on the conditions of the use. Ask a Shimadzu service engineer to clean it at least once a year. 5-34... - Page 99 5 Maintenance 5-35...
- Page 100 5 Maintenance (This page is intentionally left blank.) 5-36...
- Page 101 Chapter 6 Installation...
-
Page 102: Installation
6 Installation Installation Before installing PDA-7000, carefully prepare the location of the installation and the configuration of the peripheral equipment by referring the following guidelines. Temperature and humidity • The installation site should be air-conditioned and meet the following conditions. -
Page 103: Power Supply
Dew point below -70°C • 140 - 200kPa (1.4 - 2.0kgf / cm ) of pressure is required at PDA-7000 gas inlet. If the argon gas is provided from a gas cylinder, a pressure regulator is needed. (Ex.) Ar gas regulator P/N : 200-33871 Secondary pressure: 150kPa(1.5kgf / cm... -
Page 104: Peripheral Equipment
• The installation site should be free of corrosive or explosive elements. • Avoid use near equipment that generates powerful magnetic fields such as an electric furnace. If the installation site is near such equipment, contact your Shimadzu service representative. 6.10 Moving and Disposing of the product Contact your Shimadzu service representative before moving or disposing PDA-7000. -
Page 105: Troubleshooting
Chapter 7 Troubleshooting... -
Page 106: Basic Items To Be Checked
7 Troubleshooting Troubleshooting Basic items to be checked Sometimes, problems are caused by a simple cause. If a problem happens, check the followings first. Are the power of every unit ON? Referring to "4.2 Checking gas flow rate", check if the power supply of the spectrometer main unit and the vacuum pump are turned on. - Page 107 When all the basic check items listed on the previous page are OK, take a corrective action on the list below. If the same problem still remains after that, or a problem other than the ones described below happens, contact Shimadzu's service engineer. Problem Corrective action The Vacuum does not become OK.
-
Page 108: Installing The Software
Unexpected troubles or accidental miss-operation may destroy the data processing system stored in the computer. In such a case, recover it using the software installer, which consists of one CD-ROM, provided with PDA-7000. Foer the recovery procedure, refer to the installation manual below.
Need help?
Do you have a question about the PDA-7000 and is the answer not in the manual?
Questions and answers