Sign In
Upload
Download
Table of Contents
Contents
Add to my manuals
Delete from my manuals
Share
URL of this page:
HTML Link:
Bookmark this page
Add
Manual will be automatically added to "My Manuals"
Print this page
×
Bookmark added
×
Added to my manuals
Manuals
Brands
Shimadzu Manuals
Measuring Instruments
UV-2450
Instruction manual
Shimadzu UV-2450 Instruction Manual
Spectrophotometer
Hide thumbs
1
2
3
4
5
6
7
8
9
10
Table Of Contents
11
12
13
14
15
16
17
18
19
20
21
22
23
24
25
26
27
28
29
30
31
32
33
34
35
36
37
38
39
40
41
42
43
44
45
46
47
48
49
50
51
52
53
54
55
56
57
58
59
60
61
62
63
64
65
66
67
page
of
67
Go
/
67
Contents
Table of Contents
Troubleshooting
Bookmarks
Table of Contents
Table of Contents
Chapter 1 Inspection
Inspection
Chapter 2 Installation
Hardware Installation
Site Requirements
Environmental Requirements
Instrument Voltage Setting
Personal Computer Hardware and Software Requirements
Cable Connections
Software Installation
Installing Uvprobe
Uninstalling Uvprobe
Application Mode
Communications and Printer Setup
Electro Magnetic Compatibility
Chapter 3 Construction
UV-2450/2550 Photometer Unit
Sample Compartment of UV-2450/2550 Photometer Unit
Photometric System
Optical System (UV-2450)
Optical System (UV-2550)
Cell Holder / Light Beam Relative Position
Electrical System
Chapter 4 Maintenance and Checking
Periodic Maintenance
Troubleshooting
Photometer Initialization Failures
Scanning Problems
Replacement of the Light Source
Light Source Specifications
Light Source Replacement Procedure
Replacement of the Fuses
Cleaning the Unit
Consumable/Spare Parts List for Maintenance
Precaution During Transportation of the Unit
Chapter 5 Specifications
Chapter 6 Optional Accessories
Optional Cells
Advertisement
Quick Links
1
Chapter 1 Inspection
2
Uv-2450/2550 Photometer Unit
3
Optical System (Uv-2450)
4
Optical System (Uv-2550)
5
Chapter 4 Maintenance and Checking
6
Chapter 5 Specifications
Download this manual
SPECTROPHOTOMETER
Read the instruction manual thoroughly before you use the product.
Keep this instruction manual for future reference.
INSTRUCTION MANUAL
User's System Guide
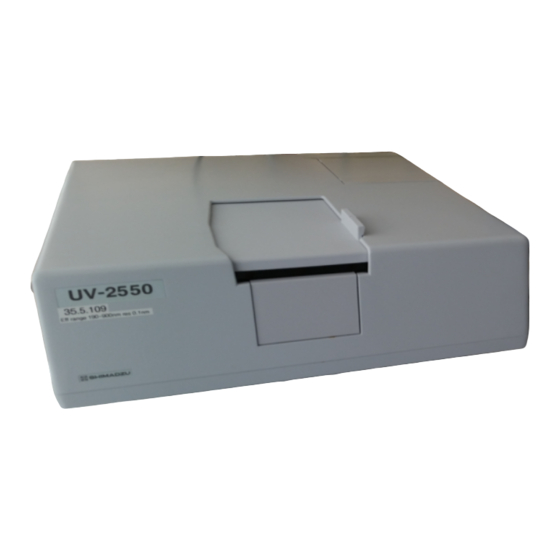
UV-2450
UV-2550
206-94649D
Sep. 2008
Table of
Contents
Previous
Page
Next
Page
1
2
3
4
5
Advertisement
Table of Contents
Need help?
Do you have a question about the UV-2450 and is the answer not in the manual?
Ask a question
Questions and answers
Related Manuals for Shimadzu UV-2450
Measuring Instruments Shimadzu UV-1700 series Service Manual
Uv-1700 series (115 pages)
Measuring Instruments Shimadzu UV-1800 Instruction Manual
(99 pages)
Measuring Instruments Shimadzu UV-1800 Instruction Manual
Spectrophotometer (453 pages)
Measuring Instruments Shimadzu UV-2401 PC Instruction Manual
(65 pages)
Measuring Instruments Shimadzu UV-2501 PC Instruction Manual
(65 pages)
Measuring Instruments Shimadzu UV-2550 Instruction Manual
Spectrophotometer (67 pages)
Measuring Instruments Shimadzu UV-1900i Instruction Manual
Shimadzu spectrophotometer (496 pages)
Measuring Instruments Shimadzu MOC-120H Instruction Manual
Electronic moisture balance (76 pages)
Measuring Instruments Shimadzu MOC63u Instruction Manual
Moisture analyzer (123 pages)
Measuring Instruments Shimadzu AA-7000 Series Manual
Atomic absorption spectrophotometer (29 pages)
Measuring Instruments Shimadzu IRAffinity-1 Instruction Manual
Infrared spectrophotometer (134 pages)
Measuring Instruments Shimadzu TOC-V Administrator's Manual
Total organ carbon analyzer (108 pages)
Measuring Instruments Shimadzu GCMS-QP2010 Series Operation Manual
Gas chromatograph mass spectrometer (132 pages)
Measuring Instruments Shimadzu AGS-X Series Instruction Manual
(154 pages)
Measuring Instruments Shimadzu PDA-7000 Instruction Manual
Optical emission spectrometer (108 pages)
Measuring Instruments Shimadzu AA-6800F Instruction Manual
Atomic absorption spectrophotometer (302 pages)
This manual is also suitable for:
Uv-2550
Table of Contents
Save PDF
Print
Rename the bookmark
Delete bookmark?
Delete from my manuals?
Login
Sign In
OR
Sign in with Facebook
Sign in with Google
Upload manual
Upload from disk
Upload from URL


Need help?
Do you have a question about the UV-2450 and is the answer not in the manual?
Questions and answers