Sign In
Upload
Download
Table of Contents
Contents
Add to my manuals
Delete from my manuals
Share
URL of this page:
HTML Link:
Bookmark this page
Add
Manual will be automatically added to "My Manuals"
Print this page
×
Bookmark added
×
Added to my manuals
Manuals
Brands
Toro Manuals
Lawn Mower
Diesel Z Master
Service manual
Toro Diesel Z Master Service Manual
Hide thumbs
1
2
3
Table Of Contents
4
5
6
7
8
9
10
11
12
13
14
15
16
17
18
19
20
21
22
23
24
25
26
27
28
29
30
31
32
33
34
35
36
37
38
39
40
41
42
43
44
45
46
47
48
49
50
51
52
53
54
55
56
57
58
59
60
61
62
63
64
65
66
67
68
69
70
71
72
73
74
75
76
77
78
79
80
81
82
83
84
85
86
87
88
89
90
91
92
93
94
95
96
97
98
99
100
101
102
103
104
105
106
107
108
109
110
111
112
113
114
115
116
117
118
119
120
121
122
123
124
125
126
127
128
129
130
131
132
133
134
135
136
137
138
139
140
141
142
143
144
145
146
147
148
149
150
151
152
153
154
155
156
157
158
159
160
161
162
163
164
165
166
167
168
169
170
171
172
173
174
175
176
177
178
179
180
181
182
183
184
185
186
187
188
189
190
191
192
193
194
195
196
197
198
199
200
201
202
203
204
205
206
207
208
209
210
211
212
213
214
215
216
217
218
219
220
221
222
223
224
225
226
227
228
229
230
231
232
233
234
235
236
237
238
239
240
241
242
243
244
245
246
247
248
249
250
251
252
253
254
255
256
257
258
259
260
261
262
263
264
265
266
267
268
269
270
271
272
273
274
275
276
277
278
279
280
281
282
283
284
285
286
287
288
289
290
291
292
293
294
295
296
297
298
299
300
301
302
303
304
305
306
307
308
309
310
page
of
310
Go
/
310
Contents
Table of Contents
Bookmarks
Table of Contents
Table of Contents
Safety Information
General Information
Think Safety First
Specifications
Specifi Cations Z593-D & Z595-D
Confi Gurations
Power System
Mowing Deck
Operator Zone
Dimensions
Specifi Cations Z580-D
Confi Gurations
Power System
Mowing Deck
Operator Zone
Dimensions
Torque Specifi Cations
Standard Torque for Dry, Zinc Plated, and Steel Fasteners (Inch Series)
Standard Torque for Dry, Zinc, and Steel Fasteners (Metric Fasteners)
Other Torque Specifications
Equivalents and Conversions
U.S. to Metric Conversions
Chassis
Castor Fork Assembly Replacement
Castor Fork Assembly Removal
Castor Bearing Replacement
Castor Fork Assembly Installation
Front Wheel Removal & Bearing Replacement
Fuel Tank Replacement
Right Side Fuel Tank Removal
Right Side Fuel Tank Installation
Left Side Fuel Tank Removal
Left Side Fuel Tank Installation
Fuel Tank Fitting Replacement
Hood Assembly Replacement
Hood Assembly Removal
Hood Assembly Installation
Throttle Control Assembly Replacement
Throttle Control Assembly Removal
Throttle Control Assembly Installation
Brake Lever Replacement
Brake Lever Removal
Brake Lever Installation
Brake Band Replacement
Brake Band Removal
Brake Band Installation
Brake Cross Shaft Replacement
Brake Cross Shaft Removal
Brake Cross Shaft Installation
Deck Lift Lever Replacement
Deck Lift Lever Removal
Deck Lift Lever Installation
Motion Control Assembly Replacement
Motion Control Assembly Removal
Right Hand Motion Control
Left Hand Motion Control
Motion Control Assembly Installation
Left Hand Motion Control
Right Hand Motion Control
Motion Control Damper Replacment
Motion Control Damper Removal
Motion Control Damper Installation
Adjusting the Parking Brake
Hydraulic System
Hydrostatic Tandem Pump Replacement
Hydrostatic Tandem Pump Removal
Hydrostatic Tandem Pump Installation
Wheel Motor Replacement
Wheel Motor Removal
Wheel Motor Installation
Purging the Hydraulic System
Adjusting the Control Handle Neutral Position
Setting the Hydrostatic Pump Neutral
Setting the Right Hydraulic Pump Neutral Position
Setting the Left Hydraulic Pump Neutral Position
Adjusting the Tracking
Hydraulic Flow Testing
Hydraulic Flow Testing Procedure
Traction Pump Drive Belt Replacement
Traction Pump Drive Belt Removal
Traction Pump Drive Belt Installation
Hydraulic Oil Cooler Replacement
Hydraulic Oil Cooler Removal
Hydraulic Oil Cooler Installation
Hydraulic Reservoir Tank Replacement
Hydraulic Reservoir Tank Removal
Hydraulic Reservoir Tank Installation
Pushing the Machine by Hand
Switching from Pushing the Machine Back to Machine Operation
Engine
Engine Replacement
Engine Removal
Engine Installation
Radiator Replacement
Radiator Removal
Radiator Installation
Cooling Fan Replacement
Cooling Fan Removal
Cooling Fan Installation
Air Cleaner Replacement
Air Cleaner Removal
Air Cleaner Installation
Alternator Belt Replacement
Alternator Belt Removal
Alternator Belt Installation
Checking Alternator Belt Tension
Tensioning the Alternator Belt
Fuel Filter Service
Fuel Filter Replacement
Draining the Water Separator
Checking the Radiator Coolant
General
Engine Starting
Relays
Purpose
Location
How It Works
Testing
PTO Switch
Purpose
Location
How It Works
Testing
Ignition Switch
Purpose
Location
How It Works
Testing
Neutral Safety Switch
Purpose
Location
How It Works
Parking Brake Switch
Purpose
Location
How It Works
Testing
Seat Switch
Purpose
Location
How It Works
Testing
Delay Module
Purpose
Location
How It Works
Testing
High Temperature Audible Alarm (Solid Tone)
Purpose
Location
How It Works
Testing
Temperature Sender
Purpose
Location
How It Works
Testing
Oil Pressure Switch
Purpose
Location
How It Works
Testing
High Temperature & Glow Plug Light Cluster
Purpose
Location
How It Works
Testing
Glow Plug Switch
Purpose
Location
How It Works
Testing
Hour Meter
Purpose
Location
How It Works
Testing
Electric PTO Clutch
Purpose
Location
How It Works
Testing
Clutch Coil Continuity Test
Engine Stop Solenoid
Purpose
Location
How It Works
Testing
Pull Coil Terminal Test
Hold Coil Terminal Test
Mower Decks
Mower Belt Replacement
Mower Deck Removal
Mower Deck Installation
Mower Spindle Replacement
Mower Spindle Removal
Mower Deck Spindle Rebuild
Mower Spindle Installation
Mower Deck Idler Assembly Replacement
Mower Deck Idler Assembly Removal
Mower Deck Idler Assembly Installation
Fixed Pulley Replacement
Fixed Pulley Removal
Fixed Pulley Installation
Electric PTO Clutch Replacement
Electric PTO Clutch Removal Warner Clutch
Electric PTO Clutch Installation Warner Clutch
Electric PTO Clutch Removal Ogura Clutch
Electric PTO Clutch Installation Ogura Clutch
Gearbox Assembly Replacement
Gearbox Assembly Removal
Gearbox Assembly Installation
Checking the Gearbox Oil Level
Changing Gearbox Oil
Strut Replacement
Strut Removal
Strut Installation
72" Mower Deck Belt Tension Adjustment Plate Replacement
72" Mower Deck Belt Tension Adjustment Plate Removal
72" Mower Deck Belt Tension Adjustment
Gearbox Rebuild
Pinion Shaft Teardown
Cross Shaft Teardown
Open End Cap Teardown
Closed End Cap Teardown
Closed End Cap Rebuild
Open End Cap Rebuild
Cross Shaft Rebuild
Pinion Shaft Rebuild
Gearbox Assembly
Leveling the Mower
Setting up the Machine
Leveling the Mower Side to Side
Adjusting the Front to Rear Mower Pitch
Adjusting the Compression Spring
Advertisement
Quick Links
1
Power System
Download this manual
LCE Products
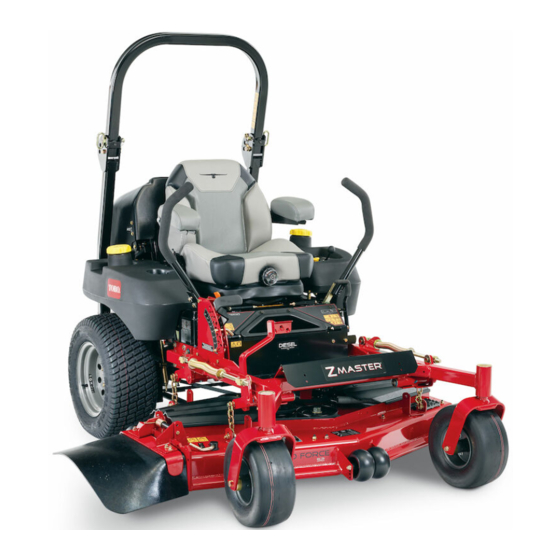
Z580-D / Z593-D / Z595-D
Diesel Z Master
Service Manual
Table of
Contents
Previous
Page
Next
Page
1
2
3
4
5
Advertisement
Table of Contents
Need help?
Do you have a question about the Diesel Z Master and is the answer not in the manual?
Ask a question
Questions and answers
Related Manuals for Toro Diesel Z Master
Lawn Mower Toro DH 210 Setup Instructions
(9 pages)
Lawn Mower Toro DH 210 Operator's Manual
(40 pages)
Lawn Mower Toro 74582 Operator's Manual
(40 pages)
Lawn Mower Toro 74585 Operator's Manual
(40 pages)
Lawn Mower Toro DH 210 Operator's Manual
Serial no. 315000001 and up (40 pages)
Lawn Mower Toro 74596 Operator's Manual
(40 pages)
Lawn Mower Toro 74593 Operator's Manual
(40 pages)
Lawn Mower Toro 74593 Operator's Manual
(40 pages)
Lawn Mower Toro DH 220 Operator's Manual
(40 pages)
Lawn Mower Toro DH 220 Operator's Manual
(40 pages)
Lawn Mower Toro DH 200 Setup Instructions
(9 pages)
Lawn Mower Toro 4573 Operator's Manual
(40 pages)
Lawn Mower Toro 74571 M74571 Operator's Manual
(40 pages)
Lawn Mower Toro DH 140 Setup Instructions
Dh series (4 pages)
Lawn Mower Toro DH 140 Operator's Manual
(40 pages)
Lawn Mower Toro Top Dresser 2500 Operator's Manual
(28 pages)
This manual is also suitable for:
Z580-d
Z593-d
Z595-d
Table of Contents
Save PDF
Print
Rename the bookmark
Delete bookmark?
Delete from my manuals?
Login
Sign In
OR
Sign in with Facebook
Sign in with Google
Upload manual
Upload from disk
Upload from URL


Need help?
Do you have a question about the Diesel Z Master and is the answer not in the manual?
Questions and answers