Table of Contents
Advertisement
Quick Links
EinScan HX User Manual
Legal Information
© Shinning 3D Technology Co., Ltd. All rights reserved.
About this Manual
The Manual includes instructions for managing EinScan HX, which is for reference only. As the
product updates from time to time, all those descriptions and explanations contained in the Manual
are subject to change, without prior written notice, and the actual product shall prevail if there is any
inconsistency between the Manual and the actual product. Contact us for the latest program and
supplementary documentation, or simply check the latest information of the product on our website
(http://www.shinging3d.com/).
If you have any further questions or comments, also feel free to contact us, we heartily provide
customers the best products and service.
Disclaimer
SHINING 3D TECH CO., LTD. OWNS COMPLETE INTELLECTUAL PROPERTY OF THIS MANUAL.
WITHOUT THE COMPANY'S WRITTEN CONSENT, IT WOULD BE ILLEGAL TO COPY, PLAGIARIZE, ADAPT
OR DEDUCT THE WORK IN ANY FORM, WITH ANY PURPOSE.
THE WARRANTY AND THE SERVICE CONTRACT ARE NOT LIABLE FOR ANY FAILURE OR DAMAGE DUE
TO IMPROPER HANDLING, USE OR STORAGE WHICH IS OUT OF QUALITY CONCERNS.
THERE MIGHT BE SOME PRINTING ERRORS OR DEVIATIONS IN THE MANUAL. IF THERE IS ANY
UNCERTAINTY OR CONTROVERSY, THE COMPANY RESERVES THE RIGHT OF THE FINAL EXPLANATION.
THE LAW OF THE PEOPLE'S REPUBLIC OF CHINA SHALL APPLY IN SETTLING THE DISPUTES
MENTIONED IN THE PRECEDING PARAGRAPH.
0
Advertisement
Table of Contents

Related Manuals for Shining 3D EinScan HX


Summary of Contents for Shining 3D EinScan HX
- Page 1 © Shinning 3D Technology Co., Ltd. All rights reserved. About this Manual The Manual includes instructions for managing EinScan HX, which is for reference only. As the product updates from time to time, all those descriptions and explanations contained in the Manual are subject to change, without prior written notice, and the actual product shall prevail if there is any inconsistency between the Manual and the actual product.
- Page 2 EinScan HX User Manual Symbol Conventions The symbols in this document are defined as follows. Symbol Description Provides additional information as the emphasis and supplement to the text. Indicates a potential risk which, if not avoided, could result in property damage, data loss, lower performance, or unpredictable issues.
-
Page 3: Table Of Contents
EinScan HX User Manual Content Content ......................2 1 Hardware ....................... 5 1.1 Introduction ............................ 5 1.2 Connect Cables ..........................6 2 Software ......................8 2.1 Introduction ............................ 8 2.2 Operating Environment ........................8 2.3 Install Software ..........................8 2.4 User Account ..........................9 2.4.1 Register .......................... - Page 4 EinScan HX User Manual 3.3 Select Scan Mode ......................... 27 3.3.1 Rapid Scan ..........................28 3.3.2 Laser Scan ..........................36 3.4 Edit Data ............................44 3.4.1 Generate Point Clouds ......................44 3.4.2 Create a Cutting Plane ......................45 3.4.3 Edit Model ..........................47 3.4.4 Edit Projects ...........................
- Page 5 EinScan HX User Manual 3.9.5 Preview Model ........................76 3.10 Other Operations ........................78 Support and Contact ..................80 Submit a Ticket ........................... 80 Contact Us............................81...
-
Page 6: Hardware
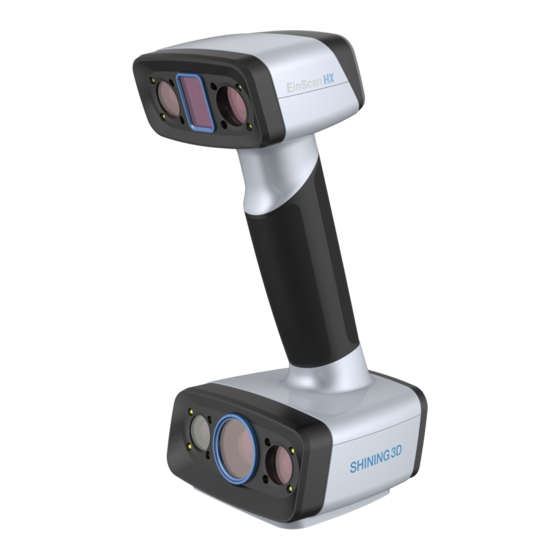
It applies the LED structure light and laser, which enables repeating high- precision scanning to various kinds of industry materials. All in all, EinScan HX is a cleverly designed tool covering various needs by balancing both quality and efficiency of scanning. -
Page 7: Connect Cables
EinScan HX User Manual 1.2 Connect Cables Connectors Figure 1-2 Assembly Diagram ① Electrical Plug (scanner) ④ Electrical Plug (power adaptor) ② Connection Plug (scanner) ⑤ USB Plug (aviation cable) ③ Electrical Connections ⑥ Plug Adapters Steps 1. Connect ① and ② with the scanner. - Page 8 EinScan HX User Manual Ensure that all the cables are not loose during the scanning operation. You are suggested to use fastening tools to prevent the device from being offline.
-
Page 9: Software
EinScan HX User Manual 2 Software 2.1 Introduction EXScan software supports HX scanners. With user-friendly software interface, full process scanning guidance, simplified software settings, you can operate the Scanner easily. 2.2 Operating Environment Table 2-1 Operating Environment of EXScan Operating... -
Page 10: User Account
EinScan HX User Manual 2.4 User Account To keep the UpToDate information and software, register for a free account after software installation or from passport.shining3d.com. Before getting shining pass, ensure that the device has been connected properly (refer to Connect Cables). -
Page 11: Register
EinScan HX User Manual 2.4.1 Register Double-click to enter the software. Register for an account firstly if you do not have a Shining 3D user account. https://passport.shining3d.com/signup 1. Click or go to for register, there will be a pop-up. Figure 2-1 Register or Login from Softeware... -
Page 12: Login To Activate Online
EinScan HX User Manual https://passport.shining3d.com/signup Figure 2-2 Sign-up Pop-up at 2. Follow the instructions and fill the blanks to create an account 2.4.2 Login to Activate Online Double-click to operate the software. If the computer with installed software has been networked, after registration, the activation will be processed automatically, and the operation interface will appear on the desktop as soon as finishing the online activation. - Page 13 EinScan HX User Manual Figure 2-3 Offline Activation Wizard 3. Export C2V file: Click Export to save generated C2V file to the disk. 4. Login your user account at https://passport.shining3d.com/login using the internet connected computer. 5. Click Offline Activation after logging in successfully.
-
Page 14: Device Offline Mode
EinScan HX User Manual Figure 2-4 Serial Number 2.4.4 Device Offline Mode Click or close button to enter the offline-mode operating interface. Offline mode only supports importing and processing projects with scanned data, while it does not support calibrating and scanning operations. -
Page 15: Upgrade
EinScan HX User Manual Upgrade 2.5.1 Upgrade Hardware For enjoying new functions and preventing the firmware from being incompatible, always make sure that the firmware in use is of the latest version. If not, a reminder prompting updates will pop up immediately after opening the software. -
Page 16: Upgrade Software
EinScan HX User Manual 2.5.2 Upgrade Software Users can get the patch through a normal software update. If the software in use is not of the latest version, a reminder prompting update will pop up immediately after opening the software. -
Page 17: Operation
EinScan HX applies safe low-energy laser during laser scan mode, which causes no harm to human body such as eyes and skin under the normal operating situation. However, avoiding direct eye-contacts with the laser beam and keeping the scanner away from children are still commanded for your own safety. - Page 18 EinScan HX User Manual The Maintenance to the Calibration Boards Make sure that there are no scratches or stains on the working side of the calibration board. Do not place loads or junk on the board as it may bring damage to the working side of the calibration board.
-
Page 19: Standard Calibration
EinScan HX User Manual 3.1.2 Standard Calibration In the initial use, you will be guided to Standard Calibration directly. Steps 1. Place the position paper on a horizontal flat surface. Figure 3-1 Position Paper 2. Open and then put the calibration board vertically aligning to the black line frame Figure 3-2 Calibration Board 3. - Page 20 EinScan HX User Manual Figure 3-4 Color Bar 5. As the calibration for one angle is done, the software automatically joins in the calibration for the next angle. Follow the operation instructions on the interface to complete the calibration for the following 5 positions.
-
Page 21: Quick Calibration
EinScan HX User Manual 3.1.3 Quick Calibration Quick Calibration is recommended when the scanning result remains not clear enough to meet the initial expectation after completing the standard calibration. Quick calibration’s operating process is like the standard calibration while it requires one position only. -
Page 22: Laser Calibration
EinScan HX User Manual 3.1.4 Laser Calibration Steps 1. Open and place the calibration board on a horizontal flat surface with its back site lying towards 2. Hold the scanner face to the center of board in upright position. 3. Keep moving the scanner up and down slowly until all the color bars turn green, which means that all the required distances have been captured. -
Page 23: White Balance
EinScan HX User Manual 3.1.5 White Balance 1. Open and place the calibration board on a horizontal flat surface with its back site lying towards 2. Hold the scanner face to the center of board in upright position. 3. Keep moving the scanner up and down slowly until the scanner takes a photo automatically, which indicates that the distance is just being optimal. -
Page 24: Preparation
EinScan HX User Manual 3.2 Preparation 3.2.1 Scanned Objects Requirements The size of the objects to be scanned ranges from 300mm to 4m The objects owning plenty of geometrical or texture features tend to be scanned quickly and easily with excellent scanning result. - Page 25 EinScan HX User Manual Figure 3-12 Different Ways of Sticking Markers...
-
Page 26: Operating Buttons
EinScan HX User Manual 3.2.2 Operating Buttons Operating Buttons on the Scanner Figure 3-12 Scanner Operating Buttons within the EXScan : Preview : Pause : Play... -
Page 27: Workflow
EinScan HX User Manual 3.2.3 Workflow... -
Page 28: Select Scan Mode
EinScan HX User Manual 3.3 Select Scan Mode You can choose a mode to start scan after a full preparation. The following diagram and form comparing the differences between rapid scan and laser scan are for your reference: Figure 3-13 Icons of Rapid Scan and Laser Scan... -
Page 29: Rapid Scan
EinScan HX User Manual 3.3.1 Rapid Scan Rapid scan mode is faster than laser scan while it has a lower resolution. The size of the objects to be scanned ranges from 300mm to 4m Different aligning methods are available under rapid scan mode, such as features aligning, markers aligning, global markers aligning and hybrid aligning. - Page 30 EinScan HX User Manual Create a Project Creating a project before scanning can provide a specific saving path, so that users are able to process existed data conveniently. Steps 1. Click New Project Group or Open Project Group. Figure 3-16 Create or Open a Project 2.
- Page 31 EinScan HX User Manual Figure 3-18 The Effect of Texture Scan Select Mode of Alignment RAPID SCAN allows aligning by markers, features, hybrid and texture. LASER SCAN only supports marker alignment. This mode aligns scanning result by recognizing markers. Markers Alignment Which is suitable for non-feature regions like flat, spherical surface or objects with repetitive features.
- Page 32 EinScan HX User Manual This mode is suitable for objects with region having less Hybrid Alignment geometrical features. The software is to switch between features alignment and markers alignment automatically depends on whether there are greater than or equal to 4 markers being collected at a time or not.
- Page 33 EinScan HX User Manual Preview Hold the scanner to face the object with enough markers or geometry features on surface, click Preview or the Trigger to run into the preview mode, through which the operator could preview the final performance and adjust parameters to an optimal level accordingly.
- Page 34 EinScan HX User Manual Find proper distance and brightness during the preview. Click Pause on the interface or the Trigger to pause scanning. The data will be automatically saved in the project file. Check Scanning Distance The colored LED on the scanner and the rangefinder on the left side both reveal the distance between the scanner and the object.
- Page 35 EinScan HX User Manual Rapid Setting Scan Users can set parameters during preview mode. Figure 3-22 Rapid Scan Setting Scan Mode: Open global markers file: Open existed makers-scanning project and import global markers. Brightness: Adjust the brightness manually by dragging the bar.
- Page 36 EinScan HX User Manual Operation Scanning 1. Hold the scanner to face the object with enough markers or geometry features on surface, click Preview or the Trigger to run into the preview mode. 2. Click the Trigger again or click Play to exit the preview mode and start the scan.
-
Page 37: Laser Scan
EinScan HX User Manual 3.3.2 Laser Scan Laser scan mode is capable of acquiring high-accuracy detailed data. The size of the objects to be scanned ranges from 300mm to 4m Laser scan allows marks alignment only, so it is necessary to stick markers properly previous operation. - Page 38 EinScan HX User Manual Create a Project Create a project before scanning, which provides a specific saving path, and so that users are able to process existing data conveniently. Steps 1. Click New Project Group or Open Project Group. Figure 3-24 Create or Open a Project 2.
- Page 39 EinScan HX User Manual When importing an existed project, its previous resolution and alignment mode are to be imported at the same time automatically. Preview Hold the scanner to face the object with enough markers on surface, click Preview...
- Page 40 EinScan HX User Manual Figure 3-27 Find proper distance and brightness during the preview. Click Pause on the interface or the Trigger to pause scanning. The data will be automatically saved in the project file. Check Scanning Distance The colored LED on the scanner and the rangefinder on the left side both reveal the distance between the scanner and the object.
- Page 41 EinScan HX User Manual Table 3-9 Preview Too bright (X) Good (√)
- Page 42 EinScan HX User Manual Laser Scan Setting Users can set parameters during preview mode. Figure 3-28 Laser Scan Setting Scan mode: Scan Point Cloud: Acquires data in form of point cloud. This mode is usually applied after scanning markers or importing global markers files.
- Page 43 EinScan HX User Manual Scanning Object: Choose the object surface material accordingly: Reflective, Normal, Black. Brightness: Manual Adjustment: Adjust the brightness by dragging the bar. Automatic Adjustment: Turn on the auto exposure by clicking the icon on the right side, then the system will adjust the brightness automatically.
- Page 44 EinScan HX User Manual Operation Scanning 1. Hold the scanner to face the object enough markers on surface, click Preview or the Trigger to run into the preview mode. 2. Click the Trigger again or click Play to exit the preview mode and start the scan. Find proper distance and brightness according to the environment as well as object itself during scanning.
-
Page 45: Edit Data
EinScan HX User Manual 3.4 Edit Data During the scanning process, the scanner may vibrate slightly, the scanned surface or the environment may be too dark for operation. Those uncertain factors upon can bring noise. In this regard, the function of editing is developed. It supports switching the perspective and editing the model manually in the custom selection region. -
Page 46: Create A Cutting Plane
EinScan HX User Manual 3.4.2 Create a Cutting Plane The plane can be rotated, zoom or move. Taking the model below as a reference, after setting the cutting plane, the cutting plane above the direction of the arrow is valid (displayed in blue). The user can choose whether to save the data in the reverse direction (displayed in red) or delete it. - Page 47 EinScan HX User Manual Do not move the scan data view during the process, or the system may generate a new cutting plane. Create a cutting plane by markers Press down Shift and Left mouse button to select at least 3 not lined-up markers.
-
Page 48: Edit Model
EinScan HX User Manual 3.4.3 Edit Model Buttons Figure 3-33 Buttons for Edition Orthographic/ Lasso Revert selection Perspective projection Straight line Delete selection Multi view Paint Brush Undo the last step Create cutting plane Select all Cancel edit Rectangular Cancel selection... -
Page 49: Edit Projects
EinScan HX User Manual 3.4.4 Edit Projects Manage projects on the project group when the scanned data is saved. Icons Figure 3-34 Icons for Editing Create a new project. Import the saved projects. Remove the project. & Delete the selected project (s). -
Page 50: Alignment
EinScan HX User Manual 3.5 Alignment Iterative scanning is required when the point cloud data of the entire model cannot be obtained at one time. When scanning, ensure that there is enough common scanning area of data scanned. Therefore, alignment is done to obtain identical surface features based on the repeatedly scanned areas, connecting such point cloud data obtained through iterative scans into one complete set of data. -
Page 51: Feature Alignment
EinScan HX User Manual 3.5.1 Feature Alignment Feature alignment can be chosen when the scanned point cloud files share common features. Regular shaped objects (circular objects and square objects included) or small sized objects are not suitable for this mode. -
Page 52: Marker Alignment
EinScan HX User Manual 1. Press down SHIFT and left mouse button. 2. Choose at least 3 common points which are not in one line in the fixed window and flotant window. 3. Click Apply to align. 4. Press down Ctrl + Z or ESC to cancel the selection points one by one. -
Page 53: Manual Marker Alignment
EinScan HX User Manual Figure 3-38 Marker Alignment Table 3-11 Button Names Button names Description Apply Perform the alignment operation. The aligned projects will be merged into a group, which can be further Next aligned. Cancel Undo the completed alignment. - Page 54 EinScan HX User Manual Figure 3-39 Manual Marker Alignment...
-
Page 55: Mesh
EinScan HX User Manual 3.6 Mesh Meshing is to convert the point cloud into a triangular mesh surface. After meshing, the model can be enlarged, and any triangle surface can be manually selected for observation. The meshed data can be directly used for rendering or measurement. - Page 56 EinScan HX User Manual Quality:choose quality under the watertight mode. Figure 3-41 Mesh Menu Filter: Optimize the data and improve the clarity of the data. The higher the level, the less the small details. Table 3-12 Level Description None No optimization...
- Page 57 EinScan HX User Manual 4. Click Apply to mesh.
-
Page 58: Post Processing
EinScan HX User Manual 3.7 Post Processing When the model data is meshed, it switches to the post-processing interface. Alternatively, you can directly click on the navigation bar to enter the post-processing interface and import data. Post-processing can then be performed on the data, including simplifying, mesh optimization, smoothening, removal of isolated faces, automatic hole mending and manual hole mending. -
Page 59: Mesh Optimization
EinScan HX User Manual Figure 3-42 Simplification menu Click Apply to simplify data, preview the result of current setting. Click Confirm to apply the “Simplification” setting. Click Cancel to quit and go back to the original data. Multiple operations on Simplification, the result will not be added. It will always operate on the original data. -
Page 60: Smooth
EinScan HX User Manual Below shows the result of different ratios. Original Mesh optimization 10 Mesh optimization 50 Mesh optimization 100 Figure 3-44 Mesh Optimization Click Apply to optimize data, preview the result of current setting. Click Confirm to apply. -
Page 61: Remove Small Floating Parts
EinScan HX User Manual Click Confirm to apply the “Smooth” setting. Click Cancel to quit and go back to the original data. Multiple operations on “Smooth”, the result will not be added. It will always operate on the original data. - Page 62 EinScan HX User Manual Auto Hole Filling Input the perimeter of the biggest hole to be filled. Less than 100mm is recommended. This function will fill every hole with a smaller perimeter than the number input. Figure 3-48 Auto hole filling Choose Curvature, Tangent or Flat before filling hole.
- Page 63 EinScan HX User Manual Manual Hole Filling The hole edges are displayed green and get red after picking. The number of the holes and the number of holes filled will be displayed on the interface. Choose Curvature, Tangent or Flat before picking a hole.
-
Page 64: Texture Remapping
EinScan HX User Manual 3.7.6 Texture Remapping If the following post-processing operations (such as hole filling, simplification) have been performed, texture remapping can be applied before saving the data. Click Texture Remapping to display the Texture menu. After the post-processing, hole filling on texture scanned data will affect the texture render. By doing the texture remapping, the texture information will be reapplied on the mesh. -
Page 65: Flip Normal
EinScan HX User Manual No Texture layout optimization Texture layout optimization Figure 3-54 Texture Layout Optimization TLO requires a longer time to compute. TLO is used only with OBJ output. TLO result is more convenient for texture manual editing. -
Page 66: Cutting Plane Tool
EinScan HX User Manual 3.7.8 Cutting Plane Tool Define a plane by drawing a straight line. Delete the selection and close the mesh at the intersection. Use the cutting plane to align the mesh to the CSYS. Steps 1. Hold down the Shift+ LMB and drag the cursor to create a plane. The front is above the plane. -
Page 67: Measurement
EinScan HX User Manual Figure 3-55 Mirror 3.8 Measurement After meshing, the Measurement menu will be available on the top. Or click Measurement on the navigation bar, and import data. The measurement interface and the post-processing interface share the same data. - Page 68 EinScan HX User Manual Click on the created plane, or select it on the dropdown. The point generated is the intersection between the non- parallel line and plane. Feature creation failed! Error code 9: The line is parallel to the plane.
-
Page 69: Movement
EinScan HX User Manual Feature creation failed! Error code 6= the point selected belongs to the line Press Shift+ LMB to select an area, press ctrl+ LMB to deselect. Best Fit — The plane generated is the position with the smallest deviation from the selected area. - Page 70 EinScan HX User Manual Click Close to confirm the movement and exit the movement interface. Figure 3-58 Movement 3-2-1 System Movement 3-2-1 system movement aligns data by selecting the point, line and plane. Before movement, create feature points, lines and planes. The feature lines created are not perpendicular to the plane.
-
Page 71: Measure
EinScan HX User Manual Figure 3-59 Movement menu 2. Click Move to perform the movement. When the line is perpendicular to the plane, the movement will fail. Click Reset to cancel. Click Apply to confirm the transformation. 3.8.3 Measure Click button to display the menu, click again to close the menu. - Page 72 EinScan HX User Manual Press Shift+ LMB to select an area, press Ctrl + LMB to unselect. Ctrl + A to select all. Click Calculate to display the Area value of the selected data in mm^2 Redo the selection and click Calculate again to update.
- Page 73 EinScan HX User Manual Enter/exit the measurement interface Click Measurement to enter the measurement interface and display the measurement menu, click the button again to exit the measurement interface.
-
Page 74: Export Data
EinScan HX User Manual 3.9 Export Data 3.9.1 Save Data Click to export the data. Input the file name. Select one of the formats below. By default, the saving path is the project folder, the file name is “Scan data”, and the format is .stl. The format of textured scanning is .obj. -
Page 75: Scale Data
EinScan HX User Manual The file is small; Mesh data scan.3mf Compatible with Microsoft 3D printing software. Universal framework point file of Markers file scan.p3 Einscan software; Identifying the positional relationship between markers. 3.9.2 Scale Data To scale data when you save it. -
Page 76: Third-Party Software
3.9.4 Third-party Software Five third-party software, including Geomagic Control X, Verisurf, Geomagic Design X, Geomagic Essentials and Solid Edge SHINING 3D Edition are included. Users can import scanned mesh data into the third-party software with one click. Geomagic Control X Export data to Geomagic Control X Mainly used for inspection. -
Page 77: Preview Model
The third-party software should be installed and activated in advanced. Solid Edge Shining 3D Edition is included in the scanner. Please follow the license card to activate the software. The rest above mentioned software are not included. Please contact us if you are interested to buy. - Page 78 EinScan HX User Manual Figure 3-67 Model Preview STL, OBJ, PLY, ASC, or 3MF can be loaded, files from 3rd party software might fail to be loaded. In this case we recommend Meshlab, a free mesh software editor, or upload to sketchfab.
-
Page 79: Other Operations
Table 3-16 Icon of Other Operations Icon Function Description Official website Open the official website of Shining 3D to learn about the company’s products and information. Facebook Enter Shining 3D’s Facebook to view product introduction and other operations. Support Platform Enter Shining 3D’s support platform to view product... - Page 80 EinScan HX User Manual About View related software release information, contact information, etc. Open help mode Open the real-time help file. Teamviewer The quick access to remote assistance. Send the ID and password in the pop-up window to the technical...
-
Page 81: Support And Contact
EinScan HX User Manual Support and Contact Submit a Ticket Sign up in Shining 3D EinScan Support Platform support.einscan.com or send an email directly to einscan_support@shining3d.com Login with your account. Click Submit a ticket on the tab bar to submit a ticket. -
Page 82: Contact Us
EinScan HX User Manual Contact Us By Email: Einscan_support@shining3d.com Sales@shining3d.com Support platform: support.shining3d.com Facebook Group: EinScanexpert Shining 3D Offices APAC Region & Headquarters SHINING 3D Tech Co., Ltd. Hangzhou, China Phone: +86 571 82999050 Add: No. 1398, Xiangbin Road, Wenyan, Xiaoshan, Hangzhou, Zhejiang, China, 311258 EMEA Region SHINING 3D Technology GmbH. - Page 83 EinScan HX User Manual...
Need help?
Do you have a question about the EinScan HX and is the answer not in the manual?
Questions and answers