Advertisement
What's In The Box
Please inspect the contents of your shipped package to ensure you have received everything that is listed
below.
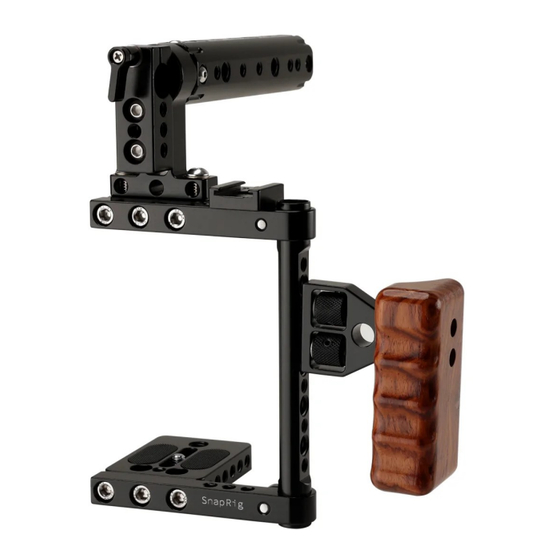
Proaim SnapRig DSLR Camera Cage
No part of this document may be reproduced, stored in a retrieval system, or transmitted by any form or by any means,
electronic, mechanical, photo-copying, recording, or otherwise, except as may be expressly permitted by the applicable copyright
SnapRig Universal DSLR Camera Cage Rig with
Top & Side Handles
A s s e m b l y M a n u a l
1 x Side
Rod
All rights reserved.
statutes or in writing by the Publisher.
(UC-01)
1 x Wooden Handle
3 x Allen Keys Sizes:
Top Handle
(3mm,3/16mm & 4mm)
1
Advertisement
Table of Contents

Subscribe to Our Youtube Channel
Related Manuals for PROAIM SnapRig Universal


Summary of Contents for PROAIM SnapRig Universal
- Page 1 SnapRig Universal DSLR Camera Cage Rig with Top & Side Handles (UC-01) A s s e m b l y M a n u a l What’s In The Box Please inspect the contents of your shipped package to ensure you have received everything that is listed below.
- Page 2 Height Adjustable Cage Setup • Match the wooden side handle to the thread of the slide rod of the camera cage, and then attach it by aligning the thread through both the knobs of the side handle and properly tighten the knobs equally. •...
- Page 3 • Remove the side bolt of the Camera Cage with slide rod, using the Allen key, as shown in the image. • Remove the wooden side handle by loosening its knob. • Remove the slide rod (145mm) by loosening the bottom bolt of the rod, using the 4mm Allen key.
- Page 4 NOTE: Camera cage offers better mobility, comfy handheld use, tripod and accessories mounting Flexibility. • Insert the rod by loosening the knob of the top handle and matching the hole of the handle. • After inserting the rod, secure the top handle by re-tightening its knob.
- Page 5 • After sliding the shoe mount of the plate, attach the bolt to the camera (Not Included) and properly fix it by tightening it using the 3mm Allen key. • Match threads camera (Not Included) to the bottom threads of the camera plate and then insert the screw.
- Page 6 Built-in cold shoe mount on the top and multiple 1/4”-20 & 3/8”-16 thread holes let you attach mics, lights, articulating arms, and other devices and accessories. YOUR PROAIM SNAPRIG UNIVERSAL DSLR CAMERA CAGE RIG WITH TOP & SIDE HANDLES ALL DRESSED UP AND READY TO GO! (SHOWN WITH OPTIONAL ACCESSORIES) Warranty: We offer one year warranty for our products from date of purchase.
Need help?
Do you have a question about the SnapRig Universal and is the answer not in the manual?
Questions and answers