
Subscribe to Our Youtube Channel
Related Manuals for Motorola solutions PELCO Sarix Professional 4


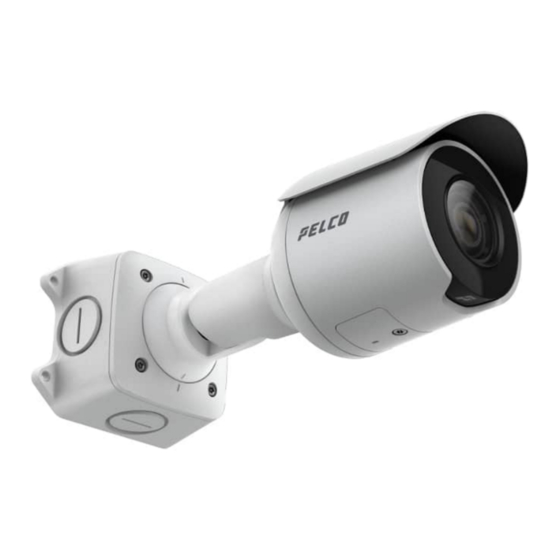
Summary of Contents for Motorola solutions PELCO Sarix Professional 4
- Page 1 Sarix Professional 4 Bullet Camera Installation Manual Document number: C6726M Publication date: 11/22...
-
Page 2: Legal Notices
Sarix Professional 4 Bullet Camera Installation Manual Legal Notices © 2022, Pelco Corporation. All rights reserved. P ELCO, the PELCO logo, PELCO are trademarks of Pelco Corporation. O ther names or logos mentioned herein may be the trademarks of their respective owners. The absence of the symbols ™ and ® in proximity to each trademark in this document or at all is not a disclaimer of ownership of the related trademark. Pelco Corporation protects its innovations with patents issued in the United States of America and other jurisdictions worldwide (see www.pelco.com). Unless stated explicitly and in writing, no license is granted with respect to any copyright, industrial design, trademark, patent or other intellectual property rights of Pelco Corporation or its licensors. Disclaimer This document has been compiled and published using product descriptions and specifications available at the time of publication. The contents of this document and the specifications of the products discussed herein are subject to change without notice. Pelco Corporation reserves the right to make any such changes without notice. Neither Pelco Corporation nor any of its affiliated companies: (1) guarantees the ... -
Page 3: Table Of Contents
Sarix Professional 4 Bullet Camera Installation Manual Table of Contents Legal Notices Disclaimer Regulatory Notices Disposal and Recycling Information Overview Junction Box View Front View Side View Rear View Configuration Panel View Installation Camera Package Contents Installation Steps Mounting the Bullet Camera Removing the Configuration Panel Cover Initializing a Camera Username and Password (Optional) Using the USB Wi-Fi Adapter Assigning an IP Address Setting the IP Address Using the ARP/Ping Method Accessing the Live Video Stream Aiming the Camera Zooming and Focusing the Camera (Optional) Configuring microSD Card Storage Configuring the Camera Connecting to Power and External Devices Connection Status LED Indicator Troubleshooting Network Connections and LED Behavior Resetting to Factory Default Settings For More Information Pelco Troubleshooting Contact Information C6726M | 11/22... -
Page 4: Regulatory Notices
Sarix Professional 4 Bullet Camera Installation Manual Regulatory Notices This device complies with part 15 of the FCC Rules. Operation is subject to the following two conditions: (1) this device may not cause harmful interference, and (2) this device must accept any interference received, including interference that may cause undesired operation. This Class B digital apparatus complies with Canadian ICES-003. This equipment has been tested and found to comply with the limits for a Class B digital device, pursuant to Part 15 of the FCC rules. These limits are designed to provide reasonable protection against harmful interference in a residential installation. T his equipment generates, uses and can radiate radio frequency energy and, if not installed and used in accordance with the instructions, may cause harmful interference to radio communications. H owever, there is no guarantee that interference will not occur in a particular installation. I f this equipment does cause harmful interference to radio or television reception, which can be determined by turning the equipment off and on, the user is encouraged to try to correct the interference by one or more of the following measures: Reorient or relocate the receiving antenna. Increase the separation between the equipment and the receiver. Connect the equipment into an outlet on a circuit different from that to which the receiver is connected. Consult the dealer or an experienced radio/TV technician for help. Changes or modifications made to this equipment not expressly approved by Pelco Corporation or parties authorized by Pelco Corporation could void the user’s authority to operate this equipment. Disposal and Recycling Information When this product has reached the end of its useful life, please dispose of it according to your local ... -
Page 5: Overview
Sarix Professional 4 Bullet Camera Installation Manual Overview Junction Box View 1. Camera mounts Points for installing the camera to the junction box. 2. Mounting hook slots Points to hold the camera to the junction box while connecting the required cables. 3. Mounting holes Holes for securing the junction box to the mounting surface. Front View 1. IR Illuminator Provides scene illumination in the IR spectrum. 2. Configuration panel cover Covers the configuration panel. C6726M | 11/22... -
Page 6: Side View
Sarix Professional 4 Bullet Camera Installation Manual Side View 1. Sun shroud An adjustable cover to help protect the lens against glare from the sun. 2. Mount arm Adjustable mount arm for positioning the camera. 3. Adjustment screws Provides a locking mechanism for the mount arm. Rear View 1. Ethernet port Accepts power and Ethernet connection to the network. Server communication and image data transmission also occur over this connection. The camera can either be powered by Power over Ethernet (PoE) or 12 VDC Aux. 2. Serial number tag Device information, product serial number and part number label. 3. Camera mounting screws Screws for mounting the camera to the junction box. 4. Mounting hooks Hooks to attach the camera to the junction box while connecting the required cables. -
Page 7: Configuration Panel View
Sarix Professional 4 Bullet Camera Installation Manual Configuration Panel View 1. microSD card slot Accepts a microSD card for onboard storage. For more information, see (Optional) Configuring microSD Card Storage. 2. Micro USB port Accepts a micro USB to USB adapter. Only required when using the USB Wi-Fi Adapter. 3. Link LED indicator Amber LED indicates if there is an active connection in the Ethernet port. 4. Connection status LED indicator Green LED provides information about device operation. For more information, see Connection Status LED Indicator. C6726M | 11/22... -
Page 8: Installation
Sarix Professional 4 Bullet Camera Installation Manual Installation Camera Package Contents Pelco Sarix Professional 4 Bullet Camera Junction box Mounting template sticker 4 screws and anchors for solid walls 4 screws for attachment to electrical box Protective rubber boot for Ethernet port Teflon tape Installation Steps Mounting the Bullet Camera If the cables for the camera will not be provided from inside the mounting surface, install the junction box first. A fter you install the junction box, you can skip directly to step 3 of this procedure. 1. Use the mounting template to drill four mounting holes into the mounting surface. 2. ... - Page 9 Sarix Professional 4 Bullet Camera Installation Manual 4. Insert the mounting hooks on the rear of the camera into the mounting hook slots on the junction box, then let the camera hang. Before connecting any cables, ensure that the cable connections are properly protected from moisture and corrosion. Make sure the protective cable boot is installed over the Ethernet port to protect the connection from dust and moisture. If PoE is not available, the camera may be powered through the auxiliary power cable using either 12 VDC. For more information, see Connecting to Power and External Devices. 5. If there are external input or output devices that need to be connected to the camera (for example: door contacts, relays, etc.), connect the devices to the camera's digital I/O connector cables. For more information see Connecting to Power and External Devices. It is recommended that seal tape be applied around the external audio and I/O connection, if necessary, to prevent moisture from entering. C6726M | 11/22...
- Page 10 Sarix Professional 4 Bullet Camera Installation Manual 6. Install the protective cable boot. a. Thread one end of the Ethernet cable through the provided protective cable boot. Ensure the orientation of the cable and boot matches the one shown in the image. b. Crimp the Ethernet cable onto the cord. c. Plug the Ethernet cable into the camera's Ethernet port. d. After you connect the cable to the camera, slide the boot over the Ethernet port. 7. Connect the network cable to the camera's Ethernet port. 8. Tuck the extra lengths of cables into the cable entry hole or within the junction box compartment. C6726M | 11/22...
-
Page 11: Removing The Configuration Panel Cover
Sarix Professional 4 Bullet Camera Installation Manual 9. Raise the camera until it covers the junction box. 10. Use the camera mounting screws to fasten the camera to the junction box. Removing the Configuration Panel Cover 1. Use a T20 Pin-In star-shaped driver to unscrew the configuration panel cover. 2. Remove the cover from the configuration panel. C6726M | 11/22... -
Page 12: Initializing A Camera Username And Password
Sarix Professional 4 Bullet Camera Installation Manual Initializing a Camera Username and Password You must create a user with administrator privileges before the camera is operational. The new user can be created using the following methods: Camera's web interface. Enter the camera's IP address in a web browser to access the web interface. For more information, see the Pelco Sarix Professional 4 Bullet Camera Operations Manual. If the camera is in the factory default state, you will be redirected to the New User page to create an administrator user: 1. Enter a new User Name or keep the default administrator name. 2. Enter a new Password for the user. It is recommended to use a secure and complex password. 3. Confirm the new password. 4. For the first user, Administrator must be selected in the Security Group drop-down menu. 5. Click Apply. After creating the user, you will be asked to login. Camera Configuration Tool: discovered cameras that are identified by will require a first user to be set. Select the Admin Users tab to create the first user. For more information, see the Camera Configuration Tool User Guide. Note: Set up the first user through the camera's Web Interface or Camera Configuration Tool before you connect the camera to a VMS. -
Page 13: Assigning An Ip Address
Sarix Professional 4 Bullet Camera Installation Manual The camera will reserve the 10.11.22.32/28 subnet for internal use while the USB Wi-Fi Adapter is plugged in. Assigning an IP Address The device automatically obtains an IP address when it is connected to a network. If the device cannot obtain an IP address from a DHCP server, it will use Zero Configuration Networking (Zeroconf) to choose an IP address. When set using Zeroconf, the IP address is in the 169.254.0.0/16 subnet. The IP address settings can be changed using one of the following methods: The mobile web interface using the USB Wifi Adapter. For more information, see (Optional) Using the USB Wi-Fi Adapter. Device's web browser interface: http://<camera IP address>/. Network Video Management software application. ARP/Ping method. For more information, see Setting the IP Address Using the ARP/Ping Method. Setting the IP Address Using the ARP/Ping Method Complete the following steps to configure the camera to use a specific IP address: Note: The ARP/Ping Method will not work if the Disable setting static IP address through... -
Page 14: Aiming The Camera
Sarix Professional 4 Bullet Camera Installation Manual Aiming the Camera Reference the camera's live stream as you aim the camera. 1. Loosen the adjustment screw closest to the junction box to rotate the camera arm. 2. Loosen the center adjustment screw to tilt the camera. 3. Loosen the adjustment screw on the camera to turn the camera body. C6726M | 11/22... -
Page 15: Zooming And Focusing The Camera
Sarix Professional 4 Bullet Camera Installation Manual 4. If the camera is turned sideways to look vertically at a scene, you can remove the sun shroud then re-install it to cover the camera's new angle of view. Zooming and Focusing the Camera In the camera web browser interface, use the camera’s Image and Display settings to zoom and focus the camera. a. Use the zoom buttons to zoom the camera in or out. b. Click Auto Focus to focus the lens. c. Use the focus near and far buttons to manually adjust the focus. (Optional) Configuring microSD Card Storage To use the c amera's SD card storage feature, you must insert a microSD card into the card slot. It is recommended that the microSD card have a write speed of class 10 or better. If the microSD card does not meet the recommended write speed, the recording performance may suffer and result in the loss of frames or footage. 1. ... -
Page 16: Configuring The Camera
Sarix Professional 4 Bullet Camera Installation Manual Configuring the Camera After the camera is installed, configure it using the instructions in the current version of the Pelco Sarix Professional 4 Bullet Camera Operations Manual. Connecting to Power and External Devices If PoE is not available, the camera may be powered through the auxiliary power cable using either 12 VDC. The power consumption information is listed in the product specifications. To power the camera, connect the two power wires to the a uxiliary power wires. T he auxiliary power wire is distinguished by its thicker wire gauge and AUX PWR label. The connection can be made with either polarity. This product is intended to be supplied by a UL Listed Power Unit marked “Class 2” or “LPS” or “Limited Power Source” with output rated 12 VDC, 13 W min. or Power over Ethernet (PoE), rated 48 VDC, 13 W min. To avoid damaging the camera, do NOT connect auxiliary power to the audio or I/O terminal block, and do NOT install the Microphone accessory and an external audio input device simultaneously. Power supplies and external devices are connected to the camera through the power and I/O wires. For the locations of the power a nd I/O connector blocks, see Overview. The pinout for the I/O and power wires is shown in the diagram on the following page. C6726M | 11/22... - Page 17 Sarix Professional 4 Bullet Camera Installation Manual Example application. 1. Brown — Audio Input (line level) An external power amplifier should be used when connecting speakers and microphones, as shown in the diagram. 2. Yellow — Audio Ground 3. Green — Audio Output (line level) 4. Grey — Ground 5. Red — Digital Input 6. Pink — Digital Output 7. Purple — Reserved Wire, do not connect. 8. White — Reserved Wire, do not connect. * — Relay ** — Switch M — Microphone S — Speaker AUX1 — Auxiliary Power Wire, labeled AUX PWR AUX2 — ...
-
Page 18: Connection Status Led Indicator
Sarix Professional 4 Bullet Camera Installation Manual Connection Status LED Indicator Once connected to the network, the green Connection Status LED indicator will display the progress in connecting to the Network Video Management software. The following table describes what the LED indicator shows: Connection State Connection Description Status LED Indicator Obtaining One short flash Attempting to obtain an IP address. IP Address every second Discoverable Two short flashes Obtained an IP address but not connected to the every second Network Video Management software. Upgrading Two short flashes Updating the firmware. Firmware and one long flash every second Connected Connected to the Network Video Management software. The default connected setting can be changed to Off using the camera's web user interface. For more information, see ... -
Page 19: Resetting To Factory Default Settings
Sarix Professional 4 Bullet Camera Installation Manual Resetting to Factory Default Settings If the device no longer functions as expected, you can choose to reset the device to its factory default settings. Use the firmware revert button to reset the device. The firmware revert button is shown in the following diagram: The firmware revert button in the Configuration Panel. 1. Ensure the device is powered on. 2. Using a straightened paperclip or similar tool, gently press and hold the firmware revert button. 3. Release the button after three seconds. Do not apply excessive force. Inserting the tool too far may damage the camera. For More Information Additional information about setting up and using the device is available in the following guides: Pelco Sarix Professional 4 Bullet Camera Operations Manual available on the Pelco website: www.pelco.com. Camera Configuration Tool User Guide Pelco Troubleshooting Contact Information For further assistance, contact Pelco Product Support at 1-800-289-9100 (USA and Canada) or +1-559- 292-1981 (international). ... - Page 20 Sarix Professional 4 Bullet Camera Installation Manual Pelco, Inc. 625 W. Alluvial Ave., Fresno, California 93711 United States (800) 289-9100 Tel (800) 289-9150 Fax +1 (559) 292-1981 International Tel +1 (559) 348-1120 International Fax ...
Need help?
Do you have a question about the PELCO Sarix Professional 4 and is the answer not in the manual?
Questions and answers