Edge-Core ECS2100-10T Quick Start Manual
10/28/52-port web-smart pro gigabit ethernet switch 26-port web-smart pro 10g ethernet switch
Hide thumbs
Also See for ECS2100-10T:
- Reference manual (725 pages) ,
- Installation manual (51 pages) ,
- Quick start manual (12 pages)
Advertisement
Available languages
Available languages
Quick Links
Quick Star t Guide
10/28/52-Port Web-Smart Pro Gigabit Ethernet Switch
26-Port Web-Smart Pro 10G Ethernet Switch
1. Unpack the Switch and Check Contents
Rack Mounting Kit—two brackets and eight screws
Four adhesive foot pads
Power Cord—either Japan, US, Continental Europe
or UK
Console Cable—RJ-45 to DB-9 (Optional item)
Documentation—Quick Start Guide (this document)
and Safety and Regulatory Information
Note:
The ECS2100 series switches are for indoor use only.
Note:
For Safety and Regulatory information, refer to
the Safety and Regulatory Information document
included with the switch.
Note:
Other documentation, including the
Installation Guide, Web Management Guide, and CLI
Reference Guide, can be obtained from www.edge-
core.com.
2. Mount the Switch
a. Mounting in a Rack
www.edge-core.com
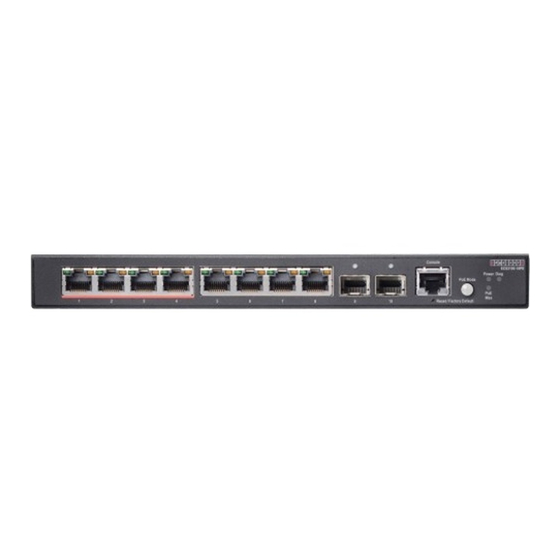
ECS2100-10T
ECS2100-10PE
ECS2100-10P
ECS2100-28T
ECS2100-28P
ECS2100-28PP
ECS2100-52T
ECS2110-26T
1
2
1
Attach the brackets to the switch.
2
Use the screws and cage nuts supplied with the rack to
secure the switch in the rack.
Caution:
Installing the switch in a rack requires two people.
One person should position the switch in the rack, while the
other secures it using the rack screws.
Attention:
Deux personnes sont nécessaires pour installer
un commutateur dans un bâti: La première personne va
positionner le commutateur dans le bâti, la seconde va le
fixer avec des vis de montage.
Note:
The switch can also be installed on a desktop or shelf
using the included adhesive rubber foot pads.
b. Mounting in a Rack (ECS2100-10PE only)
2
Caution:
For safe operation, install the switch with RJ-45
ports facing up.
Attention:
Pour un fonctionnement sûr, installez le
commutateur avec les ports RJ-45 orientés vers le haut.
1
Set two screws in the wall 150 mm (5.9 in.) apart.
2
Slide the switch's wall mounting slots down onto the screws
so that the unit is secure.
3. Ground the Switch
1
2
1
Ensure the rack on which the switch is to be mounted is
properly grounded and in compliance with ETSI ETS 300 253.
Verify that there is a good electrical connection to the
grounding point on the rack (no paint or isolating surface
treatment).
2
Attach a lug (not provided) to a #12 AWG (PoE switch) or #18
AWG (non-PoE switch) minimum grounding wire (not
provided), and connect it to the grounding point on the
switch rear panel. Then connect the other end of the wire to
rack ground.
– 1 –
1
E122022-AP-R03
150200001754A
Advertisement

Related Manuals for Edge-Core ECS2100-10T


Summary of Contents for Edge-Core ECS2100-10T
- Page 1 1. Unpack the Switch and Check Contents Attach the brackets to the switch. Use the screws and cage nuts supplied with the rack to ECS2100-10T secure the switch in the rack. Caution: Installing the switch in a rack requires two people.
-
Page 2: Perform Initial Configuration
Verify that the external AC power requirements for the switch can be met as listed below: ECS2100-10T: AC 100-240 V, 50-60 Hz, 0.5 A ECS2100-10P: AC 100-240 V, 50-60 Hz, 2.1 A ECS2100-28T: AC 100-240 V, 50-60 Hz, 0.5 A (Not for China), AC 100-240 V, 50/60 Hz, 0.5 A... - Page 3 Switch Chassis Immunity EN 55035:2017+A11:2020 IEC 61000-4-2/3/4/5/6/11 Size (W x D x H) ECS2100-10T: 19.64 x 11.71 x 3.66 cm (7.73 x 4.61 x 1.44 in.) Safety UL/CUL(UL60950-1, CSA60950-1) ECS2100-10P: 33.0 x 20.4 x 4.26 cm (12.99 x 8.03 x 1.67 in.) UL/CUL (UL 62368-1, 2nd Ed &...
- Page 4 3. 将交换机接地 注意: 有关安全与法规信息,请参阅交换器随附的 《Safety and Regulatory Information- 安全与法规信息》 文件。 注意:说明文件-包含安装指南、 Web 管理指南及 CLI 参考指南可以从 www.edge-core.com 下载。 2. 安装交换机 确保要安装交换机的机架已正确接地,并且符合 ETSI ETS 300 253 规范。确认到机架上接地点的电力连接良好 (未 a. 在机架中安装 经过油漆或绝缘表面处理) 。 连接# 12 AWG (PoE 交换机)或# 18 AWG (非 PoE 交...
- Page 5 Power 以及 Diag LED 应亮起绿色 6. 执行初始配置 将 AC 电源线插入背板 AC 电源孔。 连接 AC 电源到交换器电源插孔,各型号电源规格如下: ECS2100-10T: AC 100-240 V, 50-60 Hz, 0.5 A ECS2100-10P: AC 100-240 V, 50-60 Hz, 2.1 A ECS2100-28T: AC 100-240 V, 50-60 Hz, 0.5 A 不适用于中国 , 使用附带的控制台线将 PC 连接到交换机控制台端口。...
- Page 6 安全 UL/CUL(UL60950-1, CSA60950-1) UL/CUL (UL 62368-1, 2nd Ed & CAN/CSA C22.2 尺寸 (W x D x H) ECS2100-10T: 19.64 x 11.71 x 3.66 cm (7.73 x 4.61 No. 62368-1-14, 2nd Edition) x 1.44 英寸 ) CB (IEC/EN 60950-1 & IEC/EN 62368-1) ECS2100-10P: 33.0 x 20.4 x 4.26 cm (12.99 x 8.03...
- Page 7 ECS2100 系列交換器僅供室內使用。 注意: 有關安全與法規資訊,請參閱交換器隨附的 《Safety and Regulatory Information - 安全與法規資訊》 注意: 說明文件-包含安裝指南、Web 管理指南及 CLI 參考指南可從 www.edge-core.com 下載。 2. 安裝交換器 請確保對機架正確實施接地,並確保符合 ETSI ETS 300 a. 安裝於托架上 253。請確認機架上的接地點的電氣導通狀態良好 (確 保沒有油漆或絕緣表面處理) 。 將 12 號 AWG 接地線 (PoE 交換器 ) 或 18 號 AWG 接地...
- Page 8 6. 初始設定 將 AC 電源線插入背板 AC 電源孔。 連接 AC 電源到交換器電源插孔,各型號電源規格如下: ECS2100-10T: AC 100-240 V, 50-60 Hz, 0.5 A ECS2100-10P: AC 100-240 V, 50-60 Hz, 2.1 A ECS2100-28T: AC 100-240 V, 50-60 Hz, 0.5 A 不適用於 中國 , AC 100-240 V, 50/60 Hz, 0.5 A ECS2100-28P: AC 100-240 V, 50-60 Hz, 3.2 A...
- Page 9 快 速 入 門 指 南 完成連接線,檢查連接埠狀態 LED,確保連結有效。 電源規格 按模式按鍵從⼄太網更改成 PoE 模式 : ECS2100-10T: AC 100-240 V, 50-60 Hz, 0.5 A 開機 / 閃爍綠燈 — 有效連接。燈號閃略表示網路正 ECS2100-10P: AC 100-240 V, 50-60 Hz, 2.1 A 在運作中。 ECS2100-28T: AC 100-240 V, 50-60 Hz, 0.5 A 琥珀色...
Need help?
Do you have a question about the ECS2100-10T and is the answer not in the manual?
Questions and answers