
Related Manuals for CLEAR DESIGN BLCC Series


Summary of Contents for CLEAR DESIGN BLCC Series
- Page 1 BLCC## STORAGE LAMINATE CONFERENCE CREDENZA Includes Optional Laminate Top Install General Installation Guide...
- Page 2 PARTS LIST CODE DESCRIPTION Bottom Panel Top Panel End Panel Center Support Panel Back Panel Fixed Shelf 1 BLCC## Fixed Shelf 2 Door Wooden Dowel Cam Lock Cam Pin Connecting Rod...
- Page 3 CODE DESCRIPTION Cam Cover Corner Foot Center Footer Wood Screw 1 BLCC## Wood Screw 2 Handle w/ Screws Lock Corner Bracket Latch WALAMCC.X Custom FX Top Panel* Plastic L-Bracket KIT-LCCB Wood Screws *If applicable. FX Top Panel does not include pre-drilled holes.
- Page 4 1 | INSERT HARDWARE INTO BOTTOM PANEL Using a screwdriver, secure 8 cam pins into the pre-drilled holes on the bottom panel of the credenza. Cam Pin 2 | INSERT HARDWARE INTO TOP PANEL Using a screwdriver, secure 8 cam pins into the pre-drilled holes on the top panel of the credenza.
- Page 5 3 | INSERT HARDWARE INTO FIXED SHELF Using a screwdriver, secure 4 cam pins into the pre-drilled holes as they are shown below, for each panel. Insert 4 wooden dowels and 4 cam locks into the pre-drilled holes at the top and bottom of the panel. Note: Repeat steps for both side panels.
- Page 6 4 | INSERT HARDWARE INTO CENTER SUPPORT PANEL Insert 4 wooden dowels and 6 cam locks into the pre-drilled holes in the panel. Cam Lock Wooden Dowel 5 | INSERT HARDWARE INTO BACK PANEL Using a screwdriver, secure 6 cam pins and 8 cam locks into the pre-drilled holes in the panel.
- Page 7 6 | INSERT HARDWARE INTO FIXED SHELF 1 Insert 2 wooden dowels into the pre-drilled holes at the bottom of the panel. Insert 6 cam locks into the pre-drilled holes on the side of the panel. Cam Lock Wooden Dowel 7 | INSERT HARDWARE INTO FIXED SHELF 2 Insert 6 cam locks into the pre-drilled holes at the top and bottom of the panel.
- Page 8 8 | SECURE FIXED SHELVES TO CENTER SUPPORT PANEL Pass 2 wooden dowels and 2 connecting rods through the center support panel and insert into the sides of both of the fixed shelf panels. Using a screwdriver, turn the 4 cam locks to lock the connecting rods in place. Wooden Dowel Connecting Rod Tighten Cams...
- Page 9 9 | SECURE BACK PANEL TO ASSEMBLED STRUCTURE Align the cam pins with the open cam locks on the assembled structure. Using a screwdriver, turn the 6 cam locks to lock the cam pins in place. Tighten Cams 10 | SECURE END PANELS TO ASSEMBLED STRUCTURE Align the cam pins with the open cam locks on the assembled structure.
- Page 10 11 | SECURE BOTTOM PANEL TO ASSEMBLED STRUCTURE Align the cam pins with the open cam locks on the assembled structure. Using a screwdriver, turn the 8 cam locks to lock the cam pins in place. Tighten Cam Locks 12 | SECURE TOP PANEL TO ASSEMBLED STRUCTURE (A) FAST (1"...
- Page 11 (B) FX (1.25" Thick) Top: Drill 2.5” deep holes with a 5/16” drill bit. Holes STEP #1 CONTINUED should be 17 5/8” from the left edge, 16 3/8” from the right edge and 7” from the bottom edge. 13 ” 13 ”...
- Page 12 13 | SECURE FEET TO BOTTOM PANEL Attach corner feet and center foot to the bottom panel with 4 wood screws per foot. Cover all exposed cam locks with cam covers. 14 | SECURE DOORS TO CREDENZA Use 4 wood screws to the side and center panels.
- Page 13 15 | SECURE LOCKS AND LATCHES TO DOORS Align the cam pins with the open cam locks on the assembled structure. Using a screwdriver, turn the 6 cam locks to lock the cam pins in place. 16 | ATTACH CORNER BRACKETS TO THE TOP PANEL Attach brackets to the underside of the top panel using 2 wood screws each.
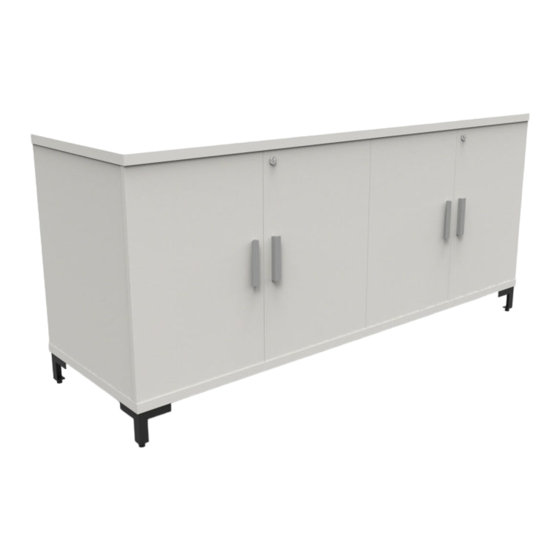
- Page 14 17 | ATTACH HANDLES TO EACH DOOR Attach using 2 wood screws for each handle. 18 | ASSEMBLY COMPLETE...
- Page 16 1-866-304-7197 | inspire@mycleardesign.com | mycleardesign.com © 2022 Clear Design | Version 22.1.2...
Need help?
Do you have a question about the BLCC Series and is the answer not in the manual?
Questions and answers