Juniper ACX2000 Quick Start Manual
Universal access routers
Hide thumbs
Also See for ACX2000:
- Hardware manual (190 pages) ,
- Quick start manual (30 pages) ,
- Configuration manual (3270 pages)
Table of Contents
Advertisement
Quick Links
ACX2000 and ACX2100 Universal Access
Routers Quick Start
December 2012
Part Number: 530-048742
Revision 01
Contents
Copyright © 2012, Juniper Networks, Inc.
This document describes how to install the Juniper Networks ACX2000 and ACX2100
Universal Access Router.
ACX2000 and ACX2100 Quick Start Description . . . . . . . . . . . . . . . . . . . . . . . . . . . 3
Step 1: Prepare the Site for Installation . . . . . . . . . . . . . . . . . . . . . . . . . . . . . . . . . . . 6
Step 2: Install the Router . . . . . . . . . . . . . . . . . . . . . . . . . . . . . . . . . . . . . . . . . . . . . . 8
Tools Required to Install the Router in a Rack . . . . . . . . . . . . . . . . . . . . . . . . . . 8
Install the Mounting Brackets . . . . . . . . . . . . . . . . . . . . . . . . . . . . . . . . . . . . . . . 8
Install the ACX Series Router in the Rack . . . . . . . . . . . . . . . . . . . . . . . . . . . . . . 9
Step 3: Ground the ACX2000 and ACX2100 Router . . . . . . . . . . . . . . . . . . . . . . . . 10
Tools Required to Ground the ACX Router . . . . . . . . . . . . . . . . . . . . . . . . . . . . 10
Connect the Grounding Cable . . . . . . . . . . . . . . . . . . . . . . . . . . . . . . . . . . . . . . 10
Step 4: Connect External Devices and Cables . . . . . . . . . . . . . . . . . . . . . . . . . . . . . 12
Tools Required to Connect External Devices and Cables . . . . . . . . . . . . . . . . . 12
Connect the ACX Series Router to a Network for Out-of-Band
Management . . . . . . . . . . . . . . . . . . . . . . . . . . . . . . . . . . . . . . . . . . . . . . . . 12
Connect the ACX Series Router to a Management Console or Auxiliary
Device . . . . . . . . . . . . . . . . . . . . . . . . . . . . . . . . . . . . . . . . . . . . . . . . . . . . . 12
Connect Network Interface Cables to the ACX Series Router . . . . . . . . . . . . . 12
Step 5: Connect Power to the ACX Series Router . . . . . . . . . . . . . . . . . . . . . . . . . . 14
Connect AC Power to an AC-Powered ACX2100 Series Router . . . . . . . . . . . . 14
Connect DC Power to a DC-Powered ACX2000 or ACX2100 Router . . . . . . . 14
Step 6: Perform Initial Software Configuration . . . . . . . . . . . . . . . . . . . . . . . . . . . . 18
Enter Configuration Mode . . . . . . . . . . . . . . . . . . . . . . . . . . . . . . . . . . . . . . . . . 18
Configure User Accounts and Passwords . . . . . . . . . . . . . . . . . . . . . . . . . . . . . 18
Configure System Attributes . . . . . . . . . . . . . . . . . . . . . . . . . . . . . . . . . . . . . . . 19
Commit the Configuration . . . . . . . . . . . . . . . . . . . . . . . . . . . . . . . . . . . . . . . . . 19
Safety Warnings . . . . . . . . . . . . . . . . . . . . . . . . . . . . . . . . . . . . . . . . . . . . . . . . . . . . 21
Compliance Statements for NEBS . . . . . . . . . . . . . . . . . . . . . . . . . . . . . . . . . . . . . 22
1
Advertisement
Table of Contents

Related Manuals for Juniper ACX2000


Summary of Contents for Juniper ACX2000
-
Page 1: Table Of Contents
Contents ACX2000 and ACX2100 Quick Start Description ......3 Step 1: Prepare the Site for Installation ........6 Step 2: Install the Router . - Page 2 ACX2000 and ACX2100 Universal Access Routers Quick Start Compliance Statements for EMC Requirements for the ACX2000 and ACX2100 Router ............22 Canada .
-
Page 3: Acx2000 And Acx2100 Quick Start Description
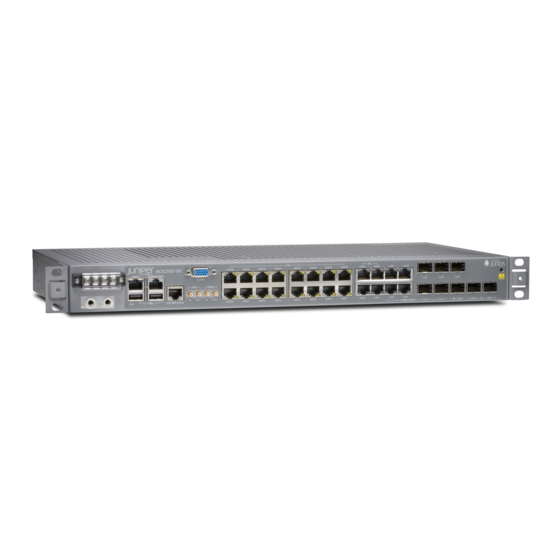
The ACX2000 router contains sixteen T1/E1 ports and eight copper Gigabit Ethernet ports. The ACX2000 router also contains two ports for installing Gigabit Ethernet SFP and two ports for installing 10-Gigabit Ethernet SFP+ transceivers. The ACX2100 router contains sixteen T1/E1 ports, and four copper Gigabit Ethernet ports. - Page 4 ACX2000 and ACX2100 Universal Access Routers Quick Start Figure 1: Front Panel of the ACX2000 Router T1/E1 ACX2000 0/0/8 0/0/9 0/0/10 0/0/11 0/0/12 0/0/13 0/0/14 0/0/15 0/1/4 0/1/5 0/1/6 0/1/7 POE MGMT CONSOLE/AUX ALARM 1PPS 10MHz EXT REF CLK IN...
- Page 5 ACX2000 and ACX2100 Quick Start Description Figure 3: Front Panel of the DC-Powered ACX2100 Router T1/E1 ACX2100 0/0/8 0/0/9 0/0/10 0/0/11 0/0/12 0/0/13 0/0/14 0/0/15 1/0/2 1/0/3 1/1/2 1/1/3 MGMT CONSOLE/AUX ALARM 1/1/2 1/1/3 1/2/1 1PPS 10MHz EXT REF CLK IN...
-
Page 6: Step 1: Prepare The Site For Installation
ACX2000 and ACX2100 Universal Access Routers Quick Start Step 1: Prepare the Site for Installation Prepare your site for installation by observing the following guidelines: You can install the router in a four-post rack or cabinet or an open-frame rack. - Page 7 2.16" (5.5 cm) .75" (2 cm) clearance required clearance required 3" (7.6 cm) for the cables for free airflow 9.4" (24 cm) 19.2" 17.5" Front Rear (48.7 cm) (44.5 cm) 3" (7.6 cm) Front-mounting flange Copyright © 2012, Juniper Networks, Inc.
-
Page 8: Step 2: Install The Router
ACX2000 and ACX2100 Universal Access Routers Quick Start Step 2: Install the Router Tools Required to Install the Router in a Rack on page 8 Install the Mounting Brackets on page 8 Install the ACX Series Router in the Rack on page 9... -
Page 9: Install The Acx Series Router In The Rack
Figure 7: Installing the Front-Mounted Router in the Rack Mounting rack Mounting bracket Copyright © 2012, Juniper Networks, Inc. -
Page 10: Step 3: Ground The Acx2000 And Acx2100 Router
ACX2000 and ACX2100 Universal Access Routers Quick Start Step 3: Ground the ACX2000 and ACX2100 Router You must ground DC-powered routers before connecting DC power. Tools Required to Ground the ACX Router on page 10 Connect the Grounding Cable on page 10... - Page 11 Connect the Grounding Cable Figure 8: Grounding Points on the DC-powered ACX Router 1— Grounding lug 2— SAE 10-32 screw and washer Copyright © 2012, Juniper Networks, Inc.
-
Page 12: Step 4: Connect External Devices And Cables
ACX2000 and ACX2100 Universal Access Routers Quick Start Step 4: Connect External Devices and Cables Figure 9: Ethernet Cable Connector Tools Required to Connect External Devices and Cables on page 12 Connect the ACX Series Router to a Network for Out-of-Band Management on page 12... - Page 13 CAUTION: Do not let fiber-optic cable hang free from the connector. Do not allow fastened loops of cable to dangle, which stresses the cable at the fastening point. Copyright © 2012, Juniper Networks, Inc.
-
Page 14: Step 5: Connect Power To The Acx Series Router
Connect AC Power to an AC-Powered ACX2100 Series Router on page 14 Connect DC Power to a DC-Powered ACX2000 or ACX2100 Router on page 14 Connect AC Power to an AC-Powered ACX2100 Series Router... - Page 15 Connect DC Power to a DC-Powered ACX2000 or ACX2100 Router DC power source cables, minimum 14 AWG or as required by local code (not provided) Ring lugs, Molex 190700067 or equivalent (not provided) The DC power supply has four terminals on the front panel, covered by a clear plastic cover.
- Page 16 ACX2000 and ACX2100 Universal Access Routers Quick Start Secure each power cable lug to the terminal with the flat washers and screw (see Figure 10 on page 17). Apply between 8 lb-in. (0.9 Nm) and 9 lb-in. (1.02 Nm) of torque to each screw.
- Page 17 Connect DC Power to a DC-Powered ACX2000 or ACX2100 Router Figure 10: Connecting DC Power to the Router Copyright © 2012, Juniper Networks, Inc.
-
Page 18: Step 6: Perform Initial Software Configuration
ACX2000 and ACX2100 Universal Access Routers Quick Start Step 6: Perform Initial Software Configuration This procedure connects the router to the network but does not enable it to forward traffic. For complete information about configuring the router to forward traffic, including examples, see the Junos OS configuration guides. -
Page 19: Configure System Attributes
Commit the Configuration (Optional) Display the configuration to verify that it is correct. [edit] root@# show system { host-name host-name; domain-name domain-name; backup-router address; root-authentication { authentication-method (password | public-key); name-server { address; Copyright © 2012, Juniper Networks, Inc. - Page 20 ACX2000 and ACX2100 Universal Access Routers Quick Start interfaces { fxp0 { unit 0 { family inet { address address/prefix-length; Commit the configuration to activate it on the router. [edit] root@# commit (Optional) Configure additional properties by adding the necessary configuration statements.
-
Page 21: Safety Warnings
WARNING: See installation instructions before connecting the router. This is a summary of safety warnings. For a complete list of warnings for this router, including translations, see the ACX2000 and ACX2100 Universal Access Routers Hardware Guide http://www.juniper.net/techpubs/ WARNING: The intrabuilding port(s) of the router is suitable for connection to intrabuilding or unexposed wiring or cabling only. -
Page 22: Compliance Statements For Nebs
The battery return connection is to be treated as an isolated DC return (that is, DC-I), as defined in GR-1089-CORE. Compliance Statements for EMC Requirements for the ACX2000 and ACX2100 Router Canada on page 22 European Community on page 22... - Page 23 Compliance Statements for EMC Requirements for the ACX2000 and ACX2100 Router Figure 11: ACX2000 and ACX2100 Router Declaration of Conformity Copyright © 2012, Juniper Networks, Inc.
- Page 24 ACX2000 and ACX2100 Universal Access Routers Quick Start Copyright © 2012, Juniper Networks, Inc.
-
Page 25: Junos Os Documentation And Release Notes
7 days a week, 365 days a year. Self-Help Online Tools and Resources For quick and easy problem resolution, Juniper Networks has designed an online self-service portal called the Customer Support Center (CSC) that provides you with the following features: Find CSC offerings: http://www.juniper.net/customers/support/... -
Page 26: Opening A Case With Jtac
Products made or sold by Juniper Networks or components thereof might be covered by one or more of the following patents that are owned by or licensed to Juniper Networks: U.S. Patent Nos. 5,473,599, 5,905,725, 5,909,440, 6,192,051, 6,333,650, 6,359,479, 6,406,312, 6,429,706, 6,459,579, 6,493,347, 6,538,518, 6,538,899, 6,552,918, 6,567,902, 6,578,186, and 6,590,785.
Need help?
Do you have a question about the ACX2000 and is the answer not in the manual?
Questions and answers