
Related Manuals for SPRT SP-RMD9


Summary of Contents for SPRT SP-RMD9
- Page 1 SPRT ® PANEL THERMAL RECEIPT PRINTER USER MANUAL SP-RMD9 VER 1.05 Beijing Spirit Technology Development Co., Ltd www.sprt-printer.com...
-
Page 2: Table Of Contents
Content Introduction............................1 Chapter 1 Characteristic and Specification...................2 1.1 Main characteristic........................ 2 1.2 Printing capability........................2 Chapter 2 Printing Installation......................3 2.1 Outer Appearance......................... 3 2.2 Outline Dimension......................... 4 2.3 Install the Paper Roll......................4 Chapter 3 Operating Instructions.......................4 3.1 Interface Connection......................4 3.1.1 Serial interface connection.................. -
Page 3: Introduction
Introduction RMD9 thermal printer is an intelligent dot matrix printer which is developed by Beijing spirit technology development co., LTD., and oriented toward the 21st century’s market. The printer itself uses the new imported printing head with single chip computer and has an advantage in small volume, light weight, fully functional, high speed, high-definition, beautiful appearance, simple operation and convenient connection. -
Page 4: Chapter 1 Characteristic And Specification
◇There is enough of the receive buffer----3K. ◇57.5±0.5mm width thermal printing paper. ◇Power supply: SP-RMD9 P/S/Q H: DC5V~8.5V, Current 3A SP-RMD9 VP/VS/V Q/VUS H: DC9V~24V, Current 3A ◇Operating temperature range: 0~50℃ ◇Can be used under DOS and Windows ◇Resolution:8dots/mm(384dpl). ◇Printing speed :30mm/s. -
Page 5: Chapter 2 Printing Installation
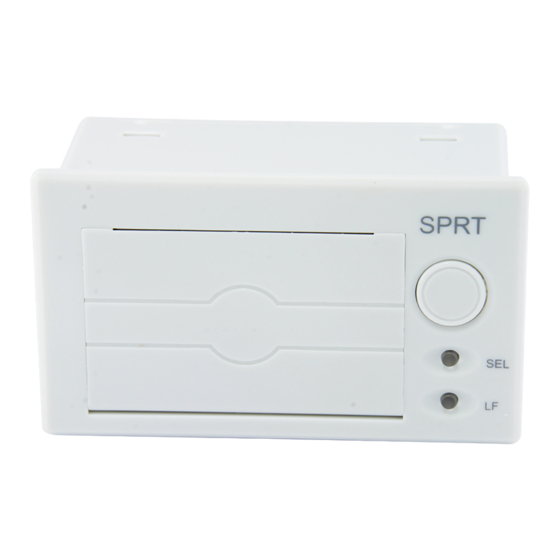
button. LF light is power light. [SEL] and [LF] can be used to modify printer parameters refer to 3.1.3 of chapter 3. ◇Printing Paper: Thermal printing paper ◇Reliability: MCBF (Mean Cycles Between Failure) (5~15)× 10 ◇Operating temperature 0~50℃, relative temperature 0~80% ◇Storage temperature -20~60℃,10~90% Chapter 2 Printing Installation 2.1 Outer Appearance... -
Page 6: Outline Dimension
2.2 Outline Dimension Fig 2-2 D9 outline dimensional drawing 2.3 Install the Paper Roll Press the button, open the door, install the paper and close the door. Chapter 3 Operating Instructions 3.1 Interface Connection 3.1.1 Serial interface connection The serial interface is RS-232 and 485. 1. - Page 7 Figure 3-1 serial interface IDC10 pin type socket pin number 5PIN single serial interface socket of the serial number as shown in figure 3-2 Figure 3-2 5 pin single serial interface socket pin number Figure 3-3 USB interface socket pin number The definition of each pin signal serial interface as shown in table 3-1: IDC10 5PIN...
- Page 8 Printer online signal earth - Receipt Have same function with CTS Printer Table 3-1 serial interface socket pin definition Note: (1) "source", said the source of the signal (2) signal logic level was divided into EIA and TTL level based on the different of the jack ;...
-
Page 9: Parallel Interface Connection
3.1.2 Parallel interface connection RMD9 printer’s parallel interface is compatible with CENIRONICS, the interface socket is 26 line flat cable plug socket or its substitute adaptor, parallel interface socket pin number shown in the figure below: Figure 3-3 parallel interface socket pin number The definition of each pin signal parallel interface is shown in the following table Direct... -
Page 10: Usb Interface Connection
receive the next data. “HIGH” level signal indicates that paper is end, “LOW” indicates that paper is available. Pulling up to” HIGH” level signal by a resistor indicates the printer is on-line. Pulling up to “HIGH” level signal by a /ERR resistor indicates that there is no error. -
Page 11: The Printer Parameter Settings
Function Mark V Bus Power positive5V Data- Data- Data+ Data+ Blank Grand 3.1.4 The printer parameter Settings The printer parameter can be set by the two methods Through the software Download the setting tool from our company website to download tool software. - Page 12 1. Baud Rate: 2. Data bit / Handshaking / Parity: Introduction: Data Bit: 8bit or 7 bits Handshaking: RTS/CTS or XON/XOFF Parity: None or Odd or Even 3. Language Status: Introduction: 1. GB12345 is traditional character that corresponds with national standard secondary character GB2312.
- Page 13 Instruction: characters font is only effective in character mode, English mode only 6 * 8 5. Printing Density: 6. Paper Sensor Setting 7. Power Level 8. Printing Direction 9. Command System 10. Dot Matrix Printer Compatible: Dot matrix printer model can be alternatively choose through this setting:...
-
Page 14: Power Supply
First, after selecting this setting, power consumption level can be choose. Second, after choosing dot matrix printer compatible, function of choosing characters and Chinese characters size will not be supported. 3.1.5 Power supply SP-RMD9P/S/Q H:Input DC5V~8.5V Current: 3A SP-RMD9VP/VS/VQ/VUS H: Input DC9V~24V Current: 3A Power socket is like the following figure3-5, PIN assignment of power socket is like below figure 3-6:... -
Page 15: Self-Test And Hex Mode
Flicker twice every one Printer head is overheat, it will second recover after cool down Flicker three times Heating plate on printer head is every one second broken, irrecoverable error, need to Note: when the printer is under BUSY status, the red light will light up. be repaired 3.3 Self-test and HEX mode Self-test can test whether the printer works normally, if it can print the... - Page 16 Version:R-708 1.00 版本号:R-708 1.00 Model:SP-RMD9 机型:SP-RMD9 Interface:RS232(EIA,TTL) 接口类型:RS232串口(EIA, TTL) Interface:Parallel 接口类型:并口 Baud Rate:9600 波特率:9600 Data bit/Handshaking/Parity:8 串口数据位/握手方式/校验方 RTS/CTS / None 式: 8位/标志控制/无校验 Language Status:Chiese-GB2312 语言:简体中文(国标一二级 字库) Printing Font:12*24 字符字体:12*24 Printing Density:Medium 打印浓度:中 Paper Sensor Setting:Medium 测纸传感器灵敏度:中 Power Level:3 功耗级别:3 Printing Direction:Reverse 打印方向:反向...
-
Page 17: Initialization
Press 【LF】and connect power supply, the red indicator will flash every one second, after the indicator flashes three times release the 【LF】 . After that the red indicator still flashes then stop flashing, the printer prints out “Hexadecimal Dump”,the printer enters into Hex printing mode. Upgrade mode Under off status, press [SEL] and [LF] buttons and connect power cable, release these two buttons while powered on. -
Page 18: Commands Description
Format: ASCII: the standard ASCII character sequence Decimal: the Decimal number sequence Hexadecimal: the Hexadecimal number sequence Explanation: what the command does and how to use it. Example: some examples are listed to illustrate the command for better understanding. The following is the description of each command according to the function of each command. -
Page 19: Format Setting Commands
The line spacing is set to n dot-lines for future Line Feed command. n=0~255, default setting n=6 for text printing, n=0 for bit map printing when using ESC K command. The BASIC programs for observing the effect of this command are as below: FOR I=1 TO 11 STEP 2 PRINT CHR$(27);CHR$(49);CHR$(I);... - Page 20 Decimal: Hexadecimal: 1B The BASIC programs for sending the said sequences are as below: LPRINT CHR$ (27); “B”; CHR$ (2); CHR$ (5); CHR$ (8); CHR$(0); ’ESC B command LPRINT CHR$ (11); ’VT command LPRINT “SPRM1”; ’Print character string LPRINT CHR$ (11); ’...
- Page 21 The tab positions are entered as n1, n2 and so on, all of these should be within the line width of this model printer. Command NUL added at the end indicates the command is over. All horizontal tab positions that set can be deleted by using this command in ESC D NUL format.
- Page 22 Explanation: When m=0, ESC f NUL n will command to print n blank characters, the value of n should be within the line width of this model printer. When m=1, ESC f SOH n will command to print n blank lines. n=0~255. Example: print 6 blank characters in one line, you can send the following commands: ASCII: Decimal:...
- Page 23 ESC Q Set Right Margin Format: ASCII: Decimal: Hexadecimal: Explanation: The value of n should be in the range from 0 to the line width of this model printer. Default n=0, that means no right margin. This command sets absolute position, and won’t be influenced by character enlarging commands ESC U and ESC W.
-
Page 24: Character Setting Commands
This command is to set the empty points between words, valid to Chinese character at the same time . Default is 0,that means there is no empty between words, n is between 0-255. 4.2.3 Character Setting Commands ESC U Enlarge Width Format: ASCII: Decimal: Hexadecimal:... - Page 25 NEXT I The print result is as following: ESC W Enlarge Width and Height Format: ASCII: Decimal: Hexadecimal: Explanation: The characters and graphics following this command are printed at n times of normal width and height, n=1~8, default n=1. The BASIC programs for observing the print effect of this command are as below: FOR I=1 TO 3 ’...
- Page 26 The BASIC programs for observing the effect of this command are as below: LPRINT CHR$ (27); CHR$ (57); CHR$ (2); ’ Enlarge the width and height twice LPRINT “SPRM”; LPRINT CHR$ (27); CHR$ (43);CHR$ (1); ’ Select up-line print LPRINT “SPRM”; ’...
-
Page 27: User-Defined Character Setting Commands
Decimal: Hexadecimal: Explanation: When n=1, select reverse print; when n=0, cancel reverse print. Default n=1. Reverse print not only supports character mode but also supports graphics mode. When print the graphics in reverse direction, pay attention to the print order of graphic units, please see ESC K command. - Page 28 User-defined character is saved in RAM and will be lost after power off. If several ESC & commands use the same m value, only the last one is valid. At most 32 characters can be defined by users. Ref: ESC% and ESC: commands. ESC % Replace User-defined Character Format:ASCII:...
-
Page 29: Graphics Printing And Codepage Choosing Commands
80 LPRINT CHR$(65); ‘print original character The print result of the above programs is as following: 4.2.5 Graphics Printing and Codepage Choosing Commands ESC K Print bit-map graphics Format: ASCII: ESC K n2….data….. Decimal: n2….data….. Hexadecimal: 1B n2….data….. Explanation: This command is used to print (n2x256+n1) ×8bit map. The width of this graphics is (n2×256+n1)... - Page 30 The BASIC programs for this example are as below: LPRINT CHR$ (27); “W”; CHR$ (4); ’Enlarge the width and height 4 times LPRINT CHR$ (27); “K”; CHR$ (15); CHR$ (0); ’ESC K command LPRINT CHR$ (&H7C); CHR$ (&H44); CHR$ (&H44); CHR$ (&HFF); LPRINT CHR$ (&H44);...
- Page 31 FS P Print Pre-saved Bitmap [Format] ASCII: Decimal: Hex: Explanation: 0≤ n ≤2, this command is used to print the monochrome bitmap which is pre-saved in the Flash memory of printer. The bitmap in Flash memory can be created and wrote into printer through Setting Tool in PC.
-
Page 32: Initialization Commands
reserve 保留 reserve 保留 reserve 保留 CP862 [希伯来] CP862 [Hebrew] WCP1252 [拉丁语 1] WCP1252 Latin I WCP1253 [希腊] WCP1253 [Greek] CP852 [拉丁语 2] CP852 [Latina 2] CP858 [多种语言拉丁语 1+ CP858 Multilingual Latin Ⅰ+Euro) 欧元符] Iran II 伊朗Ⅱ[波斯语] Latvian 拉脱维亚 CP864 [阿拉伯语] CP864 [Arabic] ISO-8859-1 [西欧] ISO-8859-1 [West Europe]... -
Page 33: Data Control Commands
Decimal: Hexadecimal: 1B Explanation: This command is to initialize the following contents of the printer: ·Clear the data in the print buffer; ·Restore the default; ·Delete user-defined characters. 4.2.7 Data Control Commands Carriage Return Format: ASCII: Decimal: Hexadecimal: Explanation: When the “CR” command is sent to printer, all data in the print buffer will be printed out and paper will be fed one line. - Page 34 Decimal: Hexadecimal: Explanation: After printer received this command, it will switch from ASCII character print mode to Chinese character print mode. Using GB Chinese Character Library I&II. Notice: This command is used to switch printer into Chinese Mode when printer is in normal printing mode, but won’t be saved after power off.
- Page 35 Decimal: Hexadecimal: 1C Explanation: Characters following this command are printed at n times of their normal width and height, n=1~8 FS J Set Vertical Print Format: ASCII: Decimal: Hexadecimal: Explanation: This command print Chinese characters vertically, which is that to print characters by rotating 90 o at anticlockwise direction.
-
Page 36: Real-Time Commands
FS - Chinese Character with Underline Print Format: ASCII: Decimal: Hexadecimal: Explanation: The specified Chinese characters after this command are printed with underline. When LSB n=1, underline selected; when LSB n=0, it canceled. Remark: Only LSB of n is valid. Default n=0. This command is valid for both characters and Chinese. - Page 37 Format: ASCII: Decimal: Hexdecimal: Explanation: Transmits the selected printer status specified by n in real-time, according to the following parameters: n = 1: Transmit printer status n = 2: Transmit off-line status n = 3: Transmit error status n = 4: Transmit paper sensor status ·...
- Page 38 n = 3: Error status n=4: paper feeding status...
-
Page 39: Bar Code Printing Commands
4.2.10 Bar Code Printing Commands GS k m d1...dk NUL Print Barcode Format: d1...d k NUL ①ASCII: Decimal: d1...dk 0 Hexadecimal: d1...dk 00 d1... dn ②ASCII: Decimal: d1... dn Hexadecimal: d1... dn Explanation: ①0 ≤ m ≤ 6 (the value range of k&d is decided by the barcode type) ②65 ≤... - Page 40 When UPC-A or UPC-E is choosed, after 12bytes barcode data is received, the other characters will be managed as the common characters. When JAN13 (EAN13) is choosed, after 13bytes barcode data is received, the other characters will be managed as the common characters. When JAN8 (EAN8) is choosed, after 8bytes barcode data is received, the other characters will be deal with as the common characters.
- Page 41 When CODE128 ( m = 73) is choose: · Pls refer to Appendix 5 – Related information and characters set of CODE128. · When CODE128 is used, pls encode according to the below structions: 1. Do choose characters set (one of CODE A, CODE B and CODE C) before the barcode data.
- Page 42 GS k 73 10 123 66 78 111 46 123 67 12 34 56 · If it is not the choosing of characters set at the beginning of barcode data, the printer will stop dealing with this command and deal with the other data as the common data. ·...
-
Page 43: Chapter 5 Using And Maintenance
Decimal: Hexadecimal: Explanation:2 ≤ n ≤ 6(the other value of n is invalid). Set the horizontal module width of barcode. The detail is as below, Width of single basic Width of double basic module Narrow basic Wide basic module module (mm) module (mm)... -
Page 44: Other
5.2 Other Please also notice following aspects: Don't insert and pull out the chip. If there is abnormity, please hand over to the producer for repairing. 2. When you suppress to join the electric wire by yourself, pls do pay attention to the interface of printer - parallel interface or serial interface, to avoid the wrong connection with the host computer. -
Page 45: Appendix 1 Valid Codes Form Under Ank Printing
Appendix 1 Valid Codes Form under ANK printing The serial numbers of valid codes are from 00H to 0FFH under ANK printing, among which 00H-1FH are control codes and 20H-0FFH are character codes. Character codes are composed by two characters sets. The character codes of each character set are all in 20H-0FFH permutation. - Page 46 Characters Set 2:...
-
Page 47: Appendix 2 Valid Codes Form Under Chinese Printing
Appendix 2 Valid Codes Form under Chinese printing The serial numbers of valid codes are from 00H to 0FFH under Chinese printing, among which 00H-1FH are control codes and 20H-0FFH are character codes. -
Page 48: Appendix 3 Printing Commands Form
Appendix 3 Printing Commands Form Decimal Hexadecimal Symbol&Format Function Page Ending Mark Levels of clock Line Feed Perform Vertical Tabulation Enter Real-time status 16 4 n 10 04 n DLE EOT n transmission 27 34 n 1B 22 n ESC “ n Hex Mode Print Replace User-defined... - Page 49 27 74 n 1B 4A n ESC J n n Dot Line Feed 27 75 1B 4B ESC K n1…n2…data Print bit-map graphics 27 81 n 1B 51 n ESC Q n Set Right Margin 27 85 n 1B 55 n ESC U n Enlarge Width 27 86 n...
- Page 50 Choose printing position of 29 72 n 1D 48 n GS H n HRI character 29 104 n 1D 68 n GS h n Set Barcode Height 29 107 n 1D 6B n GS k n Print Barcode 29 119 n 1D 77 n GS w n Set Barcode Width...
Need help?
Do you have a question about the SP-RMD9 and is the answer not in the manual?
Questions and answers