
Related Manuals for Struers Xmatic


Summary of Contents for Struers Xmatic
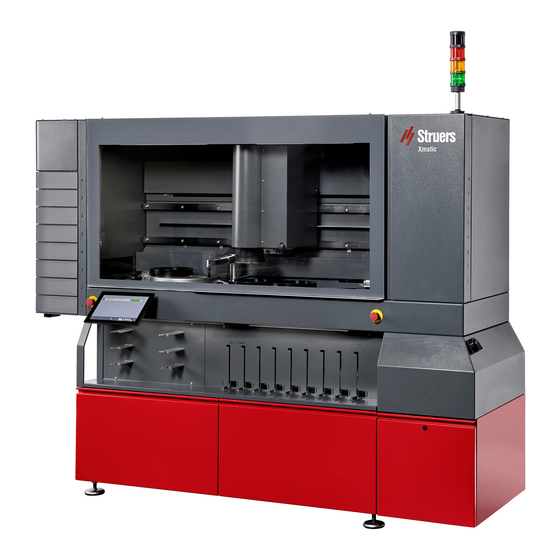
- Page 1 Xmatic Instruction Manual Original Instructions Doc. no.: 16897025_A_en Date of release: 2022.07.08...
- Page 2 Copyright The contents of this manual are the property of Struers ApS. Reproduction of any part of this manual without the written permission of Struers ApS is not allowed. All rights reserved. © Struers ApS 2022.10.06. Xmatic...
-
Page 3: Table Of Contents
Table of Contents 1 About this manual 1.1 Accessories and consumables 2 Safety 2.1 Intended use 2.2 Safety functions 2.2.1 Xmatic safety precautions 2.3 Safety messages 2.4 Safety messages in this manual 3 Getting started 3.1 Device description 3.2 Overview 3.3 The display 4 Installation 4.1 Unpacking... - Page 4 8.3.1 Struers methods 8.3.2 Custom methods 8.4 The preparation process 8.4.1 Consumables 8.4.2 Starting the preparation process 9 Maintenance and service - Xmatic 9.1 General cleaning 9.2 When necessary 9.2.1 Air filter 9.2.2 Cleaning the MD-Disc 9.2.3 Cleaning the grinding stone station 9.2.4 Cleaning the tubes...
- Page 5 9.7 Spare parts 9.8 Service and repair 9.9 Disposal 9.9.1 Environmental considerations 10 Troubleshooting - Xmatic 10.1 Accessing the work zone in case of power failure 11 Technical data 11.1 Technical data 11.2 Safety Related Parts of the Control System (SRP/CS) 11.3 Diagrams...
-
Page 6: About This Manual
1 About this manual About this manual Instruction Manuals Struers equipment must only be used in connection with and as described in the Instruction Manual supplied with the equipment. Note Read the instruction manual carefully before use. Note If you wish to view specific information in detail, see the online version of this manual. -
Page 7: Safety Functions
Model Xmatic with high-pressure cleaning Xmatic with high-pressure cleaning and ultra-sonic cleaning Safety functions The machine is equipped with the following safety devices: •... -
Page 8: Xmatic Safety Precautions
Once the machine has completed the preparation, you must wait approximately 3 minutes before you can open the main safety cover. 2.2.1 Xmatic safety precautions Read carefully before use Specific safety precautions - residual risks Ignoring this information and mishandling of the equipment can lead to severe bodily injuries and material damage. -
Page 9: Safety Messages
The operator must read the Instruction Manual and, where applicable, the Safety Data Sheets for the applied consumables. Struers equipment must only be used in connection with and as described in the Instruction Manual supplied with the equipment. Dismantling of any part of the equipment, during service or repair, should always be performed by a qualified technician (electromechanical, electronic, mechanical, pneumatic, etc.). -
Page 10: Safety Messages In This Manual
WARNING If there are visible signs of deterioration or damage to the main safety cover, it must be replaced immediately. Contact Struers Service. WARNING Safety critical components must be replaced after a maximum lifetime of 20 years. Contact Struers Service. - Page 11 Disconnecting the unit from the electrical power supply must only be done by a qualified technician. CAUTION Struers equipment must only be used in connection with and as described in the Instruction Manual supplied with the equipment. CAUTION Do not use the machine if it is damaged.
-
Page 12: Getting Started
MD surfaces and position the doser arm over the MD surface. During a step on the MD station the machine automatically doses the selected consumables or water. Between each step on the MD station the specimen holder is typically cleaned and dried. Xmatic... - Page 13 The machine is able to automatically process all the specimen holders in the vertical conveyor without operator intervention. The machine recognizes all Struers consumables present in the machine. This allows the machine to prompt the operator about missing or low consumable levels for the selected methods.
-
Page 14: Overview
D High pressure cleaning station E MD grinding and polishing F MD elevator G Emergency stop H Main switch Bottle rack J Electrical compartment K Recirculation unit compartment L Recirculation unit M Display N Pick-up point O Vertical conveyor Xmatic... - Page 15 3 Getting started Side view Right side Main switch. Left side A Water flow regulators and water supply B Water inlet C Water outlet D Ethernet connection E Compressed air F External control signal G Exhaust Rear view - Power supply Xmatic...
-
Page 16: The Display
All programming and operation is carried out on the touch screen. The software is launched when you switch on the machine. Overview A Specimen holders ribbon B Main menu C User modes D Consumables ribbon E MD surface ribbon Xmatic... -
Page 17: Installation
J The consumables ribbon shows which consumables are available in the machine. K This item shows the type of user that is logged into the machine. Installation Unpacking The packing box Open and remove the sides and the top of the packing box. Xmatic... -
Page 18: Lifting
The transport brackets • Unscrew the transport brackets that secure the machine to the pallet. Note Struers recommends that all original packaging and fittings are kept for future use. Lifting CRUSHING HAZARD Take care of your fingers when handling the machine. - Page 19 Lifting the machine from the pallet Lift the machine from the pallet using a forklift to access the adjustable feet. Loosen the adjustable feet before moving the machine from the pallet. Make sure that the feet are positioned higher than the wheels. Xmatic...
- Page 20 Moving the machine using a forklift Place the forks so that the center of gravity is placed between the forks. Lift the machine from the front. Move the machine into its final position. Lower the machine so that the wheels touch the floor. Xmatic...
- Page 21 Push the machine into the correct position. CAUTION Make sure that the machine is level. Turn the adjustable feet until the machine rests on the feet, and make sure that the machine is level. Remove the transportation crossbar and store it for future use. Xmatic...
-
Page 22: Checking The Packing List
Optional parts can be included in the packing box. The packing box contains the following items: Pcs. Description Xmatic Bottle, square with QR-label, 4 l Bottle placement guides, 1 l Bottle placement guides, 2 l Bottle placement guides, 4 l... -
Page 23: Power Supply
+ PE Voltage/frequency: 3 x 380-480 V/50-60 Hz Min. fuse: Minimum cable size at minimum fuse: 20 A 3 x AWG14/1.5 mm + PE Max. fuse: Minimum cable size at maximum fuse: 40 A 3 x AWG12/2.5 mm + PE Xmatic... - Page 24 To install the electrical power supply, the following is needed: • Electrical power supply cable, 4-lead, three phases and one earth connection Connect the cable to the electrical connection box. Earth (ground) Phase Phase Phase Electrical connection box EU cable Brown Black Xmatic...
-
Page 25: Noise
Prolonged exposure to loud noises may cause permanent damage to a person’s hearing. Use hearing protection if the exposure to noise exceeds the levels set by local regulations. Vibration For information on the total vibration exposure to hand and arm, see this section: Technical data ►81. Xmatic... -
Page 26: Compressed Air Supply
Connect the air hose to the compressed air supply. Connecting to the water inlet and outlet Water inlet Note New water pipe installations: Leave the water to run for a few minutes to flush any debris from the pipe before connecting the machine to the water supply. Xmatic... - Page 27 Diameter: ¾”. GEKA coupling to recirculation unit. Tube connection Reinforced PVC hose Waste water outlet Procedure Connect a standard HT water outlet pipe or hose (Diameter: 50 mm (2") to the water outlet on the left side of the machine. Xmatic...
-
Page 28: Connecting To An Exhaust System
Specifications Minimum capacity:150 m /h (5297 ft /h) at 50 mm (2") diameter. A Exhaust Procedure Connect a 50 mm (2") pipe to the exhaust outlet on the machine. Connect the other end of the pipe to the exhaust system. Xmatic... -
Page 29: Installing A Beacon On The Machine
Installing a beacon on the machine The machine can be equipped with a beacon. A 6-pole connector B Socket Open the MD elevator door. Mount the beacon using the socket screws supplied with the beacon. Connect the 6-pole connector to the socket. Xmatic... -
Page 30: Connecting The Recirculation Unit
Place the recirculation unit in its final position, or make sure that you can easily push it into position before filling the tank. Note To prevent corrosion, Struers recommends using a Struers additive in the cooling Remember to top up with Struers additive each time you fill up the tank with water. Xmatic... -
Page 31: Connecting The Recirculation Unit To The Machine
Avoid spilling when you move the tank. 4.11.2 Connecting the recirculation unit to the machine Note See also the Instruction Manual for the recirculation unit. A Power connector for recirculation unit B Power connector for level sensor C Quick coupling for water connection Xmatic... -
Page 32: Adjusting Disc Cooling And Op-Flushing
You can set the level of disc cooling and flushing time in the software. If needed, adjust the rate of disc cooling. Water flow regulators A OP flush water B Tap water on stone C MD dresser water D MD disc cooling water Xmatic... -
Page 33: Mounting The Md-Disc
4.13 Mounting the MD-Disc Note Struers recommends that the MD-Disc is mounted by a service technician. Procedure Unscrew the three screws on the rear side of the MD-Disc Remove the bolt and washer from the shaft [A] Place the lower part of the MD-Disc in the bowl, and fasten it using the three screws you... -
Page 34: Transport And Storage
Insufficient packaging could cause damage to the unit and will void the warranty. Contact Struers Service. • Struers recommends that all original packaging and fittings are kept for future use. Storage Note Struers recommends that all original packaging and fittings are kept for future use. - Page 35 Moving the machine To move the machine, use a fork-lift truck and a crossbar. Note The machine must be installed by Struers technicians or by an authorized service technician trained by Struers for this specific task. Open the recirculation module doors .
-
Page 36: Start-Up - The First Time
6 Start-up - the first time Start-up - the first time CAUTION Struers equipment must only be used in connection with and as described in the Instruction Manual supplied with the equipment. Selecting language From the Main menu, select User types, Administrator. See also: The display ►16. - Page 37 Log in to the machine as Administrator. In the consumables ribbon, tap the stone icon. Tap Change. Open the main safety cover Loosen and lift the three-lobe knob. (D) Pull the index plunger (B),and lift the grinding stone cover. (C) Xmatic...
-
Page 38: Md Surfaces
If you select a diamond grinding disc, the dresser remains at the side of the grinding chamber because it is not used. Hint Struers recommends that you dress a new stone a couple of times before using it for grinding. This will ensure that it is plane and ready for use. MD surfaces CAUTION Do not use the machine with non-compatible accessories or consumables. - Page 39 The MD elevator has several shelves that contain individual MD grinding or polishing surfaces to be used for the different steps in a method. If you are using Struers surfaces, the machine automatically detects the type of surface placed on each shelf.
-
Page 40: Bottle Rack
Suspension, lubricant or oxide polishing. 6.3.1 Placing bottles in the bottle rack module If you are using Struers consumables, the machine will automatically detect the type of consumable and liquid levels of the bottles. Note Positions 1 and 2 are for Alcohol/Soap only. -
Page 41: Soap And Alcohol
Monitoring the soap and alcohol levels The machine automatically monitors the soap and alcohol levels. Configuration Note Only users with Administrator rights can configure the machine. In the Main screen, select Administrator. Tap the Main menu icon. Select Configuration Xmatic... -
Page 42: Preparation
Configuring Dresser programs Note You need Administrator access to adjust the settings for dressing of the grinding stone. Log in to the machine as Administrator. From the Main menu select Configuration. Select Preparation > Stone to open the dresser program list. Xmatic... - Page 43 You can select among one of the following dresser templates: Note Dressing after process is selected independently in the preparation method. Manual Adjust the settings as desired. Struers ductile Use this dresser template for grinding with a consumable suited for ductile materials as nickel-based alloys and stainless steel. Xmatic...
-
Page 44: Manual Dressing
Select No to lift the specimen holder when dressing the stone 7.1.1 Manual dressing Struers recommends that you dress a new stone a couple of times before using it for grinding. This ensures that it is plane and ready for use. Xmatic... -
Page 45: Machine Settings
Select Rotate grinding stone to start the process. Machine settings Configuring machine settings Log in to the machine as Administrator. From the Main menu select Configuration. From the Configuration menu, select Machine settings. The Machine settings menu is shown. Xmatic... - Page 46 MD elevator. Stone • Select whether the machine should .automatically measure the dresser tip and stone heigth. Liquid • Select whether the machine should automatically read the liquid levels in the bottles placed in the bottle rack. Xmatic...
-
Page 47: Cleaning Templates
7 Configuration Cleaning templates The software contains predefined Struers cleaning programs which can be used for most requirements, but you can also create your own cleaning programs. Configuring cleaning templates Log in to the machine as Administrator. From the Main menu select Configuration. -
Page 48: Creating Cleaning Templates
From the Main menu select Configuration. Select Cleaning templates. The Cleaning templates menu is shown. Tap +Template to add a new template, and adjust the parameters as desired. Tap Copy. Note You can only copy Struers predefined cleaning templates. Xmatic... -
Page 49: Operating The Device
Add cleaning steps • Delete the template Operating the device WARNING If power is interrupted under operation, the main safety cover and the MD elevator door will remain locked until power returns. See: Accessing the work zone in case ►79. Xmatic... -
Page 50: Clamping And Leveling Specimens
• Open: The drawer is ready to be used. • Partially open: The specimen holder is ready for inspection, or the drawer is empty. • Closed: The machine is processing the specimen holder you placed in this position. Xmatic... - Page 51 Open the drawer and remove the specimen holder. If the specimen holder has not been processed yet, the drawer remains closed. To open it, tap the specimen holder icon, and select the Eject icon. Open the drawer and remove the specimen holder. Xmatic...
-
Page 52: Methods
8 Operating the device Methods 8.3.1 Struers methods You can access all Struers methods in the Method Library. Procedure Place a specimen holder in the desired position. The machine shows the latest applied method as default. Tap the method name on the screen. -
Page 53: Custom Methods
8 Operating the device Applying filters You can apply filters to the Struers method library to find the best method for the task you need to perform. You can apply filters using the following criteria: • Material group names •... - Page 54 The machine shows the latest applied method as default. Tap the method name. Tap Methods to open the User-defined methods library, or tap Library if you want to open the Struers methods library. Select the method you want to edit. Xmatic...
- Page 55 When you finish editing, you can save your changes. Editing a method without placing a specimen holder in the machine Log in to the machine as Administrator. Tap the Main menu icon. See also: The display ►16. Tap Methods. Xmatic...
-
Page 56: The Preparation Process
8 Operating the device Tap Methods to open the User-defined methods library, or tap Library if you want to open the Struers methods library. Select the method you want to edit. You can Delete or Copy steps, and you can add Preparation and Cleaning steps as desired. -
Page 57: Consumables
Run for each of the specimen holders. To modify the queue, tap Eject, and press Run for each specimen holder in the order you want them to be processed. Xmatic... -
Page 58: Maintenance And Service - Xmatic
The serial number and the voltage are stated on the type plate of the machine. General cleaning To ensure a longer lifetime for your machine, Struers strongly recommends regular cleaning. Note Do not use a dry cloth as the surfaces are not scratch resistant. -
Page 59: Cleaning The Md-Disc
9 Maintenance and service - Xmatic 9.2.2 Cleaning the MD-Disc Note Do not use a dry cloth as the surfaces are not scratch resistant. Note Do not use acetone, benzol or similar solvents. • Wipe the MD-Disc clean using a damp cloth. - Page 60 9 Maintenance and service - Xmatic The bowl liner Cleaning the bowl liner Remove the splash guard. (A) Remove the upper part of the bowl liner and wash it. (B) Wipe the lower part of the bowl liner using a damp cloth. (C) Remount the upper part of the bowl liner and the splash guard.
-
Page 61: Cleaning The Grinding Stone Station
9 Maintenance and service - Xmatic Remove the splash guard. (A) Remove the MD Disc. See also: Mounting the MD-Disc ►33. Remove the used bowl liner (C), and ,mount the new one. Remount the splash guard. Dispose of the used bowl liner according to local regulations. -
Page 62: Cleaning The Tubes
9 Maintenance and service - Xmatic Cleaning the grinding stone/diamond grinding disc • Wipe the bowl clean using a cloth. If necessary, you can remove the stone before cleaning. See also: Mounting the grinding stone or diamond grinding disc ►36. - Page 63 9 Maintenance and service - Xmatic Tap Clean tubes. Select the tubtles to be cleaned, and place the Easy Connector in inlet on the bottle rack. Xmatic...
- Page 64 9 Maintenance and service - Xmatic In the Clean tubes menu, you can select: – Clean tubes – Calibrate tubes and pumps – Fill tube – Empty tube Select the desired process. Xmatic...
-
Page 65: Replacing The Stone Dresser And The Md Dressers
9 Maintenance and service - Xmatic 9.2.5 Replacing the stone dresser and the MD dressers Aluminum oxide stick [A] Untighten the three-lobe knob by rotating it counterclockwise. Mount a new aluminum oxide stick in the holder. Tighten the three-lobe knob again. -
Page 66: Cleaning The Md Elevator Mirrors
9 Maintenance and service - Xmatic Clean the touch screen with an LCD cleaning agent. 9.2.7 Cleaning the MD elevator mirrors Clean the mirrors (A) inside the 9 drawers in the MD surface elevator with a damp cloth. Hint If available, you can also use compressed air to clean the mirrors. - Page 67 9 Maintenance and service - Xmatic A Connector for alcohol bottle B Alcohol bottle Procedure Pull the recirculation unit out so you can reach the alcohol bottle. Remove the bottle from the connector for alcohol bottle. Empty the contents of the bottle.
-
Page 68: Md Dressers
9 Maintenance and service - Xmatic 9.2.9 MD dressers The aluminum oxide stone Dismount the aluminum oxide stone. (A) Wipe all surfaces carefully and make sure that there is no debris or dirt left. Mount the aluminum oxide stone in the dresser. -
Page 69: Weekly
9 Maintenance and service - Xmatic Open the MD elevator door and check each MD grinding surface. Replace damaged MD grinding surfaces. Clean the MD grinding surfaces: – Carefully brush the surface with a clean, soft nail brush under lukewarm running water. - Page 70 9 Maintenance and service - Xmatic The work zone Clean all painted surfaces inside the machine with a soft damp cloth and common household detergents. The specimen mover head and rails Clean the specimen mover head and rails regularly using a damp cloth. See also: Overview ►14.
- Page 71 9 Maintenance and service - Xmatic Clean the upper and lower part of the specimen mover head (A) thoroughly using a damp cloth. Clean any buildup of contaminants on the rails (B) inside the work zone using a dry cloth.
-
Page 72: High Pressure Cleaning Station
9 Maintenance and service - Xmatic The main safety cover Clean the main safety cover regularly using a damp cloth or a regular household window cleaning solution. Let the window cleaning solution work for a few seconds before wiping it away with a cloth. -
Page 73: Ultrasonic Cleaning Station - (Optional)
9 Maintenance and service - Xmatic Clean the nozzles. See:Cleaning the nozzles ►73 Use a damp cloth to clean the rubber seals. Cleaning the nozzles Use the nozzle cleaner to clean the nozzles in the high pressure cleaning station. 9.4.3... -
Page 74: Monthly
9 Maintenance and service - Xmatic Monthly Note Do not use a dry cloth as the surfaces are not scratch resistant. Note Do not use acetone, benzol or similar solvents. Hint If needed, use ethanol or isopropanol to remove grease and oil. -
Page 75: Annually
CAUTION Do not use Xmatic if it is damaged. Note Replacement of safety critical components must only be performed by a Struers engineer or a qualified technician (electromechanical, electronic, mechanical, pneumatic, etc.). Safety critical components must only be replaced by components with at least the same safety level. -
Page 76: Main Safety Cover
Replacing the main safety cover CAUTION The main safety cover must be replaced by a Struers technician. Note The main safety cover must be replaced immediately if it has been weakened by collision with projectile objects or if there are visible signs of deterioration or damage. - Page 77 9 Maintenance and service - Xmatic Contact Struers Service. Main safety cover Testing the main safety cover interlock Open the main safety cover. Start a preparation process. If the machine starts the preparation process, press one of the Emergency stops. See also: Overview ►14.
-
Page 78: Spare Parts
Struers.com. Service and repair Struers recommends that a regular service check be carried out yearly or after every 1500 hours of use. When the machine is started up, the display shows information about total operation time and the machines service information. -
Page 79: 10 Troubleshooting - Xmatic
10 Troubleshooting - Xmatic Note Swarf must be disposed of according to the current safety regulations for handling and disposal of swarf/ additive in the recirculation water. Note The recirculation water contains additive and swarf and may NOT be disposed of into a main drain. - Page 80 10 Troubleshooting - Xmatic Xmatic...
-
Page 81: 11 Technical Data
TECHNICAL DATA Xmatic 11 Technical data 11.1 Technical data Capacity Diameter 250 mm MD disc: 4 x 40 mm, 300 mm disc: 4 x 50 mm High removal plane Diameter 270 mm grinding station Speed 1450 rpm Material removal sensor (built-in) 0.05 mm - 10 mm (0.002-0.4") - Page 82 TECHNICAL DATA Xmatic Mover head Specimen holder Applicable only with RFID-tag holders Weight 4 kg (8.8 lbs) incl. specimens Max. protrusion of specimen under 6 mm holder Specimen holder - Diameter 140 mm (MD disc 250 mm) or 160 mm (MD disc 300 mm)
- Page 83 TECHNICAL DATA Xmatic Operating environment Surrounding temperature During operation 5 - 40°C (41 - 104°F) During transport -25°C - 55°C (transport) -25°C - 70°C (max. 24 hours during transport) Humidity 35 - 85 % RH non-condensing Water supply (tap water) Pressure 1 - 9.9 bar (14.5 - 143 psi)
- Page 84 TECHNICAL DATA Xmatic Safety Circuit SF-1 PL c, Category 1 Categories/Performance Stop category 0 Level SF-2 PL d, Category 3 Stop category 0 SF-3 PL d, Category 3 Stop category 0 SF-4 PL d, Category 3 Stop category 0 SF-5 PL d, Category 1...
- Page 85 Declared vibration emission Dimensions and weight Width 242.5 cm (95.5") Depth 75.0 cm (29.5") Height 189.0 cm (74.4") Height (with open cover) 244.0 cm (96.0") Weight 960 kg (2116.4 lbs) REACH For information about REACH, contact your local Struers office.
-
Page 86: Safety Related Parts Of The Control System (Srp/Cs)
SRP/CS (safety-related parts of a control system) are parts that have an influence on safe operation of the machine. Note Replacement of safety critical components must only be performed by a Struers engineer or a qualified technician (electromechanical, electronic, mechanical, pneumatic, etc.). -
Page 87: Diagrams
L41S-11MA1A 2HQ00110 SF-9 conveyor SH feeder L41E-11MA1A 2HQ00120 interlock Recirculation Sick Inductive sensor IME2S12- 2SS00812 doors 04B4DW2 interlocks Exhaust supervision system 11.3 Diagrams If you wish to view specific information in detail, see the online version of this manual. Xmatic... -
Page 88: Diagrams - Xmatic
11.3.1 Diagrams - Xmatic Title Pneumatic circuit diagram 16891001 C ►89 Water diagram 16891000 C ►90 Block diagram 19543050 A ►91... - Page 89 16891001 C...
- Page 90 16891000 C...
- Page 91 19543050 A...
-
Page 92: Legal And Regulatory Information
Responsibility of the manufacturer The following restrictions should be observed, as violation of the restrictions may cause cancellation of Struers legal obligations. The manufacturer assumes no responsibility for errors in the text and/or illustrations in this manual. The information in this manual is subject to change without notice. The manual may mention accessories or parts not included in the supplied version of the equipment. -
Page 93: Declaration Of Conformity
Based on: 16897900 A Declaration of Conformity Manufacturer Struers ApS • Pederstrupvej 84 • DK-2750 Ballerup • Denmark Name Xmatic Model Function Grinding/Polishing equipment abrasive stone/disk Type 06896229, 06896246, 06896129, 06896146 Serial no. Module H, according to global approach We declare that the product mentioned is in conformity with the following legislation, directives and standards:...
Need help?
Do you have a question about the Xmatic and is the answer not in the manual?
Questions and answers