
Subscribe to Our Youtube Channel
Related Manuals for Struers CitoPress-15


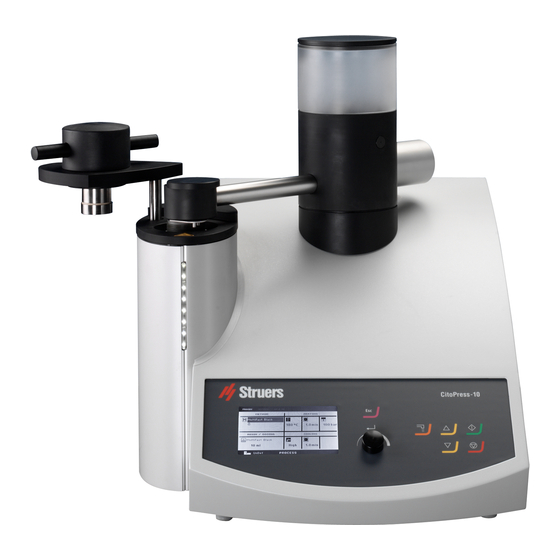
Summary of Contents for Struers CitoPress-15
- Page 1 Manual No.: 15737025-01 Revision A Date of Release 2023.02.28 CitoPress-15/-30 Instruction Manual Original instructions.
-
Page 2: Table Of Contents
CitoPress-15/-30 Instruction Manual Table of Contents Page Intended use ............. 3 Safety Precautions ............ 5 User’s Guide ............. 9 Reference Guide ............. 66 Appendix: Pre-Installation Checklist ........115 Declaration of Conformity ........121... -
Page 3: Intended Use
The machine is only designed to be used with Struers consumables specially designed for this purpose and this type of machine. The machine is for use in a professional working environment (e.g. a... - Page 4 The manual may mention accessories or parts not included in the present version of the equipment. The contents of this manual are the property of Struers. Reproduction of any part of this manual without the written permission of Struers is not allowed.
-
Page 5: Safety Precautions
Ensure that it is not possible to come into contact with the cooling water. 11. Ensure that the outlet hose is securely attached to the water outlet system. 12. Only use water (or water with Struers additives) as a cooling medium. From Safety Precaution Sheet, Revision B. - Page 6 The equipment is designed for use with consumables supplied by Struers. If subjected to misuse, improper installation, alteration, neglect, accident or improper repair, Struers will accept no responsibility for damage(s) to the user or the equipment. Dismantling of any part of the equipment, during service or repair, should always be performed by a qualified technician (electromechanical, electronic, mechanical, pneumatic, etc.).
- Page 7 CitoPress-15/-30 Instruction Manual Icons and typography Struers uses the following icons and typographical conventions. A list of the Safety Messages used in this manual can be found in the chapter on Cautionary Statements. Always consult the Instruction Manual for information on the potential hazards marked by the icons fixed to the machine.
- Page 8 CitoPress-15/-30 Instruction Manual General Messages NOTE indicates a risk of damage to property, or the need to proceed with special care. HINT indicates additional information and tips. Colour Inside Logo The 'colour inside' logo on the cover page of this Instruction Manual indicates that it contains colours which are considered to be useful for the correct understanding of its contents.
-
Page 9: User's Guide
CitoPress-15/-30 Instruction Manual User’s Guide Table of Contents Page 1. Getting Started Device Description ................ 11 Checking the Contents of Packing ..........12 Unpacking CitoPress..............12 Placing CitoPress ................. 12 Recommended Workbench Dimensions ........13 Getting Acquainted with CitoPress ..........14 Noise Level................... - Page 10 CitoPress-15/-30 Instruction Manual Starting the Mounting Process ..........51 Stopping the Mounting Process ..........53 Removing the Top Closure ........... 53 3. Maintenance Daily Inspection ................54 Daily Maintenance ................ 54 Removing Residues ............. 54 Cleaning the Rams............... 54 Lubricating the Threads of the Top Closure......55 Weekly Maintenance..............
-
Page 11: Getting Started
Cylinders can easily be exchanged if a different diameter is needed. The required cylinder size will depend on the size of the sample to be mounted. CitoPress-15/-30 have a built-in Hot Mounting Application Guide that contains all Struers resins. CitoPress-15/-30 automatically adapts the selected method according to cylinder size and the resin selected. -
Page 12: Checking The Contents Of Packing
Mounting Unit 1 Mounting unit 1 Top closure with upper ram 1 Lower ram 1 Piston pin 1 Mount release agent, Struers AntiStick 1 Scraper Unpacking CitoPress NOTE Store the packing box, foam blocks, bolts and fittings for future use. -
Page 13: Recommended Workbench Dimensions
CitoPress-15/-30 Instruction Manual Recommended Workbench To facilitate easy access for servicing, allow sufficient space around Dimensions the machine. Height (H): Local preference Width (W): 92cm/ 36.2” Depth (D): 90 cm / 35.4” Recommended workbench dimensions. Height of table (X) follows local preferences. -
Page 14: Getting Acquainted With Citopress
Swivel arm for top closure (elevator) Top closure Cylinders Cover screw* Mounting unit top plate Plastic cap (CitoDoser mounting point) * Cover screw - Only on CitoPress from following serial numbers: CitoPress-15 s/n: 57310517 CitoPress-30 s/n: 57411456... -
Page 15: Noise Level
CitoPress-15/-30 Instruction Manual Rear View Mains connection socket Mains switch Fuse holders Fuse holder: hydraulic pump Water inlet Cooli unit 24 V / CAN control cable connection RS232 service socket Ventilation valves ... -
Page 16: Supplying Power
CitoPress-15/-30 Instruction Manual Supplying Power ELECTRICAL HAZARD The machine must be earthed (grounded). Check that the mains voltage corresponds to the voltage stated on the type plate on the side of the machine. Incorrect voltage may result in damage to the electrical circuit. - Page 17 CitoPress-15/-30 Instruction Manual Connection to the Machine All cables are equipped with an IEC 320 cable connector that has to be connected to the CitoPress. Single-phase Supply The 2-pin (European Schuko) plug is for use on single-phase connections. If the plug supplied on this cable is not approved in your country, then the plug must be replaced with an approved plug.
-
Page 18: Opening The Ventilation Valve
CitoPress-15/-30 Instruction Manual Opening the Ventilation Valve Open the ventilation valve to equalize the pressure in the machine’s hydraulic system. The valve is closed during transport and is protected with the plastic cap. Remove the plastic cap from the valve. -
Page 19: Supplying Water
CitoPress-15/-30 Instruction Manual Supplying Water Cooling water can be provided either by the mains water supply. or by a recirculation cooling unit. For instructions on how to connect a recirculation cooling unit, see “Connecting a Cooli Cooling Unit". To connect to the mains water supply: Connecting the Water Inlet ... -
Page 20: Installing The Lower Ram
CitoPress-15/-30 Instruction Manual Installing the Lower Ram To install the lower ram, before installing the mounting unit: Remove the top closure and the swivel arm (if already mounted). Unscrew the cover screw and remove the Axle mounting unit top plate. -
Page 21: Installing The Mounting Unit
CitoPress-15/-30 Instruction Manual Installing the Mounting Unit ELECTRICAL HAZARD Disconnect the machine from the mains electricity and water supply whilst installing the mounting unit. Installation of the mounting unit must be carried out by skilled or instructed persons. Connect the water and electrical connections in the order described. - Page 22 CitoPress-15/-30 Instruction Manual Arrows aligned NOTE Double check that the mounting unit is locked into position. If it is not, CitoPress may be damaged during operation. If the mounting unit is to be mounted on the right tower (CitoPress-30 only), move the retaining screw to the hole for retaining screw for unit 2 (see illustration).
-
Page 23: Water Connections
CitoPress-15/-30 Instruction Manual The water connections are colour coded. Water Connections Inlet connection Outlet connection blue Connect the male inlet and outlet water couplings on the mounting unit to the female fittings on CitoPress. Hold the spring-loaded collar down and connect the water −... -
Page 24: Installing The Swivel Arm
CitoPress-15/-30 Instruction Manual Mount the swivel arm by sliding it through the hole in the top Installing the Swivel Arm plate and into the sleeve in the mounting unit cover. Mount the top closure in the hole in the top of the swivel arm. - Page 25 Mount the top closure and the swivel arm. HINT A build-up of mounting material can make it difficult to remove the lower ram from the mounting unit. Please contact Struers Service for advice on how to loosen the lower ram.
-
Page 26: Removing The Mounting Unit
CitoPress-15/-30 Instruction Manual Removing the Mounting Unit ELECTRICAL HAZARD Disconnect the machine from the mains electricity and water • supply before removing the mounting unit. Removal of the mounting unit must be carried out by skilled or • instructed persons. -
Page 27: Removing The Upper Ram
CitoPress-15/-30 Instruction Manual Removing the Upper Ram Handles Spring Top closure cap Spacer Retaining washer Upper ram Top nut Unscrew the handles on either side of the top closure cap (). -
Page 28: Installing Citodoser (Option)
CitoPress-15/-30 Instruction Manual Installing CitoDoser (option) Installing the CitoDoser Unit’s Base Plate ELECTRICAL HAZARD • Disconnect the machine from the mains electricity while installing the dosing unit. Installation of CitoDoser must be carried out by skilled or • instructed persons. -
Page 29: Installing The Citodoser Dosing Unit
CitoPress-15/-30 Instruction Manual Installing the CitoDoser Dosing Unit Spout Lid Screw conveyor housing Hold the unit above the dosing unit base plate with the spout Mounting the CitoDoser Dosing Unit to the front of the machine. - Page 30 CitoPress-15/-30 Instruction Manual Removing the CitoDoser Dosing With the spout in the centre of the machine, line up the location Unit slots on the dosing unit and base plate. Lift the front (spout end) of the dosing upwards. When the location slots are lined up properly, it will be possible to lift the front of the dosing unit clear of the base plate.
-
Page 31: Software Settings
CitoPress-15/-30 Instruction Manual Software Settings When CitoPress is initially powered up, using the mains switch, the following two screens will be displayed: Initial Start Up Screen NOTE The screens in this Instruction Manual show a number of possible texts and may differ from the actual screens displayed on CitoPress. - Page 32 CitoPress-15/-30 Instruction Manual Service Information Start Up Screen Main Menu The MAIN MENU will automatically replace these screens.
-
Page 33: Using Software Menus
CitoPress-15/-30 Instruction Manual Use the multi-function knob key to navigate and use CitoPress’ Using Software Menus software menus Multi-function Knob Turn the knob to navigate to menu items. Push the knob to select items. Turn the knob to change a selected item’s value. -
Page 34: Configuration And Extensions Menu
CitoPress-15/-30 Instruction Manual Configuration and Extensions The following is a description of the items found in the Menu CONFIGURATION menu. Language The language can be set to English (default), German, French, Spanish or Japanese. Display contrast The contrast settings of the display can be adjusted to suit individual preferences (default value: 22, adjustment range: 0-15/-300). -
Page 35: Extensions Menu
Database and Sensitive Options (if purchased) can be enabled. Options are enabled by entering the appropriate unlock code supplied by Struers. Selecting the Option activation menu item then pressing the knob opens the Enter password menu. Use this menu to enter passwords. -
Page 36: Setting The Language
CitoPress-15/-30 Instruction Manual The default language is English. Setting the Language To change the language after the initial start-up: From the MAIN MENU, turn knob to highlight Configuration. Push knob to enter the CONFIGURATION menu. Turn knob to highlight LANGUAGE. - Page 37 CitoPress-15/-30 Instruction Manual Push knob to accept the language. The Configuration menu now appears in the language you have chosen. Press to return to the MAIN MENU.
-
Page 38: Basic Operations
CitoPress-15/-30 Instruction Manual 2. Basic Operations Using the Controls Control Panel of CitoPress-30... -
Page 39: Control Panel Functions
CitoPress-15/-30 Instruction Manual Control Panel Functions Name Function Name Function Moves one step backward in menus. Push knob to select function. Turn (If modified parameters have not knob to adjust settings. Push MULTI- been stored, they are discarded.) knob to store modified settings. -
Page 40: Process Setup Display
CitoPress-15/-30 Instruction Manual Process Setup Display The PROCESS display has four main areas: A METHOD B RESIN / DOSING C HEATING D COOLING The display also has an upper and lower bar and . The upper bar provides additional top-level menu items: PROCESS, SETTINGS, DOSER SETTINGS and SAVE AS. - Page 41 CitoPress-15/-30 Instruction Manual Heating The HEATING area displays information about the selected method’s heating values Temperature Duration Pressure HINT If the Sensitive option has been enabled, the settings for the two phases are displayed on separate lines. Cooling The COOLING area displays information about the selected cooling...
-
Page 42: Using The Process Setup Menu
This is referred to as manual operation. CitoPress-15 and 30 come standard with a library of preset Struers methods matching the Struers’ range of hot mounting resins (the On Screen Hot Mounting Application Guide). Choosing any of the Struers methods will automatically adapt the selected method to the cylinder size, thereby greatly reducing the risk of errors. -
Page 43: Sensitive Mode
CitoPress-15/-30 Instruction Manual Sensitive mode, with a dual heating phase, is used for fragile/porous Sensitive mode samples. Option Adjust the Heating values to suit the samples to be mounted. E.g. Phase 1 Apply Heat to melt the resin, no Pressure... -
Page 44: Reuse The Method Settings For The Next Sample
CitoPress-15/-30 Instruction Manual Manual operation When operated using manual settings, you will need to change the process settings manually each time you process a sample (unless the previously used settings are appropriate for the next sample). HINT When a CitoDoser (option) dosing unit is used and the database option is enabled, the dosing unit stores information about which method should be used f or a particular resin. - Page 45 CitoPress-15/-30 Instruction Manual Editing the Method’s Values To edit a mounting method manually: Manually NOTE The example below is based on editing the method’s temperature value; the procedure for editing other values is the same. More than one of the method’s values can be edited.
- Page 46 CitoPress-15/-30 Instruction Manual Push knob to accept the new value. HINT When you edit a stored method’s values, a temporary copy of the method is created. This is called “Copy of Method Name”, for example, “Copy of ClaroFast”. These values can be used to process the samples but will not be stored to the database unless the method is saved.
- Page 47 CitoPress-15/-30 Instruction Manual Selecting a Stored Method To select a stored mounting method from the database: From the PROCESS menu, turn knob to highlight the METHOD item. Push knob to activate the SELECT GROUP pop-up menu. Turn knob to highlight the required group ...
- Page 48 CitoPress-15/-30 Instruction Manual Turn knob to highlight the method required. Push knob to accept the method. Changing Method by Changing When a dosing unit is replaced with another, the method that is the CitoDoser Dosing Unit associated with the new dosing unit is automatically recalled from the (option) database (option).
-
Page 49: Mounting A Sample
A thin layer of mount release agent must always be applied to the mounting rams to prevent the mounting materials sticking to the surface. Using Struers’ AntiStick a thin layer of stearate powder can easily be dabbed on the rams. -
Page 50: Pouring Resin Over The Sample Manually
CitoPress-15/-30 Instruction Manual Fill a suitable amount of mounting material into the cylinder using Pouring Resin over the Sample the funnel supplied. Please refer to the Application Guide for Hot Manually Mounting. NOTE Always make sure there is sufficient mounting material to cover the sample after compression. -
Page 51: Starting The Mounting Process
The display with the mounting parameters will change to a new Process display, which illustrates the progress of the current stage (Heating or Cooling) and the time remaining before the mounting process is complete. One unit (CitoPress-15/-30) Two units (CitoPress-30) - Page 52 CitoPress-15/-30 Instruction Manual Displaying Process Parameters Push knob to display process parameters. Press to return to the process display. ...
-
Page 53: Stopping The Mounting Process
CAUTION Always follow the recommended heating and cooling parameters described in Struers Application Guide for Hot Mounting. Always make sure to that the mounting unit is cooled sufficiently before opening the top closure. -
Page 54: Maintenance
CitoPress-15/-30 Instruction Manual 3. Maintenance Proper maintenance is required to achieve the maximum uptime and operating lifetime of the machine. Maintenance is also important in ensuring your machine’s continued safe operation. The maintenance procedures described in this section must be carried out by skilled or instructed persons. -
Page 55: Lubricating The Threads Of The Top Closure
The threads of the top nut will get worn over time and therefore the top Check the threads nut is a wear part. If the threads are worn do not use the top closure any more. Contact Struers Service and order a new top nut. -
Page 56: Yearly Maintenance
CitoPress-15/-30 Instruction Manual Yearly Maintenance Using a 17 mm torque wrench, check that the bolts that hold the mounting unit to the cylinder are tight. Check the Bolts If necessary, tighten with a force of maximum 25 Nm / 18 lbf- −... - Page 57 CitoPress-15/-30 Instruction Manual Flush the cooling coil with clean water. Re-install the mounting unit (see, “Installing the Mounting Unit”. If there are still deposits in the coil, repeat this procedure and leave the decalcifying fluid in the mounting unit overnight before flushing with water the next day.
- Page 58 CitoPress-15/-30 Instruction Manual Push knob to Start/Stop the Doser resin feed. The following warning will be displayed. Ensure that the nozzle is in a suitable position. Push knob to start emptying the CitoDoser.
-
Page 59: Cleaning The Citodoser Dosing Unit
CitoPress-15/-30 Instruction Manual Cleaning the CitoDoser Dosing Unit Spout Lid Nozzle Nozzle cover Screw conveyor Place the CitoDoser on a flat steady surface. Remove the lid . Remove the nozzle cover by turning it anti-clockwise and pulling it away from the spout . -
Page 60: Spare Parts
Check that the protective grid in CitoDoser is intact and that it is not possible to come into contact with the agitator wheel whilst rotating. Spare Parts For further information, or to check the availability of replacement parts, please contact your local Struers Service department. Contact information is available on Struers.com. -
Page 61: Cautionary Statements
CitoPress-15/-30 Instruction Manual 4. Cautionary Statements List of Safety Messages in the Manual CAUTION Prolonged exposure to loud noises may cause permanent damage to the hearing, Use hearing protection if exposure to noise exceeds levels set by local regulations. ELECTRICAL HAZARD The machine must be earthed (grounded). - Page 62 CAUTION Always follow the recommended heating and cooling parameters described in Struers Application Guide for Hot Mounting. Always make sure to that the mounting unit is cooled sufficiently before opening the top closure.
-
Page 63: Symbols On The Machine
CitoPress-15/-30 Instruction Manual Symbols on the Machine Hot surface symbol • Top plate on mounting unit • On side on mounting unit Warning! • Inside mounting unit cover... -
Page 64: Transport And Storage
Clean the machine. Lift the machine onto a trolley. Lift CitoPress-15/-30 by holding underneath the base of the − machine, on the left side and on the right side. Two persons are required to lift the machine. Lift the machine off the trolley into its new position. -
Page 65: Disposal
CitoPress-15/-30 Instruction Manual 6. Disposal Equipment marked with a WEEE symbol contain electrical and electronic components and must not be disposed of as general waste. Please contact your local authorities for information on the correct method of disposal in accordance with national legislation. -
Page 66: Reference Guide
Using the Methods Database (option)..........70 Creating and Storing User Methods in the Database ..... 70 Creating a New Method..............70 Modifying a Struers Method............72 Saving a User method ............73 Using the Enter Name Menu..........75 Entering Characters ..............75 Deleting Characters .............. - Page 67 CitoPress-15/-30 Instruction Manual 8. Spare Parts and Diagrams ......105 Diagrams ..................105 CitoPress-15 ................105 CitoPress-30 ................105 9. Legal and Regulatory ......112 FCC Notice ................. 112 10. Technical Data ........113...
-
Page 68: Advanced Operations
To avoid corrosion, Struers recommends the use of Struers Additive in the cooling water (percentage stated on the Additive container). Remember to top up with Struers Additive each time you refill with water. To connect CitoPress to a Struers Recirculation Cooling Unit, the... -
Page 69: Connecting To The Cooli Unit
CitoPress-15/-30 Instruction Manual Connect the Cooli unit to CitoPress as follows: Connecting to the Cooli Unit Connecting the Cooli Water Inlet Mount the pressure hose onto the water inlet tube on the back of CitoPress. Insert the filter gasket in the coupling nut with the flat side ... -
Page 70: Using The Methods Database (Option)
CitoPress-15/-30 Instruction Manual Using the Methods Database With the CitoPress database option enabled up to 15 User Methods (option) can be stored as well as associations between a number of resins and CitoDoser units. HINT Without Database option: Only 2 methods can be stored. - Page 71 CitoPress-15/-30 Instruction Manual Turn knob to highlight the method required. Push knob to accept the method. Edit the method’s values to create your user method. For information on how to edit a method’s values, see “Editing the Method’s values...
-
Page 72: Modifying A Struers Method
“Creating and Storing User Methods in the Database”. HINT The Struers method is NOT overwritten when the new method is saved. The method has to be saved using a different name. All Struers methods are protected against being overwritten. -
Page 73: Saving A User Method
CitoPress-15/-30 Instruction Manual Saving a User method From the PROCESS menu, press the button to access the top-level menu items. Turn knob to select SAVE AS. Push knob to activate the ENTER METHOD NAME menu. - Page 74 CitoPress-15/-30 Instruction Manual Turn knob to highlight either the functions at the bottom of the menu or characters to use in the method name. The RAM UP / RAM DOWN keys are used for quick navigation from line to line.
-
Page 75: Using The Enter Name Menu
CitoPress-15/-30 Instruction Manual Doser associations, Resins and Method names can also be edited. Using the Enter Name Menu A cursor is available in the NAME field at the bottom. A second, large cursor is used for selecting characters or actions:... - Page 76 CitoPress-15/-30 Instruction Manual Press the knob to enter the character.
-
Page 77: Deleting Characters
CitoPress-15/-30 Instruction Manual Deleting Characters Characters can be deleted from a name by using the Del and (left), (right) editing symbols at the bottom of the menu. To delete characters from a name: Turn knob to the left or right until the cursor moves from the character selection area to the editing area at the bottom of the menu. - Page 78 CitoPress-15/-30 Instruction Manual Press the knob to delete the underlined character. ...
-
Page 79: Creating A User Resin
Resin data is stored separately in the database. As well as using Creating a User Resin Struers resins it is possible to create and store user resins. To create and store a user resin: In the PROCESS menu, turn the knob to highlight the RESIN / DOSING item. - Page 80 The resin will be stored in the User resins group. HINT Struers resins are linked to a unique method with the name of the resin. These default resins cannot be changed, unless the method is saved under a different name.
-
Page 81: Using The Settings Menu
The SETTINGS menu is used to view and, in the case of User Using the Settings Menu Methods, delete, rename and lock/unlock methods. Viewing Resin Details CitoPress stores details about Struers resins. To view these details: From the PROCESS menu, press the button once to access the top-level menu. - Page 82 CitoPress-15/-30 Instruction Manual Push knob to view the details for the resin selected. ...
-
Page 83: Deleting, Renaming Or Locking/Unlocking User Methods
CitoPress-15/-30 Instruction Manual Deleting, Renaming or To delete, rename or lock/unlock a user method: Locking/Unlocking User Methods From the PROCESS menu, press the button once to access the top-level menu. Turn knob to highlight the SETTINGS item. - Page 84 CitoPress-15/-30 Instruction Manual Turn knob to highlight a User method. Push knob to select the method. The method can now be deleted. Turn knob to select DELETE, RENAME or LOCK/ UNLOCK. Push knob to carry out the action required.
-
Page 85: Creating And Deleting Citodoser Associations
Association”) the dosing unit will need to be associated with a method. A resin is selected and the method that uses this resin will then be associated with the CitoDoser. Mount the CitoDoser on CitoPress, the Struers resin menu will be displayed. ... - Page 86 CitoPress-15/-30 Instruction Manual Press to return to the PROCESS menu. ...
-
Page 87: Deleting A Citodoser Dosing Unit Association
CitoPress-15/-30 Instruction Manual To associate the dosing unit with a different method, the existing Deleting a CitoDoser Dosing Unit association must first be deleted. Association From the PROCESS menu, press the button once to access the top-level menu. - Page 88 CitoPress-15/-30 Instruction Manual The associated resin will be highlighted. Push knob to highlight the DELETE option at the bottom of the menu. Push knob to delete the resin association.
-
Page 89: Setting The Operation Mode
CitoPress-15/-30 Instruction Manual Setting the Operation Mode To change the operation mode: From the EXTENSIONS menu: Turn knob to highlight Operation mode. Push knob to activate the OPERATION MODE PARAMETERS menu. Turn knob to highlight Pass code. - Page 90 CitoPress-15/-30 Instruction Manual Push knob to accept the Pass code. Operation mode can now be changed and a new Pass code set. Push knob to activate the SELECT OPERATION MODE menu. Turn the knob to highlight the Operation mode.
-
Page 91: Struers Knowledge
CitoPress-15/-30 Instruction Manual 2. Struers Knowledge Materialographic mounting can be regarded as a helping process assisting the mechanical preparation process as well as the final test. Understanding the different characteristics of mounting materials and being able to evaluate the need for mounting is the key to have specimens that are easy to handle and clean and gives a good image of a coating or an edge. -
Page 92: Application Guide For Hot Mounting
CitoPress-15/-30 Instruction Manual 3. Application Guide for Hot Mounting Useful mounting data and hints can be found in the Struers Application Guide for Hot Mounting (delivered with CitoPress)or visit the Struers website on http://www.struers.com and see the section on Knowledge. -
Page 93: Troubleshooting
The set interval has expired. maintenance service. Process Parameters are displayed To remove the message press when ENTER has been pressed ENTER again. whilst a process is running. Turn CitoPress OFF and then turn If this does not help, contact Struers Service. - Page 94 CitoPress-15/-30 Instruction Manual Display/error Cause Action Turn CitoPress OFF and then turn If this does not help, contact Struers Service. Voltage overload Turn CitoPress OFF and then turn If this does not help, contact Struers Service. Turn CitoPress OFF, wait for 5 minutes then turn ON.
- Page 95 Bef ore removing the mounting unit, ensure that it is cool enough to be handled. Processing error: The Heating unit has failed. Heating unit failure. Please, contact Struers Service.
- Page 96 The f orce should be min. 50 bar/800psi. Incorrect configuration of cylinder Check the configuration. diameter. Contact Struers Service. Incorrect unit for force or pressure. Insuf f icient heating. Incorrect setting of time or for Set the correct parameters. preheating or heating.
- Page 97 Replace the upper ram. on the f loor/table, causing a bulge in the edge of the ram. The swivel arm has become askew. Call a Struers service technician. In the meantime the mounting press can be used without the swivel arm.
- Page 98 CitoPress-15/-30 Instruction Manual The top closure cannot be Cured mounting material on the To release the top closure: loosened. cylindrical surface of the top ram. Move the lower ram up and down several times. Dirt in the threads of the top closure.
-
Page 99: Service
The maintenance plans include equipment inspection, replacement of wear parts, adjustments/calibration for optimal operation, and a final functional test. NOTE: Servicing may only be performed by a Struers engineer or a qualified technician (electromechanical, electronic, mechanical, pneumatic, etc.). Contact Struers Service for information. -
Page 100: Statistics Menu
CitoPress-15/-30 Instruction Manual CitoPress measures and records statistical information about its Statistics Menu operation, this data is shown in the Statistics display. The following table provides information about this statistical data. Item Display Statistics Serial Number (number) Sof tware Version... - Page 101 CitoPress-15/-30 Instruction Manual Item Display Statistics SINCE LAST RESET (individual reset of each parameter) Total operation time (hours) Operation Time since (hours) last service Lef t Hydraulic Motor run (hours) time Right Hydraulic Motor (hours) run time (option). Lef t Heating Element...
-
Page 102: Sensors Menu
CitoPress-15/-30 Instruction Manual CitoPress is equipped with a range of sensors. Real time data, Sensors Menu provided by these sensors, is shown in the Sensors display. The following table provides information about this sensor data. Sensor Display PCB VOLTAGES Main PCB version... - Page 103 CitoPress-15/-30 Instruction Manual Sensor Display Mounting Unit Lef t cylinder size ADC+ (mm or inch) Lef t cylinder ADC + (°C) temperature Lef t Cylinder Oil ADC + (bar) Pressure Right cylinder size (mm or inch) (option). Right cylinder ADC + (°C) temperature (option).
-
Page 104: Doser Menu
CitoPress-15/-30 Instruction Manual When the optional CitoDoser is fitted to CitoPress, the Doser menu Doser Menu option is used to empty the dosing unit of resin. - Page 105 CitoPress-15/-30 Instruction Manual 8. Spare Parts and Diagrams For further information, or to check the availability of replacement parts, please contact your local Struers Service department. Contact information is available on Struers.com. Diagrams CitoPress-15 Block Diagram.............. 15733050 Water Diagram ............. 15731001 Hydraulic Diagram............
-
Page 112: Fcc Notice
Pursuant to Part 15.21 of the FCC Rules, any changes or modifications to this product not expressly approved by Struers ApS could cause harmful radio interference and void the user’s authority to operate the equipment. - Page 113 200-240V / 50-60Hz 100-120V / 50-60Hz, consumption Power phases 1-phase (N+L1+PE) or 2-phase (L1+L2+PE) Power consumption: @200-240V / 50-60Hz @100-120V / 50-60Hz, Idle Max (CitoPress-15) 1300W 1300W Max (CitoPress-30) 2300W 1300W Current (CitoPress-15) 5.6A Current (CitoPress-30) Type A, 30 mA (or better) is required...
- Page 114 CitoPress-15/-30 Instruction Manual Specifications Subject Metric/International Dimensions and Width (CitoPress-15) 480 mm 19” Weight Width (CitoPress-30) 550 mm 21`.5” Depth 560 mm 22” Height (Mounting Unit 450 mm 17.7” and Top Closure installed) Height 550 mm 21.5” (Including CitoDoser) Weight (CitoPress-15)
-
Page 115: Pre-Installation Checklist
− Table: - able to carry at least 60 kg/ 132 lbs Required Accessories and Consumables (ordered separately) Please ref er to the www.struers.com for details of the range available. Recommended for CitoPress-15/-30 − Recirculation cooling unit Crating Specifications CitoPress-5/- 15 CitoPress-30 51 kg/... - Page 116 CitoPress, Pre-Installation Checklist Handling, Transportation and Storage • Lif t CitoPress by holding underneath the base of the machine, on the left side and on the right side. • Lif t the machine onto the table. • Lif t the front of the machine and carefully move into place. •...
- Page 117 CitoPress, Pre-Installation Checklist Recommended Space Front: Recommended space at the front: 100 cm / 40”. Rear: The machine may be placed against a wall. • Check there is enough room behind the table for the inlet and outlet hoses. Approx 10 cm / 4“ Sides: •...
- Page 118 200-240 V / 50-60 Hz Auto detection and auto switch over Power inlet 1-phase (N+L1+PE) or 2-phase (L1+L2+PE) The electrical installation must comply with "Installation Category II" CitoPress-5 CitoPress-15 CitoPress-30 Power consumption: Idle Power Max 100-120V 1300 W 1300 W...
- Page 119 CitoPress, Pre-Installation Checklist Water Supply Required Option The machine is supplied with a 2 m / 6.5' pressure hose to connect the machine to the water mains. Water Pressure: 1 - 6 bar / 14.5 - 87 psi Hose supplied: ¾”...
- Page 120 Struers Cooling System 7 with 50 l tank, small pump and Cooli-1 is recommended. For intensive use, Struers Cooling System 5 with 100 l tank, small pump, Cooli-1 and filter bag is recommended. The use of Struers consumables is recommended.
-
Page 121: Declaration Of Conformity
Based on: 15737901 F Declaration of Conformity Manufacturer Struers ApS • Pederstrupvej 84 • DK-2750 Ballerup • Denmark Name CitoPress-5, CitoPress-15, CitoPress-30 Model Function Hot mounting press Type 0577, 0573, and/or 0574 Cat. no. CitoPress-5: 05776127 CitoPress-15: 05736127 CitoPress-30: 05746127 Serial no. - Page 122 Pederstrupvej 84 DK-2750 Ballerup Denmark...
Need help?
Do you have a question about the CitoPress-15 and is the answer not in the manual?
Questions and answers