
Subscribe to Our Youtube Channel
Related Manuals for Struers Xmatic Compact


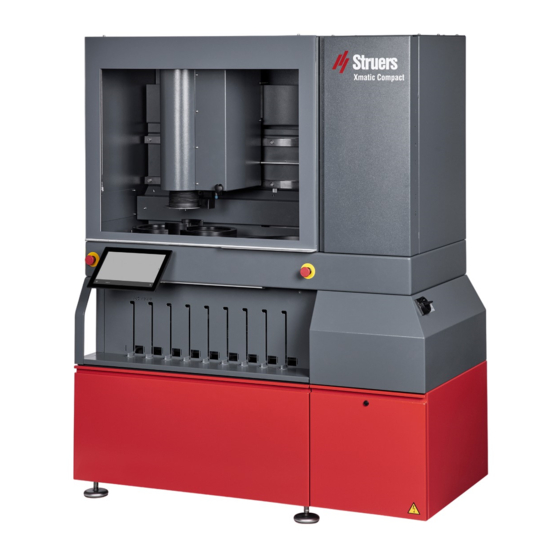
Summary of Contents for Struers Xmatic Compact
- Page 1 Xmatic Compact Instruction Manual Original Instructions Doc. no.: 16887025-01_A_en-us Date of release: 2022.12.08...
- Page 2 Copyright The contents of this manual are the property of Struers ApS. Reproduction of any part of this manual without the written permission of Struers ApS is not allowed. All rights reserved. © Struers ApS 2022.12.19. Xmatic Compact...
-
Page 3: Table Of Contents
1 About this manual 1.1 Accessories and consumables 2 Safety 2.1 Intended use 2.2 Safety functions - (SF) 2.3 Xmatic Compact safety precautions 2.3.1 Read carefully before use 2.4 Safety messages 2.5 Safety messages in this manual 3 Getting started 3.1 Device description 3.2 Overview... - Page 4 8.5.2 Custom methods 8.6 The preparation process 8.6.1 Step selection 8.6.2 Inspect a specimen holder 8.6.3 Start the preparation process 9 Maintenance and service - Xmatic Compact 9.1 General cleaning 9.2 When necessary 9.2.1 Air filter 9.2.2 The bottles and bottle rack 9.2.3 Clean the MD-Disc...
- Page 5 10 Troubleshooting - Xmatic Compact 10.1 Access the work zone in case of power failure 11 Technical data 11.1 Technical data - Xmatic Compact with vertical conveyor 11.2 Technical data - Xmatic Compact without vertical conveyor 11.3 Volatile memory 11.4 Terms and definitions - volatility 11.5 Safety Related Parts of the Control System (SRP/CS)
-
Page 6: About This Manual
1 About this manual About this manual Instruction Manuals Struers equipment must only be used in connection with and as described in the Instruction Manual supplied with the equipment. Note Read the Instruction Manual carefully before use. Note If you wish to view specific information in detail, see the online version of this manual. -
Page 7: Safety Functions - (Sf)
Xmatic Compact with high pressure cleaning and ultra-sonic cleaning Xmatic Compact with high pressure cleaning and Vertical conveyor Xmatic Compact with high pressure cleaning, ultra-sonic cleaning and vertical conveyor Optional: Recirculation unit for MD grinding/polishing station. Safety functions - (SF) The machine is equipped with the following safety devices: •... - Page 8 2 Safety Emergency stops A Emergency stops Xmatic Compact...
-
Page 9: Xmatic Compact Safety Precautions
The operator must read the Instruction Manual and, where applicable, the Safety Data Sheets for the applied consumables. Struers equipment must only be used in connection with and as described in the Instruction Manual supplied with the equipment. Dismantling of any part of the equipment, during service or repair, should always be performed by a qualified technician (electromechanical, electronic, mechanical, pneumatic, etc.). -
Page 10: Safety Messages
2 Safety If the equipment is subjected to misuse, incorrect installation, alteration, neglect, accident or incorrect repair, Struers will accept no responsibility for damage to the user or the equipment. Safety messages Struers uses the following signs to indicate potential hazards. - Page 11 Disconnecting the unit from the electrical power supply must only be done by a qualified technician. CAUTION Struers equipment must only be used in connection with and as described in the Instruction Manual supplied with the equipment. CAUTION Do not use the machine if it is damaged.
- Page 12 The machine must not operate when it is resting on its wheels. CAUTION Avoid skin contact with the cooling fluid additive. CAUTION The recirculation tank is very heavy when it is full. CAUTION The pressure of the cooling fluid supplied to the machine must be max. 2 bar. Xmatic Compact...
-
Page 13: Getting Started
If a Xmatic Compact with vertical conveyor is used the machine delivers the specimen holder to the pick-up station from where the mover head picks it up. If Xmatic Compact without vertical conveyor is used, the operator places the specimen holder at the pick-up station. - Page 14 Xmatic Compact with high pressure cleaning Xmatic Compact with high pressure cleaning and ultra-sonic cleaning Xmatic Compact with high pressure cleaning and Vertical conveyor Xmatic Compact with high pressure cleaning, ultra-sonic cleaning and vertical conveyor Optional: Recirculation unit for MD grinding/polishing station. Xmatic Compact...
-
Page 15: Overview
C Ultrasonic cleaning station, Optional D High pressure cleaning station E MD grinding and polishing F MD elevator G Emergency stop H Bottle rack Main switch J Electrical compartment K Recirculation unit compartment L Display M Vertical conveyor Xmatic Compact... - Page 16 3 Getting started A Pick-up point B Main safety cover C High pressure cleaning station D MD grinding and polishing E MD elevator F Emergency stop G Main switch H Bottle rack Electrical compartment J Recirculation unit compartment K Display Xmatic Compact...
- Page 17 Side view Right side Main switch. Left side A Water flow regulators and water supply B Water inlet C Water outlet D Ethernet connection E Compressed air F External control signal G Exhaust Rear view - Power supply Xmatic Compact...
-
Page 18: The Display
The display is a touch screen, where you tap on buttons, icons and specific areas to access a screen or activate a function. All programming and operation is carried out on the touch screen. The software is launched when you switch on the machine. Xmatic Compact... - Page 19 3 Getting started Overview A Specimen holders ribbon B Main menu C User modes D Consumables ribbon E MD surface ribbon Note The display on an Xmatic Compact without conveyor does not show the specimen holder ribbon. (A) Xmatic Compact...
- Page 20 3 Getting started Detailed view - Xmatic Compact with Vertical conveyor A This item indicates that there is a specimen holder in the drawer, and it shows how many specimens it contains. You can configure the machine to automatically detect how many specimens the specimen holder contains.
-
Page 21: Installation
4 Installation Detailed view - Xmatic Compact without conveyor A This item indicates that there is a specimen holder in the drawer, and it shows how many specimens it contains. B This item shows the name of the selected method. If needed, tap on the method name to open the Methods library and select another method. - Page 22 4 Installation Remove the transport brackets • Unscrew the transport brackets that secure the machine to the pallet. Note We recommend that you keep all original packaging and fittings for future use. Xmatic Compact...
-
Page 23: Lift The Machine
The weight of the specimen holders and consumables used. Center of gravity Front view Side view A 1008 mm (40") A 341 mm (13.4") B 900 mm (35.4") A 970 mm (38") A 329 (13") B 634 mm (25") Xmatic Compact... - Page 24 Lift the machine from the pallet Lift the machine from the pallet using a forklift to access the adjustable feet. Loosen the adjustable feet before moving the machine from the pallet. Make sure that the feet are positioned higher than the wheels. Xmatic Compact...
- Page 25 Move the machine using a forklift Place the forks so that the center of gravity is placed between the forks. Lift the machine from the front. Move the machine into its final position. Lower the machine so that the wheels touch the floor. Xmatic Compact...
- Page 26 Push the machine into the correct position. CAUTION Make sure that the machine is level. Turn the adjustable feet until the machine rests on the feet, and make sure that the machine is level. Remove the transportation crossbar and store it for future use. Xmatic Compact...
-
Page 27: Check The Packing List
Optional parts can be included in the packing box. The packing box contains the following items: Pcs. Description Xmatic Compact with vertical conveyor, orXmatic Compact Bottle, square with QR-label, 4 l Bottle placement guides, 1 l Bottle placement guides, 2 l... -
Page 28: Power Supply
63 A Maximum cable size: 10 mm /AWG 6. Electrical data The other end of the cable can be fitted with an approved plug or hard-wired into the power supply according to the electrical specifications and local regulations. Xmatic Compact... - Page 29 The machine is delivered without a power supply cable. To install the electrical power supply, the following is needed: • Electrical power supply cable, 4-lead, three phases and one earth connection Connect the cable to the electrical connection box. Earth (ground) Phase Phase Phase Electrical connection box Xmatic Compact...
- Page 30 External short circuit protection The machine must always be protected by external fuses.See the electrical table for details on the fuse size required. The machine is equipped with an isolation transformer in the power input. Xmatic Compact...
-
Page 31: Noise
• a filter bag for MD grinding/polishing • a GEKA coupling for connection to the machine hose Consumables • Struers recommends adding a Struers anti-corrosion additive to the cooling water. • The use of Struers consumables is recommended. Xmatic Compact... -
Page 32: Fill The Recirculation Tank
To prevent corrosion, Struers recommends using a Struers additive in the cooling water. For more information, see the additive container. Remember to top up with Struers additive each time you fill up the tank with water. Note Do not overfill the tank. -
Page 33: Connect The Recirculation Unit To The Machine
Instruction Manual for the recirculation unit. 4.6.3 Connect the recirculation unit to the machine Note See also the Instruction Manual for the recirculation unit. A Power connector for recirculation unit B Power connector for level sensor C Quick coupling for water connection Xmatic Compact... -
Page 34: Vibration
Specifications Pressure 6 - 9.9 bar (87 - 143 psi) Air consumption, approx. Min. 200 l/min (53 gpm) at atmospheric pressure Air quality The air quality is obtained via the internal regulator with built- in filter and water separator. Xmatic Compact... -
Page 35: Connect To The Water Inlet And Outlet
Connect to the water inlet and outlet Water inlet Note New water pipe installations: Leave the water to run for a few minutes to flush any debris from the pipe before connecting the machine to the water supply. Xmatic Compact... - Page 36 The machine is supplied with a standard hose to connect the machine to the water supply. Water supply - Specifications Water pressure 2 - 9.9 bar (29 - 143 psi) Water flow Min. 10 l/min. (2.6 gpm) Connections Diameter: ¾”. GEKA coupling to recirculation unit. Tube connection Reinforced PVC hose Xmatic Compact...
-
Page 37: Connect To An Exhaust System
Connect to an exhaust system WARNING An exhaust system with monitoring is required. Specifications Minimum capacity:150 m /h (5297 ft /h) at 50 mm (2") diameter. A Exhaust Procedure Connect a 50 mm (2") pipe to the exhaust outlet on the machine. Xmatic Compact... -
Page 38: Install A Beacon On The Machine
Mount the beacon using the socket screws supplied with the beacon. Connect the 6-pole connector to the socket. 4.12 Adjust the disc cooling flow rate You can set the level of disc cooling and flushing time in the software. If needed, adjust the flow rate of disc cooling. Xmatic Compact... -
Page 39: Mount The Md-Disc
4 Installation Water flow regulators A OP flush water B MD dresser water C MD disc cooling water 4.13 Mount the MD-Disc Note We recommend that the MD-Disc is mounted by a service technician. Xmatic Compact... -
Page 40: Transport And Storage
Insufficient packaging could cause damage to the unit and will void the warranty. Contact Struers Service. • We recommend that you keep all original packaging and fittings for future use. Storage Note We recommend that you keep all original packaging and fittings for future use. Xmatic Compact... -
Page 41: Transport
Compressed air supply – Water supply – Recirculation unit. See the manual supplied with the specific equipment. – Disconnect the monitor. This must be done by Struers Service. – Accessories Clean and dry the unit. Requirements • Make sure that the floor of the working area and the transportation corridor are designed to... -
Page 42: Start-Up - The First Time
Lift the machine ►23 Start-up - the first time CAUTION Struers equipment must only be used in connection with and as described in the Instruction Manual supplied with the equipment. Selecting language From the Main menu, select User types, Administrator. See also: The display ►18. - Page 43 The MD elevator has several shelves that contain individual MD grinding or polishing surfaces to be used for the different steps in a method. If you are using Struers surfaces, the machine automatically detects the type of surface placed on each shelf.
-
Page 44: Bottle Rack
Suspension, lubricant or oxide polishing. 6.2.1 Place the bottles in the bottle rack module If you are using Struers consumables, the machine will automatically detect the type of consumable and liquid levels of the bottles. Note Positions 1 and 2 are for Alcohol/Soap only. -
Page 45: Soap And Alcohol
Monitorthe soap and alcohol levels The machine automatically monitors the soap and alcohol levels. Configuration Note Only users with Administrator rights can configure the machine. In the Main screen, select Administrator. Tap the Main menu icon. Select Configuration Xmatic Compact... - Page 46 7 Configuration In the Configuration screen, you can access the following submenus: • Preparation • Consumables • Custom consumables • Cleaning templates • User settings • Machine settings • System settings Xmatic Compact...
-
Page 47: Consumables
7 Configuration Consumables Note If you are using Struers consumables, the machine automatically detects the contents of the consumables bottles when you place them in the bottle rack. Configure Custom consumables Log in to the machine as Administrator. From the Main menu select Configuration. -
Page 48: Machine Settings
7 Configuration Machine settings Configure machine settings Log in to the machine as Administrator. From the Main menu select Configuration. From the Configuration menu, select Machine settings. The Machine settings menu is shown. Xmatic Compact... -
Page 49: Cleaning Templates
Select whether the machine should automatically read the liquid levels in the bottles placed in the bottle rack. Cleaning templates The software contains predefined Struers cleaning programs which can be used for most requirements, but you can also create your own cleaning templates. Configure cleaning templates Log in to the machine as Administrator. -
Page 50: Disc Cooling
Disc cooling By default, the MD surface is cooled after each method step that require an MD surface, but if necessary, you can change the setting. Procedure Tap the 3 dots to the left of the Run button. Xmatic Compact... -
Page 51: Operate The Device
Do not use the machine with non-compatible accessories or consumables. Clamp and level the specimens CAUTION Do not use the machine with non-compatible accessories or consumables. Make sure that the specimens are firmly clamped in the specimen holder, and that they are level. Xmatic Compact... -
Page 52: Access The Work Zone
8 Operate the device Access the work zone If you have an Xmatic Compact with vertical conveyor, you must unlock the main safety cover to access the work zone. Procedure Tap the Main menu. See also: The display ►18. Tap Unlock main safety cover to access the work zone. - Page 53 Open the drawer and remove the specimen holder. If the specimen holder has not been processed yet, the drawer remains closed. To open it, tap the specimen holder icon, and select the Eject icon. Open the drawer and remove the specimen holder. Xmatic Compact...
-
Page 54: Clean The Tubes
8 Operate the device Note If you have an Xmatic Compact without vertical conveyor, open the main safety cover to remove the specimen holder from the pick-up point. Clean the tubes If necessary, you can clean the tubes before and during the preparation process. -
Page 55: Methods
Repeat this procedure for other tubes if necessary. Methods 8.5.1 Struers methods You can access all Struers methods in the Method Library. Procedure Place a specimen holder in the desired position. The machine shows the latest applied method as default. - Page 56 8 Operate the device The Methods screen opens. Tap the Library tab Select the desired method, or use the filter tools to locate the desired method. Xmatic Compact...
-
Page 57: Custom Methods
8 Operate the device Apply filters You can apply filters to the Struers method library to find the best method for the task you need to perform. You can apply filters using the following criteria: • Material group names •... - Page 58 Tap the method name. (A) Tap Methods to open the User-defined methods library, or tap Library if you want to open the Struers methods library. Note You can also tap the 3 dots (B) to access the Edit method menu.
- Page 59 When you finish editing, you can save your changes. Edit a method without placing a specimen holder in the machine Log in to the machine as Administrator. Tap the Main menu icon. See also: The display ►18. Tap Methods. Xmatic Compact...
- Page 60 8 Operate the device Tap Methods to open the User-defined methods library, or tap Library if you want to open the Struers methods library. Select the method you want to edit. You can Delete or Copy steps, and you can add Preparation and Cleaning steps as desired.
-
Page 61: The Preparation Process
Use the Preparation for the daily preparation work. 8.6.1 Step selection If necessary, you can add or remove steps in a preparation process. Procedure Tap the 3 dots on the method line to access the Step selection menu. Xmatic Compact... - Page 62 A green check mark indicates that the step is included in the preparation process. If the necessary consumables are not present in the machine, a red triangle is shown to prompt you to place the missing consumables in the bottle rack. Xmatic Compact...
-
Page 63: Inspect A Specimen Holder
Place the missing consumables, and select Run. 8.6.2 Inspect a specimen holder You can at any time inspect a specimen holder while the preparation process is running. On the preparation process bar, tap the Pause icon Tap the eye icon on the process bar. Xmatic Compact... -
Page 64: Start The Preparation Process
When the method is running, the progress of the preparation is shown with the time counting down to Log in to the machine as Administrator or Operator. In the Methods, select the desired method. Make sure that all the necessary consumables and MD surfaces are available on the machine. Tap Run. Xmatic Compact... -
Page 65: Maintenance And Service - Xmatic Compact
9 Maintenance and service - Xmatic Compact The machine stops automatically when the process is completed. Note If you have placed several specimen holders in the vertical conveyor, the specimen holders are queued based on the order in which you have pressed Run for each of the specimen holders. -
Page 66: When Necessary
9 Maintenance and service - Xmatic Compact When necessary The frequency with which some maintenance and cleaning procedures should be carried out depend on how often and how you use the machine. 9.2.1 Air filter Clean the air filter carefully using a soft brush. - Page 67 9 Maintenance and service - Xmatic Compact Clean the bowl liner Remove the splash guard. (A) Remove the upper part of the bowl liner and wash it. (B) Wipe the lower part of the bowl liner using a damp cloth. (C) Remove the overflow tube and rinse using running water.
-
Page 68: Clean The Tubes
9 Maintenance and service - Xmatic Compact Remove the splash guard. (A) Remove the MD Disc. See also: Mount the MD-Disc ►39. Remove the used bowl liner (C), and ,mount the new one. Remount the splash guard. Dispose of the used bowl liner according to local regulations. - Page 69 9 Maintenance and service - Xmatic Compact In the Maintenance, select Clean tubes. Select the tubes you want to clean. A green check mark indicates the tubes to be cleaned. Tap Clean tubes. Xmatic Compact...
- Page 70 9 Maintenance and service - Xmatic Compact Place the respective Easy Connector in the inlet on the bottle rack. Tap Clean tubes. Place the Easy Connector on the consumable bottle again when the cleaning process is finished Xmatic Compact...
-
Page 71: Md Dressers
9 Maintenance and service - Xmatic Compact 9.2.5 MD dressers The aluminum oxide stone Dismount the aluminum oxide stone. (A) Wipe all surfaces carefully and make sure that there is no debris or dirt left. Mount the aluminum oxide stone in the dresser. -
Page 72: Clean The Md Elevator Mirrors
9 Maintenance and service - Xmatic Compact 9.2.7 Clean the MD elevator mirrors • Clean the mirrors (A) inside the 9 drawers in the MD surface elevator with a damp cloth. Hint If available, you can also use compressed air to clean the mirrors. -
Page 73: Daily
9 Maintenance and service - Xmatic Compact A Connector for alcohol bottle B Alcohol bottle Procedure Pull the recirculation unit out so you can reach the alcohol bottle. Remove the bottle from the connector for alcohol bottle. Empty the contents of the bottle. -
Page 74: Weekly
9 Maintenance and service - Xmatic Compact Weekly Note Do not use a dry cloth as the surfaces are not scratch resistant. Note Do not use acetone, benzol or similar solvents. Hint If needed, use ethanol or isopropanol to remove grease and oil. - Page 75 9 Maintenance and service - Xmatic Compact The work zone • Clean all painted surfaces inside the machine with a soft damp cloth and common household detergents. The specimen mover head and rails Clean the specimen mover head and rails regularly using a damp cloth. See also: Overview ►15.
- Page 76 9 Maintenance and service - Xmatic Compact Clean the upper and lower part of the specimen mover head (A) thoroughly using a damp cloth. Clean any buildup of contaminants on the rails (B) inside the work zone using a dry cloth.
-
Page 77: High Pressure Cleaning Station
9 Maintenance and service - Xmatic Compact The main safety cover Clean the main safety cover regularly using a damp cloth or a regular household window cleaning solution. Let the window cleaning solution work for a few seconds before wiping it away with a cloth. -
Page 78: Ultrasonic Cleaning Station - (Optional)
9 Maintenance and service - Xmatic Compact Hint If needed, use ethanol or isopropanol to remove grease and oil. Clean the nozzles. See:Clean the nozzles ►78 Use a damp cloth to clean the rubber seals. Clean the nozzles • Use the nozzle cleaner to clean the nozzles in the high pressure cleaning station. -
Page 79: Monthly
9 Maintenance and service - Xmatic Compact Empty the ultrasonic bath. Use a brush and soap to clean the inner wall of the ultrasonic bath. Empty the ultrasonic bath. Fill the ultrasonic bath. Monthly Note Do not use a dry cloth as the surfaces are not scratch resistant. -
Page 80: Annually
Do not use Xmatic Compact if it is damaged. Note Replacement of safety critical components must only be performed by a Struers engineer or a qualified technician (electromechanical, electronic, mechanical, Safety critical components must only be replaced by components with at least the Contact Struers Service. -
Page 81: The Diamond Tip Dresser
9 Maintenance and service - Xmatic Compact 9.6.1 The diamond tip dresser The diamond tip dresser must be checked annually. This must be carried out by a Struers service technician. 9.6.2 Main safety cover Inspect the main safety cover Hint If the machine is used for more than one 7-hour shift per day, carry out inspection more often. - Page 82 9 Maintenance and service - Xmatic Compact Start a preparation process Try to open the empty drawer completely while the machine is picking up and moving the specimen holder. If the machine does not stop moving, select Stop on the display.
-
Page 83: Spare Parts
If you have technical questions or when you order spare parts, state the serial number. The serial number is stated on the type plate of the unit. For further information, or to check the availability of spare parts, contact Struers Service. Contact information is available on Struers.com. -
Page 84: Environmental Considerations
10 Troubleshooting - Xmatic Compact 9.9.1 Environmental considerations WARNING In case of fire, alert bystanders, the fire brigade and cut power. Use a powder fire extinguisher. Do not use water. Note Swarf must be disposed of according to the current safety regulations for handling and disposal of swarf/ additive in the recirculation water. -
Page 85: Access The Work Zone In Case Of Power Failure
10 Troubleshooting - Xmatic Compact 10.1 Access the work zone in case of power failure Make sure that the main switch is in the off position. See: Overview ►15 Use the triangular key supplied with the machine to unblock the main safety cover and the MD elevator. -
Page 86: 11 Technical Data
11 Technical data 11 Technical data 11.1 Technical data - Xmatic Compact with vertical conveyor Capacity Individual speciemens Specimen holder Diameter: 140 mm for 250 mm MD disc Diameter: 160 mm for 300 mm MD disc High speed plane grinding station... - Page 87 1200 rpm Rotational direction Counter-clockwise, Clockwise Motor 1.1 kW Torque 7.3 Nm @ 150 rpm Vertical conveyor Number of specimen holders MD elevator Number of MD surfaces Cleaning station High pressure water 40 bar (580 psi) Alcohol and soap Xmatic Compact...
- Page 88 See the Declaration of standards/directives/legislation Conformity/Instruction manual. REACH For information about REACH, contact your local Struers office. Operating environment Surrounding temperature During operation 5 - 40°C (41 - 104°F) During transport -25°C - 55°C (transport) -25°C - 70°C (max. 24...
- Page 89 Exhaust Diameter 100 mm (2") Recommended capacity 250 m³/h (8830 ft³/h) Dimensions and weight Width 182 cm (71.7") Depth 75 cm (29.5") Height 189 cm (74.4") Height (with open cover) 244 cm (96.0") Weight 730 kg (1630 lbs) Xmatic Compact...
- Page 90 A-weighted sound emission LpA = 64.4 dB(A) pressure level at workstations (measured value). Uncertainty K = 4 dB Noise level Equivalent ultrasound sound Lteq, T=95.2 dB pressure level (equivalent (measured value). - Ultrasound level of ultrasound) Uncertainty K = 2 dB Xmatic Compact...
- Page 91 Also, the permissible exposure level can vary from country to country. This information, however, will enable the user of the machine to make a better evaluation of the hazard and risk. Vibration level Declared vibration emission Xmatic Compact...
-
Page 93: Technical Data - Xmatic Compact Without Vertical Conveyor
11.2 Technical data - Xmatic Compact without vertical conveyor Capacity Individual speciemens Specimen holder Diameter: 140mm for 250mm MD disc Diameter: 160mm for 300mm MD disc High speed plane grinding station Diameter Speed Material removal Rotational direction Recirculation system Motor power Continuous (s1) Max. - Page 94 1200 rpm Rotational direction Counter-clockwise, Clockwise Motor 1.1 kW Torque 7.3 Nm @ 150 rpm Vertical conveyor Number of specimen holders MD elevator Number of MD surfaces Cleaning station High pressure water 40 bar (580 psi) Alcohol and soap Xmatic Compact...
- Page 95 Safety See the Declaration of standards/directives/legislation Conformity/Instruction manual. REACH For information about REACH, contact your local Struers office. Operating environment Surrounding temperature During operation 5 - 40°C (41 - 104°F) During transport -25°C - 55°C (transport) -25°C - 70°C (max. 24...
- Page 96 Exhaust Diameter 100 mm (2") Recommended capacity 250 m³/h (8830 ft³/h) Dimensions and weight Width 149 cm (58.66") Depth 75.0 cm (29.5") Height 189.0 cm (74.4") Height (with open cover) 244.0 cm (96.0") Weight 690 kg (1522 lbs) Xmatic Compact...
- Page 97 A-weighted sound LpA = 64.4 dB(A) emission pressure level at (measured value). workstations Uncertainty K = 4 dB Noise level Equivalent ultrasound Lteq, T=95.2 dB sound pressure level (measured value). - Ultrasound (equivalent level of Uncertainty K = 2 dB ultrasound) Xmatic Compact...
-
Page 98: Volatile Memory
Sytem on 2 GB Cycle power module Compulab SOM- AM57x GUI computer 8 GB Cycle power UDOO BOLT V3 RFID controller Cycle power FEIG ISC.LRM1002-E Safety system Cycle power Beckhoff EP1957-0022 Ext. IO system Cycle power Beckhoff CX8190 Xmatic Compact... - Page 99 Authentication Factory Configuration reset data Calibration data Cryptographic Flash 8 KB controller Maxim MAXQ1065 GUI computer Flash 32 GB UDOO BOLT V3 RFID controller Flash FEIG ISC.LRM1002-E Safety system Beckhoff EP1957-0022 Ext. IO system Flash Beckhoff CX8190 Xmatic Compact...
-
Page 100: Terms And Definitions - Volatility
Clearing is a logical approach used to sanitize data in all user-accessible storage locations to protect data against simple non-invasive data recovery methods that use the user interface on the machine. Factory reset A factory reset clears all data stored in the user-accessible storage locations. The machine is set to default values. Xmatic Compact... -
Page 101: Safety Related Parts Of The Control System (Srp/Cs)
SRP/CS (safety-related parts of a control system) are parts that have an influence on safe operation of the machine. Note Replacement of safety critical components must only be performed by a Struers engineer or a qualified technician (electromechanical, electronic, mechanical, pneumatic, etc.). -
Page 102: Diagrams
2KM70909 SF-1, SF-5 11.6 Diagrams If you wish to view specific information in detail, see the online version of this manual. 11.6.1 Diagrams - Xmatic Compact Title Pneumatic circuit diagram 16881000 ►104 Water diagram 16881001 ►103 Block diagram 19543050 ►105... - Page 103 16881001 Xmatic Compact...
- Page 104 16881000 Xmatic Compact...
- Page 105 19543050 Xmatic Compact...
-
Page 106: Legal And Regulatory Information
Responsibility of the manufacturer The following restrictions should be observed, as violation of the restrictions may cause cancellation of Struers legal obligations. The manufacturer assumes no responsibility for errors in the text and/or illustrations in this manual. The information in this manual is subject to change without notice. The manual may mention accessories or parts not included in the supplied version of the equipment. -
Page 107: Declaration Of Conformity
Based on: 16887900 A Declaration of Conformity Manufacturer Struers ApS • Pederstrupvej 84 • DK-2750 Ballerup • Denmark Name Xmatic Compact Model Function Grinding/Polishing equipment Type Grinding/polishing equipment with MD surfaces Cat. no. 06886129, 06886146, 0688629, 06886246, 06886329, 06886346, 06886429, 06886446 Serial no. - Page 108 Tõlked leiate aadressilt Katso käännökset osoitteesta Pour les traductions, voir Za prijevode idite na A fordítások itt érhetők el Per le traduzioni consultare www.struers.com/Library 翻 訳 については、 Vertimai patalpinti Tulkojumus skatīt Voor vertalingen zie For oversettelser se Aby znaleźć tłumaczenia, sprawdź...
Need help?
Do you have a question about the Xmatic Compact and is the answer not in the manual?
Questions and answers