
Subscribe to Our Youtube Channel
Related Manuals for Struers Xmatic


Summary of Contents for Struers Xmatic
- Page 1 Xmatic Instruction Manual Original Instructions Doc. no.: 16897025-02_A_en Date of release: 2024.04.25...
- Page 2 Copyright The contents of this manual are the property of Struers ApS. Reproduction of any part of this manual without the written permission of Struers ApS is not allowed. All rights reserved. © Struers ApS. Xmatic...
-
Page 3: Table Of Contents
1 About this manual 1.1 Accessories and consumables 2 Safety 2.1 Intended use 2.2 Safety functions - (SF) 2.3 Xmatic safety precautions 2.3.1 Read carefully before use 2.4 Safety messages 2.5 Safety messages in this manual 3 Get started - introduction 3.1 Device description... - Page 4 7.3.2 Detect the number of specimens 7.4 Methods 7.4.1 Struers methods 7.4.2 Custom methods 7.5 The preparation process 7.5.1 Prepare the specimen holder for the Xmatic 7.5.2 Step selection 7.5.3 Indication of missing consumables 7.5.4 Start the preparation process 7.5.5 Inspect the specimens 7.5.6 Manual dressing of the grinding stone...
- Page 5 8.6 User settings 8.7 Machine settings 8.7.1 Eject empty tray 8.7.2 Number of specimens 8.8 System settings 9 Maintenance and service - Xmatic 9.1 General cleaning 9.2 When necessary 9.2.1 Air filter 9.2.2 Clean the touch screen 9.2.3 The bottles and bottle rack 9.2.4 Clean the tubes...
- Page 6 12 Technical data 12.1 Technical data sheet 12.2 Volatile memory 12.3 Terms and definitions - volatility 12.4 Safety Related Parts of the Control System (SRP/CS) 12.5 Diagrams 12.6 Legal and regulatory information 13 Manufacturer Declaration of Conformity Xmatic...
-
Page 7: About This Manual
(http://www.struers.com). Consumables The machine is designed to be used only with Struers consumables specifically designed for this purpose and this type of machine. Other products may contain aggressive solvents, which dissolve e.g. rubber seals. The warranty may not cover damaged machine parts (e.g. seals and tubes), where the damage can be directly related to the use of consumables not supplied by Struers. -
Page 8: Safety Functions - (Sf)
Models Xmatic with high pressure cleaning and vertical conveyor Xmatic with high pressure cleaning, ultra-sonic cleaning and vertical conveyor Optional: Recirculation unit for MD grinding/polishing station. Safety functions - (SF) The machine is equipped with the following safety devices: •... - Page 9 Once the machine has completed the preparation, it can take up to 3 minutes before you can open the main safety cover. If you use alcohol, fumes must be removed from the main chamber via the exhaust function. Electrical compartment - residual voltage WARNING Xmatic...
-
Page 10: Xmatic Safety Precautions
2 Safety A Electrical compartment Xmatic safety precautions 2.3.1 Read carefully before use Specific safety precautions - residual risks Ignoring this information and mishandling of the equipment can lead to severe bodily injuries and material damage. Make sure that the actual electrical power supply voltage corresponds to the voltage stated on the type plate of the machine. The machine must be earthed (grounded). -
Page 11: Safety Messages
The operator must read the Instruction Manual and, where applicable, the Safety Data Sheets for the applied consumables. Struers equipment must only be used in connection with and as described in the Instruction Manual supplied with the equipment. Dismantling of any part of the equipment, during service or repair, should always be performed by a qualified technician (electromechanical, electronic, mechanical, pneumatic, etc.). -
Page 12: Safety Messages In This Manual
Safety messages in this manual WARNING If there are visible signs of deterioration or damage to the main safety cover, it must be replaced immediately. Contact Struers Service. WARNING Safety critical components must be replaced after a maximum lifetime of 20 years. - Page 13 20 years. If you use the machine for longer periods of time than indicated, the safety critical components must be replaced sooner. Contact Struers Service. ELECTRICAL HAZARD Disconnect the electrical power supply before installing electrical equipment.
- Page 14 2 Safety CAUTION Struers equipment must only be used in connection with and as described in the Instruction Manual supplied with the equipment. CAUTION Do not use Xmatic if it is damaged. CAUTION If power is interrupted during operation, the main safety cover and the MD elevator door will remain locked until power returns.
-
Page 15: Get Started - Introduction
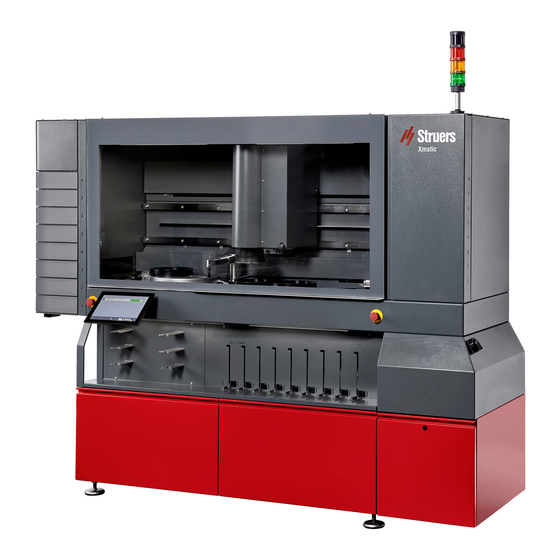
Get started - introduction Device description Xmatic is an automatic machine for materialographic grinding, polishing and cleaning. The operator selects the preparation parameters, the grinding/polishing surfaces, and suspension/lubricant to be used for the method. There are standard preparation and cleaning methods on Xmatic, and customized methods can be added. - Page 16 The main safety cover of Xmatic locks when the operator starts the machine, and it remains locked. The operator can manually unlock the main safety cover when all hazardous movements has come to a stop.
-
Page 17: Overview Of The Machine
J Bottle rack C Grinding station K Electrical compartment D Ultrasonic cleaning station L Recirculation unit compartment (Optional) M Recirculation unit E High pressure cleaning station N Display F MD grinding and polishing O Vertical conveyor G MD-elevator H Emergency stop Xmatic... - Page 18 3 Get started - introduction Side view, right side A Main switch Xmatic...
- Page 19 3 Get started - introduction Side view, left side A External control signal E Water flow regulators and water supply B Compressed air F Water inlet C Ethernet connection G Water outlet D Exhaust Rear view - Power supply Xmatic...
-
Page 20: Overview Of The Display
All programming and operation is carried out on the touch screen. The software is launched when you switch on the machine. Overall overview A Specimen holders ribbon D Consumables ribbon B Main menu E MD surface ribbon C User mode Xmatic... - Page 21 G Drop-down (to see the steps for the selected method) H MD surface ribbon Pause (put the ongoing process on hold) J Consumables ribbon K Total process time L User mode (the type of user logged into the machine) Xmatic...
-
Page 22: Installation
We recommend that you keep all original packaging and fittings for future use. Remove the packing box • Open and remove the sides and the top of the packing box. Remove the transport brackets • Unscrew the transport brackets that secure the machine to the pallet. Xmatic... -
Page 23: Lift The Machine
Wear safety shoes when handling heavy machinery. Weight Machine 960 kg (2116 lbs) Machine including packaging 1193 kg (2630 lbs) Center of gravity Front view Side view A: 1000 mm (40") C: 300 mm (12") B: 845 mm (34") Xmatic... - Page 24 Loosen and remove the transport brackets. Place the forks so that the center of gravity is placed between the forks. Lift the machine from the front. Lift the machine off the pallet. Note Place the machine on a plane and horizontal floor. Xmatic...
-
Page 25: Check The Packing List
Check the packing list Optional parts can be included in the packing box. The packing box contains the following items: Pcs. Description Xmatic Bottle, square with QR-label, 4 l Bottle placement guides,1 l Bottle placement guides, 2 l Bottle placement guides, 4 l... - Page 26 Remove the counterweight screws on the rear side of the machine ►27. Remove the transportation crossbar Remove the wheels and the transportation crossbar supplied with the machine. Store the crossbar for future use. Machine with crossbar Machine without crossbar Xmatic...
-
Page 27: Power Supply
Incorrect voltage can damage the electrical circuit. WARNING In case of fire, alert bystanders, the fire brigade and cut power. Use a powder fire extinguisher. Do not use water. Always contact a qualified electrician to verify which option is suitable for the local installation setup. Xmatic... - Page 28 Phase Phase Not internally connected Earth (ground) Note The connection terminals allow for a maximum cable size of 10 mm /AWG 6. Note Always contact a qualified electrician to verify which option is suitable for the local installation setup. Xmatic...
-
Page 29: Noise
Prolonged exposure to loud noises may cause permanent damage to a person’s hearing. Use hearing protection if the exposure to noise exceeds the levels set by local regulations. The recirculation unit The machine is equipped with a recirculation unit for the plane grinding station. Xmatic... - Page 30 Add a Struers anti-corrosion additive to the coolant. • The machine is designed to be used only with Struers consumables specifically designed for this purpose and this type of machine. Other products may contain aggressive solvents, which dissolve e.g. rubber seals. The warranty may not cover damaged machine parts (e.g.
-
Page 31: Fill The Recirculation Tank
To prevent corrosion, you must use a Struers additive in the coolant. For more information, see the additive container. Remember to top up with Struers additive each time you fill up the tank with water. Note Do not overfill the tank. -
Page 32: Connect The Recirculation Unit To The Machine
Connect the water inlet hose to the quick coupling on the recirculation pump (C). Connect the cable from the recirculation pump to the electrical power socket of the recirculation unit inside the compartment (A). Connect the level sensor (B). Push the unit into place in the compartment under the machine. Xmatic... -
Page 33: Place The Filter Bag In The Recirculation Unit
• On the MD grinding/polishing station, use a filter bag which is applicable for your recirculation unit. See the Xmatic accessories overview the Struers website (http://www.struers.com). Compressed air supply For specifications on pressure and air consumption, see the section Technical data sheet ►130. -
Page 34: Connect To The Water Inlet And Outlet
Connect the air hose to the compressed air supply. Connect to the water inlet and outlet Water inlet Note New water pipe installations: Let the water run for a few minutes to flush any debris from the pipe before you connect the machine to the water supply. Xmatic... - Page 35 The machine is supplied with a standard hose to connect the machine to the water supply. Water supply - Specifications Water pressure 2-4 bar (29-58 psi) Water flow Min. 10 l/min. (2.6 gpm) Connections Diameter: ¾” GEKA coupling to recirculation unit. Tube connection Reinforced PVC hose Xmatic...
-
Page 36: Connect To An Exhaust System
►32. 4.10 Connect to an exhaust system CAUTION You must connect the machine to an exhaust system. We recommend the use of a system with monitoring. Specifications Minimum capacity: 250 m /h (8829 ft /h) at 100 mm (4") diameter. Xmatic... -
Page 37: Adjust The Water Flow Rate
Connect the other end of the pipe to the exhaust system. 4.11 Adjust the water flow rate You can enable or disable the disc cooling and flushing in the software. If needed, adjust the flow rate of disc cooling. Xmatic... - Page 38 4 Installation Water flow regulators A OP flush water B Tap water on stone C MD disc cooling water Xmatic...
- Page 39 4 Installation Procedure • Turn the regulator to adjust the amount of water applied directly onto the grinding stone. Xmatic...
-
Page 40: Install A Beacon (Option)
Mount the beacon using the socket screws supplied with the beacon. Connect the 6-pin connector to the socket. The light signals are described in Beacon (option) ►72. Hint For more information about this unit, see the specific Instruction Manual or User Guide. Xmatic... -
Page 41: Mount The Grinding Stone Or Diamond Grinding Disc
Mount the grinding stone or diamond grinding disc CAUTION Do not use the machine with non-compatible accessories or consumables. Overview A Grinding stone dresser B Index plunger C Grinding stone cover D Three-lobe knob Procedure Log in to the machine as an Administrator. Xmatic... - Page 42 (D) in the above Overview ►41. Pull the index plunger (B),and lift the grinding stone cover (C). Use an 8 mm Allen key to remove the screw and washer. If there is a grinding stone in the stone module, remove it. Xmatic...
- Page 43 When you have selected a grinding stone or diamond grinding disc on the screen, the dresser automatically moves to detect the top of the stone. When the top of the stone has been detected the dresser moves into its parking position. Xmatic...
-
Page 44: Network Connection
If you select a diamond grinding disc, the dresser remains at the side of the grinding chamber because it is not used. Hint Struers recommends that you dress a new stone a couple of times before using it for grinding. This will ensure that it is plane and ready for use. 4.14 Network connection Xmatic cannot use wireless networks (Wi-Fi/Bluetooth). -
Page 45: Transport And Storage
• Package the unit securely before transportation. Insufficient packaging could cause damage to the unit and will void the warranty. Contact Struers Service. • We recommend that you use the original packaging and fittings. - Page 46 Moving the machine To move the machine, use a fork-lift truck and a crossbar. Note The machine must be installed by Struers technicians or by an authorized service technician trained by Struers for this specific task. Procedure Open the recirculation module doors .
-
Page 47: Start-Up - The First Time
6 Start-up - the first time Start-up - the first time CAUTION Struers equipment must only be used in connection with and as described in the Instruction Manual supplied with the equipment. Log in as an Administrator If you have administrator rights, you can log in as an administrator and configure a variety of... - Page 48 The MD surfaces are placed on shelves in the MD elevator. This has several shelves that contain individual MD grinding or polishing surfaces to be used for the different steps in a method. If you are using Struers surfaces, the machine automatically detects the type of surface placed on each shelf.
-
Page 49: Place The Bottles In The Bottle Rack Module
Use only Struers consumables. The machine is designed to be used only with Struers consumables specifically designed for this purpose and this type of machine. The machine will automatically detect the type of Struers consumable and liquid levels of the bottles. -
Page 50: Alcohol And Soap
Place a concentrated soap bottle on the bottle rack. 6.4.2 Alcohol separator bottle (option) If you wish to collect alcohol used during the cleaning methods, connect an alcohol separator bottle to your cleaning station. Procedure Place the bottle in the bottle bracket. Xmatic... -
Page 51: Operate The Device
Clamp and level the specimens Make sure that the specimens are firmly clamped in the specimen holder, and that they are level. To do this, we recommend that you use Struers Uniforce. See the Instruction Manual for this unit. Access the work zone To access the work zone, you must unlock the main safety cover. -
Page 52: The Specimen Holder
Open: The drawer is ready to be used. • Partially open: The specimen holder is ready for inspection, or the drawer is empty. • Closed: The machine is processing the specimen holder you placed in this position or the holder is in queue. Xmatic... - Page 53 When a specimen holder has been processed, the machine automatically opens the drawer to the partially open position. Open the drawer and remove the specimen holder. If the specimen holder has not been processed yet, the drawer remains closed. To open it, tap the specimen holder button, and select the Eject button. Xmatic...
-
Page 54: Detect The Number Of Specimens
Manual option (operation) Click on the specific specimen holder button. Find the button that displays the number of specimens you have in the holder. Select the button with the correct number of specimens. Xmatic... -
Page 55: Methods
The force is being calculated according to the number of specimens. Methods 7.4.1 Struers methods When there is a specimen holder in the machine, you can access the Struers methods in the Method library (see how to access in Overview of the display ►20 under "Detailed view"). - Page 56 Select the desired method, or use the filter tools to locate the desired method. Apply filters You can apply filters to the Struers Method library to find the best method for the task you need to perform. You can apply filters using the following criteria: •...
- Page 57 7 Operate the device Method parameters When you use a Struers method, you have default parameters. You can adjust these in each step but you cannot save them. To be able to reuse a step with changed parameters, you must create a custom method in a...
- Page 58 Tap the drop-down arrow for the step to open the parameters. Choose the parameters you wish to change. Parameters vary from step to step but may include: Parameters for preparation Definition steps Disc speed How fast the disc rotates. Holder speed How fast the specimen holder rotates. Xmatic...
- Page 59 Offset in position +10 Dosing level All Struers methods automatically adjusts the dosing level according to the disc size used on the machine. This means that the dosing level on a 250 mm MD-Disc is lower for the same method than it is on a 300 mm MD-Disc.
- Page 60 You can activate the optional cooling of the MD-Disc during a specific step. Hint When you use the dics cooling function, the MD bowl is also flushed and easier to keep clean. Procedure Tap the 3 dots to the left of the Run button. Xmatic...
-
Page 61: Custom Methods
Custom methods Create custom methods You can create your own custom method if you copy a Struers method, add or modify steps,and then save in a different name. All methods that you change are saved in the Method library (see how to access in Overview of the display ►20... - Page 62 Log in to the machine as an Administrator. Place a specimen holder in the desired position. The machine shows the latest applied method as default. Tap the 3 dots to access the Edit method menu. Select the step you want to edit. Xmatic...
- Page 63 You can Delete or Copy steps, and you can add Preparation and Cleaning steps as desired. When you finish editing, you can save your changes. Edit a method via the Main menu Log in to the machine as an Administrator. Tap the Main menu. Tap Methods. Xmatic...
- Page 64 7 Operate the device Tap Methods to open the user-defined Method library, or tap Library if you want to open the Struers Method library. Select the method you want to edit. You can Delete or Copy steps, and you can add Preparation and Cleaning steps as desired.
-
Page 65: The Preparation Process
7 Operate the device The preparation process 7.5.1 Prepare the specimen holder for the Xmatic Place your specimens in the specimen holder. Place your specimen holder in the conveyor. See Place and remove the specimen holder ►52. Manually select the number of specimens you have in the holder, or tap the Run button to... -
Page 66: Indication Of Missing Consumables
Tap the Run button, and the method will run with the selected steps. 7.5.3 Indication of missing consumables If the necessary consumables are not present in the machine, a yellow triangle is shown to prompt you to place the missing consumables in the bottle rack. Xmatic... -
Page 67: Start The Preparation Process
Start the preparation process CAUTION Wear suitable gloves to protect fingers from abrasives and warm/sharp specimens. Before you start the preparation process, you can see a list of the different preparation steps in the selected method by tapping the drop-down button. Xmatic... - Page 68 Procedure Log in to the machine as an Administrator or Operator. In the Methods, select the desired method. Make sure that all the necessary consumables and MD surfaces are available on the machine. The Run button must be green. Xmatic...
-
Page 69: Inspect The Specimens
Inspect the specimens You can at any time inspect a specimens holder and the specimens while the preparation process is running. Procedure On the preparation process bar, tap the Pause button. Tap the Eye button on the process bar. Xmatic... -
Page 70: Manual Dressing Of The Grinding Stone
On how to configure Dresser programs and Manual dressing, see from Configure Dresser programs for the grinding stone ►76 7.5.7 Open the MD-elevator You can change or refill MD surfaces while the machine is running. Open the MD-elevator door during the process Tap the Main menu. Xmatic... -
Page 71: Pause The Ongoing Process
Pause the ongoing process During the preparation, you may discover that you need to pause the process. You can then pause the ongoing process on the display. Tab on the Pause icon. Complete the action you wish to perform. Xmatic... -
Page 72: Beacon (Option)
Bottom position Green light State Flashing light The machine is paused Constant light The machine is in work No light The machine is idle Hint For more information about this unit, see the specific Instruction Manual or User Guide. Xmatic... -
Page 73: History - Log File Reporting
History - log file reporting Procedure Log in as an Administrator (described in Log in as an Administrator ►47). In the Main menu, select History. Click in the Date range area. Select the time range you are interested in. Xmatic... - Page 74 7 Operate the device See the data for the selected period on the display. To export the data, connect a USB flash drive, and tab Save to USB. Xmatic...
-
Page 75: Configuration
Select and log in as an Administrator. (Log in as an Administrator ►47). Tap the Main menu button (Overview of the display ►20). Select Configuration. You can now access the following sub menus that will be described in this chapter: Xmatic... -
Page 76: Preparation
Manual dressing of the grinding stone ►70 on operation). Dresser programs You can select among one of the following dresser programs: Note Dressing after process is selected independently in the preparation method. Manual Adjust the settings as desired. Xmatic... - Page 77 Use this dresser program for grinding with a consumable suited for ductile materials as nickel-based alloys and stainless steel. Struers hard Struers hard - eco Use this dresser program for grinding with a consumable suited for hard and very hard metals.
-
Page 78: Configure Manual Dressing Of The Grinding Stone
Select No to lift the specimen holder when dressing the stone 8.1.2 Configure manual dressing of the grinding stone Struers recommends that you dress a new stone a couple of times before using it for grinding. This ensures that it is plane and ready for use. Procedure Log in to the machine as an Administrator. -
Page 79: Configure The Md Grinding Surface
Set the rotation time from 1 to 9 minutes, in steps of 1 min. For operation, see Manual dressing of the grinding stone ►70. 8.1.3 Configure the MD grinding surface Log in to the machine as an Administrator. From the Main menu, select Configuration. Xmatic... -
Page 80: Consumables
It is not possible to clean the MD polishing surfaces. Consumables Note The machine is designed to be used only with Struers consumables specifically designed for this purpose and this type of machine. The machine automatically detects the contents of the Struers consumables bottles and the MD surfaces when you place them in the machine. - Page 81 8 Configuration Configure MDs Configure bottles Select Automatic or Manual. Automatic The machine reads the data matrix code that is on all consumables. Xmatic...
- Page 82 The machine does not look for a code to read. Select the surface, suspension or lubricant on the position in question. When you click on the button for a bottle set manually, you get a list of Struers consumables and your custom consumables: Select a consumable from the list, and this will have this position until you change this or select automatic, and the data matrix code is read.
-
Page 83: Custom Consumables
In the view, select the type of consumable you want to rename, delete or add, such as Stone, MD surface, Suspension or Lubricant , either in the menu or on the green buttons. To add a new custom consumable, click on the green button for the consumable in question, e.g. MD surface. Xmatic... - Page 84 Give the custom consumable a name. When you click on the Consumable name text field, a keyboard pops up. Type the new name and save. Choose dressing, abrasive rule, abrasive or lubricant type, dependent on the custom consumable in question. Dressing of stones and MD surfaces Click on the Dressable field in the middle. Xmatic...
- Page 85 If the custom grinding surface is a diamond grinding surface such as the MD-Piano,MD-Mezzo, and MD-Molto. Diamond tip: If the custom grinding surface is a resin-bonded aluminum oxide surface such as the MD-Alto. Choose an abrasive rule for the MD surface. Xmatic...
- Page 86 All types of coolant or suspension can be used except water. Abrasive contained in a The consumable has abrasives in the surface and water is used surface: as a coolant. Abrasive type for the suspensions Click on the Abrasive type field in the middle. Xmatic...
- Page 87 Choose the abrasive type. Abrasive type Oxide If the custom consumable is an Oxide Polishing type of suspension Diamond If the custom consumable is a Diamond Suspension Lubricant types for the lubricants Click on the Lubricant type field in the middle. Xmatic...
- Page 88 8 Configuration Choose the lubricant type. Lubricant type Water If the custom lubricant is water-based Alcohol If the custom lubricant is alcohol-based Xmatic...
-
Page 89: Consumables Lifetime
Consumables Lifetime Configure the custom lifetime of the MD surface All Struers MD surfaces have a defined lifetime which depends on for instance the material that is prepared. If a different lifetime is relevant, you can configure this. Log in to the machine as an Administrator. -
Page 90: Cleaning Templates
Click on the specific consumable you wish to change the lifetime of, for example MD-Dac. Now change the lifetime of the chosen consumable. Cleaning Templates The Struers methods that are already predefined and available in the Method library (see Struers methods ►55), have built-in cleaning templates, that you cannot change. -
Page 91: Configure A New Cleaning Template From A Copy
You can copy a cleaning template and use it to create your own cleaning template. Log in to the machine as an Administrator. From the Main menu, select Configuration and Cleaning Templates. The Cleaning Templates menu is shown. Select the desired cleaning template you wish to copy, and tab Copy. Xmatic... - Page 92 8 Configuration Now a new User template appears. Adjust the different parameters as desired, and save as a different template by renaming it. Xmatic...
-
Page 93: Add A New Cleaning Template
8 Configuration 8.5.2 Add a new cleaning template Tab the green button + Cleaning Template. Fill in the parameters for the new template. Tab on Rename and write a name for the template before you save this. Xmatic... -
Page 94: Pre-Cleaning Steps
The standard setting includes the following parameters: User settings Default user settings and administrator password Log in as an Administrator (Log in as an Administrator ►47). Select Configuration and User settings. In Configure, select your default user setting to be either Operator or Administrator. Xmatic... -
Page 95: Machine Settings
Configure Machine settings Log in to the machine as an Administrator. From the Main menu, select Configuration and Machine settings. Adjust the settings as desired in either Eject empty tray or Number of specimens. All changes are automatically saved. Xmatic... -
Page 96: Eject Empty Tray
Select if you would like the machine to automatically detect the number of specimens in each holder, or if you wish to manually select the correct number of specimens. In both cases, the force is adjusted accordingly by the machine itself. Xmatic... -
Page 97: System Settings
Select whether the machine should .automatically measure the dresser tip and stone height. System settings In this menu, you can change the default language from English to another language, or the default setting from the metric to the imperial system. Xmatic... -
Page 98: Maintenance And Service - Xmatic
9 Maintenance and service - Xmatic Procedure Tap the Main menu button, and select Configuration and System settings. Tap the drop-down arrow to select the language you want to use. Tap the circle before the preferred choice to select whether you want to use Metric or Imperial units when you work with the machine. -
Page 99: General Cleaning
9 Maintenance and service - Xmatic General cleaning To ensure a longer lifetime for your machine, we strongly recommend regular cleaning. Note Do not use a dry cloth as the surfaces are not scratch resistant. Note Do not use acetone, benzol or similar solvents. -
Page 100: Clean The Touch Screen
9 Maintenance and service - Xmatic 9.2.2 Clean the touch screen Note Do not use a dry cloth as the surfaces are not scratch resistant. Do not use acetone, benzol or similar solvents. • Clean the touch screen with an LCD cleaning agent. - Page 101 9 Maintenance and service - Xmatic Select the tubes you want to clean. A green check mark above the frames indicates the tubes to be cleaned. Tap Clean tubes, and follow the directions on the screen: Xmatic...
- Page 102 9 Maintenance and service - Xmatic Wait while the liquid is pumped back to the bottle. Remove the bottle and place the Easy Connector in the inlet on the bottle rack. The tubes are flushed. Place the Easy Connector on the consumable bottle again when the cleaning process is finished.
- Page 103 9 Maintenance and service - Xmatic In the pop-up message, select Clean. Xmatic...
-
Page 104: Clean The Grinding Stone Station
9 Maintenance and service - Xmatic Follow the instruction on the display to remove the current consumable from the machine, and place the Easy Connector on the drain. The tube is flushed. When the cleaning process is finished, tap Continue. -
Page 105: Clean The Stone
9 Maintenance and service - Xmatic Clean the grinding stone/diamond grinding disc A Overflow tube Procedure Wipe the bowl using a brush. Remove the overflow tube and rinse using running water. Reinsert the overflow tube. If necessary, you can remove the stone before cleaning. See also:... - Page 106 9 Maintenance and service - Xmatic Action: Spin test Allows you to test the stone. During the spin test, the stone will rotate at full speed for 60 seconds. Action: Change stone dresser tip Enables you to move the grinding stone dresser out of the slot in the grinding station to a position that allows you to change the tip.
-
Page 107: Replace And Clean The Aluminum Oxide Stick And The Dresser Tip
9 Maintenance and service - Xmatic 9.2.7 Replace and clean the aluminum oxide stick and the dresser tip Aluminum oxide stick (A) Untighten thefixation screw with a 6-mm Allen key by rotating it counterclockwise. Dismount the aluminum oxide stick. Wipe all surfaces carefully and make sure that there is no debris or dirt left. -
Page 108: Clean The Md Arm
9 Maintenance and service - Xmatic 9.2.8 Clean the MD arm A MD arm Procedure In Maintenance, select MD. Select the action you need, and follow the instructions on the display. Action: Change tip Use this function when you change the MD dresser tip. -
Page 109: The Bowl Liner
Action: Arm to parked The MD arm returns to the parking slot in the MD elevator. Diamond tip dresser The diamond tip dresser must be checked regularly by a Struers service technician. Procedure Dismount the diamond tip dresser. (B) Wipe all surfaces carefully and make sure that there is no debris or dirt left. - Page 110 9 Maintenance and service - Xmatic Procedure Remove the splash guard (A) from the MD grinding and polishing station. Remove the upper part of the bowl liner (B) and wash it. Remount the upper part of the bowl liner. Remount the splash guard.
-
Page 111: Maintenance Of The Md-Disc
9 Maintenance and service - Xmatic Procedure Remove the splash guard (A). Remove the upper part of the bowl liner (B). Remove the MD-Disc (C) (see Maintenance of the MD-Disc ►111). Remove the used bowl liner (D), and mount the new one. - Page 112 9 Maintenance and service - Xmatic Procedure Unscrew the three screws on the rear side of the MD-Disc Remove the bolt and washer from the shaft (A). Place the lower part of the MD-Disc in the bowl, and fasten it using the three screws you...
-
Page 113: Clean The Md Elevator Mirrors
9 Maintenance and service - Xmatic 9.2.11 Clean the MD elevator mirrors • Clean the mirrors (A) inside the 8 drawers in the MD surface elevator with a damp cloth. Note Do not use a dry cloth when cleaning the mirrors, as the surface is not scratch- resistant. -
Page 114: Weekly
9 Maintenance and service - Xmatic Automatic cleaning In the main menu you can also choose to have the MD surfaces cleaned automatically after preparation. Weekly Note Do not use a dry cloth as the surfaces are not scratch resistant. -
Page 115: The Work Zone
9 Maintenance and service - Xmatic 9.3.1 The work zone • Clean all painted surfaces inside the machine with a soft damp cloth and common household detergents. 9.3.2 The specimen mover head and rails Clean the specimen mover head and rails regularly using a damp cloth. See also:... - Page 116 9 Maintenance and service - Xmatic Procedure Clean the upper and lower part of the specimen mover head (A) thoroughly using a damp cloth. Clean any buildup of contaminants on the rails (B) inside the work zone using a dry cloth.
-
Page 117: The Main Safety Cover
9 Maintenance and service - Xmatic 9.3.3 The main safety cover Procedure Clean the main safety cover regularly with a damp cloth or a regular household window cleaning solution. Let the window cleaning solution work for a few seconds before wiping it away with a cloth. - Page 118 9 Maintenance and service - Xmatic Empty the ultrasonic tub on Empty tub. Use a brush and soap to clean the inner wall of the ultrasonic tub. Fill the tub on Fill tub, and empty again on Empty tub to rinse.
-
Page 119: High Pressure Cleaning Station
9 Maintenance and service - Xmatic 9.3.5 High pressure cleaning station Note Do not use a dry cloth as the surfaces are not scratch resistant. Do not use acetone, benzol or similar solvents. If needed, use ethanol or isopropanol to remove grease and oil. - Page 120 9 Maintenance and service - Xmatic A Connector for alcohol separator bottle B Alcohol separator bottle Procedure Pull the recirculation unit out so you can reach the alcohol bottle. Remove the bottle from the connector for the alcohol bottle. Empty the contents of the bottle.
-
Page 121: Monthly
If the cooling water has been infected with bacteria or algae, clean the tank and tubes with a suitable antibacterial disinfectant. Fill up with water. To prevent corrosion, use a Struers additive in the coolant. For more information, see the additive container. -
Page 122: Annually
CAUTION Do not use Xmatic if it is damaged. Note Replacement of safety critical components must only be performed by a Struers engineer or a qualified technician (electromechanical, electronic, mechanical, pneumatic, etc.). Safety critical components must only be replaced by components with at least the same safety level. -
Page 123: Test The Safety Devices
9 Maintenance and service - Xmatic • Visually inspect the main safety cover for signs of wear or damage such as cracks, dents, or damage. Replace the main safety cover WARNING If there are visible signs of deterioration or damage to the main safety cover, it must be replaced immediately. -
Page 124: Service And Repair
9 Maintenance and service - Xmatic If the machine starts the preparation process, press one of the Emergency stops. See also: Overview of the machine ►17. Contact Struers Service. Test the main safety cover locking function Start a preparation process. -
Page 125: Disposal
Note Service must only be performed by a qualified technician (electromechanical, electronic, mechanical, pneumatic, etc.). Contact Struers Service. Service check We offer a range of comprehensive maintenance plans to suit the requirements of our customers. This range of services is called ServiceGuard. -
Page 126: 11 Troubleshooting
11 Troubleshooting For further information, or to check the availability of spare parts, contact Struers Service. Contact information is available on Struers.com. 11 Troubleshooting Error Cause Action Continuous, irregular wear on Coupling on the specimen Replace the coupling. a grinding/polishing surface. - Page 127 The specimen holder is not The specimen holder is If the RFID is missing, contact detected. missing RFID. Struers Service. The RFID is damaged. If the RFID is damaged, contact Struers Service. The drawer is not closed Try to open and close the drawer correctly.
-
Page 128: Access The Work Zone In Case Of Power Failure
Turn the key clockwise to open the main safety cover and the MD elevator. CAUTION In case of power failure, do not use excessive force when you turn the triangular key to access the work zone. The lock could be damaged. Xmatic... - Page 129 11 Troubleshooting Before processing again, close the main safety cover and MD elevator and turn the key counter-clockwise. Xmatic...
-
Page 130: 12 Technical Data
Recirculation system Motor power Continuous (s1) 2.2 kW MD grinding and polishing station Diameter 250 mm or 300 mm Rotational speed 50 - 600 rpm (1000 rpm when spin-drying the disc) Rotational direction Clockwise Motor power Continuous (s1) 1.5 kW Xmatic... - Page 131 7.3 Nm @ 150 rpm Vertical conveyor Number of specimen holders MD elevator Number of MD surfaces Cleaning station High pressure water 40 bar High pressure Pump 1350 VA power High pressure Pump 6.5 A single phase Current Alcohol and soap Xmatic...
- Page 132 Touchscreen Capacitive Display LCD, 12.1" (1280 x 800) Safety See the Declaration of Conformity/Instruction manual. standards/directives/legislation REACH For information about REACH, contact your local Struers office. Operating environment Surrounding temperature During operation 5 - 40°C (41 - 104°F) During transport -25°C - 55°C (transport)
- Page 133 The machine has no more than Circuit Breaker 6mA residual current. RCCB type (RCCB) A can be used. Power supply Max. conductor size 10 connection /AWG 6 terminals Exhaust Diameter 100 mm (4") Minimum capacity 250 m³/h (8830 ft³/h) Xmatic...
- Page 134 SF-7 PL d, Category 3 MD-elevator door Stop category 0 locking device SF-8 PL c, Category 1 MD-elevator door Stop category 0 locking device SF-9 PL d, Category 3 Vertical conveyor Stop category 0 doors interlock Xmatic...
- Page 135 Also, the permissible exposure level can vary from country to country. This information, however, will enable the user of the machine to make a better evaluation of the hazard and risk. Xmatic...
-
Page 136: Volatile Memory
Ext. IO system Cycle power Beckhoff CX8190 Non-volatile memory Target data Type Size Battery User System Clearing backup accessible accessible procedure System on Flash 32 GB Module Compulab SOM- AM57x Methods Default User Factory reset Consumables User Default Factory reset Xmatic... -
Page 137: Terms And Definitions - Volatility
Non-volatile memory does not require power to keep the stored information. When power is interrupted, the contents of the non-volatile memory are preserved. This type of memory usually contains information necessary to boot the machine, machine- specific application configuration and methods data. Xmatic... -
Page 138: Safety Related Parts Of The Control System (Srp/Cs)
SRP/CS (safety-related parts of a control system) are parts that have an influence on safe operation of the machine. Note Replacement of safety critical components must only be performed by a Struers engineer or a qualified technician (electromechanical, electronic, mechanical, pneumatic, etc.). -
Page 139: Diagrams
If you want to view specific information in detail, see the online version of this manual. Title Pneumatic circuit diagram 16891001 ►140 Water diagram 16891000 ►141 Block diagram 16893050 ►142 Circuit diagram See the diagram number on the type plate of the equipment, and contact Struers Service via Struers.com. Xmatic... - Page 140 12 Technical data 16891001 Xmatic...
- Page 141 12 Technical data 16891000 l n i Xmatic...
- Page 142 12 Technical data 16893050 Xmatic...
-
Page 143: Legal And Regulatory Information
Responsibility of the manufacturer The following restrictions should be observed, as violation of the restrictions may cause cancellation of Struers legal obligations. The manufacturer assumes no responsibility for errors in the text and/or illustrations in this manual. The information in this manual is subject to change without notice. The manual may mention accessories or parts not included in the supplied version of the equipment. -
Page 145: Declaration Of Conformity
Based on: 16897900 B Declaration of Conformity Manufacturer Struers ApS • Pederstrupvej 84 • DK-2750 Ballerup • Denmark Name Xmatic Function Grinding/polishing equipment Type Grinding stone with MD surfaces with or without ultrasonic cleaning Cat. no. 3 x 200-240 V, 50-60 Hz... - Page 146 Tõlked leiate aadressilt Katso käännökset osoitteesta Pour les traductions, voir Za prijevode idite na A fordítások itt érhetők el Per le traduzioni consultare www.struers.com/Library 翻 訳 については、 Vertimai patalpinti Tulkojumus skatīt Voor vertalingen zie For oversettelser se Aby znaleźć tłumaczenia, sprawdź...
Need help?
Do you have a question about the Xmatic and is the answer not in the manual?
Questions and answers