
Related Manuals for Struers Duramin-100


Summary of Contents for Struers Duramin-100
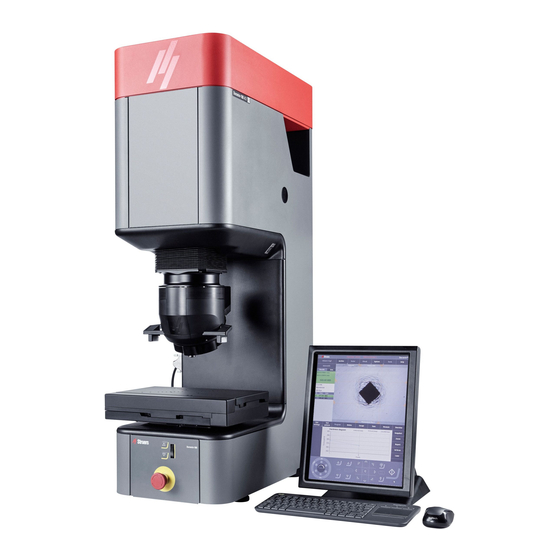
- Page 1 Duramin-100 Manual No.: 16617025 Revision A Instruction Manual Date of Release 2018.08.10...
- Page 2 Duramin-100 Instruction Manual...
- Page 3 For load ranges 10 gf-62.5 kgf, 10 gf-150 kgf, and 10 gf-250 kgf The hardness tester meets the applicable DIN, ISO-EN, ASTM and JIS standards. The machine is for use in a professional working environment (e.g. a materialography laboratory). Models: Duramin-100 AC1/AC2/AC3...
- Page 4 Original instructions. The content of this manual are the property of Struers. Reproduction of any part of this manual without the written permission of Struers is not allowed. All rights reserved. © Struers 2018.
-
Page 5: Instruction Manual Duramin
Duramin-100 Instruction Manual Duramin-100 Safety Precaution Sheet Read carefully before use Ignoring this information and mishandling of the equipment can lead to severe bodily injuries and material damage. The operator(s) must read the Safety and User’s Guide sections of this manual and the relevant sections of the manuals for any connected equipment and accessories. - Page 6 The equipment should only be used for its intended use and as detailed in the Instruction Manual. The equipment is designed for use with accessories supplied by Struers. If subjected to misuse, improper installation, alteration, neglect, accident or improper repair, Struers will accept no responsibility for damage(s) to the user or the equipment.
- Page 7 Duramin-100 Instruction Manual Icons and typography Struers uses the below icons and typographical conventions. A list of the Safety Messages used in this manual can be found in the chapter on Cautionary Statements. Icons and Safety Messages ELECTRICAL HAZARD indicates an electrical hazard which, if not avoided, will result in death or serious injury.
- Page 8 Duramin-100 Instruction Manual Colour Inside Logo The 'colour inside' logo on the cover page of this Instruction Manual indicates that it contains colours which are considered to be useful for the correct understanding of its contents. Users should therefore print this document using a colour printer.
-
Page 9: Table Of Contents
Levelling ................. 14 Removing the Lifting Bar ............14 Removing the Transport Plate ..........15 Checking the Contents ..............16 Getting Acquainted with Duramin-100 ..........17 USB Drive and WiFi Adapter ..........18 Rear plate ................18 Power Supply .................. 19 Connecting the Tester ............ - Page 10 Duramin-100 Instruction Manual 7.Disposal ..................33 8.Transport and Storage ............34 9.Cautionary Statements ............35 List of Safety Messages in the Manual ..........35 10.Legal and Regulatory ............36 FCC Notice ..................36 11.Technical Data ..............37...
-
Page 11: Getting Started
Instruction Manual 1. Getting Started General Device Description Duramin-100 is an automatic hardness tester that offers the most common-used hardness testing methods for all types of stable and non-explosive metals. The test operator starts the procedure by positioning – and eventually –... -
Page 12: Location
Duramin-100 Instruction Manual Location Duramin must be placed close to the power supply. Duramin is designed to be placed on a rigid, stable workbench with a horizontal surface. Recommended workbench dimensions. Height of table (X) follows local preferences. -
Page 13: Lifting Duramin-100
Duramin-100 Instruction Manual Lifting Duramin-100 A crane, lifting bar (approx. 75cm length, 25mm diameter) and lifting straps are required to lift the machine from the packing crate. The crane should have a minimum lifting capacity of twice the weight of the machine. -
Page 14: Placing Duramin-100
Duramin-100 Instruction Manual Placing Duramin-100 To eliminate possible wear and tear or the tester’s mechanical Levelling structure, the tester should be levelled once it is in its final location. Check that the XY-stage is level. If not: Turn the vibration damper in the rear right hand corner, to level the XY-stage. -
Page 15: Removing The Transport Plate
Duramin-100 Instruction Manual Remove the transport safety before turning on the tester. Removing the Transport Plate The motorized XY-stage will automatically move to perform a (Motorized XY-stage option only) reference search on initialization. NOTE: Damage to the stage will result if the tester is switched on with the transport safety plate mounted. -
Page 16: Checking The Contents
Duramin-100 Instruction Manual Checking the Contents In the packing crate you should find the following parts: Duramin-100 (Hardness Tester) Accessories Case 15“ Monitor (2 monitor optional) Keyboard (Option) Mouse (Option) Accessories Case Indenter(s) and objective lens(es) Standard Accessories Wireless Mouse and keyboard (Option) -
Page 17: Getting Acquainted With Duramin-100
Duramin-100 Instruction Manual Getting Acquainted Take a moment to familiarise yourself with the location and names of with Duramin-100 the Duramin-100 components. Turret XY-stage Z-axis control buttons Emergency stop Scroll wheel for fine fo- Levelling adjustment Hole for lifting bar... -
Page 18: Usb Drive And Wifi Adapter
Duramin-100 Instruction Manual The USB drive contains direct and indirect USB Drive and WiFi Adapter calibration documents. The USB WiFi adapter allows for cable-free communication with the machine. Information on the model number, serial number, weight, date of Rear plate manufacture, and power requirements can be found on the type plate on the back of the machine. -
Page 19: Power Supply
Duramin-100 Instruction Manual Power Supply Always remember to switch the power off when installing electrical equipment! Connecting the Tester ELECTRICAL HAZARD The machine must be earthed. Check that the mains voltage corresponds to the voltage stated on the type plate on the side of the machine. -
Page 20: Assembling The Monitor
Duramin-100 Instruction Manual Assembling the Monitor Contents of the monitor box: monitor with base HDMI-DVI cable USB cable, and European power cords. HINT: The dual monitor option will be delivered with 2 monitor boxes Remove the monitor’s rear panel. -
Page 21: Connecting The Monitor
Check that all plugs are connected correctly and replace the rear panel of the monitor. NOTE: Only monitors supplied by Struers may be connected to Duramin. Failure to adhere to this may result in material damage. Dual Monitor Option The monitors will be labelled Screen L and Screen R. -
Page 22: Installing An Xy-Stage
Duramin-100 Instruction Manual Installing an XY-Stage HINT: The XY-stage is usually delivered already mounted on the machine. NOTE:. Switch Duramin OFF at the mains when installing or /removing an XY-stage. Failure to comply may result in damage to the tester. -
Page 23: Basic Operations
Duramin-100 Instruction Manual 2. Basic Operations 1. Spindle up/down Front Panel Controls 2. Scroll wheel for fine adjustment 3. Emergency stop MAIN SWITCH The main switch is located on the rear of the machine. The main switch will be illuminated when the power is turned on. -
Page 24: Software
Duramin-100 Instruction Manual Software Duramin-100 is operated through the Duramin software. A short description of the software is included in this manual. Please refer to the Duramin software manual for a detailed description of the software functions. Start-up Switch the machine on. - Page 25 Duramin-100 Instruction Manual HINT: The default username is not case sensitive. HINT: For instructions on how to add new users, please refer to the Software manual. If the emergency stop is activated during start-up, a failure message Start-up After Emergency Stop will appear.
-
Page 26: Overview Screen
Duramin-100 Instruction Manual Overview Screen The overview screen is primarily divided into 5 main areas. Main Menu Test result Objective view Test settings Graph Dashboard Controls The Main Menu is used to select the test method and scale required Main Menu as well as adjusting settings and other functions. -
Page 27: Perform A Test
Duramin-100 Instruction Manual Perform a Test Consider the following as your basic test. Follow these steps: Check that the sample surface is smooth and even. Check that the sample surface is free from oxide scale, foreign matter and completely free from lubricants. -
Page 28: Maintenance
Duramin-100 Instruction Manual 3. Maintenance General Cleaning Keep Duramin-100 as clean as possible. To ensure a longer lifetime for your equipment Struers strongly recommends regular cleaning. Daily Maintenance Clean all accessible surfaces with a soft, damp cloth. Machine HINT: Do not use a dry cloth as the surfaces are not scratch resistant. -
Page 29: Replacing The Fuse
Re-connect the electric power cable. HINT: Remember to order a new spare fuse. Calibration Duramin-100’s highly sensitive and accurate load cell and objectives are calibrated prior to shipping. Please contact Struers Service should the load cell or objectives require recalibration. -
Page 30: Struers Knowledge
HINT: Visit the Struers Hardness testing website for a comprehensive introduction to the principles of hardness testing, useful troubleshooting tips and the latest application knowledge in the field. -
Page 31: Trouble-Shooting
Max down reached! force actuator has been reached. - Restart the tester. Motor failure! Failure of force application motor. If the error remains, contact Struers Service. - Restart the tester. System not initialized! Failure of Software communication. If the error remains, contact Struers Service. -
Page 32: Service
Duramin-100 Instruction Manual 6. Service Struers recommends that a regular service check be carried out after every 1500 hours of use. Servicing must be carried out by Struers Field Engineers, or skilled personnel specifically trained by Struers. NOTE. Safety critical components must be replaced at least after a lifetime of 20 years . -
Page 33: Disposal
Duramin-100 Instruction Manual 7. Disposal Equipment marked with a WEEE symbol contain electrical and electronic components and must not be disposed of as general waste. Please contact your local authorities for information on the correct method of disposal in accordance with national legislation. -
Page 34: Transport And Storage
Failure to use the original packaging and fittings could cause severe damage to the tester and will void the warranty. Follow these steps: Familiarize yourself with the DURAMIN-100: HOW TO UNPACK document Disconnect Duramin from power. Mount the transport plate on the motorized XY-stage (if present). -
Page 35: Cautionary Statements
Duramin-100 Instruction Manual 9. Cautionary Statements List of Safety Messages in the Manual ELECTRICAL HAZARD The machine must be earthed. Check that the mains voltage corresponds to the voltage stated on the type plate on the side of the machine. -
Page 36: Legal And Regulatory
Pursuant to Part 15.21 of the FCC Rules, any changes or modifications to this product not expressly approved by Struers ApS could cause harmful radio interference and void the user’s authority to operate the equipment... -
Page 37: Technical Data
Power consumption (Standby) 30 W Type A, 30 mA is required. Residual Current Circuit Breaker Weight Duramin-100 M1/M2/M3 101 Kg/ 223 lbs Duramin-100 A1/A2/A3 112 Kg/ 247 lbs Duramin-100 AC1/AC2/AC3 112 Kg/ 247 lbs Noise level Less than 70 dB (A) measured at idle running, at a distance... - Page 38 Duramin-100 Instruction Manual...
- Page 39 Duramin-100 Instruction Manual Contents of the Declaration of Conformity Manufacturer Struers ApS Pederstrupvej 84 DK-2750 Ballerup, Denmark Telephone +45 44 600 800 Herewith declares that Name: Duramin-100 AC1/ AC2/ AC3 Models: Hardness Tester Function: 066161XX Type: fulfils all the relevant provisions of the:...
- Page 40 Pederstrupvej 84 DK-2750 Ballerup Denmark...
Need help?
Do you have a question about the Duramin-100 and is the answer not in the manual?
Questions and answers