Table of Contents
Advertisement
Advertisement
Table of Contents

Related Manuals for Storz DRILLCUT-X II


Summary of Contents for Storz DRILLCUT-X II
- Page 1 Instructions for use DRILLCUT-X II/DRILLCUT-X II-35...
- Page 2 03-2020 Copyright © All product illustrations, product descriptions, and texts are the intellectual property of KARL STORZ SE & Co. KG. Their use and reproduction by third parties require the express approval of KARL STORZ SE & Co. KG. All rights reserved.
-
Page 3: Table Of Contents
10.1 Troubleshooting ............................ 30 11 Electromagnetic compatibility........................ 31 11.1 General notes on the operating environment .................. 31 11.2 General notes on the operating environment .................. 31 11.3 Table 1 – Compliance level for immunity tests .................. 31 Instructions for use • DRILLCUT-X II/DRILLCUT-X II-35 • WWK497_EN_V1.0_03-2020_IFU_CE-MDR... - Page 4 11.5 Table 3 – Test levels for radiated and conducted immunity tests ............ 34 11.6 Table 4 – Emission class and group ....................... 35 11.7 Table 5 – Recommended separation distances between portable and mobile HF communications equipment and the product ........................ 35 12 Subsidiaries.............................. 37 Instructions for use • DRILLCUT-X II/DRILLCUT-X II-35 • WWK497_EN_V1.0_03-2020_IFU_CE-MDR...
-
Page 5: General Information
Designates a possible imminent risk. If this is not avoided, it could lead to minor injuries. NOTICE ATTENTION Designates a possibly harmful situation. If this is not avoided, the products could be damaged. Instructions for use • DRILLCUT-X II/DRILLCUT-X II-35 • WWK497_EN_V1.0_03-2020_IFU_CE-MDR... -
Page 6: Normal Use
The product can be used universally in the ENT, NEURO, and SPINE fields of application. 2.6 Target user populations The medical device may only be used by doctors and medical assistants with a relevant specialist qualification. Instructions for use • DRILLCUT-X II/DRILLCUT-X II-35 • WWK497_EN_V1.0_03-2020_IFU_CE-MDR... -
Page 7: Patient Population
Normal use 2.7 Patient population There are no restrictions in terms of patient groups for this product. Instructions for use • DRILLCUT-X II/DRILLCUT-X II-35 • WWK497_EN_V1.0_03-2020_IFU_CE-MDR... -
Page 8: Safety
Risk of injury for the patient: The sheaths and tips of the blades/burrs must not have any grooves, scratches, or dents. After cleaning, inspect the handpieces, blades, and burrs for cleanliness and damage. Instructions for use • DRILLCUT-X II/DRILLCUT-X II-35 • WWK497_EN_V1.0_03-2020_IFU_CE-MDR... - Page 9 Portable HF communications equipment (including peripherals such as antenna cables and external antennas) should be used no closer than 30 cm (12 inches) to any part of the device, including cables specified by the manufacturer. Otherwise, performance may be impaired. Instructions for use • DRILLCUT-X II/DRILLCUT-X II-35 • WWK497_EN_V1.0_03-2020_IFU_CE-MDR...
- Page 10 Do not open the device! Arrange for service work to be carried out by the manufacturer or by personnel authorized by the manufacturer only. Any opening of the device by non- authorized personnel will void the warranty. Instructions for use • DRILLCUT-X II/DRILLCUT-X II-35 • WWK497_EN_V1.0_03-2020_IFU_CE-MDR...
-
Page 11: Product Description
Guide grooves for the handle Rotating wheel Irrigation port Connectors for guide grooves Suction device Clamping jaw Integrated connecting cable Cleaning adaptor 4.2 Product overview for applied parts 40712050 Reusable shaver attachments (applied parts) straight Instructions for use • DRILLCUT-X II/DRILLCUT-X II-35 • WWK497_EN_V1.0_03-2020_IFU_CE-MDR... - Page 12 Product description curved 35°/40° curved 65° Single-use shaver attachments (applied parts) straight curved 35°/40° curved 65° Single-use sinus burr (applied parts) curved 35°/40° Instructions for use • DRILLCUT-X II/DRILLCUT-X II-35 • WWK497_EN_V1.0_03-2020_IFU_CE-MDR...
-
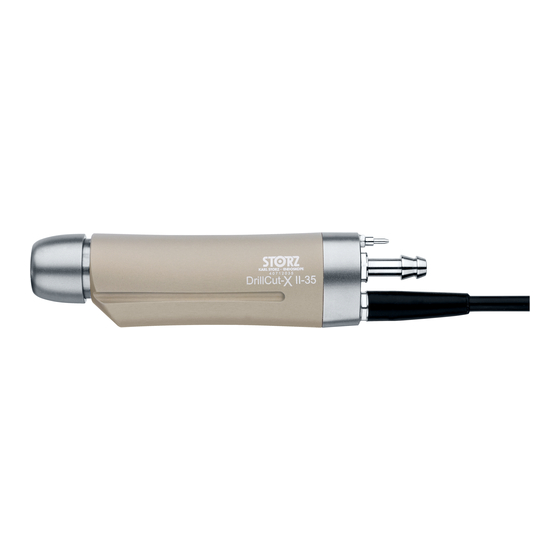
Page 13: Product Overview 40712035
Irrigation port Connectors for guide grooves Suction device Clamping jaw Integrated connecting cable Cleaning adaptor 4.4 Product overview for applied parts 40712035 Single-use sinus burr (applied parts) curved 15° curved 40° Instructions for use • DRILLCUT-X II/DRILLCUT-X II-35 • WWK497_EN_V1.0_03-2020_IFU_CE-MDR... - Page 14 Product description curved 40° curved 40° curved 70° Reusable shaver attachments (applied parts) straight curved 35°/40° curved 65° Single-use shaver attachments (applied parts) straight curved 35°/40° curved 65° Instructions for use • DRILLCUT-X II/DRILLCUT-X II-35 • WWK497_EN_V1.0_03-2020_IFU_CE-MDR...
-
Page 15: Symbols On The Packaging
Do not use if package is damaged. Temperature limit Humidity limit Air pressure limit Article no. Serial number Number of products in the product packaging Medical device Unsterile Type BF device Instructions for use • DRILLCUT-X II/DRILLCUT-X II-35 • WWK497_EN_V1.0_03-2020_IFU_CE-MDR... -
Page 16: Included With Delivery
DRILLCUT-X II-35 shaver handpiece, model 40712035 with integrated connecting cable – Cleaning adaptor 41250 RA Optional accessories Handle, adjustable, model 40712090, for use with all DRILLCUT-X II shaver handpieces Required accessories The DRILLCUT X II/DRILLCUT X II-35 shaver handpiece requires additional accessories for normal use: –... -
Page 17: Technical Data
Maximum speed 35,000 rpm Start-up maximum speed 35,000 rpm Rotation mode Rotation 4.9 Storage and usage conditions NOTICE Improper storage may damage the product. The described storage and usage conditions must be complied with. Instructions for use • DRILLCUT-X II/DRILLCUT-X II-35 • WWK497_EN_V1.0_03-2020_IFU_CE-MDR... - Page 18 -20°C to 60°C Relative humidity 20% to 95% (non-condensing) Air pressure 500 hPa – 1,080 hPa Usage conditions Temperature 10°C to 30°C Relative humidity 30% to 70% (non-condensing) Air pressure 500 hPa – 1,080 hPa Instructions for use • DRILLCUT-X II/DRILLCUT-X II-35 • WWK497_EN_V1.0_03-2020_IFU_CE-MDR...
-
Page 19: Preparation
Before assembling ensure that the clamping jaw does not project beyond the guide channel. Insert the handle with the guide in the guide grooves of the DRILLCUT X II/DRILLCUT X II-35 shaver handpiece and push it into the desired position. Instructions for use • DRILLCUT-X II/DRILLCUT-X II-35 • WWK497_EN_V1.0_03-2020_IFU_CE-MDR... -
Page 20: Connecting The Suction And Irrigation Tubes
5.4 Assembling the reusable shaver attachments WARNING Both sheaths must have the same article number. If the sheaths are assembled incorrectly, this can generate excessive heat and wear at the tip of the shaver attachments. Instructions for use • DRILLCUT-X II/DRILLCUT-X II-35 • WWK497_EN_V1.0_03-2020_IFU_CE-MDR... - Page 21 Pull back and hold the lock of the DRILLCUT X II/DRILLCUT X II-35 shaver handpiece. Insert the shaver attachment into the handpiece as far as it will go. Release the lock 2. ð The shaver attachment is locked in place. Instructions for use • DRILLCUT-X II/DRILLCUT-X II-35 • WWK497_EN_V1.0_03-2020_IFU_CE-MDR...
-
Page 22: Assembling The Single-Use Shaver Attachments
Insert the inner sheath into the outer sheath from behind. Pull back and hold the lock of the DRILLCUT X II/DRILLCUT X II-35 shaver handpiece. Insert the shaver insert into the handpiece as far as it will go. Instructions for use • DRILLCUT-X II/DRILLCUT-X II-35 • WWK497_EN_V1.0_03-2020_IFU_CE-MDR... -
Page 23: Assembling The Single-Use Sinus Burr
Insert the inner sheath into the outer sheath from behind. Pull back and hold the lock of the DRILLCUT X II/DRILLCUT X II-35 shaver handpiece. Insert the sinus burr into the handpiece as far as it will go. Instructions for use • DRILLCUT-X II/DRILLCUT-X II-35 • WWK497_EN_V1.0_03-2020_IFU_CE-MDR... - Page 24 ð The sinus burr is locked in place. Check that it is firmly in place by gently pulling the adjustment wheel axially. Check the rotating function by rotating the adjustment wheel. Instructions for use • DRILLCUT-X II/DRILLCUT-X II-35 • WWK497_EN_V1.0_03-2020_IFU_CE-MDR...
-
Page 25: Operation
Rinse the suction drill/shaver attachment with the DRILLCUT X II handpiece (with the cutting window open) immediately after use by activating the suction function, preferably with distilled water, in order to prevent the attachment from becoming blocked. Instructions for use • DRILLCUT-X II/DRILLCUT-X II-35 • WWK497_EN_V1.0_03-2020_IFU_CE-MDR... -
Page 26: Disassembly
Remove the shaver attachment or sinus burr from the instrument holder on the DRILLCUT-X II/DRILLCUT-X II-35 and release the lock again. Remove the suction tube from the suction port on the DRILLCUT-X II/DRILLCUT-X II-35. Remove the irrigation tube from the irrigation port of the DRILLCUT-X II/DRILLCUT- X II-35. - Page 27 Remove the handle from the handpiece by pushing it axially over the guide grooves. NOTICE Turning the rotating wheel clockwise when the handle is disassembled can damage the seal. Do not turn the rotating wheel clockwise while the handle is disassembled. Instructions for use • DRILLCUT-X II/DRILLCUT-X II-35 • WWK497_EN_V1.0_03-2020_IFU_CE-MDR...
-
Page 28: Maintenance, Servicing, Repairs, And Disposal
IEC 62353. 8.2 Repairing the product Repair work may only be performed by KARL STORZ or by a company authorized by KARL STORZ. The interventions described in this instruction manual are exempt from this rule. Please contact your local KARL STORZ subsidiary or authorized dealer (see the list of subsidiaries). -
Page 29: Accessories And Spare Parts
35° curved, 65° curved non-serrated, single-serrated, double-serrated, reusable or disposable (sterile), pack of 5. Sinus burr (applied parts): curved 15°, curved 40°, curved 70° For article numbers, see Endoscopes and instruments for ENT and Neurosurgery catalogs Instructions for use • DRILLCUT-X II/DRILLCUT-X II-35 • WWK497_EN_V1.0_03-2020_IFU_CE-MDR... -
Page 30: Fault Correction
No power output when Handpiece is damaged. Connect another footswitch or keys pressed. handpiece. Handpiece blocked or Clean handpiece. jammed. Speed cannot be regulated. Device is possibly damaged. Notify customer service. Instructions for use • DRILLCUT-X II/DRILLCUT-X II-35 • WWK497_EN_V1.0_03-2020_IFU_CE-MDR... -
Page 31: Electromagnetic Compatibility
Guidelines and manufacturer’s declaration – electromagnetic immunity The product is intended for use in the electromagnetic environment specified below. The user of the product should make sure that it is used in such an environment. Instructions for use • DRILLCUT-X II/DRILLCUT-X II-35 • WWK497_EN_V1.0_03-2020_IFU_CE-MDR... - Page 32 Immunity test acc. 3 V/m 80 MHz to 3 V/m 80 MHz to to IEC 61000-4–3 2.7 GHz 2.7 GHz for radiated, ra- * Refer to Table 2 for wireless proximity RF field test levels Instructions for use • DRILLCUT-X II/DRILLCUT-X II-35 • WWK497_EN_V1.0_03-2020_IFU_CE-MDR...
- Page 33 4, 25, UMTS 2,450 2,400 – 2,570 Bluetooth, Pulse modula- WLAN 802.11 tion b/g/n, 217 Hz RFID 2450, LTE band 7 5,240 5,100 – 5,800 WLAN 802.11 Pulse modula- tion 5,500 217 Hz 5,785 Instructions for use • DRILLCUT-X II/DRILLCUT-X II-35 • WWK497_EN_V1.0_03-2020_IFU_CE-MDR...
- Page 34 = 1.2 √P 80 MHz to 800 MHz d = 2.3 √P 800 MHz to 2.5 GHz Interferences may occur in the vicinity of equipment marked with the following symbol: Instructions for use • DRILLCUT-X II/DRILLCUT-X II-35 • WWK497_EN_V1.0_03-2020_IFU_CE-MDR...
- Page 35 The customer or user of the product can help prevent electromagnetic interference by maintaining a minimum distance between portable and mobile HF communications equipment (transmitters) and the product as recommended below, according to the output energy of the communications equipment. Instructions for use • DRILLCUT-X II/DRILLCUT-X II-35 • WWK497_EN_V1.0_03-2020_IFU_CE-MDR...
- Page 36 Note: At 80 MHz and 800 MHz, the separation distance for the higher frequency range ap- plies. Note: These guidelines may not apply in all situations. The propagation of electromagnetic waves is affected by absorptions and reflections of buildings, objects, and people. Instructions for use • DRILLCUT-X II/DRILLCUT-X II-35 • WWK497_EN_V1.0_03-2020_IFU_CE-MDR...
- Page 37 Phone: +358 (0)96824774, Fax: +358 (0)968247755 Email: asiakaspalvelu@karlstorz.fi KARL STORZ Endoskope Greece M.E.P.E.* Patriarhou Grigoriou E’ 34, 54248 Thessaloniki, Greece Phone: +30 2310 304868, Fax: +30 2310 304862 Email: info-gr@karlstorz.com *Repair & Service Subsidiary Instructions for use • DRILLCUT-X II/DRILLCUT-X II-35 • WWK497_EN_V1.0_03-2020_IFU_CE-MDR...
- Page 38 No. 8 Commonwealth Lane #03-02, Singapore 149555, Singapore Phone: +65 69229150, Fax: +65 69229155 KARL STORZ ENDOSKOPE – East Mediterranean and Gulf (Offshore) S.A.L. Email: infoasia@karlstorz.com Spark Tower 1st floor Charles Helou St., Horch Tabet – Sin El Fil, Beirut,...
- Page 39 Subsidiaries Instructions for use • DRILLCUT-X II/DRILLCUT-X II-35 • WWK497_EN_V1.0_03-2020_IFU_CE-MDR...
- Page 40 KARL STORZ SE & Co. KG Dr.-Karl-Storz-Straße 34 78532 Tuttlingen Postfach 230 78503 Tuttlingen Germany Phone: +49 7461 708-0 Fax: +49 7461 708-105 E-mail: info@karlstorz.com www.karlstorz.com...
Need help?
Do you have a question about the DRILLCUT-X II and is the answer not in the manual?
Questions and answers
sterilization instructions Drill Cut II