Table of Contents
Advertisement
Quick Links
Advertisement
Table of Contents

Subscribe to Our Youtube Channel
Related Manuals for Ryobi RPGENINV4K


Summary of Contents for Ryobi RPGENINV4K
- Page 1 RPGENINV4K...
-
Page 2: Intended Use
■ Do not connect the product to a building’s electrical IMPORTANT! system unless the product and the transfer switch have It is essential that you read the instructions in this manual been properly installed, and the electrical output has before assembling, operating, and maintaining the been verified by a qualified electrician. -
Page 3: Generator Safety Warnings
FUEL AND REFUELLING GENERATOR SAFETY WARNINGS ■ Allow the product to cool down for five minutes before WARNING! When the product is used to supply a refuelling. building wiring system, the product must be installed by a ■ Loosen the fuel cap slowly to release pressure and to qualified electrician and connected to a transfer switch as a keep fuel from escaping around the cap. -
Page 4: Symbols On The Product
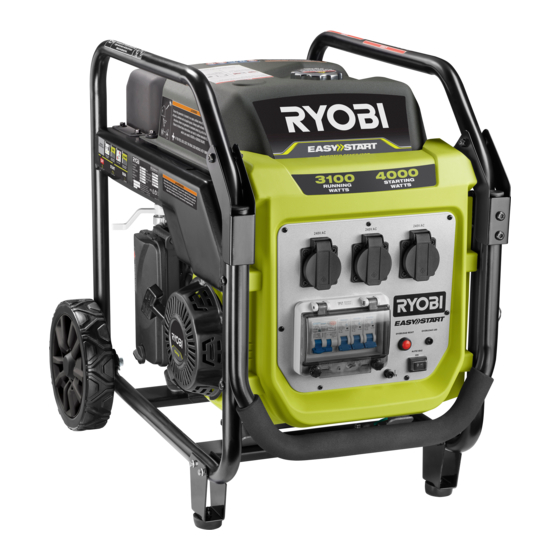
SYMBOLS ON THE PRODUCT Safety alert Read and understand all instructions before operating the product. Follow all warnings and safety instructions. Risk of fire. Do not add fuel while the product is operating. The product is a potential source of electric shock. - Page 5 RPGENINV4K Oil cap Fuel cap Frame Pin release Start lever AC outlet covers Folding handle Circuit breakers LED indicator Overload reset button Switch button Starter grip Rubber foot bracket Operator's manual Air filter Air filter cover Knob Wheel Know your product...
- Page 6 Align the rubber foot bracket with the Insert bolts through the rubber foot Position the axle on the frame so that it holes in the frame. bracket, then through the frame. aligns with the hole in the frame. Thread lock nuts onto the bolts and turn clockwise to tighten.
- Page 7 Slide a washer onto the axle, then slide the axle into the wheel mounting hole. Remove the pin release to unlock the Insert the hitch pin to secure the wheel and axle. The hitch pin should be pushed handle. Lift the handle, then reattach into the axle until the center of the rest on top of the axle.
- Page 8 Using the AC outlets and Overload reset switch Maintaining the p.12 spark plug Changing engine p.13 lubricant Cleaning the p.14 air filter Operating the p.10 single output switch Operating the Cleaning and storing p.11 p.15 the product main output switch...
-
Page 9: Overload Reset Switch
15-30s USING OUTLETS OVERLOAD RESET SWITCH 1. Turn the start lever to the START position. Pull the starter grip until the product runs. NOTE: Do not allow the starter grip to snap back after starting. Return it gently to its original place. 2. - Page 10 5. Disconnect the device from the AC outlet then press the overload reset button, wait for the product to function normally, and connect the appropriate load. OPERATING THE SINGLE OUTPUT SWITCH 1. Connect the device to be powered to the AC outlet.
- Page 11 OPERATING MAIN OUTPUT SWITCH 1. Connect the device to be powered to the AC outlet. NOTE: The main output switch controls the output in all the AC outlets. If these are in the OFF position, the current is too high. 2.
-
Page 12: Maintaining The Spark Plug
MAINTAINING THE SPARK PLUG 1. Turn the start lever to the OFF position to turn off the product. 2. Remove the spark plug cap. Remove the spark plug using a spark plug wrench or socket. 3. Inspect the spark plug for damage, and clean it with a wire brush before reinstalling. - Page 13 CHANGING ENGINE LUBRICANT 1. Turn the start lever to the OFF position to turn off the product. 2. Remove the oil cap. 3. Remove the oil drain plug. 4. Allow lubricant to drain completely into an approved container. NOTE: Drain the lubricant while the engine is still warm but not hot.
-
Page 14: Cleaning The Air Filter
CLEANING THE AIR FILTER 1. Turn the knob counterclockwise to unlock the air filter cover. Remove the cover and set it aside. Remove the filter element. 2. If the filter element is dirty, clean it with warm, soapy water. Rinse and let it dry. Apply a light coat of engine lubricant to the element, then squeeze it out. - Page 15 CLEANING STORING PRODUCT 1. Turn the start lever to the OFF position to turn off the product. 2. Remove all foreign materials from the product. Clean the product with a soft, dry cloth, or cleaning brush. Clean air vents with low pressure air that does not exceed 25 psi.
-
Page 16: Maintenance Schedule
MAINTENANCE SCHEDULE After 1st month Every 3 months Every 6 months Before each Every 12 months or after or 20 hours of or 50 hours of or 100 hours of 300 hours of operation operation operation operation Check the engine lubricant Change the engine lubricant Check the air filter Clean the air filter... -
Page 17: Troubleshooting
TROUBLESHOOTING If these solutions do not solve the problem, contact an authorised service centre. Problem Possible cause Solution The engine does The engine switch is off. Turn engine switch on. not start. The fuel valve is OFF. Turn fuel valve to ON position. There is no fuel. -
Page 18: Product Specifications
A-Weighted sound power level = 95.26 dB(A) Uncertainty of measurement K = 0.75 dB 96 dB(A) REPLACEMENT PARTS Spark plug TORCH F7RTC or NGK BPR7ES NOTE: Visit your local special orders desk or contact RYOBI customer service for replacement parts. - Page 20 Unit C, 70 Business Parade South, Highbrook, Auckland 2013, New Zealand RYOBI is a trade mark of Ryobi Limited, and is used under license. TORCH is a registered trade mark of ZhuZhou Torch Spark Plug Company Limited. NGK is a registered mark of NGK Spark Plug Co Limited.
Need help?
Do you have a question about the RPGENINV4K and is the answer not in the manual?
Questions and answers