
Related Manuals for Ryobi RGN1200A


Summary of Contents for Ryobi RGN1200A
- Page 1 RGN1200A PORTABLE GENERATOR SET OPERATOR'S MANUAL Important! It is essential that you read the instructions in this manual before assembling, maintaining and operating this machine. Subject to technical modifications.
-
Page 2: Circuit Breaker
CARBURETOR DRAIN SCREW Fig. 1 Fig. 2 FUEL CAP CIRCUIT BREAKER FUEL TANK CHOKE LEVER AIR FILTER RECOIL OIL CAP/ DIPSTICK Fig. 3 STARTER GRIP FUEL CAP FUEL TANK OIL CAP/ OIL CAP/ DIPSTICK DIPSTICK OIL FILL HOLE Fig. 4 Fig. -
Page 3: Fuel Valve
RECOIL STARTER GRIP Fig. 6 CHOKE LEVER CHOKE LEVER TO START TO START (CHOKE CLOSED) (CHOKE CLOSED) TO RUN (CHOKE OPEN) FUEL VALVE Fig. 7 Fig. 8 LATCHES LATCHES AIR FILTER Fig. 9... -
Page 4: Spark Plug
OIL DRAINAGE PLUG Fig. 10 SPARK PLUG FUEL VALVE FILTER O-RING SEDIMENT SPARK PLUG Fig. 11 Fig. 12 FUEL FUEL LINE VALVE BARB Fig. 13... -
Page 5: Important Safety Instructions
English INTRODUCTION Do not touch bare wire or receptacles. Do not use the generator with electrical cords which This product has many features for making its use are worn, frayed, bare, or otherwise damaged. more pleasant and enjoyable. Safety, performance, and Before storing, allow the engine to cool. - Page 6 English Keep children a minimum of 3m away from the other than the equipment grounding conductor. Failure to isolate the generator from power utility generator at all times. can result in death or injury to electric utility The unit operates best in temperatures between 5°C workers.
- Page 7 English SYMBOLS Some of the following symbols may be used on this tool. Please study them and learn their meaning. Proper interpretation of these symbols will allow you to operate the tool better and safer. SYMBOLS DESIGNATION/EXPLANATION Do not expose to rain or use in damp locations. To reduce the risk of injury, the user must read and understand the operator’s manual before using this product.
- Page 8 English Add oil. Oil level should fall within the level indicator area on the dipstick. Waste electrical products should not be disposed of with household waste. Please recycle where facilities exist. Check with your Local Authority or retailer for recycling advice. SYMBOLS SYMBOL SIGNAL...
- Page 9 English SYMBOLS SAFETY LABELS HOT SURFACE WARNING The information below can be found on the generator. Do not touch the muffler or aluminium cylinder of the For your safety, please study and understand all of the engine. They are very HOT and will cause severe burns. labels before starting the generator.
-
Page 10: Generator Capacity
English ELECTRICAL Never add more loads than the generator capacity. Take special care to consider surge loads in generator capacity as previously described. GENERATOR CAPACITY CAUTION: Make sure the generator can supply enough continuous Do not overload the generator’s capacity. Exceeding the (running) and surge (starting) watts for the items you will generator’s wattage/amperage capacity can damage the power at the same time. - Page 11 English FEATURES Model RGN1200A AC Output AC Frequency (Hz) AC Output voltage (V) Rated AC Output (W) Rated Current (A) Circuit Breaker (A) Power Factor Generator Mode Floating Neutral DC Output Volts Amps Engine Engine Number UP154 Engine Type 4-Stroke; air-cooled OHV; Gasoline...
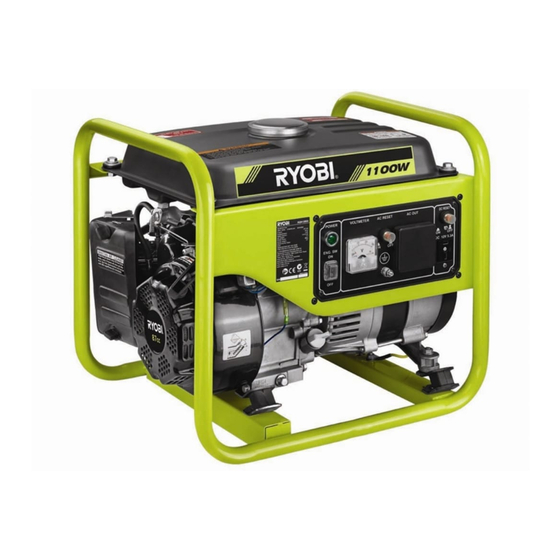
- Page 12 English FEATURES RECEPTACLES Your generator has the following single phase, 50 Hz outlets: one 230 Volt AC, 15 Amp receptacle. These can be used KNOW YOUR GENERATOR for operating appropriate appliances, electrical lighting, See Figure 3. tools, and motor loads. The safe use of this product requires an understanding of the information on the product and in this operator’s manual RECOIL STARTER GRIP...
-
Page 13: Operation
English WARNING: and motor loads. If any parts are damaged or missing do not BEFORE OPERATING THE UNIT operate this product until the parts are replaced. Position the generator on a flat surface before checking Failure to heed this warning could result in fluid levels or adding fluid. -
Page 14: Starting The Engine
English NOTE: Fuel stabiliser and unleaded fuel can be Start the engine. (refer to "STARTING THE ENGINE" mixed prior to filling the tank by using a gasoline can section) or other approved fuel container and shaking gently NOTE: Do not start the vehicle while the battery to combine. -
Page 15: Maintenance
CLEANING FUEL SEDIMENT CUP WARNING: See Figure 11. When servicing, use only identical Ryobi replacement parts. Use of any other parts may The sediment cup prevents dirt and water that may have create a hazard or cause product damage. -
Page 16: Spark Arrestor
English SPARK ARRESTOR Product users in some areas, must comply with fire prevention regulations. This product is equipped with a spark arrestor. DRAINING FUEL TANK / CARBURETOR When not using a fuel stabiliser, draining the fuel from the tank and carburetor before storage may help prevent gum deposits in the fuel system. -
Page 17: Storage Time
English MAINTENANCE STORAGE When preparing the generator for storage, follow the guidelines below. STORAGE TIME PRIOR TO STORING No special preparation is required. Less than 1 month Empty fuel from fuel tank. 1 to 2 months Empty fuel from fuel tank. 2 months to 1 year Drain fuel from carburetor. - Page 18 English MAINTENANCE PROBLEM POSSIBLE CAUSE SOLUTION Engine will not start. Engine switch is OFF. Turn engine switch to ON. No fuel. Fill fuel tank. Oil level is low. Check engine oil level and fill, if necessary. Fuel valve is OFF. Turn fuel valve ON.
- Page 19 English...
- Page 20 Techtronic Industries (Australia) Pty. Ltd. Level 1, 660 Doncaster Road Doncaster, VIC 3108, Australia Techtronic Industries New Zealand Ltd. 18-26 Amelia Earhart Avenue Mangere, Auckland 2022, New Zealand...
Need help?
Do you have a question about the RGN1200A and is the answer not in the manual?
Questions and answers