
Related Manuals for Eighteeth CuringPen-E


Summary of Contents for Eighteeth CuringPen-E
-
Page 1: Curingpen-E
CuringPen-E Dental Curing Light USER MANUAL Changzhou Sifary Medical Technology Co.,Ltd. - Page 2 Version: S03 IFU-6535021 Issued: 2022.03.30 Size: 180mm×87mm...
-
Page 3: Table Of Contents
3. Before Use ..............7 3.1 Scope of application ........7 3.2 Contraindications ........... 7 4. Setting up the CuringPen-E ........9 4.1 Install the light source head ......9 4.2 Install the disposable sleeve ......9 4.3 Install the protective light shield ....9 4.4 Plug the adapter ........... -
Page 4: Scope Of Curingpen-E
Scope of CuringPen-E 1.Scope of CuringPen-E 1.1 Parts Identification ○ Disposable sleeve ○ Light source head ○ Protective light shield ○ Adapter ○ Handpiece ○ Base Page 4 / 33... -
Page 5: Components And Accessories
Scope of CuringPen-E 1.2 Components and accessories Handpiece (1pcs) Light source head (1pcs) 6551021 6551020 Disposable sleeves (100 pcs) Base (1pcs) 6531034 6551022 Protective light shield (1pcs) Manual(1pcs) 6551005 6535021 For different regions, there are several different adapter options to be selected as follows. -
Page 6: Symbols Used
Symbols Used 2. Symbols Used If the instructions are not followed properly, operation may lead to hazards for the product or the user/patient. Additional information, explanation operation and performance. Serial number Catalogue number Manufacturer Date of manufacture Class II equipment Type B applied part Direct current Dispose of in accordance with the WEEE... -
Page 7: Before Use
Before Use 3. Before Use 3.1 Scope of application CuringPen-E is intended to cure dental resins and composites. This device must only be used in hospital environments, clinics or dental offices by qualified dental personnel and not used in the oxygen-rich environment. - Page 8 Before Use 5. If the light emission window cannot be optimally placed in relation to the composite restoration, the restoration must be polymerized using a conventional method. If soft tissue exposure to the curing light cannot be avoided, the Turbo Mode must not be used, as exposure may result in damage of the soft tissues.
-
Page 9: Setting Up The Curingpen-E
Setting up the CuringPen-E 4.Setting up the CuringPen-E installation. Do not use 4.1 Install the light source head damaged light source head and handpiece. Make sure the light source head align to the slots of the After installing the light handpiece. -
Page 10: Plug The Adapter
Setting up the CuringPen-E Disposable sleeves must be discarded after each use. The light source head, protective light shield , Base handpiece should be cleaned and disinfected after each NOTE treatment. Only original adapter used.Otherwise, device 4.4 Plug the adapter damaged. -
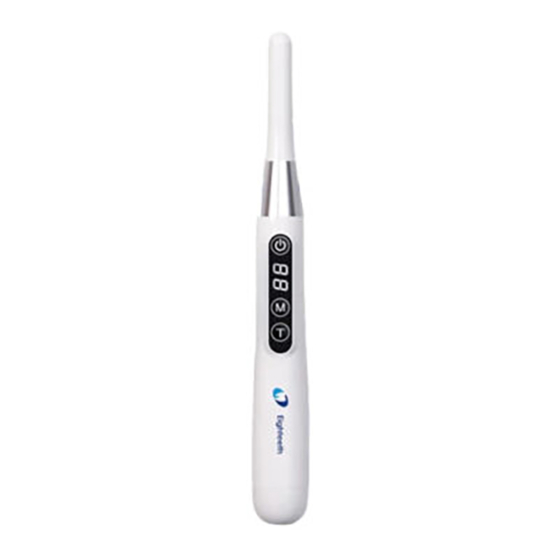
Page 11: Use Interface
Use Interface 5.Use Interface 5.1 Panel key ○ Main switch ○ 2 “M” Mode key ○ 3 “T” Time key Turn Power On Press more than 0.5 seconds to turn on the device,the screen lights up with green letters numbers indicating it is on. -
Page 12: Setting
Setting 6.Setting 6.1 Selecting memory mode Memory mode setting There are 5 built-in memory programs, namely P1 Normal Mode,P2 High Power Mode,P3 Turbo Mode,P4 Pulse Mode,P5 Ramp Mode. Press setting key to enter the mode setting menu.In the menu,press setting key gently again to change the memory. -
Page 13: Operation
Operation 7.Operation 7.1 Handpiece operation In the off state,short press turn on the device, and then select one mode,and then short press start the light intensity output, and the time will start counting down. Press to stop the output during the light intensity output. - Page 14 Operation NOTE To prevent the lamp from injurying patients by overheating, after the device is used continuously 300 seconds at P2 High Power Mode and P3 Turbo Mode, it will be prohibited to use the highest light intensity output within 60 seconds. ...
-
Page 15: Operation Mode
Operation 7.2 Operation mode Normal Mode Light intensity :1200mW/cm² Wavelength:380nm-515nm When is pressed, the set light intensity is output immediately. There is a beep prompt after finishing treatment, or every 5 seconds while working. light intensity 100% Time High Power Mode Light intensity: 2000mW/cm²... - Page 16 Operation Pulse Mode Light intensity: 1200mW/cm² Wavelength: 380nm-515nm When is pressed, the set light intensity is output immediately and flashes once every 1 second. There is a beep prompt after finishing treatment, or every 5 seconds while working. Ramp Mode Light intensity: 1200mW/cm²...
-
Page 17: Charge
Operation 7.3 Charge When the “E0” low battery prompt appears on the screen, it means the battery is exhausted, please charge it in time.How to plug the adapter is described in the Chapter 4.4 Plug the adapter. During charging, the charging indication “... - Page 18 Operation If pluging the adapter while the device is working, other functions of the device will forcibly stop,and then the device will enter charging status. When the device is not used for a long time, please change the device at least once a month. ...
-
Page 19: Maintenance
Maintenance 8.Maintenance 8.1 Foreword For hygiene and sanitary safety purpose, the handpiece, light source head and protective light shield must be cleaned and disinfected even if the disposable sleeve is used. They should be cleaned and disinfected before each usage to prevent any contamination. This concerns the first use as well as the subsequent uses. - Page 20 Maintenance contamination, disinfect the above components. Reprocessing Instructions Preparation before cleaning: Immediately after using, remove the used disposable sleeve. Disconnect all plug connections. Put the handpiece, light source head and protective light shield in container for transportation. Warning Make sure that used sleeves are disposed of as infected waste which is potentially biologically hazardous.
- Page 21 Maintenance 1.Do not disinfect the handpiece and light source head in an autoclave or other sterilization container. 2.Do not soak or immerse any part of the handpiece and light source head in liquid. Storage: Store the components in a clean and dry place for the next treatment. Page 21 / 33...
-
Page 22: Error Warning
Error Warning 9.Error Warning When the indication "E0" blinks on the screen, it means the battery is exhausted, please charge it in time. If the error warning persists, please contact your local distributor. When the indication "E1" blinks on the screen, it indicates that the light source head has failed. -
Page 23: Troubleshooting
Troubleshooting 10.Troubleshooting When trouble is found, check the following points before contacting your distributor. If none of these are applicable or the trouble is not remedied even after action has been taken, the product may have failed. Please contact your distributor. - Page 24 Troubleshooting The circuit Contact your local light source head is distributor. “E2” error short. warning. Contact your local Handpiece is broken. distributor. number Keep the device from “EH” error using High light working for 60 seconds warning. intensity mode reachs before continuing.
-
Page 25: Technical Data
Technical Data 11.Technical Data Changzhou Sifary Medical Technology Manufacturer Co.,Ltd Model CuringPen-E 19cm×16.5cm×7.5cm±1cm Dimensions 660g±10% Weight Lithium battery: 3.7V, Power supply 1400mAh, ±10% Charger power supply AC 100-240 V, ±10% Charger power output 50/60Hz,±10% Power Frequency Charger nominal power input 0.2A... -
Page 26: Emc Tables
– Guidance electromagnetic emissions The CuringPen-E is intended for use in the electromagnetic environment specified below. The customer or the user of the CuringPen-E should assure that it is used in such an environment. Electromagnetic Emissions test Compliance environment-guidance... - Page 27 EMC Tables Electrostatic +/- 8 kV contact Floors should be discharge contact wood, concrete or (ESD) ceramic tile. 61000-4-2 +/- 2 kV, +/- 4 +/- 2 kV, +/- 4 floors are covered kV, +/- 8 kV, kV, +/- 8 kV, +/- with synthetic +/- 15 kV air...
- Page 28 – electromagnetic immunity The CuringPen-E is intended for use in the electromagnetic environment specified below. The customer or the user of the CuringPen-E should assure that it is used in such an environment. Proximity IEC 61000-4- Compliance Electromagnetic –...
- Page 29 EMC Tables The CuringPen-E is intended for use in the electromagnetic environment specified below. The customer or the user of the CuringPen-E should assure that it is used in such an environment. Electromagnetic 60601 Compliance Immunity test environment test level...
- Page 30 When they are used in close proximity to medical equipment and/or systems, the medical equipment and/or systems’ basic safety and essential performance may be affected. The CuringPen-E has been tested with the immunity test level in the below table and meet the related requirements of IEC 60601-1-2:2014+A1:2020.
- Page 31 Shielded or not Remark Adapter Cable 2. Use of CuringPen-E adjacent to or stacked with other equipment should be avoided because it could result in improper operation. If such use is necessary, CuringPen-E and the other equipment should be observed to verify that they are operating normally.
-
Page 32: Statement
Statement 13.Statement Service Life The service life of CuringPen-E series products is 5 years. Maintenance MANUFACTURE will provide circuit diagrams, component part lists, descriptions, calibration instructions to assist to SERVICE PERSONNEL in parts repair. Disposal The package should be recycled. Metal parts of the device are disposed as scrap metal. - Page 33 Statement Changzhou Sifary Medical Technology Co., Ltd Add: NO.99, Qingyang Road, Xuejia County, Xinbei District, Changzhou City, 213000 Jiangsu, P.R. China Tel: +86-0519-85962691 Fax: +86-0519-85962691 Email:Info@sifary.com Web: www.sifary.com Caretechion GmbH Tel: +49 211 2398 900 Add: Niederrheinstr. 71, 40474 Duesseldorf, Germany Email:info@caretechion.de All rights reserved.
Need help?
Do you have a question about the CuringPen-E and is the answer not in the manual?
Questions and answers