Table of Contents
Advertisement
Advertisement
Table of Contents

Related Manuals for Eighteeth Helios 600


Summary of Contents for Eighteeth Helios 600
- Page 1 Helios 600 USER MANUAL Changzhou Sifary Medical Technology Co., Ltd...
- Page 2 Version: R01 IFU-7635001 Issued: 2021.11.8 Size: 100mm x 150mm.
-
Page 3: Table Of Contents
3.3 Safety Instructions ..........8 4. Product Installing ............ 11 4.1 Installation Environment Requirements ....11 4.2 Connecting the Helios 600 to the Computer Terinal.11 4.3 Software Installing ..........12 4.5 Software Update ..........12 4.6 Helios 600 Mounting ......... 12 5. - Page 4 11.4 Cleaning and High-Level Disinfecting Tips ..41 11.5 Manually cleaning HELIOS 600 Tips .... 42 11.6 Cleaning the HELIOS 600 Tips in an Automatic Washer 42 11.7High-Level Disinfection for HELIOS 600 Tips 42 11.8 Cleaning and Sterilizing Tips ......42 11.9 Manually cleaning HELIOS 600 Tips ....
- Page 5 Table of Contents 11.10Cleaning the HELIOS 600 Tips in an Automatic Washer 43 11.11 Sterilization for HELIOS 600 Tips ....43 11.12 Visually Inspecting the Mirror in the Scanner Tip 11.13 Visually Inspecting the Scanner Tips for Damage 12 Troubleshooting ..........45 13 Electromagnetic Compatibility Precautions ..
-
Page 6: Helios 600 Components
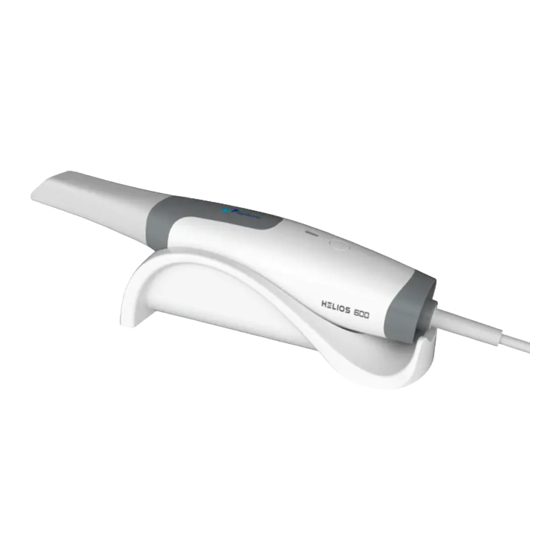
1. Helios 600 Components The Helios 600 consists of the following parts: 1.Reusable tip 2.Scanner 3.Hold of Scanner 4.USB Flash Driver Page 6 / 53... -
Page 7: Symbols
2. Symbols If the instructions are not followed properly, the operation may lead to hazards for the product or the user/patient. Additional information, explanation of operation, and performance. Serial number Catalogue number Manufacturer Date of manufacture Lot of manufacture Type BF applied part Dispose of in accordance with the WEEE directive Keep dry 55 C... -
Page 8: Introduction
3. Introduction 3.1 Indications for Use The HELIOS 600 is a digital optical scanning device used to record the topographic characteristics of teeth or dental impressions in three dimensions. The resulting topographic impressions are intended for use in the computer-aided design and manufacturing of dental restorative prosthetic devices, dental implant prosthetic devices, and orthodontic models. - Page 9 DO NOT remove the cover of any scanner components. The scanner contains no user- serviceable parts. For any repairs, contact a qualified Eighteeth service technician. DO NOT replace the cables provided with the scanner with other cables. Doing so may damage the scanner and adversely affect the safety protection and EMC performance of the scanner.
- Page 10 See the installation guide for your computer for information about the data processing system, computer, and screen. Leave a sufficient amount of clear space around the computer to ensure that it is properly ventilated. Position the screen to avoid light reflections from internal or external lighting for maximum image quality and visual comfort.
-
Page 11: Product Installing
Since this product is not equipped with a computer, during the installation of this product, customers need to provide an additional laptop or desktop computer. The specific performance requirements of the computer see Technical Specification 4.2 Connecting the Helios 600 to the Computer Terinal. Step Graphic Example Description... -
Page 12: Software Installing
If there is an update of Helios 600 software, we(Sifary) will notify local distributors (agents) and provide free installation U disk, and the distributor(agents) will upgrade the software for everyone. 4.6 Helios 600 Mounting It is recommended to use the Helios 600 mounting bracket to place the Helios 600. Page 12 / 53... - Page 13 The installation method is as follows: The holder can be used as a desktop mount holder. Place the scanner in the holder when you are not using it. Page 13 / 53...
-
Page 14: Software Introduction
5. Software Introduction 5.1 HELIOS Interface Overview The HELIOS 600 scanner operates with HELIOS software. The HELIOS interface enables you to acquire 3D models in two ways: Partial arch scan: Several teeth in the preparation area on both the upper and lower jaws, and buccal bite registration. -
Page 15: Toolbar Overview
Option Menu: Access the system configuration and version information. Login Menu: Enables you to log in, log out and switch users. 5.2 Toolbar Overview Acquisition Step Toolbar Scan button: Enables you to scan the upper and lower arch, and the buccal bite registration. - Page 16 Quadrant Snapshot button: Displays a preview of five 2D images showing different views of the model. Transparency button: Set the transparency of the scanned model. Return to the up-level toolbar Display Toolbar True Color button: When selected, displays the 3D model in the actual color of the patient’s hard and soft tissues.
-
Page 17: Option Menu Overview
Scanner is in the holder Scanner tip is not detected 5.3 Option Menu Overview 5.3.1 Import/Export Scan Data Overview The import/export scan data menus allow users to export the current scan data to a specified folder, and import it later to continue scanning or perform other operations. If you need to continue scanning after importing the previously saved scan data, you must ensure that the scan data is acquired by the same scanner currently connected, otherwise you will not be able to perform subsequent scans on the imported... -
Page 18: Preference Dialog Overview
6.Preference Dialog Overview The Preferences dialog enables you to select the Acquisition interface and scanner settings 6.1 General 6.1.1 Language: Select the user interface language. 6.1.2 Tooth numbering system: Select the FDI/ISO or Universal as the tooth numbering system. 6.1.3 Automatically update software and firmware: When selected, Automatically update software version and firmware when connected to the network. -
Page 19: Display
6.2.1 Implant cut out diameter: Set the diameter of the automatic cut out areas in implant mode, it is recommended to choose a value slightly larger than the diameter of the scan body used. 6.2.2 Bite adjustment:When selected, the software will automatically correct over-bite after refinement. -
Page 20: Save
6.4 Save 6.4.1Save bite data: When selected, the bite registration relationship is saved as additional file along with the maxilla and mandibular files. 6.4.2 Automatically save scan history: When selected, scan history files are automatically saved when the scan is completed. When this option is enabled, users can customize the number of days and path for saving the scan history. -
Page 21: Getting Started
7.1.2. In the HELIOS window, Automatic display of the login window 7.1.3 Type your Eighteeth DataHub account information in the username and password fields, and click Login. 7.1.4.If the scanner is not activated, the device activation dialog will be displayed. -
Page 22: Start Acquiring 3D Models
For detailed information on cleaning, disin fection and sterilization, please refer to the HELIOS 600 User Manual: Safety, Regulatory and Technical Specifications. Avoid any liquid from leaking into the air outlet near the tip mount or the air inlet at the rear of the scanner (see the figure below), otherwise the scanner may be damaged. -
Page 23: Scanning Approach
During the scanning process, adjust the surgical light to keep the light away from the patient’s mouth to avoid interference with the scanner. 7.5Scanning Approach The recommended scanning method is to start with a molar, since it has greater details for easier identification. Change the scanning angle to less than 60 degrees during scanning to allow the surfaces to overlap, if the overlap is too small, the alignment may be lost. -
Page 24: Acquiring A 3D Model For Orthodontics
8 Acquiring a 3D Model for Orthodontics The common scan workflow allows you to scan either a partial or full arch. For either type of scan, you should scan upper jaw, lower jaw, and buccal bite registration. Once this basic information has been scanned, other scan types (such as scan body scanning) can be used to acquire other information. - Page 25 8.2.4. Slowly move the tip of the scanner along the occlusal surface to scan the remaining teeth in the arch. If Fill tooth holes with color is enabled, the holes will be displayed in the specified color. It is recommended to scan these areas until the holes disappear. 8.2.5.When the occlusal surface scan is complete, scan the lingual or buccal surface of the teeth in the arch.
-
Page 26: Scanning The Buccal Bite Registration
8.2.10. When you confirm that the 3D model of the upper and lower jaw is complete, continue with the buccal bite registration acquisition. 8.3 Scanning the Buccal Bite Registration To acquire a buccal bite registration, follow these steps: 8.3.1. On the HELIOS interface, select the Buccal Bite Registration acquisition mode Press the mode button on the scanner to select the buccal bite registration mode... -
Page 27: Completing And Saving The 3D Model
8.4.2. After the refining is complete, manipulate the refined 3D model using the following methods: Right-click and hold on the 3D model to move it in the window. Click and hold on the 3D model to rotate it. ... - Page 28 8.5.2. Complete the patient information, if necessary, you can add some attachments to the case. save ( 8.5.3. Click the button to save the case. Page 28 / 53...
-
Page 29: Acquiring A 3D Model For Restoration
9.Acquiring a 3D Model for Restoration To use the common scan workflow to obtain a 3D model for restoration use, you should acquire images of the upper jaw, lower jaw, and the buccal bite registration. In some cases, you can acquire images of a single arch (partial or full) and not obtain a buccal bite registration (for example, if there are no teeth in the opposing arch), but it is recommended that you acquire both arches and a buccal bite registration when possible. - Page 30 9.1.6. Go to the adjacent side of the preparation (including the distal and mesial points) to scan the 3D model of the adjacent side and the contact point of the preparation. After scanning the preparation, you can use the Lock tool to lock the scanned area to prevent it from being updated by additional scanning.
-
Page 31: Scanning The Buccal Bite Registration
opposite side referring to steps 7 to 9. 9.1.11. Check whether there are obvious holes in the 3D model and rescan if necessary. If there is a hole in the preparation area, rescan the area until the hole is filled. 9.1.12. -
Page 32: Marking The Preparation Areas
9.3 Marking the Preparation Areas After the scan is complete, you can mark the preparation areas for further processing. To mark one or more preparation areas, follow these steps: 9.3.1. On the HELIOS interface, select the jaw ( ) with preparation to activate the 3D model. -
Page 33: Completing And Saving The 3D Model
Right-click and hold on the 3D model to move it in the window. Click and hold on the 3D model to rotate it. Use the wheel of the mouse to zoom in or zoom out on the 3D model. ... -
Page 34: Acquiring A 3D Model For Implant
10.Acquiring a 3D Model for Implant To use the common scan workflow to obtain a 3D model for implant use, you should first acquire images of the upper jaw, lower jaw, and the buccal bite registration. After that you should rescan the jaw with the scan body in place. In some cases, you can acquire images of a single arch (partial or full) and not obtain a buccal bite registration (for example, if there are no teeth in the opposing arch), but it is recommended that you acquire both arches and a buccal bite registration when... -
Page 35: Scanning The Buccal Bite Registration
remaining teeth in the arch. If Fill tooth holes with color is enabled, the holes will be displayed in the specified color. It is recommended to scan these areas until the holes disappear. 10.2.5. When the occlusal surface scan is complete, scan the lingual or buccal surface of the teeth in the arch. -
Page 36: Marking The Implant Areas
10.3.3. Press the Star Scan button, slowly move the scanner tip in mesial direction with equal coverage of upper and lower teeth. The example below shows a buccal bite registration. You can use the toolbar on the left side to switch between the scanned occlusion views, or delete the scanned occlusion views for rescanning. -
Page 37: Installing And Scanning The Scan Body
10.4.3. Rotate the 3D model if necessary, and mark all the implant areas. You can click and hold the middle mouse button to rotate the 3D model when using tools such as Cut , Lock and Mark tooth . 10.4.4. Click the Return button to quit Mark tooth tool. -
Page 38: Refining And Checking The 3D Model
If there are more than one adjacent scan bodies that cause mismatch, you can click the scan body placeholder at the bottom of the interface to specify the area for matching. The activated matching area is highlighted in a column. Click on an activated scan body placeholder again to restore the global match. -
Page 39: Completing And Saving The 3D Model
Click the True color button to view the color or monochrome 3D model. Click the Zoom fit button to scale the model to its best view. Click the Six Views button to see six views of the 3D model. ... -
Page 40: 11Cleaning, Disinfecting, And Sterilizing
11Cleaning, Disinfecting, and Sterilizing You must clean, disinfect, and sterilize the scanner and accessories regularly. The removable scanner tips can be high-level disinfected for up to 50 cycles. After 50 cycles, discard the tip. The removable scanner tips can be autoclaved for up to 20 cycles. After 20 cycles, discard the tip. -
Page 41: Visually Inspecting The Scanner For Damage
Dry the scanner tips thoroughly before mounting onto the scanner. Do not use an ultrasonic cleaning machine to clean the scanner tips. 11.4.1The Operator can clean HELIOS 600 Tips by one of following two way Manually cleaning HELIOS 600 Tips ... -
Page 42: Manually Cleaning Helios 600 Tips
(2 minutes). 11.5.3Rinse under clean, running water (2 minutes). 11.5.4Inspect HELIOS 600 tip. If the tip is not clean, repeat the steps11.5. 1-11.5.3. 11.5.5Use a lens tissue or lint-free cloth to remove any dust from the mirror in the tip. -
Page 43: Manually Cleaning Helios 600 Tips
EmPower) to all surfaces (2 minutes). 11.9.3 Rinse under clean, running water (2 minutes). 11.9.4 Inspect HELIOS 600 tip. If the tip is not clean, repeat the steps 1-3. 11.9.5 Use a lens tissue or lint-free cloth to remove any dust from the mirror in the tip. -
Page 44: Visually Inspecting The Mirror In The Scanner Tip
exposure time for 20 minutes. Important: Temperature should not exceed 121° C. Important: Exposure time should not exceed 20 minutes. 11.12 Visually Inspecting the Mirror in the Scanner Tip Before scanning, verify that the mirror inside the end of the tip does not have any smudges or scratches on it. -
Page 45: Troubleshooting
12 Troubleshooting HELIOS 600 Troubleshooting Instructions Problem Action Description There is mismatching and Remove mismatched data and excessive tissue overlap using the Cut tool and rescan. in the 3D image. After bite registration, Delete the incorrect bite view, and rescan. Enable bite there optimization option. - Page 46 The tip is installed but not Reinstall the tip, and make sure the tip is in firm detected. No live video is contact with the scanner. displayed, Scanner detected icon is displayed the bottom-right of the interface. Fogging appears on the Mount a completely dry tip on the scanner, and place inner surface of the lens the scanner in the holder or set it on the desk, and wait...
-
Page 47: Electromagnetic Compatibility Precautions
13.1.1 Guidance and Manufacturer’s Declaration - Electromagnetic Emissions The HELIOS 600 is intended for use in the electromagnetic environment specified below. The customer or user of the HELIOS 600 should assure that it is used in such an environment. 13.1.2Guidance and Manufacturer’s Declaration – Electromagnetic Immunity for 13.2... - Page 48 13.2.2 For the immunity to proximity fields from RF wireless communications equipment, the HELIOS 600 is compliant with the test levels specified below, according to IEC 60601-1-2 standard. The customer or user of the HELIOS 600 should assure that it is used in such an environment.
-
Page 49: Emc Standards For The Helios 600
If such use is necessary, this equipment and the other equipment should be observed to verify normal operation. 13.6 Regulatory Information The HELIOS 600 complies with the following regulations: (EU) 2017/745 Medical Device Regulation (MDR), Cass I following the Rule 5. ... -
Page 50: Compliance With European And International Standards
14 Compliance with European and International Standards EN 60601-1 / IEC 60601-1: Medical Electrical Equipment, Part 1: General Requirements for Basic Safety and Essential Performance ANSI/AAMI ES 60601-1: Medical Electrical Equipment - Part 1: General requirements for basic safety and essential performanceCAN/CSA-C22.2 No. 60601-1: Medical Electrical Equipment - Part 1: General requirements for basic safety and essential performance ... -
Page 51: Technical Specification
15 Technical Specification 15.1 Model Helios 600 15.2 HELIOS 600 Technical Specifications Components Technical Specifications Weight Scanner (cable included) without tip: 260g Tip: 12.5g Color 3D full color Connectivity USB 3.0 Power source USB 3.0 5V, 900mA Field of view... -
Page 52: Helios 600 Environmental Requirements
16.Helios 600 Environmental Requirements Components Environmental Requirements Operating Temperature 15° C ~ 30° C Transport and Storage Temperature -10° C ~ 60° C Operating Relative Humidity 10% ~ 65% RH Transportation and Storage Relative 10% ~ 95% RH Humidity Operating Atmospheric Pressure... - Page 53 Changzhou Sifary Medical Technology Co., Ltd Add: NO.99, Qingyang Road, Xuejia County, Xinbei District, Changzhou City, 213000 Jiangsu, P.R. China Tel: +86-0519-85962691 Fax: +86-0519-85962691 Email: ivy@sifary.com Web: www.eighteeth.com All rights reserved. Page 53 / 53...
Need help?
Do you have a question about the Helios 600 and is the answer not in the manual?
Questions and answers
Reset password