Table of Contents
Advertisement
Quick Links
Advertisement
Table of Contents

Subscribe to Our Youtube Channel
Related Manuals for Eighteeth E-PEX


Summary of Contents for Eighteeth E-PEX
- Page 1 E-PEX USER MANUAL...
- Page 2 P/N: IFU- 6135003 Version: 07 Issued: 2023.11.09 Size: 96mm 119mm ×...
-
Page 3: Table Of Contents
Content 1. Scope of E-PEX .................... 4 Parts Identification ..................4 Components ....................5 2. Symbols used ....................7 3. Before Use ..................... 9 Intended Use ....................9 Contra-indications ..................9 4. Installing the E-PEX ..................11 Install the E-PEX ..................11 Connection Operation................11 E-PEX Charging .................. -
Page 4: Scope Of E-Pex
1. Scope of E-PEX 1. Scope of E-PEX Parts Identification ○ Apex Locator(main unit) ○ Measuring Wire ○ File Clip ○ Lip Hook ○ Tester ○ Adapter Page 4 / 39... -
Page 5: Components
1. Scope of E-PEX Components Apex Locator (1pcs) File clip (2pcs) Tester(1pcs) Part No: 6051004 Part No: 6151012 Part No: 6015007 Measuring Wire (1pcs) Lip Hook (2pcs) Part No: 6015002 Part No: 6072002 For different regions, there are several different adapter options to be selected as follows. - Page 6 1. Scope of E-PEX American standard power Adapter (1pcs) plug (1pcs) American Part No: 6016007 Part No: 6016011 standard British standard power plug (1pcs) Part No: 6016009 Australian standard power Adapter (1pcs) plug (1pcs) Multi- Part No: 6016007 Part No: 6016010...
-
Page 7: Symbols Used
2. Symbols used in the User Manual 2.Symbols used General warning sign Caution Serial number Catalogue number Medical device Authorized representative in the European Community Manufacturer Country of manufacture + Date of manufacture Class II equipment Type BF applied part Keep dry CE marking 0197... - Page 8 2. Symbols used in the User Manual Manufacturer‘s Logo Sterilizable in a steam sterilizer (autoclave) at the temperature specified Temperature limitation Humidity limitation Atmospheric pressure limitation Page 8 / 39...
-
Page 9: Before Use
3. Before Use 3. Before Use Intended Use This apex locator is used to detect the apex of root canal. This device must only be used in hospital environments, clinics or dental offices by qualified dental personnel and not used in the oxygen-rich environment. - Page 10 Portable RF communications equipment (including peripherals such as antenna cables and external antennas) should be used no closer than 30 cm (12 inches) to any part of the E-PEX, including cables specified by the manufacturer. Otherwise, degradation of the performance of this equipment could result.
-
Page 11: Installing The E-Pex
Open rubber cover, plug data make sure connect properly. transfer cable into E-CONNECT. Turn on the E-PEX, and insert the other end of data transfer cable into E-PEX. Connect the file clip, measuring wire and lip hook as shown in the picture. - Page 12 4. Installing the E-PEX adapting it. Incorrect connection will result in inaccurate measurement, even the device cannot be used. If connect lip hook with black slot , the funtion of apex detection ca nnot be realized. 1. Insert the file into the contra angle.
-
Page 13: E-Pex Charging
4. Installing the E-PEX When the power indicator is as shown E-PEX Charging below, it indicates that the device is in When the power indicator charging. flashes, please stop using the device and charge it immediately. We suggest the user to charge the device when there is only one bar left. -
Page 14: Functions Setting
5. Functions Setting 5.Functions Setting Volume control Function Checking The E-PEX’s volume of the key 1. Press the Power switch to turn and alarm sounds can be adjusted. the device on. The display will Press the volume keys to cycle the show measuring interface. -
Page 15: Display
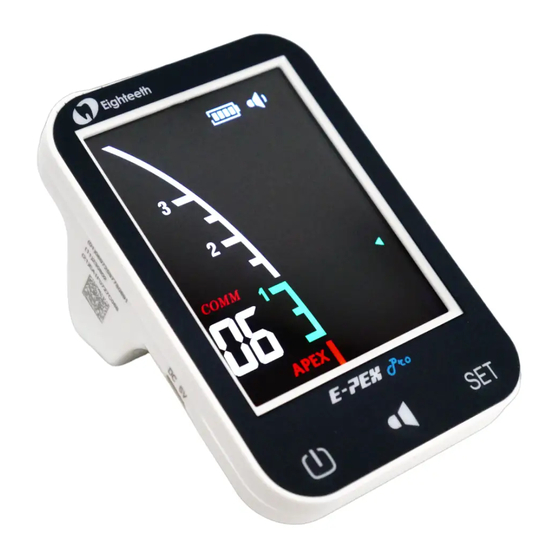
6. Display 6.Display Instruction 1. When the file reaches the front region of the apical foramen, the Avoid using apex locator for screen displays the white indicator working length determination in the bars (As shown in picture 1). following conditions: ... -
Page 16: Display The Root Canal On E-Connect
The position of the reference point abnormal unusual is automatically set with the E-PEX, morphology of the root canal. The and the cursor is displayed on the user needs to coordinate with x- E-CONNECT screen. -
Page 17: Not Suitable Condition
6. Display check the results. Accurate apex location may not always possible. It depends on tooth condition, case complexity, as well as degradation of the device. Not suitable condition Unsuitable situation of root canals for Electric Measurement Cannot obtain precise measurements if the root canal conditions as below Root canal with a large apical foramen root canal... - Page 18 6. Display blood, and then measure it. The root canal uses a chemical solution to flow out from the opening If a chemical solution flows out of the root canal, it is impossible to get an accurate measurement. It is important to remove the overflow from the opening.
- Page 19 6. Display Retreatment canal which was filled with gutta-percha gutta-percha must completely removed to eliminate its insulation, then pass a small file all the way through the apical Gutta-percha foramen and then put a little saline in the canal, but do not let it overflow the canal opening.
- Page 20 6. Display Caries Caries touching the gums touches gums In this case, electrical leakage through the caries infected area to the gums are impossible obtain accurate measurement. Difference measuring result between Apex locator reading and Radiography Sometimes the reading of the apex locator reading does not correspond to the X-ray image.
-
Page 21: Cleaning, Disinfection And Sterilization
7.Cleaning, Disinfection and Sterilization 7.Cleaning, Disinfection and Sterilization Foreword For hygiene and sanitary safety purpose, the components (file clip, lip hook) must be cleaned, disinfected and sterilized before each usage to prevent any contamination. This concerns the first use as well use the subsequent uses. - Page 22 7.Cleaning, Disinfection and Sterilization Do not use bleach or chloride disinfectant materials. Only the components above can be autoclaved. Before first use and after each use, sterilize the above components heat sources. Autoclave Procedure: Reprocessing Instructions Disconnect the components (Lip hook and file clip) from the main unit.
- Page 23 7.Cleaning, Disinfection and Sterilization The devices must be reprocessed in a disassembled state. Preparation for Decontamination: Do not fail to take out the file before cleaning the file clip. Observe suitable personal protective measures. Do a manual pre-cleaning, until the components are visually clean.
- Page 24 7.Cleaning, Disinfection and Sterilization (>40°C) emptying 5 min intermediate rinsing with warm water (>40°C) emptying The automated cleaning processes have been validated by using 0.5% neodisher MediClean forte (Dr. Weigert) Note Acc. to EN ISO 17664 no manual reprocessing methods are required for these devices.
- Page 25 7.Cleaning, Disinfection and Sterilization Automated Drying: Drying of outside of instrument through drying cycle of washer/disinfector. If needed, additional Drying: manual drying can be performed through lint free towel. Insufflate cavities of instruments by using sterile compressed air. Visual inspection for cleanliness of the components and reassembling.
- Page 26 7.Cleaning, Disinfection and Sterilization Use only approved autoclave devices according to EN 13060 or EN 285. Use a validated sterilization procedure according to EN ISO 17665. Respect the maintenance procedure of the autoclave device given by the manufacturer. Use only this recommended sterilization ...
-
Page 27: Disinfection
7.Cleaning, Disinfection and Sterilization RDS2020S0067 001 and RDS2020S0066 001 The instructions provided above have been validated by the manufacturer of the medical device as being capable of preparing a medical device for use. It remains the responsibility of the processor to ensure that the processing, as actually performed using equipment, materials and personnel in the processing facility, achieves the desired result. -
Page 28: Troubleshooting
8.Troubleshooting 8.Troubleshooting When trouble is found, check the following points before contacting your distributor. If none of these are applicable or the trouble is not remedied even after action has been taken, the product may have failed. Contact your distributor. Problem Cause Solution... -
Page 29: Technical Data
9. Technical Data 9.Technical Data Manufacturer Changzhou Sifary Medical Technology Co., Ltd Model E-PEX Dimensions 13cm x 11cm x11cm±1cm (package) Gross weight 0.56Kg±10% Display 3.5’ color LCD Power supply Lithium ion battery: 3.7V, 1500mAh European standard Model No: UE05LV2-050100SPA Adapter Input: AC 100-240 V,50/60Hz,0.2A... -
Page 30: Emc Tables
Guidance and manufacturer’s declaration – electromagnetic emissions The E-PEX is intended for use in the electromagnetic environment specified below. The customer or the user of the E-PEX should assure that it is used in such an environment. Electromagnetic environment -... - Page 31 10. EMC Tables Guidance and manufacturer’s declaration – electromagnetic immunity The E-PEX is intended for use in the electromagnetic environment specified below. The customer or the user of the E-PEX should assure that it is used in such an environment. IEC 60601...
- Page 32 10. EMC Tables Voltage dips 0% UT; 0.5 0% UT; 0.5 Mains power quality IEC 61000-4-11 cycle cycle should be that of a at 0°, 45°, 90°, at 0°, 45°,90°, typical commercial or 135°, 180°, 135°, 180°, hospital environment. If 225°, 270°, 225°, 270°, the user of devices...
- Page 33 10. EMC Tables Guidance and manufacturer’s declaration – electromagnetic immunity The E-PEX is intended for use in the electromagnetic environment specified below. The customer or the user of the E-PEX should assure that it is used in such an environment. Electromagnetic...
- Page 34 The E-PEX has been tested with the immunity test level in the below table and meet the related requirements of IEC 60601-1-2:2020. The customer and/or user should help keep a minimum distance between RF wireless communications equipment and the E-PEX as recommended below.
- Page 35 10. EMC Tables 800/900, TETRA Pulse 800-960 800, iDEN modulation 820,CDMA 18Hz 850, LTE Band 5 1720 GSM 1800; CDMA 1845 1900; Pulse 1700- GSM 1900; modulation 1990 DECT; 217Hz 1970 LTE Band 1, 3, 4, 25; UMTS Bluetooth, WLAN, Pulse 2400- 802.11...
- Page 36 Guidance and manufacturer’s declaration – electromagnetic immunity The E-PEX is intended for use in the electromagnetic environment specified below. The customer or the user of the E-PEX should assure that it is used in such an environment. Proximity IEC 61000-...
- Page 37 10. EMC Tables Use of E-PEX adjacent to or stacked with other equipment should be avoided because it could result in improper operation. If such use is necessary, E-PEX and the other equipment should be observed to verify that they are operating normally.
-
Page 38: Statement
11. Statement 11.Statement Service Life The service life of E-PEX series products is 3 years. It is recommended that the equipment be checked and repaired at the dealer once a year. Maintenance MANUFACTURER will provide circuit diagrams, component part lists,... - Page 39 Changzhou Sifary Medical Technology Co., Ltd. Add: No.99 Qingyang Road, Xuejia County, Xinbei District Changzhou city,213000 , Jiangsu, P.R. China Tel: +86-0519-85962691 Fax: +86-0519-85962691 Email: info@sifary.com Web: www.sifary.com Caretechion GmbH Tel: +49 211 2398 900 Add: Niederrheinstr. 71, 40474 Dü sseldorf, Germany Email: info@caretechion.de All rights reserved.
Need help?
Do you have a question about the E-PEX and is the answer not in the manual?
Questions and answers