Table of Contents
Advertisement
Quick Links
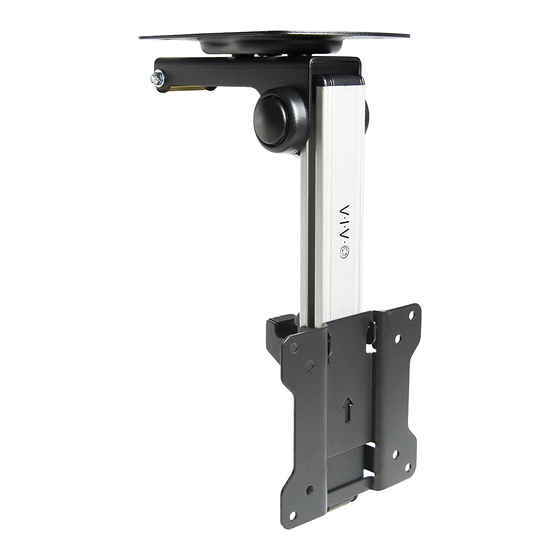
Flip Down Ceiling TV and Monitor Mount
Instruction Manual
SKU: MOUNT-M-FD27
Scan the QR code with your mobile device or follow the link
for helpful videos and specifications related to this product.
https://vivo-us.com/products/mount-m-fd27
GET IN TOUCH | Monday-Friday from 7:00am-7:00pm CST
help@vivo-us.com
www.vivo-us.com
Chat live with an agent!
309-278-5303
Advertisement
Table of Contents

Summary of Contents for Vivo MOUNT-M-FD27
- Page 1 Flip Down Ceiling TV and Monitor Mount Instruction Manual SKU: MOUNT-M-FD27 Scan the QR code with your mobile device or follow the link for helpful videos and specifications related to this product. https://vivo-us.com/products/mount-m-fd27 GET IN TOUCH | Monday-Friday from 7:00am-7:00pm CST help@vivo-us.com...
- Page 2 CAUTION! DO NOT INSTALL INTO DRYWALL ALONE. VERIFY YOUR CEILING CONSTRUCTION. USE WOOD STUDS TO MOUNT. We include mounting for concrete ceilings as well. If unsure, please contact us at vivo-us. com, email at help@vivo-us.com, or call us at 309-278-5303.
- Page 3 ASSEMBLY STEPS STEP 1 Remove screws connecting VESA Plate (A1) to Mount (A) using 4mm Allen Wrench (T-A). STEP 2 Slide the arm on Mount (A) down to release the lock, and unfold Mount (A).
- Page 4 STEP 3 OPTION A: Wood Beam Ceiling OPTION B: Concrete Ceiling Rotate Mount (A) to expose the front and back Hold Mount (A) to mounting surface and mark mounting holes. Hold it in place along the stud pilot holes with a pencil. Drill 2.4” (60mm) deep (use of a stud finder is recommended) and mark holes using a 3/8”...
- Page 5 STEP 4 OPTION A: Wood Beam Ceiling OPTION B: Concrete Ceiling Slide Mount (A) onto ST6.3x55mm Screw (W-A). Slide Mount (A) onto front two ST6.3x55mm Insert ST6.3x55mm Screw (W-A) with M6 Washer Screws. Insert ST6.3x55mm Screws (W-A) with M6 (W-C) into the back hole. Tighten both screws with Washers (W-C) into back two holes.
- Page 6 STEP 5 With TV laying face down on a flat surface, place VESA Plate (A1) on back. Make sure arrow is pointing towards the top of the TV. Secure VESA Plate (A1) in place using Screws (M-A or M-B) and M5 Washers (M-C).
- Page 7 STEP 7 Secure VESA Plate (A1) to Mount (A) using the previously removed screws from STEP 1 and tighten using 4mm Allen Wrench (T-A). STEP 8 Fold the arm on Mount (A) up an slide the TV forward to lock it into place. Reverse this process to unlock and lower the TV.
- Page 8 AVG. RESPONSE TIME (within office hrs) - 23% within < 15m - 38% within < 30m - 61% within < 1hr - 83% within < 2hr - 92% within < 3hr FOR MORE VIVO PRODUCTS, CHECK OUT OUR WEBSITE AT: www.vivo-us.com...


Need help?
Do you have a question about the MOUNT-M-FD27 and is the answer not in the manual?
Questions and answers