
Subscribe to Our Youtube Channel
Related Manuals for Microgate Racetime 2


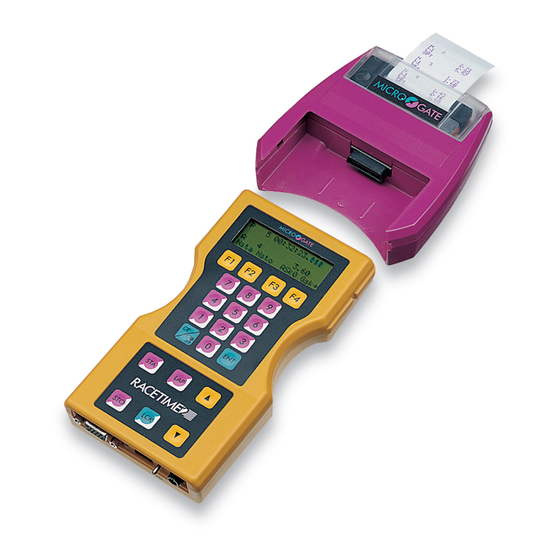
Summary of Contents for Microgate Racetime 2
- Page 1 RACETIME 2 OptoJump Program User Manual Revision 1.00 Microgate S.r.l. Via J. Kravogl, 8 39100 BOLZANO...
-
Page 2: Table Of Contents
SWITCHING ON RACETIME 2, INITIALIZATION ..................3 MAIN MENU ................................5 NEW TESTS................................9 TESTS PERFORMED............................20 RECHARGING BATTERIES ..........................22 MEMORY LIMITS ..............................24 APPENDIX 1 - RACETIME 2 TRANSMISSION PROTOCOL FOR OPTOJUMP........25 APPENDIX 2 - FORMULAS FOR THE CALCULATION OF POWER AND WORK ......26... -
Page 3: Introduction
Make sure that the Optojump modules are correctly aligned, as indicated in the Optojump system assembly instructions. Connect the cable coming from the interface/battery for Optojump to the socket located at the rear of the Racetime 2 chronometer using the appropriate 9 pole/15 pole adaptor. Now the system is ready to function. - Page 4 A : Parallel mode B : PC ON-LINE mode C : OptoJump These operations are not necessary if your Racetime 2 is C menu equipped with only the Optojump program. If the data memory has not been canceled or the Optojump mode was chosen in the previous work session, you can set Clear all config.
-
Page 5: Main Menu
(chap. 6) more F3 – Data transmission – Activates the transmission of memorized data to the PC. Connect the PC to Racetime 2 with the appropriate cable (Cod.CAB046 or Cod.CAB047 + F1=Start data transm. Cod.CAB001), and press F1 (Start) to confirm the start of transmission. - Page 6 F1 – Synchronization – Allows you to synchronize Racetime A: Synchronisation 2’s internal clock. This function should be used when you B: Test WalkJump base employ two or more Racetime 2 systems in WalkJump mode C: Automatic print: Yes with automatic acquisition. See chap. 5.10 for further more information.
- Page 7 Press F1 (Nmod) to set the number of modules present on the track. ATTENTION: for correct functioning of the test, it is essential that the number of modules set on Racetime 2 corresponds exactly to the number actually present on the measurement base.
- Page 8 Racetime 2 - OptoJump Program User manual F1 : Averages : all values/minimum and maximum excluded A: Aver.: all values – If ‘all values’ is chosen, the average values of the B: Keyb. beep: On measurements acquired (flight times, contact times, etc.) are C: Accu.
-
Page 9: New Tests
Racetime 2 - OptoJump Program User manual 5 New tests From this menu you can select the various types of test that A: Preconf. Tests you wish to make. Press CE to return to the main menu. ←← B:Jump test Njump... - Page 10 (Important: the combination athlete’s code/number of test is a Edit Setup menu single item, which means that Racetime 2 does not allow the same athlete to perform two tests indicated by the same test number). To modify the athlete’s and/or the test number, press F2 (Edit.).
- Page 11 Racetime 2 will then show the athlete’s code and test. (Important: the combination athlete’s code/test number is a Athlete single item, i.e. Racetime 2 does not allow the same athlete to Test N. perform two tests indicated by the same test number).
- Page 12 Racetime 2 - OptoJump Program User manual At this point, Racetime 2 is waiting for the start of the test. If the athlete’s position does not correspond to the start type settings (from inside or outside the measurement base) an error message is displayed.
- Page 13 Racetime 2 - OptoJump Program User manual Jump N. Press F3 (values) to pass to the screen display of the single Tc 0589 Tf 0649ms jumps; press keys ↓ and ↑ to view the next or previous jump Hei 51.7cm 48j/m respectively.
- Page 14 Press F4 (OK) to confirm your choice. Insert the duration of the test, in seconds. Start : extern Racetime 2 will then display the athlete’s code and the test. For performance of the test and the data displayed, refer to the Length (s) : previous paragraph (Jump test number of jumps).
- Page 15 Test N. (Important: the combination athlete’s code/test number is a Start from inside single item, that is to say, Racetime 2 does not allow the Edit Setup menu same athlete to perform two tests indicated by the same test number).
- Page 16 Int. side = the athlete runs the distance of the base after entering from the side with the interface for Racetime 2 or PC connection; cable side = the athlete runs the distance of the base after entering from the side with the connection cable between modules TX and RX.
- Page 17 Test N. (Important: the combination athlete’s code/test number is a single item, that is to say, Racetime 2 does not allow the same Edit Setup menu athlete to perform two tests indicated by the same test number).
- Page 18 Racetime 2 - OptoJump Program User manual 5.12 Press F1 (esc) to go on to the next test. The values of the test made obviously remain in the memory for subsequent 4 Walk reprinting. Lenm. 42.4 cm Press F2 (print) to obtain a printout of the values measured;...
- Page 19 Racetime 2 - OptoJump Program User manual 5.13 F3 RollJump The RollJump test has been devised so as to make it possible to use the OptoJump system in combination with the mobile running boards (tapis roulant) used to simulate running in the gymnasium.
-
Page 20: Tests Performed
Select this option to display, print or delete afterwards tests previously performed. Press CE to return to the main menu. A:Preconfig. Tests Attention: if Racetime 2 finds no tests memorized, the ←← B:Jump test Njump message ‘Not found’ appears and it is not possible to enter the C:Jump test time Tests performed mode. - Page 21 Racetime 2 - OptoJump Program User manual Press F2 (print) to obtain a printout of all the values for the test displayed (both average values and data for the single jump). Press F3 (values) to pass to the screen display of the single Jump N.
-
Page 22: Recharging Batteries
To recharge the batteries, connect the Racetime 2 battery recharger to the corresponding socket on the back of the device. If the chronometer is off, information on the current status of the battery recharge management function will be immediately shown on the display. - Page 23 Racetime 2 - OptoJump Program User manual During discharging, it is possible at any time to go straight Charging 7 :00 :00 over to charging by pressing F1 (A: Rep. charge/disch.). This A : rep. charge/disch. will shorten the time needed for recharging. However, you are...
-
Page 24: Memory Limits
User manual 8 Memory limits Racetime 2 makes possible the storage of data for about 2000 jumps (the number varies according to the number of different trials made). When its memory limit has been reached, at each jump Racetime 2 displays the message ‘memory full’. -
Page 25: Appendix 1 - Racetime 2 Transmission Protocol For Optojump
Racetime 2 - OptoJump Program User manual 9 Appendix 1 - Racetime 2 transmission protocol for Optojump All data are transmitted in ASCII format (values < 127 (7Fh) only), except the ‘Program code’ All fields are numeric ones, padded with ‘0’... -
Page 26: Appendix 2 - Formulas For The Calculation Of Power And Work
∑ ∑ ∑ ⋅ ⋅ volo volo contatto W Kg Specif power (g = gravitational force) ∑ ⋅ ⋅ salti contatto ∑ ⋅ volo Cal Kg Specific work ⋅ 4 186 8 Microgate S.r.l. Via J. Kravogl, 8 39100 BOLZANO...
Need help?
Do you have a question about the Racetime 2 and is the answer not in the manual?
Questions and answers