Advertisement
Advertisement
Table of Contents

Subscribe to Our Youtube Channel
Related Manuals for Thermo Scientific GENESYS 30


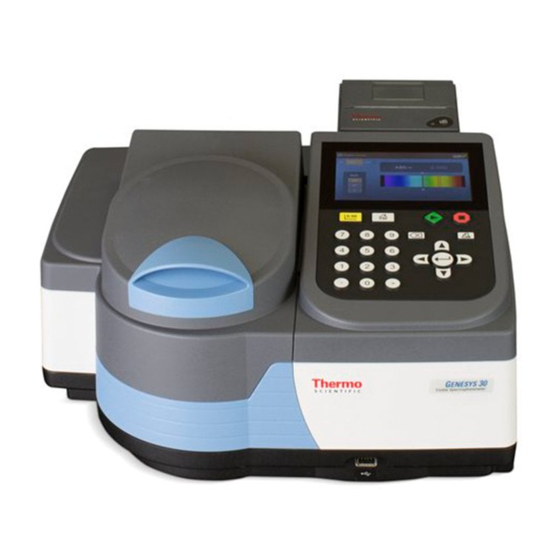
Summary of Contents for Thermo Scientific GENESYS 30
- Page 1 GENESYS 30 Spectrophotometer User Guide 269-317300 Revision A March 2015...
- Page 2 © 2016 Thermo Fisher Scientific Inc. All rights reserved. For U.S. Technical Support, please contact: For International Support, please contact: Thermo Fisher Scientific Unity Lab Services Telephone: +1 608 273 5017 Part of Thermo Fisher Scientific E-mail: support.madison@thermofisher.com 5225 Verona Road Madison WI 53711-4495 U.S.A.
- Page 3 USB port conveniently located on the front of the instrument. All aspects of the users’ interactions with the GENESYS 30 visible spectrophotometer have been carefully considered and accommodated in the design of the instrument. Accessibility of...
-
Page 4: Table Of Contents
• “Quant” page 13 • “Fixed” page 17 • “OD600” page 20 • “Library” page 22 • “Settings” page 23 • “SmartStart” page 30 • “Optional Accessories” page 31 • “Halogen Lamp” page 35 GENESYS 30 User Guide Thermo Scientific... -
Page 5: Terminology
Some applications allow the user to save methods to an on-board method library or to a USB memory device. Methods saved to a USB memory device can be transfered to other GENESYS 30 instruments or archived on a PC. The Scan, Fixed and Quant applications also support saving tables of data directly to a USB memory device for off line storage or processing. -
Page 6: About The Keypad
• In alerts or dialogs where the user is not entering numeric or text data and there is a Cancel button displayed on the screen, pressing on the keypad has the same effect as navigating to Cancel and pressing GENESYS 30 User Guide Thermo Scientific... - Page 7 Enter About the Home page Options are clearly labeled with the name of the measurement modes or functions that they execute. Use the nav keys to select the desired application and press start it. Thermo Scientific GENESYS 30 User Guide...
- Page 8 OD600 for detailed information Load or transfer saved methods in the on-board memory or an inserted USB memory device. See Library for detailed information. Live Display for detailed information. Quant for detailed information. GENESYS 30 User Guide Thermo Scientific...
- Page 9 You may choose to save selected methods to a special SmartStart™ menu which will be displayed instead of the home screen at start-up. This home screen option brings you to that same SmartStart menu. Thermo Scientific GENESYS 30 User Guide...
-
Page 10: Live Display
Tip If you are using the test tube holder you may not need to close the lid when making measurements. GENESYS 30 User Guide Thermo Scientific... - Page 11 Follow the directions in the message bar. 4. Place a cuvette with a blank solution in the measurement position and press 5. Type the standard concentration in the Std. Conc. box and press to confirm. Thermo Scientific GENESYS 30 User Guide...
- Page 12 In concentration mode, the information displayed below the Result field is also printed. GENESYS 30 does not support saving Live Display methods to the library because the parameters of the measurement are so simple.
-
Page 13: Scan
4. Remove the blank cuvette, place the sample cuvette in the measurement position, close the lid and press The scan plot y-axis autoscales as the data is collected. The current measurement wavelength and ABS/%T are displayed as the scan is recorded. Thermo Scientific GENESYS 30 User Guide... - Page 14 Printed data includes a time and date stamp. Optional Accessories for detailed information on installing and loading the optional printer accessory. 3. Select to clear the scan plot. You will be prompted to save your data before it is discarded. GENESYS 30 User Guide Thermo Scientific...
-
Page 15: Quant
Save tool Clear tool The GENESYS 30 Quant application supports up to six standard solutions and offers linear fits with the option to force the line through zero. 1. Set the analytical wavelength. a. Navigate to the Units tool and press b. - Page 16 The application supports a data table with entries for up to ten samples. Samples are labeled S1 through S10. Once the data table is full you must clear it before you can measure additional samples. GENESYS 30 User Guide Thermo Scientific...
- Page 17 Select to view the calibration graph or print the calibration graph and standard data Select to view or print the results in table format Thermo Scientific GENESYS 30 User Guide...
- Page 18 To save and print GENESYS 30 provides the option to save your data directly to a USB memory device inserted into the USB-A port on the front of the instrument. Data files are named as Quant_<time and date> for easy identification and include method information and a time and date stamp.
-
Page 19: Fixed
2. Set the measurement wavelength(s) and factor(s). 3. Select the Mode (ABS or %T). 4. Select the concentration Units. 5. Select 6. Place a cuvette with a blank in the measurement position, close the lid and press Thermo Scientific GENESYS 30 User Guide... - Page 20 Message bar - look here for Baseline status instructions and reports Equation in use indicator Clear tool Result values Return to Save tool setup screen Ten-sample Table GENESYS 30 User Guide Thermo Scientific...
- Page 21 GENESYS 30 provides the option to save your data directly to a USB memory device inserted into the USB-A port on the front of the instrument. Data files are named as Fixed_<time and date> for easy identification and include method information and a time and date stamp.
-
Page 22: Od600
GENESYS 30 result to yield the value on the other instrument. It is best to do this over a range of cell concentrations and use an average number as your factor because you may see some variation from data point to data point. - Page 23 GENESYS 30 does not support saving OD600 methods to the library because the parameters of the measurement are so simple. Live display measurements are transient and are not stored in memory, so it is also not possible to save OD600 data electronically.
-
Page 24: Library"
• Methods will be exported to the GENESYS 30 Methods folder off the root directory of the USB memory device • If the method already exists on the memory device the user will be prompted to “Overwrite”... -
Page 25: Settings
• You will be prompted to confirm that you want to delete the method before it is erased. Erased methods cannot be recovered. Settings The Settings tools are clearly labeled and in most cases require no explanation Thermo Scientific GENESYS 30 User Guide... - Page 26 Navigate to the desired screen language and Turn sounds on or off and set the sound press volume Connect to a Windows PC with VISIONlite Performance Verification for details. software to run the instrument remotely GENESYS 30 User Guide Thermo Scientific...
- Page 27 When you change a lamp, select the Reset to 0 option. Do not select this option unless you have installed a new lamp. Updates to the GENESYS 30 instrument software will be available from time to time and can be downloaded from the Thermo Fisher Scientific Web Site. Updates may include new features, additions or improvements to the language set, or improvements to the capability or function of the software.
- Page 28 The GENESYS 30 will log the results of all the tests that it does upon startup and any errors that are reported to the user. When you call us for support to address a problem with your instrument, the technician will ask you to place a USB memory device in the instrument and go to the “Export Log”...
- Page 29 Two filters are required to perform the Performance Verification tests. Both are contained in the SPECTRONIC Standards 2 Kit, available from your Thermo Scientific distributor. • A lambda filter, labeled - this filter has three peaks in transmittance space •...
- Page 30 TSV file type, right-click on the file icon and select Open with from the menu; select Choose default program. Choose your preferred program in the dialog that opens. You will be able to double-click the files to open them directly in the future. GENESYS 30 User Guide Thermo Scientific...
- Page 31 • Filenames of up to 12 characters are supported. The default save location for methods is the library in the GENESYS 30 internal memory. Select the appropriate check box to save the method to a USB stick or to label it as a SmartStart method.
-
Page 32: Smartstart
To add a method to the SmartStart menu, save the method from within the particular application and select the Save to SmartStart box. The method will be saved to the internal library and will appear on the Smart Start menu. GENESYS 30 User Guide Thermo Scientific... -
Page 33: Optional Accessories
Note Deleting a method from the Library will also delete it from the SmartStart menu. Optional Accessories Printer 1. Remove the printer housing cover. Use the finger hold, pull towards you and lift. Printer housing Finger hold 2. Load paper into the optional printer. Lift Thermo Scientific GENESYS 30 User Guide... - Page 34 3. Insert printer into GENESYS 30. Back of GENESYS 30 Connector Guide rails Bottom of printer Release lever Serial Number Connector Guide rails a. Align the guide rail on the printer with the guide rail on the GENESYS 30. GENESYS 30 User Guide Thermo Scientific...
- Page 35 Printer fully engaged Single Cell Holder Your GENESYS 30 comes with a standard single cell holder already installed in the sample compartment. The cell holder is held in place with two magnets. To remove the cell holder, lift up on the cell holder.
- Page 36 The individual cell holders are held to the sample compartment tray by a single slotted screw. The GENESYS 30 uses the same cell holder accessories as other instruments in the GENESYS line. Standard GENESYS accessories can be positioned in the GENESYS 30 sample tray by removing the supplied 10 mm cell holder and replacing it with another accessory.
-
Page 37: Halogen Lamp
Halogen Lamp The lamp source lifetime is approximately 1,000 hours. To replace the halogen lamp Back right corner Lamp housing Lamp connector connector Lamp housing guide rail Lamp guide rail Bottom of lamp Thermo Scientific GENESYS 30 User Guide... - Page 38 GENESYS 30 User Guide Thermo Scientific...
Need help?
Do you have a question about the GENESYS 30 and is the answer not in the manual?
Questions and answers