Alcolizer LE5 User Manual
For more information, please visit alcolizer.com
Hide thumbs
Also See for LE5:
- User manual (75 pages) ,
- Assembly instructions (3 pages) ,
- Work instruction (22 pages)
Table of Contents
Advertisement
Quick Links
LE5 Alcohol Tester User Manual
User Manual
Disclaimer – External Documents note to reader
The g/210L BrAC reading obtained by correct use of this instrument is only considered accurate at the time
of testing. Great care has been taken to ensure the accuracy of each reading.
Neither the manufacturer, the distributor, nor the owner accepts liability or responsibility due to any action
or claim arising from the reading produced by this instrument, whether used correctly or incorrectly.
Contents
REF: LE5 Alcohol Tester User Manual V16.docx
Uncontrolled when printed
Page 1
© Alcolizer Technology
Advertisement
Table of Contents

Related Manuals for Alcolizer LE5


Summary of Contents for Alcolizer LE5
- Page 1 Neither the manufacturer, the distributor, nor the owner accepts liability or responsibility due to any action or claim arising from the reading produced by this instrument, whether used correctly or incorrectly. Contents REF: LE5 Alcohol Tester User Manual V16.docx Page 1 © Alcolizer Technology...
-
Page 2: Table Of Contents
4 Test Options Menu................21 Test Cancel ............................21 Test Refusal ............................21 5 Accessing the Setup Menu ..............22 Date & Time ............................24 Test Prompts ............................26 Test Options Menu ..........................28 REF: LE5 Alcohol Tester User Manual V16.docx Page 2 © Alcolizer Technology Uncontrolled when printed... - Page 3 Printing Records ...........................50 8.7.1 Automatic Printing ........................50 8.7.2 Printing Records ...........................50 Serial Instrument ..........................51 Setting the Bluetooth Serial Instrument PIN ..................54 8.10 Auto Send .............................55 REF: LE5 Alcohol Tester User Manual V16.docx Page 3 © Alcolizer Technology Uncontrolled when printed...
- Page 4 Saving Logs ...........................67 20.2.4 Erasing Event Logs or Clearing Logs on an Instrument ..............69 20.2.5 Configuration Editor ........................69 21 About Screen ..................70 22 Splash Screen Display ................71 REF: LE5 Alcohol Tester User Manual V16.docx Page 4 © Alcolizer Technology Uncontrolled when printed...
-
Page 5: Introduction
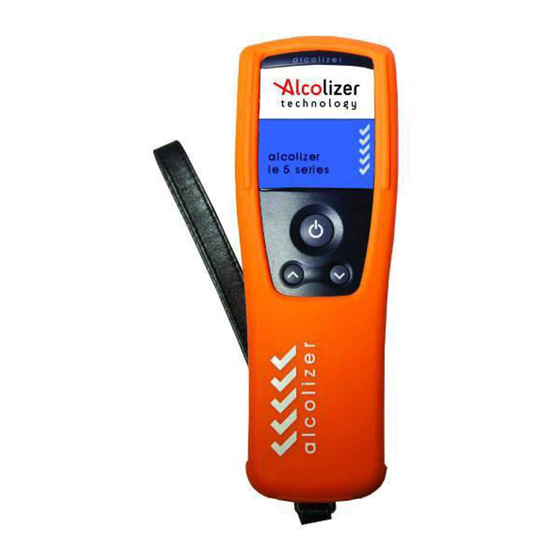
Carry bag or protective hard case (optional) Bluetooth printer (optional). 2.2 Instrument Overview The LE5 is a handheld instrument consisting of a hard-plastic outer case, silicon cover, wrist strap and the following user displays, buttons and adaptor sockets (refer Figure 1): a. Test Key b. -
Page 6: Lcd Colour Graphics Display
BrAC levels in various formats GPS acquisition data Printer setup Records information These and other displays are explained in the Operating Instructions section. REF: LE5 Alcohol Tester User Manual V16.docx Page 6 © Alcolizer Technology Uncontrolled when printed... -
Page 7: Mouthpiece Locator And Sample Inlet Spigot
Do not store the instrument in direct sunlight or places where extreme temperature conditions can occur. NOTE The LE5 has optional features which may or may not be active on your instrument. The screen images shown in the User Manual may differ to your instrument depending on the features enabled. -
Page 8: Cleaning Requirements
Rubber gloves should be used during cleaning of the instrument. 3.2 Testing Types The LE5 can perform both Mouthpiece and Passive testing: Standard – Mouthpiece test Passive Standard – If alcohol is present, the instrument will require a ... -
Page 9: Mouthpieces
3.3 Mouthpieces There are two types of Mouthpieces available for use on the LE5, these are the: Spit Trap Non-Return Valve Mouthpiece (SKU 430435)* and; Standard Spigot Locator Mouthpiece (SKU 430405). NOTE: *USA only has one mouthpiece available for use SKU 430435... -
Page 10: Charging The Battery
The spit trap non return valve mouthpieces is a more hygienic option with most of the saliva in the exhaled breath collected preventing spittle exiting the mouthpiece. 3.4 Charging the Battery Prior to initial use, the LE5 battery should be fully charged. The battery charge cycle may take up to three (3) hours. CAUTION The battery in the LE5 instrument is a Li-ION battery. -
Page 11: Turning On The Instrument
(Refer Figure 6). The orientation of the mouthpiece will not affect the sampling. Remove the remaining portion of the plastic wrap just prior to testing to ensure hygienic use. REF: LE5 Alcohol Tester User Manual V16.docx Page 11 © Alcolizer Technology Uncontrolled when printed... -
Page 12: Taking A Mouthpiece Breath Sample
If the self-check is unsuccessful an error code will be displayed, the instrument will not accept a breath sample. Contact an Alcolizer representative if an error code is displayed. If error code 81 is present: follow onscreen prompt to restart the device. - Page 13 ‘Invalid Sample Try Again’ being displayed (Refer Figure 10). The deice will return to the Blow screen for another sample to be taken. REF: LE5 Alcohol Tester User Manual V16.docx Page 13 © Alcolizer Technology...
-
Page 14: Analysing A Mouthpiece Breath Sample
The Recovering period is the time the fuel cell sensor requires to recover from the previous breath test. This period will vary according to BrAC readings displayed, longer for higher readings. REF: LE5 Alcohol Tester User Manual V16.docx Page 14 © Alcolizer Technology... -
Page 15: Passive Testing
Passive testing is a test that is performed in a non-invasive manner and without using mouthpieces. Passive testing on the LE5 can activated in one of two ways, either button activated by the operator or pressure activated by the donor blowing. -
Page 16: Taking A Passive Standard Breath Sample
3 clicking sounds (pump clicks) as the sample is being taken. The passive test will have 3 short beeps and clicks followed by a longer beep. REF: LE5 Alcohol Tester User Manual V16.docx Page 16 © Alcolizer Technology... -
Page 17: Analysing A Passive Breath Sample
After the recovery period has ended, the instrument is enabled automatically to take an Active Mouthpiece sample (Refer Figure 18). Perform an Active test in accordance with the procedures in section 3.5.1 and 3.5.2. REF: LE5 Alcohol Tester User Manual V16.docx Page 17 © Alcolizer Technology... -
Page 18: Enabling Passive Only
(Refer Figure 19). On the Press Passive Test screen, press the Test Key. The instrument will perform a background self-test while Please wait….is displayed on the screen. REF: LE5 Alcohol Tester User Manual V16.docx Page 18 © Alcolizer Technology... - Page 19 The screen will prompt to either Blow or Press the Test key to take the test. Pressure Activated Passive testing is using the Blow option. Figure 19 – LE5 with Passive Cup attached Figure 20- Ready for Passive Test Message ...
-
Page 20: Back Operation
During these three pump activations, the operator must hold the instrument steady and at the same distance from the subject. To remove the passive cup, pull the cup from the LE5 without bending the cup from the LE5 sample spigot. -
Page 21: Test Options Menu
If a test is refused, the user can activate the Test Refuse option as follows: With the Blow screen displayed, press the Up and Down buttons simultaneously. The REF: LE5 Alcohol Tester User Manual V16.docx Page 21 © Alcolizer Technology... -
Page 22: Accessing The Setup Menu
Figure 26 - Test Refused Displayed 5 Accessing the Setup Menu To make changes to the LE5 setup and the available functions, access the Setup Menu With the screen displaying press to test, Press the UP and Down buttons simultaneously for approximately five seconds. - Page 23 GPS o Bluetooth Comms o Reading Options o Timeouts o Localization o Keep Previous o Records o Speaker o LCD Brightness o Recovery Countdown Enable REF: LE5 Alcohol Tester User Manual V16.docx Page 23 © Alcolizer Technology Uncontrolled when printed...
-
Page 24: Date & Time
Figure 29 – Setup Menu 5.1 Date & Time The Date & Time on the LE5 can be adjusted to match your local requirements. In the Setup Menu use the Up and Down buttons to highlight Date & Time, press the Test Key to access. - Page 25 Repeat for the day then press the Test Key to accept. Figure 34 - Set GMT Offset GMT Offset is the number of hours a time zone is ahead or behind GMT (Greenwich Mean REF: LE5 Alcohol Tester User Manual V16.docx Page 25 © Alcolizer Technology Uncontrolled when printed...
-
Page 26: Test Prompts
Figure 35 – GMT Offset Set Time from GPS allows the time on the LE5 to be set from the GPS satellite connection. ... - Page 27 Figure 37 – Enable Test Type Selecting Test Type will result in the LE5 prompting to select one of three options when a breath test is activated. RBT – Random Breath Test ACC – Accident MOB – Mobile These acronyms will be attached to the test result and stored in the logs of the LE5.
-
Page 28: Test Options Menu
Figure 39 – Duty Type Selecting Gender will result in the LE5 prompting to select one of two options when a breath test is activated. Figure 40 – Gender Prompts Selecting Gender will result in the LE5 prompting to select one of five options when a breath test is activated. - Page 29 Activated Passive) or both Button and Blow triggers able to be used Figure 43 – Passive Trigger Settings Pre-Zero enable allows the LE5 to complete a single test sample (noted by a click prior to a test commencing). This function is to test the local environment to ensure there is no contamination of the air with alcohol and ensure the LE5 is environment is at 0.00 BrAC.
- Page 30 Blow Override allows the user to force a manual sample to be taken at the Blow screen Figure 46 – Blow Override By pressing the up and down keys together the REF: LE5 Alcohol Tester User Manual V16.docx Page 30 © Alcolizer Technology Uncontrolled when printed...
-
Page 31: User Menu Setup
6 User Menu Setup The User Menu Setup allows you to select which LE5 features are shown on the User Menu Use the Test Key to toggle between Yes and No to enable or disable features in the User Menu. -
Page 32: Enable Id Code
When the correct number is displayed, press the test key. The number will be set, and the cursor will move the next digit. Repeat the above step until all the number required are displayed (Refer Figure 51). REF: LE5 Alcohol Tester User Manual V16.docx Page 32 © Alcolizer Technology... -
Page 33: Enable Location Code
When the correct number is displayed, press the test key. The number will be set, and the cursor will move the next digit. Repeat the above step until all the number required are displayed (Refer 53). REF: LE5 Alcohol Tester User Manual V16.docx Page 33 © Alcolizer Technology... -
Page 34: Enable Print Last
Once located pressing the Test Key will activate the print function (NOTE: The Printer must be setup and connected for printing to occur) REF: LE5 Alcohol Tester User Manual V16.docx Page 34 © Alcolizer Technology... -
Page 35: Enable Print Summary
Use the up and down arrow keys to select the number of the initial record required to print. Press the Test Key to move to the next number. When the initial record number is selected press the Test Key. Figure 57 – Print Summary REF: LE5 Alcohol Tester User Manual V16.docx Page 35 © Alcolizer Technology... -
Page 36: Enable Print Setup Menu
Test Key to select Yes or No. If Yes is selected Bluetooth Comms will show in the User Menu. Enable Records Figure 59 – Print Setup REF: LE5 Alcohol Tester User Manual V16.docx Page 36 © Alcolizer Technology Uncontrolled when printed... -
Page 37: Enable Show Last Record
Press the up/down buttons to navigate through the records as required Press the up and downs simultaneously to return to the User Menu. Note For information about printing records, refer to section 8.6.2. REF: LE5 Alcohol Tester User Manual V16.docx Page 37 © Alcolizer Technology Uncontrolled when printed... -
Page 38: Clearing Records
Enable Set Date allows the Set Date feature to be available in the User Menu. Use the Test Key to toggle between Yes and No. Figure 65 – Enable Set Time REF: LE5 Alcohol Tester User Manual V16.docx Page 38 © Alcolizer Technology... -
Page 39: Enable Test Counter
Note Depending on the specific configuration of the instrument, the GPS functions are either enabled or disabled. These functions are generally enabled as a Customer requirement by Alcolizer Technology. Should the instrument require the enabling of certain GPS functionality, contact Alcolizer Technology for further advice. -
Page 40: Gps Mode Configuration
Whatever configuration is chosen on Static Mode the instrument will always acquire the location prior to the first test. Then you have a choice of the following three options: Positive Tests which will record the location only on positive readings, REF: LE5 Alcohol Tester User Manual V16.docx Page 40 © Alcolizer Technology... -
Page 41: Mobile Gps Mode Operations
Threshold which will only record the location on readings above a defined threshold. Note If the instrument is configured to record a GPS fix operation will only occur when a reading is above zero BrAC. REF: LE5 Alcohol Tester User Manual V16.docx Page 41 © Alcolizer Technology Uncontrolled when printed... -
Page 42: Bluetooth Comms
8 Bluetooth Comms The printing and sending data function (if installed) enables the printing and sending of records by connecting the LE5 to a portable printer via Bluetooth connection. The instrument supports the following printers: SPRT SP-T5 Bidoon SPP-R200 ... -
Page 43: Printer
To connect the instrument to the printer via Bluetooth, proceed as follows: Access the Bluetooth Comms menu as described in section 8. Press the down button until Printer is highlighted (Refer 75). REF: LE5 Alcohol Tester User Manual V16.docx Page 43 © Alcolizer Technology... - Page 44 Figure 77 - Searching Displayed Note The LE5 will search and display all Bluetooth instruments in range. To avoid attempting to connect to an instrument other than the intended printer, move other Bluetooth items away. REF: LE5 Alcohol Tester User Manual V16.docx Page 44 ©...
-
Page 45: Printer Driver
When the LE5 identifies the printer, the printer type will be displayed, e.g. “’SPP- R200’ (Refer 78). Figure 78 - Printer Identified Press the test key to accept the selected printer. The instrument will display the Paired message on successful pairing (Refer 79). - Page 46 Press the test key, the printer brand and type will be displayed on the screen, e.g. Bixolon SPP-R200 (Refer Figure 81 ). Figure 81 - Printer Brand and Type Displayed Once the LE5 instrument is paired with the printer, the Bluetooth icon turns blue and is always visible on the screen (Refer Figure 82 Figure 82- Bluetooth Icon on Screen ...
-
Page 47: Auto Print
None - Regardless of results: nothing is transmitted To set the LE5 to Auto Print Standard, scroll down until Auto Print Standard is selected. Positive is the default option. To select All or None, press the test key until the desired option is highlighted (Refer Figure 84). -
Page 48: Setting The Bluetooth Printer Pin
None - Regardless of results: nothing transmitted To set the LE5 to Auto Send Passive, scroll down until Auto Print Passive is the default option. To select All or None, press the test key until the desired option is highlighted (Refer Figure 84). -
Page 49: Ticket Format Type
Press the test key to change the format to the next one in sequence (e.g. 0 to 1, 1 to 2, 9 to 0) Refer to Figure 87. Alcolizer recommends all customers maintain the default format value of 0 unless advised otherwise. -
Page 50: Printing Records
Figure 88 - Print Ticket- Format 0 Other ticket formats on the Alcolizer LE5 apply to export markets. Contact Alcolizer Technology if you require further details. Printing Records 8.7.1 Automatic Printing Once the LE5 and printer are paired, turned on and within Bluetooth range, the printer will automatically print a record of the breath sample if required settings have been selected. -
Page 51: Serial Instrument
To connect the instrument to a serial instrument (laptop computer, PC) via Bluetooth, proceed as follows: Access the Bluetooth Comms menu as described in Section 8. REF: LE5 Alcohol Tester User Manual V16.docx Page 51 © Alcolizer Technology Uncontrolled when printed... - Page 52 Press the test key, the Serial screen will be displayed (Refer Figure 92). Figure 92 - Serial Menu Place the LE5 instrument next to the Bluetooth serial instrument turned on. Press the test key, the LE5 will search for the serial instrument and display Searching… (Refer Figure 93 REF: LE5 Alcohol Tester User Manual V16.docx...
- Page 53 Figure 94 - Serial Instrument Identified Note The LE5 will not list any IOS devices in the pairing screen. Instead the instrument will respond to pair attempt made from the app. Refer to OTA user manual. Press the test key to accept the selected serial instrument. The instrument will display the Paired message on successful pairing (Refer Figure 95).
-
Page 54: Setting The Bluetooth Serial Instrument Pin
Press the test key to advance to the nest number and repeat the above step. Repeat until all numbers are displayed as required by the printer (Refer Figure 97). REF: LE5 Alcohol Tester User Manual V16.docx Page 54 ©... -
Page 55: Auto Send
None- Regardless of results: nothing is transmitted To set the LE5 to Auto Send Standard, scroll down until Auto Send Standard is highlighted. Positive is the default option. To select All or None, press the test key until the desired option is highlighted (Refer Figure 98). -
Page 56: Auto Send Passive
None- Regardless of results: Nothing transmitted To set the LE5 to Auto Send Passive, scroll down until Auto Send Passive is highlighted. Positive is the default option. To select All or None, press the test key until the desired option is highlighted (Refer Figure 99). - Page 57 From the Reading Options Menu, arrow down to Low Setpoint and then High Setpoint. Use the Test Key and arrow keys to set the required levels. REF: LE5 Alcohol Tester User Manual V16.docx Page 57 © Alcolizer Technology...
-
Page 58: Timeouts
Use the Test Key and arrow keys to set the required times in seconds for each setting. 11 Localization The Localization setting is where the user can select local settings for: REF: LE5 Alcohol Tester User Manual V16.docx Page 58 © Alcolizer Technology Uncontrolled when printed... -
Page 59: Keep Previous
No to Yes. Figure 104 - Keep Previous Arrow Up or Down to ‘Back’ to Return to the User Menu REF: LE5 Alcohol Tester User Manual V16.docx Page 59 © Alcolizer Technology Uncontrolled when printed... -
Page 60: Records
Figure 105 - Area Code Set Use the Test Key to select Yes or No. If Yes is selected in the Keep Previous function the LE5 will display the last test record in the top of the screen. 13 Records The Records feature will display current records on the instrument and percentage of memory used. -
Page 61: Recovery Countdown
To enable the Warning Beacon Display, hold the Up arrow key for 5 seconds. To turn this, feature off, press any key. REF: LE5 Alcohol Tester User Manual V16.docx Page 61 © Alcolizer Technology... -
Page 62: Calibration
Figure 109 – Warning Beacon Display 18 Calibration 18.1 Calibration Alerts The Alcolizer LE5 requires calibration every six mounts as per Australian Standards Certification requirement. The instrument will display a warning message after switching on if 14 days or less remain before calibration is required (Refer Figure 110). -
Page 63: Replacing Sample Module
Rather than returning the instrument to Alcolizer for calibration, the sample module can be removed and sent in. This saves money and if the owner details are known and maintained with Alcolizer, arrangements can be made to forward a replacement sample module prior to the calibration being overdue. -
Page 64: Specifications
Calibration Six monthly recalibrations at Alcolizer Technology’s service facility 20 AlcoCONNECT AlcoCONNECT assist in the analysis of data downloaded from the LE5 instrument. The AlcoCONNECT software can be downloaded from Alcolizer website https://www.alcolizer.com/software-updates onto a compatible computer running MS Windows® XP, Vista, Win 7 or Win 8. -
Page 65: Using Alcoconnect Toolbox
Turn the LE5 instrument on. The Read Event Log window will be displayed (Refer Figure 115). A successful connection between the LE5 and the computer will be shown by a green segment on the Read Event Log window (Refer Figure 116). -
Page 66: Navigating Around The Event Log Page
Save Event Log- Save as a .csv or xml file to a file location in computer or elsewhere. Language- Choose a language if the LE5 is configured for multiple languages. Options- Set Log Setting. Refer to paragraph 11.2.2 for a description of Log Settings. -
Page 67: Set Log Settings (Filtering Data)
Figure 117 - Log Settings Window 20.2.3 Saving Logs Event Logs can be saved for future analysis. The data can then be saved to the required location on REF: LE5 Alcohol Tester User Manual V16.docx Page 67 © Alcolizer Technology Uncontrolled when printed... - Page 68 Click File > Options Click the “Save Options” tab Click the “Format” drop down menu and select the default format Click Ok REF: LE5 Alcohol Tester User Manual V16.docx Page 68 © Alcolizer Technology Uncontrolled when printed...
-
Page 69: Erasing Event Logs Or Clearing Logs On An Instrument
4. The device should show the operational screen. 20.2.5.2 Edit Mode 1. Set the value of configuration item “Code 0 Edit on Start Enable” to 1. 2. Restart the device. REF: LE5 Alcohol Tester User Manual V16.docx Page 69 © Alcolizer Technology Uncontrolled when printed... -
Page 70: About Screen
21 About Screen To access the about screen, navigate to user menu. Select About. The below screen will appear Figure 122 – About Screen Display REF: LE5 Alcohol Tester User Manual V16.docx Page 70 © Alcolizer Technology Uncontrolled when printed... -
Page 71: Splash Screen Display
Press and release the test key to turn on the device. Observe that the splash screen is retained on the screen for a duration of 2 seconds. Figure 125 – Splash screen Display REF: LE5 Alcohol Tester User Manual V16.docx Page 71 © Alcolizer Technology...
Need help?
Do you have a question about the LE5 and is the answer not in the manual?
Questions and answers