Alcolizer HH4 User Manual
For more information, please visit alcolizer.com
Table of Contents
Advertisement
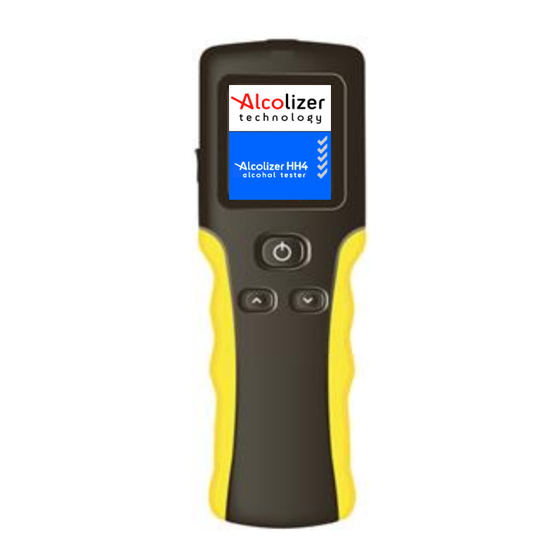
Alcolizer HH4 Alcohol Tester User Manual
User Manual
Di
Disclaimer – External Documents note to reader
The BAC reading obtained by correct use of this device is only considered accurate at the time of testing.
Great care has been taken to ensure the accuracy of each reading.
Neither the manufacturer, the distributor, nor the owner accepts liability or responsibility due to any action
or claim arising from the reading produced by this device, whether used correctly or incorrectly.
REF: Alcolizer HH4 Alcohol Tester User Manual V1
Page 1
© Alcolizer Technology
Advertisement
Table of Contents

Related Manuals for Alcolizer HH4


Summary of Contents for Alcolizer HH4
- Page 1 Neither the manufacturer, the distributor, nor the owner accepts liability or responsibility due to any action or claim arising from the reading produced by this device, whether used correctly or incorrectly. REF: Alcolizer HH4 Alcohol Tester User Manual V1 Page 1...
-
Page 2: Table Of Contents
Back Operation ......................19 Shutting Down ......................19 Test Options Menu ......................20 Test Cancel ........................ 20 Test Refusal ....................... 20 Setup Menu ........................21 Printing Function ......................23 REF: Alcolizer HH4 Alcohol Tester User Manual V1 Page 2 © Alcolizer Technology... - Page 3 12.2.1 Navigating around the Event Log Page .............. 41 12.2.2 Set Log Settings (Filtering Data) ................. 42 12.2.3 Saving Event Logs ....................42 12.2.4 Erasing Event Logs or Clear Logs on the Device..........42 REF: Alcolizer HH4 Alcohol Tester User Manual V1 Page 3 © Alcolizer Technology...
-
Page 4: Introduction
• Bluetooth Printer (Optional) 2.2 Device Overview The HH4 is a handheld device consisting of a hard-plastic case, rubberised hand grip, wrist strap and the following user displays, buttons and adaptor sockets. (Refer to Figure 1) • Mouthpiece Locator and Sample Inlet Spigot •... -
Page 5: Test Key
• Various Test Modes (Mouthpiece, Passive Standard and Passive Only) • Extensive menus and options • Ready Notification • Blow Notification including progress bar • BAC Level in various formats • Printer Setup • Records Information REF: Alcolizer HH4 Alcohol Tester User Manual V1 Page 5 © Alcolizer Technology... -
Page 6: Mouthpiece Locator And Sample Inlet Spigot
Do not store the device in direct sunlight or places where extreme temperature conditions can occur. Note The HH4 has optional functions which may or may not be active on your device. The screen images shown in this User Manual may differ to your device depending on the options fitted or functions enabled. -
Page 7: Turning On The Device
CAUTION The battery in the HH4 device is a Li-ION battery. As such it should not be tampered with in anyway. Should any problems occur that are related to the battery, contact your local Alcolizer representative for advice. -
Page 8: Testing Types
Note Mouthpiece testing is also referred to as Standard or Active testing. 3.4.1 Mouthpieces There are two types of Mouthpieces available for use on the HH4 (Refer Figure 5). Mouthpiece Types: • Spit Trap Non-Return Valve Mouthpiece (2 variants), and •... -
Page 9: Mouthpiece Testing
(Refer Figure 7). The orientation of the mouthpiece will not affect the sampling. • Remove the remaining portion of the plastic wrap just prior to testing to ensure hygienic use. Figure 6 - Locating the Mouthpiece REF: Alcolizer HH4 Alcohol Tester User Manual V1 Page 9 © Alcolizer Technology... -
Page 10: Taking A Mouthpiece (Active) Breath Sample
• Blow will be displayed when the device is ready (Refer to Figure 8). Figure 8 - Blow is displayed when the device is ready REF: Alcolizer HH4 Alcohol Tester User Manual V1 Page 10 © Alcolizer Technology... - Page 11 Blowing too hard or too soft will result in Invalid Sample Try Again being displayed (Refer Figure 11). The device will return to the Blow screen, another sample can now be taken. REF: Alcolizer HH4 Alcohol Tester User Manual V1 Page 11 © Alcolizer Technology...
-
Page 12: Analysing A Mouthpiece Breath Sample
0.019g/100ml, orange for 0.020g/100ml to 0.049 g/100ml, g/210L and red for readings greater than 0.050 g/100ml, g/210L. The Recovering period is indicated by Recovering shown on the display (Refer to Figure 13) REF: Alcolizer HH4 Alcohol Tester User Manual V1 Page 12 © Alcolizer Technology... -
Page 13: Passive Testing
To perform another breath test, repeat paragraph 3.4.2. 3.4.5 Passive Testing Passive testing is a test that is performed without using a mouthpiece. The HH4 can perform two types passive testing, that is trigged by button or blow pressure. All Passive testing is performed by holding the device approximately 50mm in front of the test subject’s mouth and asking them to count or talk so that exhaled breath may be picked up by... -
Page 14: Taking A Passive Standard Breath Sample
Perform a Passive Standard test as follows: • On the press test screen, press the Test key. Ready for passive test is displayed (Refer to Figure 16) REF: Alcolizer HH4 Alcohol Tester User Manual V1 Page 14 © Alcolizer Technology... - Page 15 The device will give three sample pump clicks, followed by a long beep sound. Analysing Sample will then be displayed (Refer to Figure 18). REF: Alcolizer HH4 Alcohol Tester User Manual V1 Page 15 © Alcolizer Technology...
-
Page 16: Analysing A Passive Breath Sample
• If a Warning Alcohol Present reading is displayed the device has indicated that alcohol was detected in the near vicinity of subject’s exhaled breath (Refer to Figure 20). REF: Alcolizer HH4 Alcohol Tester User Manual V1 Page 16 © Alcolizer Technology... -
Page 17: Enabling Passive Only
When a Warning Alcohol Present reading is displayed after performing a Passive Only test, it is strongly recommended that a Mouthpiece Breath Test be performed, after the recovery period has ended. REF: Alcolizer HH4 Alcohol Tester User Manual V1 Page 17 © Alcolizer Technology... -
Page 18: Pressure Activated Passive- Blow Testing
• Using the down button, scroll down to Passive Trigger (Refer to Figure 23). Figure 23 - Passive Trigger • Press Test key to select Blow or Button/Blow. • Then go down to Back and Back again REF: Alcolizer HH4 Alcohol Tester User Manual V1 Page 18 © Alcolizer Technology... -
Page 19: Back Operation
• Press the Test key and the display will return to the previous screen. 3.6 Shutting Down The HH4 will automatically shut down after a period of inactivity. Should the device be required to be shut down manually (e.g. to conserve battery life), perform the following procedures: •... -
Page 20: Test Options Menu
• With the Blow screen displayed, press the Up and Down buttons simultaneously. The Test Options Menu and Test Cancel is displayed (Refer to Figure 26). • Press the Down button to highlight Test Refuse (Refer to Figure 27). REF: Alcolizer HH4 Alcohol Tester User Manual V1 Page 20 © Alcolizer Technology... -
Page 21: Setup Menu
5 Setup Menu To access the setup menu, perform the following procedures: • Switch the HH4 device on (refer to paragraph 3.6). • With the screen displaying press to test, Press the Up and Down buttons simultaneously for approximately five seconds. The menu screen will be displayed during this process and then the password set-up code ‘00000000’... - Page 22 Figure 30 - Password Set Up Code 00005000 • Press the Test Key until the Setup Menu is displayed (Refer to Figure 31). Figure 31 - Setup Menu REF: Alcolizer HH4 Alcohol Tester User Manual V1 Page 22 © Alcolizer Technology...
-
Page 23: Printing Function
6 Printing Function The printing function (if installed) enables the printing of records by connecting the HH4 to a portable printer via Bluetooth connection. The device supports the following printers: • Axiohm A631 • SPRT SP-T5 • SPRT SP-T7 • Custom S’Print •... -
Page 24: Bluetooth Printer Pin
34). Figure 34 - Selecting Printer • Use the down arrow and test key to select Edit PIN (Refer to Figure 35). Figure 35 - Edit PIN REF: Alcolizer HH4 Alcohol Tester User Manual V1 Page 24 © Alcolizer Technology... -
Page 25: Pairing The Printer
To Pair the device to the nominated printer, proceed as follows: • Select the up button once and use the test key to select Pairing (Refer to Figure 37). REF: Alcolizer HH4 Alcohol Tester User Manual V1 Page 25 © Alcolizer Technology... - Page 26 Figure 37 - Pairing Selected • Place the HH4 device next to the Bluetooth printer and switch the printer on. Press the test key and he HH4 will search for the printer and display Searching… (Refer to Figure 38). Figure 38 - Searching Displayed NOTE The HH4 will search and display all Bluetooth devices in range.
- Page 27 Press the test key to accept the selected printer, the device will then show Pairing… then Paired Figure 40 - Printer Pairing... Figure 41 - Printer Paired REF: Alcolizer HH4 Alcohol Tester User Manual V1 Page 27 © Alcolizer Technology...
-
Page 28: Printer Driver
SPP-R200 and press the test key to select (Refer to Figure 43). Figure 43 - Printer Selected Once the HH4 device is paired with the printer the Bluetooth icon is visible on the screen at all times (Refer to Figure 44). -
Page 29: Auto Print
• None – regardless of results: nothing transmitted. To set the HH4 to Auto Print Standard, scroll down until Auto Print Standard is highlighted. Positive is the default option. To select All or None, press the Test key until the desired option is highlighted. -
Page 30: Auto Print Passive
• None – regardless of results: nothing transmitted. To set the HH4 to Auto Send Passive, scroll down until Auto Print Passive is highlighted in a similar manner to Auto Send Passive. Positive is the default option. To select All or None, press the Test key until the desired option is highlighted. -
Page 31: Bluetooth Printer Pin
Figure 46 - Pairing Selected NOTE The HH4 will search and display all Bluetooth devices in range. To avoid attempting to connect to a device other than the intended printer, move other Bluetooth items away. • Select the Bluetooth device which HH4 require to be paired (Refer to Figure 47). - Page 32 Figure 47 – Bluetooth Devices • Press the test key to pair HH4 with device. Unit will display a PIN number sent by the computer in this case. Figure 48 - Printer Pairing... • Follow instruction on computer screen to confirm PIN so pairing is completed.
-
Page 33: Auto Send
• Select ‘Yes’ to pair if PIN match with displayed on HH4 screen. Then, HH4 will be paired with computer. Figure 50 – HH4 Paired Figure 51 - Device Paired 7.5 Auto Send NOTE To ensure the correct operation of the Auto Send function, Auto Print Standard and Auto... -
Page 34: Auto Send Standard
• None – regardless of results: nothing transmitted. To set the HH4 to Auto Send Standard, scroll down until Auto Send Standard is highlighted. Positive is the default option. To select All or None, press the Test key until the desired option is highlighted. -
Page 35: Area Code
When the correct number is displayed, press the Test key. The number will be set, and the cursor will move the next digit. Repeat steps if necessary to all required numbers are displayed. REF: Alcolizer HH4 Alcohol Tester User Manual V1 Page 35 © Alcolizer Technology... -
Page 36: Records
Press Test key to activate the records. Press the Up/down buttons to navigate through records as required. Press the Up and Down buttons simultaneously to return to the User Menu. REF: Alcolizer HH4 Alcohol Tester User Manual V1 Page 36 © Alcolizer Technology... -
Page 37: Clearing Records
Figure 55 - Memory Capacity Warnings 10 Calibration 10.1 Calibration Alerts The Alcolizer HH4 requires calibration every six months (190 Days) as per Australian Standards Certification Requirement. The device will display a warning message after switching on if 14 days or less remain before calibration is required (Refer to Figure 56). -
Page 38: Calibration Process
The Serial Number of the instrument, your Purchase Order number if you have an account with us, or credit card details will be required. Then post your Alcolizer HH4 to our Service Centres in Cleveland or Perth. • Unit 9/ 132-140 Ross Court, Cleveland QLD 4163 •... -
Page 39: Alcoconnect
Six monthly calibration at Alcolizer Technology’s Calibration service facilities 12 Alcoconnect Alcoconnect assist is the analysis of data downloaded from the HH4 device. The Alcoconnect software can be downloaded from www.alcolizer.com 12.1 Installing Alcoconnect Software On the Alcoconnect Setup window, click Install (Refer to Figure 58). - Page 40 • A successful connection between the HH4 and the computer will be shown by a green segment on the Read Event Log window (Refer to Figure 60). Figure 60 - Read Event Log Window Click the Read Event Log icon and the Event Log will then be displayed (Refer to Figure 61).
-
Page 41: Navigating Around The Event Log Page
Save Event Log – save as a .csv or xml file to a file location in computer or elsewhere. File Icon Language - Choose a language if the HH4 is configured for multiple languages. Options - Set Log Settings. Activates the Event Log application. Same function as the Log Records Read Event Log icon. -
Page 42: Set Log Settings (Filtering Data)
Figure 62 - Log Settings Window 12.2.4 Erasing Event Logs or Clear Logs on the Device Insert access code ‘00005000’ at set address field to enable additional features. REF: Alcolizer HH4 Alcohol Tester User Manual V1 Page 42 © Alcolizer Technology...
Need help?
Do you have a question about the HH4 and is the answer not in the manual?
Questions and answers