
Related Manuals for Allied Telesis GS950PS V2 Series


Summary of Contents for Allied Telesis GS950PS V2 Series
- Page 1 GS950PS V2 Series Gigabit WebSmart Ethernet Switches GS950/10PS V2 GS950/18PS V2 GS950/28PS V2 GS950/52PS V2 Quick Installation Guide *613-003079 Rev A* 613-003079 Rev. A...
-
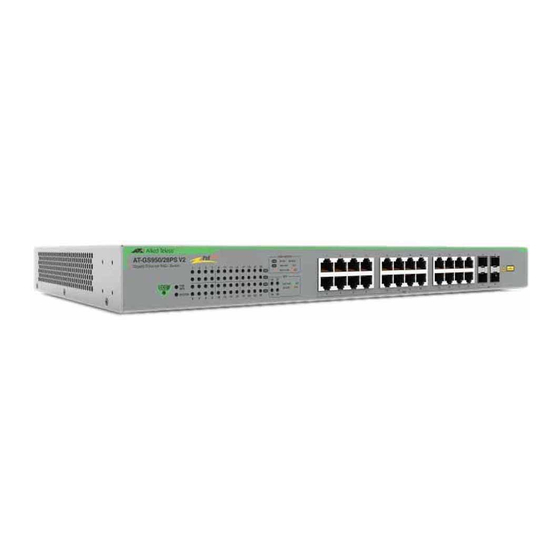
Page 2: Front Panels
Introduction This Quick Installation Guide contains a short version of the installation instructions for the GS950PS V2 Series of Gigabit WebSmart Ethernet Switches. For complete instructions, refer to the GS950PS V2 Gigabit Ethernet Switch Series Installation Guide on the Allied Telesis web site at www.alliedtelesis.com/us/en/services- support. - Page 3 25 to 48 1 to 24 Here are the 100Mbps and 1Gbps SFP transceiver ports. Switch SFP Transceiver Ports GS950/10PS V2 9 and 10 GS950/18PS V2 17 and 18 GS950/28PS V2 25 to 28 GS950PS V2 Series Quick Installation Guide...
-
Page 4: Poe+ Power Budgets
Note: The symbol indicates that a translation of the safety statement is available in the PDF document “Translated Safety Statements” on the Allied Telesis website at www.alliedtelesis.com/us/en/documents/translated-safety- statements. Warning: Class 1 Laser product. L1 Warning: Do not stare into the laser beam. L2... -
Page 5: Installation Options
Warning: To reduce the risk of electric shock, the PoE ports on this product must not connect to cabling that is routed outside the building where this device is located. E40 Installation Options Here are the installation options: GS950PS V2 Series Quick Installation Guide... -
Page 6: Unpacking The Switch
Eight 3.5mm x 16mm wall screws and washers Eight 4mm x 22.2mm wall anchors Eight M3 3mm x 6mm bracket screws Four 10#-32T 4.7mm x 11mm equipment rack screws Four bumper feet One AC power cord Power cord retaining clip GS950PS V2 Series Quick Installation Guide... - Page 7 The power outlet should be located near the switch and be easily accessible. The site should allow for easy access to the ports on the front of the switch so that you can easily connect and disconnect cables, and view the port LEDs. GS950PS V2 Series Quick Installation Guide...
-
Page 8: Installing The Switch
To install the switch on a desk or table, perform the following procedure: 1. Place the switch upside down on the table. 2. Affix the bumper feet to the four corners on the bottom panel of the switch. GS950PS V2 Series Quick Installation Guide... - Page 9 M3 3mm x 6mm screws included with the switch. This figure shows the GS950/28PS V2 Switch. 4. Have another person hold the switch in the equipment rack while you secure it using four equipment rack screws. The switch comes with equipment rack screws. GS950PS V2 Series Quick Installation Guide...
- Page 10 BRKT-J22 brackets kit. The kit is sold separately. For installation instructions, refer to the GS950PS V2 Gigabit Ethernet Switch Series Installation Guide on the Allied Telesis web site at www.alliedtelesis.com/us/en/services-support. You can install the GS950/10PS V2, GS950/18PS V2, and GS950/ 28PS V2 Switches on a wall with the front panels facing up or down.
- Page 11 2. If the four bumper feet are attached to the bottom of the switch, remove them with a flat-head screwdriver. 3. Install the two brackets to the sides of the unit with the eight screws included with the switch. GS950PS V2 Series Quick Installation Guide...
- Page 12 8. If the wall material requires anchors, insert the anchors into the screw holes. 9. Have another person hold the switch at the selected wall location while you secure it to the wall with four screws. GS950PS V2 Series Quick Installation Guide...
- Page 13 The ports must be set to Auto-Negotiation, the default setting, to operate at 1000Mbps. The ports support half- and full-duplex at 10Mbps and 100Mbps. The ports support only full-duplex at 1000Mbps. GS950PS V2 Series Quick Installation Guide...
-
Page 14: Installing Sfp Transceivers
You can install SFP transceivers while the switch is powered on. For a list of supported transceivers, refer to the product’s data sheet on the Allied Telesis web site at www.alliedtelesis.com. The operational specifications and fiber optic cable requirements are included with the transceivers. -
Page 15: Powering On The Switch
1. Install the power cord retaining clip on the AC power connector on the rear panel of the switch, and raise the clip. 2. Connect the power cord to the connector and lower the retaining clip to secure the power cord. GS950PS V2 Series Quick Installation Guide... - Page 16 5. Start the web browser on your workstation. 6. Enter the IPv4 address of the switch in the URL field of the browser. This is the IPv4 address you assigned the switch on the DHCP server. GS950PS V2 Series Quick Installation Guide...
-
Page 17: Ethernet Copper Port Leds
Switch are in the upper and lower corners of the ports. The left LEDs are L/A (Link/Activity). The right LEDs for ports 1 to 24 are PoE+. The right LEDs for ports 25 to 48 are not used. GS950PS V2 Series Quick Installation Guide... - Page 18 - The LEDs are turned off. To turn on the LEDs, use the eco-friendly button. PoE LEDs Solid green The port is delivering power to a powered device. Solid amber The switch shut down PoE+ on the port because of a fault condition. GS950PS V2 Series Quick Installation Guide...
-
Page 19: Sfp Port Leds
The LEDs for the SFP ports on the GS950/52PS V2 Switch are located between the ports. Solid The port has established a 1Gbps link to a network green device. Flashing The port is transmitting or receiving packets at 1Gbps. green GS950PS V2 Series Quick Installation Guide... -
Page 20: System Led
Possible conditions of this state include: - The power supply is not receiving power. - The switch has overheated and shut down. - The input AC power is outside the permitted operating range. - The power supply has failed. GS950PS V2 Series Quick Installation Guide... -
Page 21: Power Led
LEDs on and off. You might turn off the LEDs to conserve electricity when you are not using them to monitor the switch. Reboot the switch: Pressing the button for five to nine seconds reboots the switch. GS950PS V2 Series Quick Installation Guide... -
Page 22: Troubleshooting
AC connector on the back panel of the switch. Verify that the power outlet has power by connecting another device to it. Problem: All of the port LEDs are off even though the ports are connected to active network devices. GS950PS V2 Series Quick Installation Guide... - Page 23 25.5W by reviewing its documentation or data sheet. If the device is connected to the GS950/52PS V2 Switch, check that is connected to a port in the range of 1 to 24. Ports 25 to 48 do not support PoE. GS950PS V2 Series Quick Installation Guide...
- Page 24 Allied Telesis, Inc. reserves the right to make changes in specifications and other information contained in this document without prior written notice. The information provided herein is subject to change without notice. In no event shall Allied Telesis, Inc. be liable for any incidental, special, indirect, or consequential damages whatsoever, including but not limited to lost profits, arising out of or related to this manual or the information contained herein, even if Allied Telesis, Inc.
Need help?
Do you have a question about the GS950PS V2 Series and is the answer not in the manual?
Questions and answers