
Related Manuals for Panasonic NN-CS89LB


Summary of Contents for Panasonic NN-CS89LB
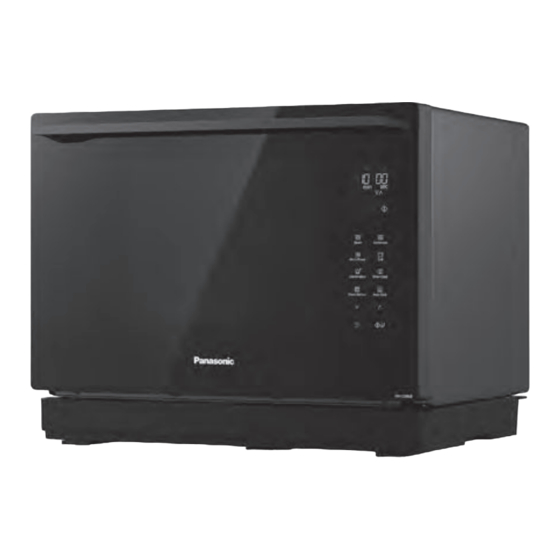
- Page 1 Operating Instructions and Cookbook Steam / Convection / Grill / Microwave Oven Model No. NN-CS89LB Household Use Only Important safety instructions Please read carefully and keep for future reference...
- Page 2 Customer Communications Centre 0344 844 3899 Selected Spares and Accessories: Order direct on line at www.panasonic.co.uk or by telephoning the Customer Communications Centre number above. For Cookery Advice call: 01344 862108 (open Monday to Wednesday 9 am - 12 pm) Alternatively visit our web site at www.theideaskitchen.co.uk...
-
Page 3: Table Of Contents
Thank you for purchasing this Panasonic appliance. Contents Safety Instructions ......4-9 Combination: Cooking with Microwave .....54 Disposal of Old Equipment ....9 Combination: Important Safety Instructions ..10-12 .. 55-56 Before Using Your Oven .....12 Combination: Convection and Microwave ..57-58 Placement of Your Oven .....13... -
Page 4: Safety Instructions
Safety Instructions Important safety instructions. Before operating this oven, please read these instructions carefully and keep for future reference. This appliance can be used by children aged from 8 years and above and persons with reduced physical, sensory and mental capabilities or lack of experience and knowledge if they have been given supervision or instruction by a person responsible for their safety concerning the use of the appliance in a safe way and... - Page 5 Safety Instructions Warning! Do not attempt to tamper with or make any adjustments or repairs to the door, control panel housing, safety interlock switches or any other part of the oven. Do not remove the outer panel from the oven which gives protection against exposure to microwave energy.
- Page 6 Safety Instructions at fuse or circuit breaker panel. This appliance is intended to be used in household applications only. When heating liquids, e.g. soup, sauces and beverages in your oven, overheating the liquid beyond boiling point can occur without evidence of bubbling. This could result in a sudden boil over of the hot liquid.
- Page 7 Safety Instructions Failure to maintain the oven in a clean condition could life of the appliance and possibly result in a hazardous situation. Warning! The accessible parts may become hot in grill, convection, steam and combination use. Young children less than 8 years of age should be kept away. Children should only use the oven under adult supervision due to the temperatures generated.
- Page 8 Safety Instructions Warning! Steam may billow out when you open the door. If there is steam in the oven, do not reach in with your bare hands! Risk of burns! Use oven gloves. Please refer to page 16-17 for correct installation of the shelf accessories.
-
Page 9: Disposal Of Old Equipment
Safety Instructions The purpose of the drip tray is to collect excess water during steam and steam combination mode. It should be emptied after each steam and steam combination operation. Do not use the water tank if it is cracked or broken, as leaking water could result in electrical failure and danger of electric shock. -
Page 10: Important Safety Instructions
A replacement fuse cover can yellow. be purchased from your local Panasonic Dealer. The wire which is coloured blue must be connected to the terminal in the How to Replace the Fuse plug which is marked with the letter N or coloured black. - Page 11 Important Safety Instructions 3. Children shall not play with the Voltage & Power appliance. Cleaning and user The voltage used must be maintenance shall not be made by children without supervision. microwave oven. Using a 4. During and after cooking with a higher voltage than that which oven door when your face is very close to the oven.
-
Page 12: Before Using Your Oven
Important Safety Instructions Heater This is the only time that the oven is operated completely empty. 8. The oven has heating elements Caution! Hot Surfaces! boiler situated in the left side of Exterior oven surfaces and the the oven and a convection heater oven door will get hot during situated in the back of the oven. -
Page 13: Placement Of Your Oven
Placement of Your Oven This oven is intended for counter-top open; 15 cm clear over the top; household use only. It is not intended for 10 cm at the rear. built-in use or for use inside a cupboard. 2. Do not place the microwave oven The microwave oven shall not be placed on a shelf directly above a gas or in a cabinet. -
Page 14: Care & Cleaning Of Your Oven
Care & Cleaning of Your Oven 6. The outside oven surface should 11. A steam cleaner is not to be used be cleaned with a damp cloth. To for cleaning. prevent damage to the operating 12. Ensure all accessories are not be allowed to seep into the using microwave or combination ventilation openings. -
Page 15: Maintenance Of Your Oven
Service Water Tank 1. When your oven requires a service 3. Do not use the water tank if it is call your local Panasonic engineer (Customer Communications could result in electrical failure Centre on 0344 844 3899 can and danger of electric shock. If the recommend an engineer). -
Page 16: Oven Accessories
Oven Accessories 3. Do not use wire shelf in microwave 1. Do not cook food directly on the mode only. base of the oven. Always place food in a microwave safe dish. 4. The maximum weight that can be 2. The metal accessories provided placed on the wire shelf is 4 kg (this must only be used as directed for includes total weight of food and... - Page 17 Oven Accessories Glass Tray Plastic Trivet 1. The glass tray can be used on the 1. The plastic trivet is placed inside the base of the oven for cooking on enamel shelf to cook on steam only microwave mode only. mode or steam + grill or steam + convection .
- Page 18 Oven Accessories The following chart shows correct use of the accessories in the oven. Enamel Wire shelf Glass tray Plastic trivet shelf Microwave Grill Convection Steam Steam + Microwave (Combi 1) Steam + Grill (Combi 2) Steam + Convection (Combi 3) Convection + Microwave + Grill Convection +...
-
Page 19: Parts Of Your Oven
Parts of Your Oven 1 Control panel 2 Drip tray 3 Water tank (behind drip tray) 4 Air vent exhaust (do not remove) 6 Warning label Front view Drip Tray water during cooking. The drip tray should be removed and cleaned on a regular basis. -
Page 20: Outline Diagram
Outline Diagram 1 Door handle 6 Bottom microwave feeding Pull the door handle downwards (refer to page 38) to open. When you open the oven 7 Steam outlets 8 Warning label is stopped temporarily without 9 Grill elements clearing the programmed settings. 10 Convection heater The cooking is resumed as soon 11 LED lights... -
Page 21: Important Information - Read Carefully
Important Information - Read Carefully Safety Never operate the oven without food inside on microwave or combination mode involving microwave. Food Low in Moisture Take care when heating foods low in shut off power at the fuse or the circuit breaker panel. - Page 22 Important Information - Read Carefully Liquids Meat Thermometer Use a meat thermometer to check the degree of cooking of roasts and poultry overheating the liquid beyond boiling only when meat has been removed from point can occur without evidence of bubbling.
- Page 23 Important Information - Read Carefully Standing Time Babies Bottles and Food Jars Standing time refers to the period at the When reheating babies bottles always end of cooking or reheating when food remove top and teat. Liquid at the top of the bottle will be much hotter time which allows the heat in the food to than that at the bottom and must be shaken thoroughly before checking...
-
Page 24: Microwaving Principles
Microwaving Principles Microwave energy has been used in this country to cook and reheat food The microwaves bounce off the metal since early experiments with radar in walls and the metal door screen. World War II. Microwaves are present in the and from manmade sources. - Page 25 Microwaving Principles Standing Time How Microwaves Cook Food When a microwave oven is switched The microwaves cause the water molecules to vibrate which causes by conduction – not by microwave friction heat. This heat then cooks energy standing time is very the food.
-
Page 26: Control Panel
Control Panel NN-CS89LB Display Window Steam (pages 49-51) Convection (pages 44-48) Micro Power (pages 38) Grill (pages 42-43) Combination (pages 52-60) Chaos Defrost (pages 65-67) Auto Cook (pages 68-88) Up/Down Selection (page 37) menu by tapping Stop/Cancel: Before cooking: One touch clears your instructions. - Page 27 General Guidelines Meat Joints Standing Time Stand for 15 minutes wrapped in aluminium foil. standing time (inside or outside of the oven) Plated Meals Stand for 2-3 minutes. conducting through the food. Vegetables Jacket Potatoes Wrapped in aluminium foil when cooked by microwave only.
- Page 28 General Guidelines Cling Film Shape Even shapes cook evenly. food moist and the trapped Food cooks better by steam assists in speeding microwave when in a round container rather than it should be pierced before square. Density steam to escape. Always take care when removing Porous airy foods heat more quickly than dense heavy...
- Page 29 General Guidelines Starting Temperature Checking Food It is essential that food is longer it takes to heat up. checked during and after a Food from a fridge takes longer to reheat than food even if an auto program at room temperature. Food has been used (just as you temperature should be would check food cooked...
-
Page 30: Containers To Use
Containers to Use Choosing the correct High Microwave for container is a very important 1 minute. factor in deciding the Result success or failure of your cooking. Testing Dishes for Suitability - the jug will begin to feel warm. If the For Microwave Cooking Only When unsure that a cooking container it is obviously absorbing microwave... - Page 31 Containers to Use Plastic Wicker, Wood, Straw Baskets Many plastic containers are designed for microwave Dishes will crack and could ignite. Do not use wooden cooking foods high in sugar dishes in your microwave. or fat or for foods that Do not use on any require long cooking times cooking mode.
-
Page 32: Microwave Display Window
Microwave Display Window Preheating (Convection) System Cleaning Temperature Display Child Lock Setting Time Display (Minute/Second) Wire Shelf Weight Display Plastic Trivet More/Less Display Accessory Placement Multistage Enamel Shelf Display Junior Menu Convection Program Steam Microwave Auto Sensor Program Defrost/Frozen mark Auto Cook Program Cooking Modes The diagrams shown below are examples of the accessories. -
Page 33: Cooking Modes
Cooking Modes Accessories Cooking modes Uses Containers to use Grill Wire shelf or • enamel shelf. If using wire • Toast grilling. • Colouring of gratin tray can be metal tin can dishes or meringue placed on be used. pies. base of oven Preheating advised to catch fat... -
Page 34: Combination Cooking Modes
Combination Cooking Modes Accessories Cooking modes Uses Containers to use Steam + Microwave • Plastic trivet on glass tray Microwaveable. rice and potatoes. on wire shelf. No Preheating (Combi 1) Grill + Steam • Cooking gratins. Enamel shelf • Kebabs. or plastic metal tin can No preheating... - Page 35 Let's Start to Use Your Oven Plug In Plug into a 13 amp fused electrical socket. You will be reminded to read your operating instructions. Tap Timer/Clock Twice to Set Clock Set clock as a 24 hr clock. (See page 36 for details).
-
Page 36: Setting The Clock
Setting the Clock BEFORE USE” appears in display window. Enter the time by "SET TIME" will appear tapping “ ” / “ ”. The colon stops blinking. in the display window and Time of day is now locked the colon starts to blink. into the display. -
Page 37: Up/Down Selection
Operation Guide Setting be turned off. Colon or time of day appears in the display window. Tap Timer/Clock Display window four times. Colon or time of day appears in the display window. Tap Timer/Clock Display window four times. Up/Down Selection menu number appears in the display window. -
Page 38: Microwave Cooking And Defrosting
Microwave Cooking and Defrosting There are 7 different microwave power levels available. Do not place food directly until the Select the cooking power you require appears time by tapping The cooking program will in the display window. “ ” / “ ”. start and the time in the display will count down. - Page 39 Defrosting Guidelines By selecting the Defrost power level of defrost is cyclic. During the standing from the microwave power pad and stages there is not any microwave power your microwave. The biggest problem is getting the inside defrosted before the The automatic stand times ensure outside starts to cook.
-
Page 40: Defrosting Chart
Defrosting Chart The times given below are a guideline only. Always check the progress of the food by opening the oven door and then re-starting. For larger quantities adjust times accordingly. Food should not be covered during defrosting. Defrost Standing Food Weight Method... - Page 41 Defrosting Chart The times given below are a guideline only. Always check the progress of the food by opening the oven door and then re-starting. For larger quantities adjust times accordingly. Food should not be covered during defrosting. Defrost Standing Food Weight Method...
- Page 42 Grilling 1 tap 2 taps 3 taps until the power you require appears in the display window. A “P” will appear in the display window. When the oven is preheated the oven open the door and place the food inside. * Skip this step when preheat is not required.
- Page 43 Grilling Oven Accessories to Use When grilling foods the wire shelf should be in the upper shelf position and glass tray on base of the oven to catch fat and drips. Alternatively you can use the enamel shelf in the upper or middle shelf positions.
-
Page 44: Convection Cooking
Convection Cooking Your Combination Oven can be used as a conventional oven using the Convection mode which incorporates a heating element with a fan. For best results always place food in a preheated oven. You can cook in three ways when using convection cooking. - Page 45 Convection Cooking Note 1. Open the door using the pull down door because if Stop/Cancel is touched the program may be cancelled. 2. The oven can not preheat to 30 °C - 60 °C. 3. You can change the cooking time during cooking if required. Tap “...
- Page 46 Convection Cooking When using the oven as a convection oven, there is no microwave power, standard metal baking tins and ovenware. It is possible to cook on one or two levels when using convection cooking. Oven Accessories to Use: One Level Cooking shelf positions.
- Page 47 Convection Cooking Two Level Cooking preheat with or without the accessories When cooking on two levels use the in position. See individual recipes for enamel shelf on the lower shelf position details. and the wire shelf in the upper shelf position.
- Page 48 Convection Cooking Guideline to Oven Temperatures generally cooked uncovered - unless it is a casserole or if you wish to use roasting bags for joints. Level Drying-oven temperature for bread or pizza dough to 30 / 40 °C Warming dishes. 50 °C 60 °C - 70 °C 80 °C - 90 °C Slow cooking.
-
Page 49: Steam Cooking
Steam Cooking rice. There are 2 different steam settings available. Power Level Once Steam 1 Maximum Twice Steam 2 Tap Steam until the power Select the cooking time you require appears in the by tapping “ ” / “ ”. cooking program display window. - Page 50 Steam Cooking Caution! gloves. 2. When removing the food or cooking accessories, hot water may drip from the oven top. 3. Steam may billow out when you open the door. If there is steam in the oven, do not reach in with your bare hands! Risk of burns! Use oven gloves.
-
Page 51: Steam Shot
Steam Shot This feature allows you add steam during cooking (up to 3 minutes). Adding steam cakes and pastries. convection and combination levels 4-12. Set and operate the desired program. Optional If you want to add 2 or 3 hold steam for 2 seconds once or twice within 3 seconds and 1 minute steam will be added. -
Page 52: Combination: Cooking With Steam
Combination: Cooking with Steam Steam can be used to cook foods simultaneously with microwave, grill or keep the food moist. Oven Accessories to Use: Combi 1: Steam + microwave Combi 2: Steam + grill Plastic trivet on glass tray on wire shelf Combi 3: Steam + convection in middle shelf position Plastic trivet inside enamel shelf in... - Page 53 Combination: Cooking with Steam Note 1. The maximum time for cooking in this mode is 30 minutes. If required to operation for the remaining time. The oven will not continue cooking until the water touched. 3. Preheating is not available with Combi 1 or Combi 2. 4.
-
Page 54: Combination: Cooking With Microwave
Combination: Cooking with Microwave Your oven has 2 methods of cooking by combination with microwave. Convection and Microwave Combination cooking is ideal for many foods. The microwave power cooks you see blue sparks or hear crackling or both gives the traditional browning and crispness. -
Page 55: Combination
Combination: Convection, Grill and Microwave This combination mode is very useful for foods which require quick browning or and yorkshire puddings. Food should always be cooked uncovered. Tap combination until the level you require appears in the display window (see chart below). Combination Uses Levels... - Page 56 Combination: Convection, Grill and Microwave Oven Accessories to Use Do not use this program with less than 200 g of food. Do not use the enamel shelf for combination cooking with microwave. Food should be placed directly onto the wire shelf in either of the shelf be placed directly onto the wire shelf in positions.
-
Page 57: Combination: Convection And Microwave
Combination: Convection and Microwave This is the most popular combination mode combining convection heat with are very successful using this combination. Unsuitable foods are those which puddings. It is not necessary to preheat oven on combination except when cooking pastry g of food. - Page 58 Combination: Convection and Microwave Oven Accessories to Use Do not use this program with less than 200 g of food. Do not use the enamel shelf for combination cooking with microwave. Joints and portions of meat should be be placed directly onto wire shelf in the placed on the glass tray on wire shelf in lower or middle shelf position.
- Page 59 Combination: Convection and Grill This mode can be programmed to cook or reheat food by combining grill and often reduce traditional oven cooking times. Do not use this program with less than 200 g of food. preheat. A “P” will appear in the Combi Level display window.
- Page 60 Combination: Convection and Grill Oven Accessories to Use Use the enamel shelf or wire shelf for convection and grill cooking. If placing food catch fat and drips. Large pieces of meat are placed on the Pizza can be placed directly on the wire enamel shelf in the lower shelf position.
-
Page 61: Multi-Stage Cooking
Multi-Stage Cooking 2 or 3 Stage Cooking Select Select desired desired power power Set the Set the level. level. cooking time cooking time by tapping by tapping The cooking program will start and the time in the display will count down. Example To defrost (270 W) for 3 minutes and cook food on High Microwave (1000 W) power for 3 minutes. -
Page 62: Using The Timer
This feature allows you to program the oven as a kitchen timer. It can be also used to program a standing time after cooking is completed or to program a delay start. 1. Delay Start Cooking Set the desired cooking program and cooking time (up to... - Page 63 2. To Set a Standing Time to program the oven as a minute timer. Set the cooking program and cooking time (up to 2 stages). Set the stand time by tapping once. (up to 9 hours). Example 2 minutes 4 minutes Set the cooking time to Power once.
-
Page 64: Using The Add Time Function
Note 1. Three stage cooking can be programmed including stand time. 2. If the oven door is opened during the stand time or Delay Start or down. in units of seconds. 4. Standing time cannot be used after an auto program. This feature allows you to add cooking time at the end of previous cooking. -
Page 65: Chaos Defrost
Chaos Defrost and bread. Tap Chaos defrost to select the correct defrost category and then enter in the weight of the food in grams (see page 66). and slices of bread should be placed in a single layer. It is not necessary to cover the foods. - Page 66 Chaos Defrost With this feature you can defrost frozen foods according to the weight. Select the category and set the weight of the food. The weight starts from the minimum weight for each category. Select desired menu by tapping pad once. program.
- Page 67 Chaos Defrost 1. Bread they may feel warm straight after defrosting. Loaves can also be defrosted on this program but these will require standing time to allow the centre to thaw out. Standing time can be shortened if slices are separated and buns and loaves cut in half.
-
Page 68: Sensor Reheat Program
Sensor Reheat Program chilled meal. It is not necessary to select the power level, weight or cooking the microwave power level together with a cooking time. Program Weight* Accessories Instructions 4. Chilled To reheat a fresh pre-cooked meal. Meal All foods must be pre-cooked. Foods should be at refrigerator temperature approx. - Page 69 Sensor Reheat Program How it Works Once the Sensor Reheat Program has much longer the food needs to reheat. The remaining cooking time will appear is touched the food is heating up. in the display window after two beeps. Whilst the Sensor program is still in the emitted.
-
Page 70: Auto Steam Programs
Auto Steam Programs This feature allows you to steam some of your favourite foods by setting the weight only. The oven determines the steam level and the cooking time automatically. Select the category and set the weight of the food. The weight is programmed in category. - Page 71 Auto Steam Programs Program Weight* Accessories Instructions 1 Level: 5. Fresh 1 Level: 200 g - 500 g. Fill water tank. Place Vegetables prepared vegetables onto plastic trivet. 1 level Place plastic trivet inside enamel shelf in (200 g - the middle shelf position.
- Page 72 Auto Steam Programs Program Weight* Accessories Instructions 7. Steamed 1 Level: 200 g - 650 g . Fill water tank. Peel Potatoes 1 Level: potatoes and cut into even sized pieces. Place prepared potatoes onto plastic trivet. Place plastic trivet 1 level inside enamel shelf in the middle (200 g - 650 g)
- Page 73 Auto Steam Programs Program Weight* Accessories Instructions 10. Frozen g - 600 g. Fill water tank. Place Fish Fillets plastic trivet inside enamel shelf in the middle shelf position. Select 200 g - 600 g 11. Fresh Fish Fillets and Green vegetables Vegetables beans or asparagus) at the same...
- Page 74 Healthy Grill Menu Select desired menu Cook once. by tapping Select the weight by tapping The weight will count up in 10 g steps. Program Weight* Accessories Instructions breasts to 13. Chicken give moist juicy meat and brown crispy Breasts skin.
-
Page 75: Auto Sensor Programs
Auto Sensor Programs This feature allows you to cook or reheat foods without entering the weight. The built-in sensor measures the humidity of the food and calculates the recommended microwave power level and/or combination setting together with a suggested cooking cooked and piping hot before serving. - Page 76 Auto Sensor Programs Note 1. For best results the Auto Sensor Programs should only be used when the oven is cold. It is recommended that the oven is allowed to cool power level and cooking time. It is not recommended to keep using the Auto Sensor Programs consecutively.
- Page 77 Auto Sensor Programs Program Weight* Accessories Instructions 400 g - 16. Jacket 1500 g with a crisper drier skin. Choose Potatoes medium sized potatoes 200 g -250 g per 400 g - potatoes and prick with a fork several 1500 g times.
-
Page 78: Auto Cook Programs
Auto Cook Programs This feature allows you to cook foods by setting the weight. The oven determines the category of food and enter the weight. To allow for some variations that occur in Select desired menu by tapping pad once. Select the weight by tapping . - Page 79 Auto Cook Programs Program Weight* Accessories Instructions For reheating and browning chilled, 20. Chilled purchased pizza. Remove all packaging Pizza and place on wire shelf in middle shelf 250 g - 500 g very thin pizzas. For reheating and browning frozen, 21.
- Page 80 Auto Cook Programs Program Weight* Accessories Instructions 23. Fish purchased frozen battered or breaded and Chips chips. This program is suitable for 1 weigh between 100 g - 250 g and the chips must weigh between 100 g - 300 g. 200 g - 500 g tray and place on wire shelf in middle shelf...
- Page 81 Auto Cook Programs Program Weight* Accessories Instructions 26. Beef For cooking medium fresh roast beef (top Medium shelf in lower shelf position. Select program 500 g - 2000 g the weight of the food and touch Start/ 20 minutes. 27. Beef For cooking well done fresh roast beef Well Done enamel shelf in lower shelf position.
-
Page 82: Re-Bake Bread Programs
Re-bake Bread Programs Select desired menu pad once. by tapping Select the weight of the food by tapping display reminds you The weight will which accessory to count up in 10 g use and which cooking steps. modes are in use. Program Weight* Accessories Instructions... -
Page 83: Junior Menu
Junior Menu taste like real food and cost less than jars or packets. Extra portions can be frozen in ice cube trays, then defrosted and reheated. Frozen potato products and pasta bakes are perfect for smaller tummies. Mug cakes offer a quick and easy dessert. - Page 84 Junior Menu Program Weight* Accessories Instructions For cooking fresh pasta bake using 33. Junior Pasta Bake cheese or tomato based sauce and grated mild cheddar cheese. Use ® container. Use the following quantities: 250 g 500 g 800 g Pasta 70 g 150 g 250 g Sauce...
- Page 85 Junior Menu Program Weight* Accessories Instructions 35. Vegetable parsnips, potatoes, butternut squash, Purée carrots, sweet potato and swede. The cooked vegetables are then puréed and suitable when weaning babies. Peel and chop the vegetables into even sized ® pieces. Place in a Pyrex dish.
-
Page 86: Cleaning Programs
Cleaning Programs F1. Drain Water Water is pumped through the system to clean the pipes. The water is drained into the drip tray. Add 100 g of Select F1 (Drain water to the water Cook pad Empty the drip tank. Ensure drip once. - Page 87 Cleaning Programs F2. System Cleaning second stage runs water through the system to rinse the pipes. Make a solution of Select F2 (System 20 g citric acid and Cook pad 250 g once. The program will the solution to the run for 29 minutes.
- Page 88 Cleaning Programs F3. Deodorization This feature is recommended for eliminating any odours from the oven. Select F3 pad once. tapping The program time appears in the display window and begins to count down. The program will run for 30 minutes. F4.
-
Page 89: Cleaning The Water Tank
Clean with a soft sponge in water. Remove the water tank and clean the compartment where the water tank is lid and pipe cap and clean. inserted. sure that the pipe faces down (see diagram). Removing the Rubber Seal Inside Ensure that the rubber seal is not close securely and it will leak. -
Page 90: Cooking And Reheating
Cooking and Reheating Guidelines Plated Meals Most foods reheat very quickly in your oven by High Microwave. Meals can be brought back to serving temperature times depend on meal contents. Dense in just minutes and will taste freshly cooked. Always check food is piping hot spread out well. -
Page 91: Reheating Charts
Cooking and Reheating Guidelines Christmas Puddings and Liquids Note - Caution! Liquid at the top of the bottle Take great care when reheating these will be much hotter than at items. Do not leave unattended. Do the bottom. The bottle must not add extra alcohol. - Page 92 Reheating Charts Weight / Power Instructions / Food Quantity Level Guidelines Bread – Precooked – Fresh – N.B. Breads reheated by Microwave will have a soft base. 20 secs Place in glass dish on base. Do not cover. 1 min Croissants / Preheat oven with brioche...
- Page 93 Reheating Charts Weight / Power Instructions / Food Quantity Level Guidelines Canned vegetables 200 g 1 min 30 secs Baked beans 415 g 2 mins 30 secs Baked beans with 415 g 2 mins 30 secs sausages Broad beans 2 mins 300 g Butter beans 1 min 30 secs...
- Page 94 Reheating Charts Weight / Power Instructions / Food Quantity Level Guidelines Savoury pastry products - precooked pastries reheated by microwave will have a soft base. 1 min - Place on a plate on the 150 g 1 min 30 secs base of oven.
- Page 95 Reheating Charts Weight / Power Instructions / Food Quantity Level Guidelines Place on micro-safe plate Mince pies - x 2 10- 20 secs 110 g on base. Remove foil. Pierce packet and place on glass tray on Pancakes 500 g Combi 1 8 mins wire shelf in lower shelf...
- Page 96 Reheating Charts Weight / Power Instructions / Food Quantity Level Guidelines 4 mins Place on base. 450 g Combi 4 12-13 mins Lasagne Place on glass tray on 700 g Combi 5 21-23 mins wire shelf in lower shelf 1.5 kg Combi 4 21-22 mins position.
- Page 97 Reheating Charts Weight / Power Instructions / Food Quantity Level Guidelines Bread Part-baked 220 g (2) Combi 12 6 mins baguettes Place on glass tray on Part-baked garlic 215 g Combi 6 10-11 mins wire shelf in middle shelf baguette/ciabatta position.
-
Page 98: Cooking Charts
Cooking Charts Weight / Power Instructions / Food Quantity Level Guidelines Beans & pulses - should be pre-soaked in cold water overnight (boiling water then 10 mins Chick peas 250 g Simmer then 40 mins Use 600 ml (1 pt) boiling water in a large 12 mins Lentils... - Page 99 Cooking Charts Weight / Power Instructions / Food Quantity Level Guidelines Chicken from raw - caution: Hot fat! Remove accessory with care. Place on plastic trivet on 300 g (2) 11-12 mins glass tray on wire shelf Combi 1 in the lower shelf 600 g (4) 13-14 mins boneless...
- Page 100 Cooking Charts Weight / Power Instructions / Food Quantity Level Guidelines Eggs - Poached then 1 min 10 secs • Place water in a 45 ml 1 Egg shallow dish and heat for water Medium 1 min cooking time on base of then 1 min 40 secs 90 ml 2 Eggs...
- Page 101 Cooking Charts Weight / Power Instructions / Food Quantity Level Guidelines Fish - frozen from raw. Breaded Place on glass tray on 220 g (2) Combi 5 10 mins wire shelf in lower shelf position. Turn halfway. Cakes 270 g (2) Combi 6 18 mins 110 g (4)
- Page 102 Cooking Charts Weight / Power Instructions / Food Quantity Level Guidelines Lamb - from raw - Caution: Hot Fat! Remove accessory with care. Medium: 25 Preheat oven. Place joint on mins per 450 g enamel shelf in lower shelf plus 15 mins position.
- Page 103 Cooking Charts Weight / Power Instructions / Food Quantity Level Guidelines Porridge N.B. Use a large bowl. 30 g oats 1 serving 150 ml 2 mins (¼ pt) milk 50 g oats Place on base and stir 2 servings 275 ml 3 mins 30 secs halfway.
- Page 104 Cooking Charts Weight / Power Instructions / Food Quantity Level Guidelines Fresh vegetables Asparagus 200 g 5 mins Baby corn 200 g 7 mins Broad beans 200 g 6 mins Runner beans 150 g 6 mins Beetroot 13 mins 450 g Broccoli 7 mins 250 g...
- Page 105 Cooking Charts Weight / Power Instructions / Food Quantity Level Guidelines Fresh vegetables - Steamed Runner beans 150 g 10-12 mins Beetroot 250 g 15-17 mins Broccoli 250 g 12 mins Brussel sprouts 11 mins 200 g Butternut squash 15 mins 300 g Cabbage - sliced 300 g...
Need help?
Do you have a question about the NN-CS89LB and is the answer not in the manual?
Questions and answers