Table of Contents
Advertisement
Quick Links
Operation 1/2 2018-05-21 Pub. No.: H640-62001-502
Air-Turbine Handpiece
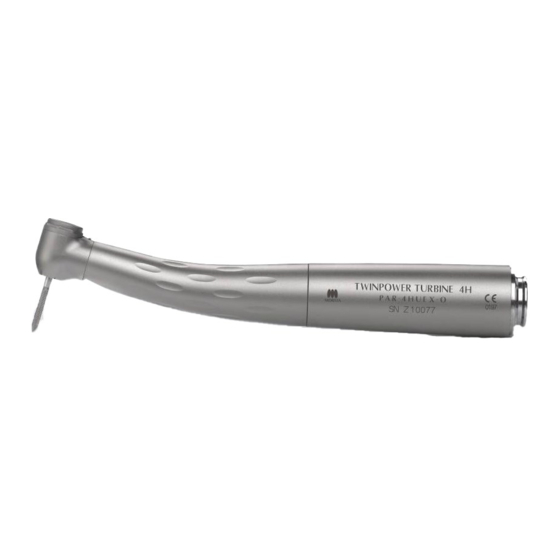
TWINPOWER TURBINE 4H
For direct connection to MORITA 4H couplings
PAR-4HEX-O, PAR-4HX-O, PAR-4HUEX-O, PAR-4HUMX-O
4H
Thank you for purchasing the TWINPOWER TURBINE 4H handpiece.
This instrument transduces compressed air into rotational power and transfers it to a bur or point, which is attached onto
the head of the instrument to cut and polish teeth or artifi cial dentures.
In order to utilize the instrument's functions fully and ensure its safe and effective use, read this manual thoroughly be-
fore using the instrument and pay close attention to the operating procedures and precautions. Keep this manual at hand
for quick reference.
The user (e.g., healthcare facility, hospital, clinic, etc.) is responsible for supervising the use and maintenance of medical devices.
This instrument must not be used by anyone other than a dentist, doctor or other legally qualifi ed professional.
This instrument must not be used for any purpose other than the provision of dental treatment.
Federal law restricts this device to sale by or on the order of a dentist (for U.S.A.).
The following symbols and expressions indicate the degree of danger and harm that could result from ignoring the instructions
they accompany:
This warns the user of the possibility of serious injury or death to the patient, damage or complete
destruction of the instrument or other valuable property, and fi re.
CAUTION
This warns the user of the possibility of slight or moderate injury to the patient.
This alerts the user of important points concerning operation of the instrument or the risk of dam-
age to it.
Disclaimer
J. MORITA MFG. CORP . will not be responsible for the following matters, even during the warranty period.
1. Malfunction or damage resulting from repairs made by personnel not authorized by J. MORITA MFG. CORP .
2. Any unauthorized modifi cations to its products
3. Malfunction or damage resulting from maintenance or repairs carried out using parts or components other than those specifi ed
by J. MORITA MFG. CORP .
4. Malfunction of or damage to Morita products caused by products made by other manufacturers unless they were supplied by J.
MORITA MFG. CORP .
5. Malfunction or damage resulting from failure to observe the safety precautions or operating procedures described in these
Operating Instructions
6. Malfunction or damage resulting from ambient conditions that do not conform to the operating conditions specifi ed in these
Operating Instructions, such as an improper electrical power supply or installation environment
7 . Malfunction or damage resulting from a natural disaster, such as a fi re, earthquake, fl ood or lightning
J. MORITA MFG. CORP . maintains supplies of service parts for 10 years after discontinuation of their production.
For the duration of this period, we will supply replacement parts and be able to repair the product.
* Replacement parts and consumable parts are described in the Regular Inspection List. Replace parts as necessary based on the
degree of wear and length of use.
Standards and Procedures for the Disposal of Medical Devices
If there is a possibility that a medical device is contaminated, the dentist or doctor responsible for the patient's treatment must
confi rm that it is uncontaminated, and must then have it disposed of by a healthcare facility or an agent licensed and qualifi ed to
handle standard industrial waste and industrial waste requiring special treatment.
Maintenance and Inspection
* This instrument should be inspected every 3 months in accordance with the Regular Inspection List.
* Maintenance and inspection are generally consider to be the duty and obligation of the user, but if, for some reason, the user is
unable to carry out these duties, he may rely on a qualifi ed medical device serviceman. Contact your local dealer or J. MORITA
OFFICE for details.
* For repairs, contact J. MORITA OFFICE or your local dealer.
Regular Inspection List
Item
Use the Chuck Grip Tester to check the chuck's gripping strength.
Chuck Gripping Strength
Replace the Cartridge if the chuck has lost its gripping strength.
Cap Tightness
Make sure that the cap and the cap screw are tightened properly.
Rotation and Spray
Make sure the instrument operates smoothly and emits a fi ne, misty spray.
Light Guide
Make sure the light guide is not chipped, cracked or sticking out.
Service and other Contacts
TWINPOWER TURBINE may be repaired and serviced by
•
the technicians of J. MORITA's subsidiaries all over the world.
•
technicians employed by authorized J. MORITA dealers and specially trained by J. MORITA.
•
independent technicians specially trained and authorized by J. MORITA.
For repairs or other types of service, contact your local dealer or J. MORITA OFFICE.
Specifi cations
Use this instrument with dental treatment units that conform to IEC 60601-1.
TWINPOWER TURBINE 4H (PAR-4H * -O)
*MORITA 4H coupling Models
Bearing
Chuck
Operation Instructions
Cartridge
Air Pressure [MPa] (at handpiece end)
Recommended Air Pressure [MPa]
(at handpiece end)
Water Pressure [MPa]
Tip Air Pressure [MPa]
Exhaust Pressure [MPa]
Speed [rpm]
(at 0.2 MPa air pressure)
Air Flow [NL/min]
Spray Hole No.
Length [mm]
Weight [g]
Head Diameter [mm]
Head Height [mm]
Usable Bur Shank Diameter [mm]
Usable Bur Shank Length [mm]
Usable Bur Length [mm]
Tip Diameter [mm]
Burs
Using dirty shanks will cause the chuck to lose its gripping power and accelerate wear on the burs or points.
Some bur detergents contain components that cause metals to rust. Be sure to wash away the bur detergent before
inserting the bur into the chuck. If any bur detergent enters the chuck, the cartridge and chuck will malfunction.
Diamond points bend easily. Even a new bur or point may not have good rotational balance and they may make an
extremely loud metallic sound when rotating. In such cases, stop using the bur as it is defective.
*1
If any bur detergent, dust, or other foreign matter enters the chuck, contact your local dealer or J. MORITA OFFICE to request
an inspection.
*2
Use miniature burs or short-shanked burs for PAR-4HUMX-O. Do not use miniature burs or short-shanked burs for any other
type of handpiece.
• Never use the types of burs or points described below. Using such burs or points is extremely dangerous as
they may become detached and cause injury to the patient's oral cavity or be swallowed by the patient.
Burs or points that do not conform to ISO standards; that have any grooves, scratched or damaged blades or
shanks; that are deformed, bent, rusty, chipped or broken; or that have been modifi ed (such as short-shanked burs).
CAUTION
• When using welded or blazed burs, ensure that the bur tip does not wobble.
• Be sure to follow the requirements regarding the usable bur length and the shank length. Using non-support-
ed burs is dangerous as they may become detached and cause a malfunction.
Parts Identifi cation
Push Button
Cap
Symbols
Procedure
CE(0197) marking
Conforms with the European
Directive, 93/42/EEC.
CE marking
Conforms with the European
Directive, 2011/65/EU.
Autoclavable up to 135°C
(275°F)
Temperature limitation
Manufacturer
Accessories
Spray Hole Wire
Code No. 5250940
(Autoclavable)
[Specifi cations may be changed without notice due to improvements.]
Type
PAR-4HEX-O
PAR-4HX-O
PAR-4HUEX-O
Ball bearing
Push chuck
Capsule cartridge
0.20 – 0.29
0.23 – 0.25
(at handpiece end)
0.05 – 0.20
0.20 minimum
(at handpiece end)
0.03 maximum
(at handpiece end)
370,000 ±30,000 350,000 ±30,000
370,000 ±30,000
60 maximum
(when air pressure at handpiece connection is 0.29 MPa)
3
110
50
10.5
12
13.2
12.7
1.59 – 1.60
*2
10 and over
*2
22 and under
2.0 and under
Use burs that conform to ISO 1797-1.
Head
Body
Notch
Aeroskirt
Light Guide
Cap Screw
Spray Hole
[Some symbols may not be used.]
EU Authorized
Representative under the
European Directive 93/42/
EEC
Supports high-temperature
Cleaning and disinfection.
Humidity limitation
Date of manufacture
Sold Separately
Maintenance Kit for 4H Code No.1831130
AR SPRAY
Code No. 5010216
4H Spray Nozzle Set
or 5010212
Code No. 5010307
(yellow-green)
Code No. 5010695
MORITA MULTI SPRAY
Code No. 7914113
or 5010201
(Ethanol disinfectable)
Phillips Screwdriver
Cap Tool
Code No. 5011440
Code No. 5011328
(Ethanol disinfectable)
(Ethanol disinfectable)
Operating, Transport and Storage Environments
Operating Temperature: +10°C to +40°C (+50°F to +104°F); Humidity: 30% to 75% (without condensation);
Atmospheric Pressure: 70 kPa to 106 kPa
Transport and Storage Temperature: -10 °C to +70°C (+14°F to +158°F); Humidity: 10% to 85% (without condensation);
PAR-4HUMX-O
Atmospheric pressure: 70 kPa to 106 kPa
* Do not expose the handpiece to direct sunlight for an extended period of time.
* If the handpiece will not be used for an extended period of time, store it in a clean, dry place after autoclaving it.
* The useful life of the TWINPOWER TURBINE 4H is 4 years (based on self-certifi cation) from the date of shipment
Rotor cartridge
provided it is regularly and properly inspected and maintained. The useful life for the cartridges is 1 year.
Warnings and Cautions
• In cases of tooth extractions, split teeth, endodontic treatment etc. or incision or open wounds in soft tis-
sue, care must be taken that air emitted from the handpiece does not cause a subcutaneous emphysema.
• If the bur or point becomes detached while you are drilling a tooth, stop using the instrument immediately.
• When removing tooth decay, never apply force in a direction that could result in the bur or point becoming
detached (scooping up) or apply excessive force.
• Always spray water while using the handpiece to avoid injury to the dental pulp.
• Wait until the bur stops rotating before placing the handpiece inside the patient's oral cavity or removing it.
1
• Avoid operating the handpiece in the following ways as doing so could cause the head, push button and cap
to heat up, resulting in burns to the patient.
• Holding down the push button while the handpiece is in operation.
• Operating the handpiece with the push button pressing against the teeth opposite the working area
when the patient's mouth is not fully open.
9
• Operating the handpiece when abnormal rotation or vibration is suspected.
10.6
CAUTION
• Always wear personal protective equipment (PPE), such as safety glasses, gloves, etc. when using this
7 .5 and over
handpiece.
20 and under
• Be sure to remove the bur or point when storing the handpiece in the dental treatment unit. Storing the
handpiece with the bur or point attached could result in physical injury or property damage.
Crown removal and similar operations produce considerable vibration, which can result in the bur getting stuck in the
*1
handpiece. Avoid this by stopping at regular intervals to remove and reinsert the bur, rather than drilling continuously.
1.
Before Use
* The handpiece is not sterilized before shipping. It must be autoclaved before it is used for the fi rst time.
Pre-use inspection: Check for the following before using the handpiece.
•
The cap and cap screw have been tightened properly.
•
There are no gaps between the connection parts of the cap, head, and body
and no rattling can be heard.
•
There are no cracks, chips, protrusions or dents on the light guide.
There are no rust, scratches or dirt.
•
•
The handpiece rotates smoothly and does not slow down, there is no abnormal
vibration or noise, the head, push button or cap does not heat up.
The spray has a fi ne, misty quality and is emitted from all of the spray holes.
•
If an abnormality is found, refrain from using the handpiece and have it profession-
ally repaired.
• If the cap or the cap screw are loose or if they are damaged or worn, the cap or the cartridge could fl y off in-
side the oral cavity and cause an injury.
2.
Attaching the Handpiece
* Refer to the user manual for the CP4-(W-)O, CP4-(W-)LD couplings.
Handpiece Connection
• Before connecting the handpiece, make sure the lamp cover and connection end are not loose, worn, or
damaged.
• Before using the handpiece, always try operating it outside the oral cavity fi rst to ensure that it is securely
attached to the tube or the coupling. If it is not securely attached, the tube could become detached and
cause physical injury.
Handle the handpiece carefully. Do not drop it, bang it against the dental treatment unit, etc. Doing so could result
in abnormal rotation or, in the event of damage to the light guide, reduced illumination.
Ensure that the handpiece connection or coupling is free of dust and other foreign matter (fi ber such as cotton, O-
ring pieces, etc.). Failure to do so could result in damage to the handpiece.
3.
Inserting Burs
Serial Number
E.g., G00001
1
Insert
E.g., H640G00001T
1
Year of Manufacture
1
(G: 2018, H: 2019...)
GS1 DataMatrix
Atmospheric pressure
Take care to insert the bur straight
limitation
all the way in.
Refer to instructions for
Do not force the bur in with-
use
out holding down the push
button. Doing so will damage
the bur and the chuck.
• Insert the burs and points as far as they will go into the chuck.
• Before using the handpiece, try operating it outside the oral cavity fi rst to ensure that the bur or point does
not wobble, there is no abnormal vibration or noise, and no heat is generated.
• If the bur or point is not completely inserted or an abnormal bur or point is used, the bur or point may be-
come detached and be swallowed by or cause physical harm to the patient.
• Wait until rotation stops completely before inserting or removing bur or point.
CAUTION
(Ethanol disinfectable)
• Exercise caution when inserting or removing the bur or point so as not to injure your fi ngers.
• If you notice any abnormal noise or vibration during use, replace the bur or point with a new one and then
try operating the handpiece to check if the problem has been resolved.
If the bur gets stuck in the handpiece, do not forcibly remove it using pliers or other tools; have it repaired instead.
(Ethanol disinfectable)
If excessive force is applied, the chuck may become damaged.
Make sure cap is not loose.
Cap
Make sure the cap
screw is in place.
Insert
Insert the bur completely.
Hold down the
push button.
Hold down the push button fi rmly, push the bur all the way in, and then re-
lease the push button.
* It is easier to press the push button if you support the body of the hand-
piece with your forefi nger positioned at a point between the head and the
body.
Advertisement
Table of Contents

Related Manuals for Morita TWINPOWERTURBINE 4H


Summary of Contents for Morita TWINPOWERTURBINE 4H
- Page 1 • Before using the handpiece, always try operating it outside the oral cavity fi rst to ensure that it is securely unable to carry out these duties, he may rely on a qualifi ed medical device serviceman. Contact your local dealer or J. MORITA attached to the tube or the coupling.
- Page 2 fi re, fl ood, natural disaster, etc. e. Use or operation of the Product in settings or under conditions not specifi ed by J. MORITA MFG. CORP . or set forth in the Do not leave a handpiece inside the high-temperature washer-disinfector.
Need help?
Do you have a question about the TWINPOWERTURBINE 4H and is the answer not in the manual?
Questions and answers