ETC fos/4 Series User Manual
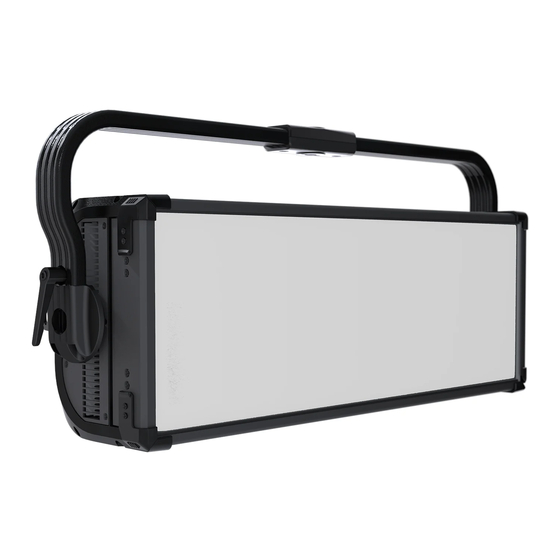
Panel light
Hide thumbs
Also See for fos/4 Series:
- User manual (44 pages) ,
- Quick manual (9 pages) ,
- Installation manual (3 pages)

Related Manuals for ETC fos/4 Series


Summary of Contents for ETC fos/4 Series
- Page 1 fos/4 Panel User Manual Version 1.0.0 Part Number: 7471M1200-1.0.0 Rev: A Released: 2020-01...
- Page 2 To view a list of ETC trademarks and patents, go to etcconnect.com/ip. All other trademarks, both marked and not marked, are the property of their respective owners. ETC intends this document, whether printed or electronic, to be provided in its entirety.
-
Page 3: Table Of Contents
Table of Contents Introduction Help from ETC Technical Services Safety Overview Fixture User Interface Set Up and Focus the Fixture Mount the Fixture Add Accessories Connect Power and Data Focus the Fixture Use Fixture in DMX Mode Set DMX Address Set DMX Mode Set DMX Loss Behavior Use Fixture in Stand-alone Mode... - Page 4 Set Up Wireless Control Set Up Multiverse Wireless Communication Control Fixtures Wirelessly Using the Set Light App Control and Customize the Display Lock the Display Adjust the Display Backlight and Display Timeout Troubleshooting and Maintenance Troubleshooting Checklist Test the Emitters View Diagnostic Data View Battery Level Export Fixture Data for Troubleshooting Restore Default Settings...
-
Page 5: Introduction
Introduction The fos/4 Panel provides an incredibly bright, top quality, highly tunable light. The Panel is available in three sizes, and each size is available in two array types: Lustr X8: The next generation of the Lustr color system incorporates deep red into the •... -
Page 6: Help From Etc Technical Services
Help from ETC Technical Services If you are having difficulties and your problem is not addressed by this document, try the ETC support website at support.etcconnect.com or the main ETC website at etcconnect.com. If none of these resources are sufficient, contact ETC Technical Services directly at one of the offices identified below. -
Page 7: Safety
Safety IMPORTANT SAFEGUARDS When using electrical equipment, basic safety precautions should always be followed including the following: READ AND FOLLOW ALL SAFETY INSTRUCTIONS Do not use outdoors. • Do not let power supply cords touch hot surfaces. • Do not mount near gas or electric heaters. •... - Page 8 AVERTISSEMENT : Prendre connaissance des avertissements de sécurité suivants avant toute utilisation : Débranchez le projecteur de son alimentation et du DMX et laissez-le • refroidir avant d’installer des accessoires ou d’effectuer un nettoyage ou un entretien. N’utilisez que de la quincaillerie de montage adaptée au poids total •...
-
Page 9: Overview
Overview Fixture Large Medium (PL24 or PD24) (PL16 or PD16) Small (PL8 or PD8) Accessory holder: Insert accessories into the two available slots from either side of the holder, page 8 and then lock the holder ( Handles: For medium (PL16 or PD16) and large (PL24 or PD24) fixtures, carry the fixture by the pairs of handles on the back of the fixture, and attach safety cables to handles when mounting the fixture ( page 7... -
Page 10: User Interface
User Interface Effects Max Int 100% Effect Flicker Rate Display: The colors of options on the display correspond to the colors of the encoders below the display ( F ) and the Intensity encoder to the right of the display ( B ). Intensity encoder: When in DMX mode, press the Intensity encoder to enter Focus mode when focusing the •... -
Page 11: Set Up And Focus The Fixture
Set Up and Focus the Fixture WARNING: Note the following safety warnings before use: Only use mounting hardware that is rated for the total weight of the • fixture and accessories. In addition to primary suspension, attach a safety cable (or other •... -
Page 12: Add Accessories
Add Accessories You can use up to two standard accessories (one diffusion and one additional accessory, such as a barn door) in the accessory holder. 1. Unlock the accessory holder on either side by pressing and sliding both accessory holder locks (A), and then rotating the accessory holder door (B). -
Page 13: Focus The Fixture
Focus the Fixture Apply power to the fixture, and wait until the fixture has booted up (the ETC splash screen displays during boot up). Press any encoder to "wake" the display. What screen is currently displayed? DMX: Press the Intensity encoder to turn on the LED array. The display shows a •... -
Page 14: Use Fixture In Dmx Mode
Use Fixture in DMX Mode After you connect power and data to the fixture and provide DMX, press the Function button ( repeatedly to toggle to the DMX screen, where you can set the DMX address, DMX mode, and DMX loss behavior. (You can also set these values using RDM.) The DMX screen displays the current DMX values. - Page 15 DMX Control Channels Parameter DMX Value Description Comments 3200 K 1–165 1900–6000 K CCT values increase by 25 for each DMX value (1 = 1900 K, 2 = 1925 K, etc.). 166–254 6050–10,450 K CCT values increase by 50 for each DMX value (166 = 6050 K, 167 = 6100 K, etc.). 5600 K Curve 0–9 Incandescent 10–19...
-
Page 16: Set Dmx Loss Behavior
Parameter DMX Value Description Comments Strobe No Strobe Shutter open 1–40 Dark Strobe Range is 1–40 Hz. 41–80 Bright Strobe Range is 1–40 Hz. 81–120 Pulse Strobe Strobe includes a fade up and fade down on each pulse. 121–160 Random Strobe Strobe pulses at random intervals. 161–200 Flicker Effect Strobe pulses at random intervals and at random... -
Page 17: Use Fixture In Stand-Alone Mode
Use Fixture in Stand-alone Mode After you connect power to the fixture, press the Function button ( ) repeatedly to toggle through the following modes: Studio: Use one of three studio (white light) presets, or customize the presets. • Color: Use one of 12 color presets, or customize the presets. •... -
Page 18: Studio Mode
Studio Mode Press the Function button ( ) until the display shows the Studio screen. Turn to adjust intensity, or press to toggle between current intensity and 0. Studio Studio 100% 100% 3200 K 3125 K Tint 0.0 Green Tint 0.0 Green Tune Brightest... -
Page 19: Color Mode
Color Mode Press the Function button ( ) until the display shows the Color screen. Turn to adjust intensity, or press to toggle between current intensity and 0. Color Color I: 97% I: 97% Page 1 Page 2 Turn the green or blue encoder to Press and hold an encoder to Turn the red encoder to move modify the value in the matching field. -
Page 20: Effects Mode
Effects Mode Press the Function button ( ) until the display shows the Effects screen. Turn an encoder to modify the value in the matching field. Effects Settings Max Int 100% Max Int 100% Effect TV Set Style Custom Rate Step Preset Turn to select effect,... -
Page 21: Preset Mode
Preset Mode Press the Function button ( ) until the display shows the Preset screen. The background approximates Turn an encoder to modify the the preset color. value in the matching field. Preset Edit Preset Color 4 100% 100% I: 100% Preset Yellow Fade... -
Page 22: Set Up Wireless Control
Set Up Wireless Control Set Up Multiverse Wireless Communication ® You can use a City Theatrical Multiverse transmitting device to wirelessly configure the fixture and control the fixture in stand-alone modes. For information on using Multiverse products, see the documentation provided with the products. Note: For additional guidance and troubleshooting resources when setting up your wireless system, download the Wireless Fixture Setup Information Guide at... -
Page 23: Control And Customize The Display
Control and Customize the Display UI Lock Lock the Display Set this switch to lock the UI and prevent any changes to the fixture setup. The display indicates when the UI is locked. Effects Max Int 100% Effect Flicker Adjust the Display Backlight Rate and Display Timeout UI Locked... -
Page 24: Troubleshooting And Maintenance
Troubleshooting and Maintenance Troubleshooting Checklist If you cannot find the resources that you need in this document, contact ETC Technical Services (see Help from ETC Technical Services on page 2 What I'm Seeing What Might Be Wrong What To Try Fixture is in Direct Mode (which is not a Change to a calibrated DMX mode. -
Page 25: Test The Emitters
(overriding any other instructions to the fixture) until you return to the Test screen and exit it. View Diagnostic Data As part of troubleshooting any issues with a fixture, ETC Technical Services may ask that you view diagnostic data on the fixture. Press the Menu button ( ), turn the Intensity encoder to navigate to Diagnostics, and then press the Intensity encoder to select it. -
Page 26: View Battery Level
Export Fixture Data for Troubleshooting As part of troubleshooting any issues with a fixture, ETC Technical Services may ask that you export fixture data to a USB flash drive and then send the data for further analysis. -
Page 27: Restore Default Settings
Copying the files to the fixture: A progress meter displays as the files are copied to the fixture. Verifying the files: The ETC logo displays on the top half of the screen as the fixture verifies the files. You can safely remove the USB drive at this time. -
Page 28: Backup And Restore The Fixture Configuration
Update All Connected Fixtures After you update the firmware on a fixture, verify that the fixture is not receiving DMX/RDM before you proceed. Press the Menu button ( ) on the fixture, and then use the Intensity encoder to navigate through the menu: Local Settings > Push Firmware. -
Page 29: Specifications And Reference
Specifications and Reference For full product specifications, see the fos/4 Panel datasheet at etcconnect.com. Environment The Panel operates in ambient temperatures of 0°C–40°C (32°F–104°F) and is rated IP20 (for use in dry locations only). Fixture temperature information: Maximum recommended ambient operating temperature: Ta=40°C (104°F) •... -
Page 30: Electrical
Parameter Fixture Value Description Manufacturer ID 0x6574 Electronic Theatre Controls Model ID fos4PL8 0x0400 ETC fos/4 Small Panel Lustr fos4PD8 0x0401 ETC fos/4 Small Panel Daylight fos4PL16 0x0410 ETC fos/4 Medium Panel Lustr fos4PD16 0x0411 ETC fos/4 Medium Panel Daylight... -
Page 31: Fixture Compliance
Fixture Compliance cETLus Listed • Conforms to UL 1573 • Certified to CAN/CSA C22.2 No. 166 • Conforms to EN60598-1 and EN60598-2-17 • Wireless Radio Compliance Contains: FCC ID VU65995, IC ID 7480A-5995 FCC Statement This device complies with part 15 of the FCC Rules. Operation is subject to the following two conditions: This device may not cause harmful interference and This device must accept any interference received, including any interference that may... - Page 32 Holzkirchen, DE +49 (80 24) 47 00-0 Rome, IT +39 (06) 32 111 683 Hong Kong +852 2799 1220 Paris, FR +33 1 4243 3535 etcconnect.com Support support.etcconnect.com Contact etcconnect.com/contactETC © 2020 Electronic Theatre Controls, Inc. Trademark and patent info: etcconnect.com/ip Product information and specifications subject to change. ETC intends this document to be provided in its entirety. 7471M1200-1.0.0 Rev A Released 2020-01...
Need help?
Do you have a question about the fos/4 Series and is the answer not in the manual?
Questions and answers