HME Clear-Com HelixNet Digital Partyline User Manual
For arcadia
Hide thumbs
Also See for Clear-Com HelixNet Digital Partyline:
- Quick start manual (2 pages) ,
- Quick start manual (2 pages)

Related Manuals for HME Clear-Com HelixNet Digital Partyline


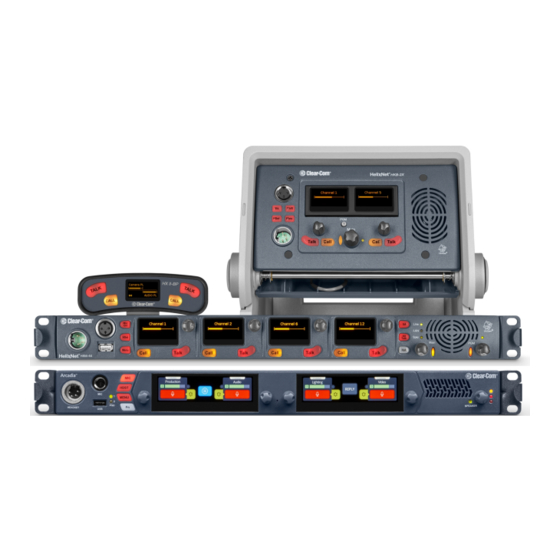
Summary of Contents for HME Clear-Com HelixNet Digital Partyline
- Page 1 User Guide HelixNet Digital Partyline for Arcadia User Guide Part Number: PUB-00199 Rev A Date: September 09, 2022...
- Page 2 The product described in this document is distributed under licenses restricting its use, copying, distribution, and decompilation / reverse engineering. No part of this document may be reproduced in any form by any means without prior written authorization of Clear-Com, an HME Company.
-
Page 3: Table Of Contents
HelixNet for Arcadia | User Guide Table of contents Table of contents 1 Introduction 1.1 Further Information 2 Remote Station: Front panel 2.1 Remote Station: rear panel 2.2 Remote Station: Channel Keyset and Display 2.3 Configuring and managing Remote Station from front panel menus 2.4 Using the Remote Station 3 HKB Speaker Station 3.1 Speaker Station : Front Panel... - Page 4 HelixNet for Arcadia | User Guide 7.1 Introduction 7.2 Ethernet Cable Recommendations 7.3 Microphone Cable Recommendations 7.4 Cable Connections 8 Troubleshooting 9 Important Safety Instructions 10 Additional instructions 10.1 Safety symbols 11 Regulatory Information 11.1 United Kingdom (UKCA Mark) Page 4...
-
Page 5: Introduction
HelixNet for Arcadia | User Guide Introduction HelixNet® Partyline is a digital intercom system that combines the simplicity and ease of use of an analog partyline system with the quality and deployment flexibility of Ethernet networks. User stations can be added to the system without configuration Simple and fast global web browser or front panel configuration All HelixNet enabled partyline channels are available on every cable Easy integration with other 2-wire or 4-wire systems... - Page 6 HelixNet for Arcadia | User Guide HelixNet endpoints can operate using PoE. However, remote stations and speaker stations should be powered locally with the PSU that is supplied with the device. Note: When using an IEEE-802.3af compliant PoE switch, you must take into account the switch's power budget.
-
Page 7: Further Information
HelixNet for Arcadia | User Guide Further Information For the latest information about HelixNet Partyline, including software updates, see the HelixNet Knowledge Center. For more information about the Arcadia Central Station, see The Arcadia Central Station Knowledge Center. Page 7... -
Page 8: Remote Station: Front Panel
HelixNet for Arcadia | User Guide Remote Station: Front panel Key to Remote Station: Front panel Feature Description Ear for rack mounting Remote Station. Headset socket (4-pin XLR–M) Function Mic ground Mic + Earphone ground Earphone Gooseneck microphone socket (3-pin female Tuchel connector) Mic control [MIC ON]. - Page 9 HelixNet for Arcadia | User Guide Key to Remote Station: Front panel Headset key [HSET]. Press to activate the headset mic. When the headset is connected, the gooseneck microphone is disconnected. Audio output to the loudspeaker is diverted to the headphones. Menu.
- Page 10 HelixNet for Arcadia | User Guide Key to Remote Station: Front panel Program feed audio level rotary control [Program]. To increase the volume of the program feed to the loudspeaker / headphones, turn clockwise (up to 360°). To decrease the volume, turn anticlockwise (up to 360°). As you increase or decrease the volume, the level control LEDs pass through a range of indicator colors: LED color...
-
Page 11: Remote Station: Rear Panel
HelixNet for Arcadia | User Guide Remote Station: rear panel Key to Remote Station: rear panel Feature Description PSU holder for a separate external AC-DC power supply. The external PSU provides the 48V required and at its input takes 100-240V, 50-60Hz. Power supply. - Page 12 HelixNet for Arcadia | User Guide Key to Remote Station: rear panel Ethernet/Power Over Ethernet (RJ45 connector) An LED on the left-hand side of the connector illuminates when the link is working. An LED on the right-hand side of the connector flashes green when there is network activity.
- Page 13 HelixNet for Arcadia | User Guide Key to Remote Station: rear panel Control input/output (DB9 connector) Function Pin 1 Audio out + Pin 2 Audio in + Pin 3 Pin 4 Relay NC Pin 5 Relay NO Pin 6 Audio out - Pin 7 Audio in - Pin 8...
-
Page 14: Remote Station: Channel Keyset And Display
HelixNet for Arcadia | User Guide Key to Remote Station: rear panel Hot Mic output. This connection is a 1/4-in (0.64 cm) phone jack. It provides an output signal from the selected headset or panel microphone. The Hot Mic output is always live. - Page 15 HelixNet for Arcadia | User Guide Key to Remote Station front panel: Channel keyset Feature Description Display screen. There are multiple screensaver options. If the Rotary controls are touched, this screen also displays the sound level on the Channel (controlled by the rotary) and the system information icons.
- Page 16 HelixNet for Arcadia | User Guide Remote Station display icons and indicators Name Icon Description Channel label A descriptive name for the Channel. The maximum length is 10 characters. Channel listen The volume of the Channel audio. volume level Paired Appears on the Remote Station and Speaker Station when it is connected properly over LAN.
-
Page 17: Configuring And Managing Remote Station From Front Panel Menus
HelixNet for Arcadia | User Guide Remote Station display icons and indicators Expansion Appears on the Remote Station when the device is part of an Expansion Group. Warning Appears on the Remote Station, Speaker Station and beltpack when something is wrong. Warning messages can be accessed in the Diagnostic menu. - Page 18 HelixNet for Arcadia | User Guide Configuring Settings 1. For each menu, turn the rotary control clockwise to scroll down the menu items. Turn counter clockwise to scroll up the menu items. Off-screen menu items are indicated by arrows at the top and/or bottom of the screen.
- Page 19 HelixNet for Arcadia | User Guide 3. To limit the audio level delivered to the headphones (or to disable headphone limiting): a. In the third menu, select Headphone Limit. b. In the fourth menu, select one of the following: +6dB 0dB (default) - 6dB c.
- Page 20 HelixNet for Arcadia | User Guide 6. To select the type of microphone on the headset: a. In the third menu, select HS Mic Type. Note: HS = Headset. b. In the fourth menu, select either of the following types of microphone: Electret (-15dB) Dynamic (0dB) (default) Dynamic (low)
- Page 21 HelixNet for Arcadia | User Guide 2. From the third menu, select Label. 3. From the fourth menu, select the existing label by scrolling to it and pushing the rotary controller. Edit the label by rotating the controller to scroll through letters and digits and pushing to select a letter/digit.
- Page 22 HelixNet for Arcadia | User Guide 2. From the fourth menu, select one of the following: Enabled Disabled (default) 3. To confirm the selected setting, press the rotary control. To select the VOX Off Delay: 1. From the third menu, select VOX Off Delay. 2.
- Page 23 HelixNet for Arcadia | User Guide 3. From the fourth menu (fourth display screen), select one of the following: IFB Disabled (default) - 6dB -12dB -18dB -24dB Full Cut 4. To confirm the selected setting, press the rotary control. Audio Settings for the SA (Stage Announce) Output/4-Wire Out On Remote Stations, SA can be disabled from channel assignment.
- Page 24 HelixNet for Arcadia | User Guide 3. To select the gain: a. From the third menu, select Gain. b. From the fourth menu, select one of the following: +12dB +6dB 0dB (default) -6dB -12dB c. To confirm the selected setting, press the rotary control. 4.
- Page 25 HelixNet for Arcadia | User Guide 5. To associate any available Channel (or to disable Channels associations) with the selected port: a. From the third menu, select Channel Assign. b. From the fourth menu, select one of the following: Disabled (default) Channel 1 Channel 2 Channel 3...
- Page 26 HelixNet for Arcadia | User Guide Audio Settings for the Front Panel To configure the audio settings for the Front Panel: 1. In Menu mode, select Audio Settings and then Front Panel. 2. From the third menu, select Loudspeaker Dim. 3.
- Page 27 HelixNet for Arcadia | User Guide Key(s) Description Talk #1 Talk keys for the available Channels. Talk #2 Talk #3 Talk #4 SA Out key Key used to talk to a connected public address or Stage Announce (SA) system. Note: The All Talk and RMK (Remote Mic Kill) key are also displayed in the list.
- Page 28 HelixNet for Arcadia | User Guide To enable or disable the RMK (Remote Mic Kill) key: 1. In Menu mode, select Station Settings and then Keysets. 2. From the third menu, select RMK. Note: Talk Latch and the SA Output Key are also listed in this menu. 3.
- Page 29 HelixNet for Arcadia | User Guide Setting Key Brightness By default, the front panel keys are set to High / Low. To set the brightness of all front panel keys: 1. In Menu mode, select Station Settings and then Display. 2.
- Page 30 HelixNet for Arcadia | User Guide 2.3.4 Editing the Channel label The maximum length for a Channel label is 12 characters. To edit the Channel label: 1. In Menu mode, select Channels and then the name of the Channel you want to edit. 2.
- Page 31 HelixNet for Arcadia | User Guide Assigning the Program Listen to a Channel To assign (or unassign) the Program Listen (Program Feed) to a Channel: 1. In Menu mode, select Channels and then the name of the Channel. 2. From the third menu, select Program Listen. 3.
- Page 32 HelixNet for Arcadia | User Guide Configuring Opto Inputs To configure the Control I/O for the Opto input: 1. In Menu mode, select Control I/O. 2. From the second menu, select Inputs. 3. From the third menu, select Opto 1 4.
- Page 33 HelixNet for Arcadia | User Guide Configuring the Relay Output To configure the Control I/O for the Relay output: 1. In Menu mode, select Control I/O. 2. From the second menu, select Outputs. 3. From the third menu, select Relay 1 4.
- Page 34 HelixNet for Arcadia | User Guide Viewing Network Preferences To view network preferences: 1. In Menu mode, select Networking > Preferences You can view the following: Hostname DHCP enabled or disabled IP address Subnet Mask Gateway Pairing to an Arcadia Central Station To pair to an Arcadia Central Station: 1.
- Page 35 HelixNet for Arcadia | User Guide Viewing the Current Versions of the Software To view the current versions of the software on the Remote Station: 1. In Menu mode, select Administration and then Software. 2. From the third menu, select Current. 3.
- Page 36 HelixNet for Arcadia | User Guide Resetting the Remote Station to Default Settings To reset the Remote Station to its default (factory mode) settings: 1. In Menu mode, select Administration and then Reset. 2. The third menu displays a selected menu item: Reset to Default. 3.
-
Page 37: Using The Remote Station
HelixNet for Arcadia | User Guide Viewing Network Information To view network status information: 1. In Menu mode, select Diagnostics and then Network. 2. To view status information about the powerline: a. From the third menu, select Powerline. b. On the fourth menu, the IP address is given. 3. - Page 38 HelixNet for Arcadia | User Guide 1. Connect the gooseneck mic, using the gooseneck mic connector (3-pin female Tuchel connector) on the left of the front panel. Note: For the location of the gooseneck mic connector, see C in Remote Station: Front panel on page 2.
- Page 39 HelixNet for Arcadia | User Guide 1. Connect the headset, using the headset connector (4-pin XLR–M) on the far left of the front panel. The Headset key is automatically activated. Incoming audio is routed to the headset instead of the loudspeaker. Note: For the location of the headset connector and the headset key, see B &...
- Page 40 HelixNet for Arcadia | User Guide In Menu mode, the display screens display the four levels of menu. The menu hierarchy proceeds left to right: The top level menu is presented in the first screen (furthest left on the front panel). The lowest level menu is presented in the fourth screen (furthest right on the front panel).
- Page 41 HelixNet for Arcadia | User Guide 2.4.4 Using the All Talk Key To talk to all connected intercom users, devices and systems, excluding the SA (Stage Announce) facility: 1. Press the All Talk key to the right of the fourth (last) display screen. Talk keys for all Channels are activated automatically.
-
Page 42: Hkb Speaker Station
HelixNet for Arcadia | User Guide HKB Speaker Station This chapter describes how to use the HelixNet Speaker Station with Arcadia. It contains the following sections: 3.1 Speaker Station : Front Panel 3.2 Speaker Station Front Panel Function Buttons 3.3 Speaker Station Rear Panel 3.4 S-Mount Rear Panel 3.5 Configuring and Managing Speaker Station from Front Panel Menus 3.6 Using the Speaker Station... -
Page 43: Speaker Station : Front Panel
HelixNet for Arcadia | User Guide Speaker Station : Front Panel Key to Speaker Station front panel Feature Description Tilt adjustable display screen. The following default information is displayed: The Channel label. The Channel listen (volume) level. In Menu mode, the display screens display the two levels of menu. The menu hierarchy proceeds left to right: The top level menu is presented in the first screen (furthest left on the front panel). - Page 44 HelixNet for Arcadia | User Guide Key to Speaker Station front panel Talk key. Press to talk on the Channel and to all nodes (intercom devices and systems) listening into the Channel. Loudspeaker / Headphone audio level rotary control [Main]. To increase the volume to the loudspeaker / headphones, turn clockwise (up to 360°).
-
Page 45: Speaker Station Front Panel Function Buttons
HelixNet for Arcadia | User Guide Speaker Station Front Panel Function Buttons Key to Speaker Station front panel function buttons Feature Description Mic control [MIC ON]. Press to activate mic audio. Shift key. Press to display two alternative Channels on the Speaker Station displays. -
Page 46: Speaker Station Rear Panel
HelixNet for Arcadia | User Guide Speaker Station Rear Panel Speaker Station rear connectors Digital Intercom Not connected -30V DC Not connected +30V DC Ground Power Ground 48V DC For power draw, see the Specifications section in this manual. S-Mount Rear Panel The S-Mount is an optional unit that allows you to mount the Speaker Station on a desk or wall. - Page 47 HelixNet for Arcadia | User Guide Note: There are cables pre-installed in the S-Mount that connect to the Speaker Station terminals. Page 47...
- Page 48 HelixNet for Arcadia | User Guide Key to S-Mount rear panel keyset Feature Description Ethernet/Power over Ethernet connection (RJ45). Name Function Transmit Data+ Transmit Data- Receive Data+ Not connected Not connected Receive Data- Not connected Not connected Power connection. The power input connector is a low voltage DC connection. It is 48VDC at a max power of 12.95W.
-
Page 49: Configuring And Managing Speaker Station From Front Panel Menus
HelixNet for Arcadia | User Guide Configuring and Managing Speaker Station from Front Panel Menus This section describes how to configure the settings and manage the Speaker Station using Menu mode. It also shows you how to monitor and diagnose performance issues, using the Diagnostics menus. - Page 50 HelixNet for Arcadia | User Guide 3.5.2 Configuring the Audio settings Audio settings for the headset To configure the audio settings for the headset, see Configuring the Audio settings on page Audio Settings for the Microphone To configure the audio settings for the microphone, see Audio Settings for the Microphone on page Audio Settings for the Front Panel...
- Page 51 HelixNet for Arcadia | User Guide 3.5.4 Networking In Menu mode > Networking, you can: See networking settings including DHCP, IP address, subnet mask and gateway. Pair to an Arcadia Central Station. Viewing Network Preferences To view network preferences: 1. In Menu mode, select Networking > Preferences You can view the following: DHCP enabled or disabled IP address...
-
Page 52: Using The Speaker Station
HelixNet for Arcadia | User Guide Viewing Keysets Information To view key sets information, see Viewing Keyset Information on page Using the Speaker Station This section describes how to use the Speaker Station, after your HelixNet Partyline system has been installed and configured. 3.6.1 Using the gooseneck mic, loudspeaker and headset To use a gooseneck mic to talk to connected intercom users, devices (including beltpacks) - Page 53 HelixNet for Arcadia | User Guide LED color Volume level Green Amber/Green Low/Medium Amber Medium Red/Amber Medium/High High To use a headset to talk and listen to connected intercom users, devices and systems: 1. Connect the headset, using the headset connector (4-pin XLR–M) on the far left of the front panel.
- Page 54 HelixNet for Arcadia | User Guide Tip: To find out more about Clear-Com accessories, including headsets and gooseneck microphones, see http://www.clearcom.com/product/accessories. 3.6.2 Entering and exiting Menu Mode Use Menu mode to: Configure the settings for the Speaker Station, including Channel and audio settings. Administrate the system, monitor system performance and diagnose system issues.
- Page 55 HelixNet for Arcadia | User Guide 2. Speak into the headset or gooseneck mic - see also Using the gooseneck mic, loudspeaker and headset on page To adjust the volume of incoming audio, turn the rotary control. Turn the rotary control clockwise to increase the volume, and counter-clockwise to decrease volume.
-
Page 56: Hxii-Bp Beltpack
HelixNet for Arcadia | User Guide HXII-BP Beltpack This chapter describes how to use the HXII-BP Beltpack with Arcadia. It contains the following sections: 4.1 HXII-BP Beltpack User Controls (Top View) 4.2 HXII-BP Beltpack Connectors and Controls (Front View) 4.3 HXII-BP Beltpack (Bottom View) 4.4 HXII-BP Beltpack (Rear) 4.5 Configuring and managing beltpack from front panel menus 4.6 Using the HXII-BP Beltpack... -
Page 57: Hxii-Bp Beltpack User Controls (Top View)
HelixNet for Arcadia | User Guide This section covers the HXII-BP beltpack that has a 4-pin headset connector, and the HXII-BP- X5 beltpack that has a 5-pin headset connector for split-ear binaural operation. This enables you to pan the keysets channels between left and right ears. For more information about the using the HXII-BP-X5 beltpack with binaural audio, see Binaural Audio on page HXII-BP Beltpack User Controls (Top View) - Page 58 HelixNet for Arcadia | User Guide Key to HXII-BP user controls (top view) Feature Description Talk keys. Press to talk to all nodes (intercom devices and systems) listening into the Channel. There are two Talk keys on the beltpack, one for each of the supported Channels.
-
Page 59: Hxii-Bp Beltpack Connectors And Controls (Front View)
HelixNet for Arcadia | User Guide HXII-BP Beltpack Connectors and Controls (Front View) Page 59... - Page 60 HelixNet for Arcadia | User Guide Key to HXII-BP user controls (front view) Feature Description Channel volume control. Turn to increase and decrease the listen volume level for the Channel. In Menu mode, you can turn either of the side-mounted rotary controls to scroll menu items.
-
Page 61: Hxii-Bp Beltpack (Bottom View)
HelixNet for Arcadia | User Guide HXII-BP Beltpack (Bottom View) Page 61... - Page 62 HelixNet for Arcadia | User Guide Key to HXII-BP user controls (bottom view) Feature Description Line (Digital Partyline) (3-pin female XLR connector). Function Ground +30V DC and Audio -30V DC and Audio etherCon connector. Used for Power over Ethernet (PoE). Name Function Transmit Data+...
- Page 63 HelixNet for Arcadia | User Guide Key to HXII-BP user controls (bottom view) Headset connector HX-II-BP-X headset connection: 4-pin XLR male Function Mic ground Mic positive Earphone ground Earphone positive HX-II-BP-X5 headset connection: 5-pin XLR female Function Mic ground Mic positive Earphone ground Earphone left Earphone right...
-
Page 64: Hxii-Bp Beltpack (Rear)
HelixNet for Arcadia | User Guide HXII-BP Beltpack (Rear) Page 64... -
Page 65: Configuring And Managing Beltpack From Front Panel Menus
HelixNet for Arcadia | User Guide Key to HXII-BP Rear Feature Description Beltloops. Use to thread through a belt or strap for securing the beltpack to a belt or a fixed position. You can also extend the beltloops to allow you to mount the beltpack on a flat surface. - Page 66 HelixNet for Arcadia | User Guide 4.5.1 Using the Menus To place the beltpack in Menu mode, press the Menu key on the top of the beltpack. Notes The Beltpack menu shows the Roles menu by default. If Menu mode is locked on the beltpack, you must unlock the menus from CCM before you can enter the menu.
- Page 67 HelixNet for Arcadia | User Guide 4.5.2 Configuring the Role Settings To configure the Role settings for the headset 1. In Menu mode press the left-hand Call Key and then select Roles. 2. Select the required Role. 3. To confirm the selected setting, press the right-hand Call key. 4.
- Page 68 HelixNet for Arcadia | User Guide 3. To limit the maximum audio level that can be delivered to the headphones: a. Select Headphone Limit. b. Select one of the following: +6dB 0dB (default) - 6dB c. To confirm the selected setting, press the right-hand Call key. Note: When Headphone Limit is set to anything except Off, a LIM indication will show up at the top right of the display.
- Page 69 HelixNet for Arcadia | User Guide 5. To set the type of mic on the headset: a. Select HS Mic Type. b. Select either of the following types of mic. Electret (-15 dB) Dynamic (0 dB) (default) Dynamic (low). This setting corresponds to -10 dB gain on HBP-2X and -15 dB gain on HXII-BP.
- Page 70 HelixNet for Arcadia | User Guide Assign Channels to the left and right beltpack keysets (set of controls). Enable (or disable) Talk key latching. Enable (or disable) beltpack vibration when a call signal is received. Enable (or disable) the USB flasher mode for the beltpack. Tip: For a quick reference to the keysets on the beltpack, see HXII-BP Beltpack User Controls (Top View) on page...
- Page 71 HelixNet for Arcadia | User Guide Setting USB Flasher Mode To enable (or disable) USB Flasher mode 1. In Beltpack Settings select either Left Keyset or Right Keyset 2. Select USB Flasher 3. Select one of the following: Disabled (default) Blinking Solid 4.
- Page 72 HelixNet for Arcadia | User Guide Setting Display Screen Brightness By default, the display screen is set to medium brightness. To set the brightness of the display screen: 1. In Menu mode, press the left-hand Call Key and then select Display Settings. 2.
- Page 73 HelixNet for Arcadia | User Guide Set Rotate Display You can set the beltpack display to rotate according to its physical position. 1. In Menu mode, press the left-hand Call Key and then select Display Settings. 2. Select Rotate Display. 3.
- Page 74 HelixNet for Arcadia | User Guide Viewing Network Preferences To view network preferences: 1. In Menu mode, select Networking > Preferences You can view the following: DHCP enabled or disabled IP address Subnet Mask Gateway Pairing to an Arcadia Central Station To pair to aArcadia Central Station: 1.
-
Page 75: Using The Hxii-Bp Beltpack
HelixNet for Arcadia | User Guide Resetting the Beltpack to Default (Factory Mode) Settings To reset the beltpack to default (factory mode) settings: 1. In Menu mode, press the left-hand Call Key and then select Administration. 2. Select Reset to Default. 3. - Page 76 HelixNet for Arcadia | User Guide The left-hand keyset controls the first (top) Channel displayed on screen. The right-hand keyset controls the second (bottom) Channel displayed on screen. For details of the standard on screen information for each Channel, see Remote Station: Channel Keyset and Display on page Note: For more information about using the beltpack in Menu mode, see...
- Page 77 HelixNet for Arcadia | User Guide 4.6.3 Adjusting the Program Feed Volume Level To adjust the listen level (volume) of the Program Feed to the beltpack, use the up and down controls on the front of the beltpack. Use the up arrow control to increase the listen level (volume), and use the down arrow control to decrease the listen level (volume).
-
Page 78: Specifications
HelixNet for Arcadia | User Guide Specifications This chapter lists the technical specification for HelixNet Digital Partyline with Arcadia. It contains the following sections: 5.1 HRM Remote Station 5.2 HKB Speaker Station 5.3 HXII-BP Beltpack 5.4 Network Page 78... -
Page 79: Hrm Remote Station
HelixNet for Arcadia | User Guide HRM Remote Station 5.1.1 Connectors Specification Description / value Intercom Powerline Outputs Powerline connectivity is not available for Arcadia. Headset 4-pin XLR–M Gooseneck mic 3-pin Tuchel USB Type A Program 3-pin XLR–F SA (Stage Announce) 3-pin XLR–M Hot Mic / IFB Interface 1/4 in. - Page 80 HelixNet for Arcadia | User Guide 5.1.3 Headphone Amplifier Specification Description / value Load impedance 32Ω Output level +12dBu before clipping Sidetone -12dB (selectable) Routed from a 4-wire input @ 0dBu in Max gain Frequency response 180Hz - 10kHz ±3dB Distortion <0.1% THD @ 1 kHz Noise...
- Page 81 HelixNet for Arcadia | User Guide 5.1.5 Program Line Input Specification Description / value Maximum level before clipping 18dBu Nominal input level 0dBu(selectable) Input impedance >= 10 KΩ Routed to 4-wire output @ 0dBu out Frequency response 20Hz - 10kHz ±3dB Distortion <0.2% THD @ 1kHz Noise...
- Page 82 HelixNet for Arcadia | User Guide 5.1.8 20.4.8 Hot Mic Output Specification Description / value Maximum level before clipping +12dBu Nominal output level 0dBu(selectable) Output impedance <= 100Ω Routed from a dynamic headset: Frequency response 300Hz - 12kHz ±2dB Distortion <0.2% THD @ 1 kHz Noise <-55dBu...
- Page 83 HelixNet for Arcadia | User Guide Specification Description / value HRM (speaker off) = 2 beltpacks HRM (speaker on) = 3 beltpacks Powerline connectivity is not available for Arcadia. AC adapter - inline Input Voltage range 100 – 240VAC Input frequency range 50 –...
- Page 84 HelixNet for Arcadia | User Guide 5.1.11 Dimensions and Weight Specification Description / value 19 in. W x 1.75 in. H x 6.4 in. D (483 mm x 44 mm x Dimensions 165 mm) Weight 4 lbs. (1.8 kg) Page 84...
-
Page 85: Hkb Speaker Station
HelixNet for Arcadia | User Guide HKB Speaker Station 5.2.1 Connectors Specification Description / value Powerline Powerline connectivity is not available for Arcadia Ethernet/PoE RJ45 Headset 4-pin XLR–M Gooseneck mic 3-pin Tuchel Input power connector Terminal Block 2 Pole, 5mm 5.2.2 Microphone Pre-Amplifier Specification... - Page 86 HelixNet for Arcadia | User Guide 5.2.3 Headphone Amplifier Specification Description / value Load impedance >32Ω Output level +12dBu before clipping Sidetone -12dB (selectable) Routed from a 4-wire input @0dBu in: Max gain Frequency response 40Hz - 10kHz ±3dB Distortion <0.1% THD @ 1 kHz Noise <-65dBu (@ max gain)
- Page 87 HelixNet for Arcadia | User Guide 5.2.4 Power Specification Description / value Voltage 48V DC Current (Max) 0.3A BTU (Max) 49BTU/hr Input power connector Terminal Block 2 Pole, 5mm Powerline connectivity is not available for Arcadia Input Voltage ±29.5V DC Input current (speaker off) 0.3A Input current (Max)
-
Page 88: Hxii-Bp Beltpack
HelixNet for Arcadia | User Guide Specification Description / value Device class IEEE 802.3af-2003 – Class 0 15.4 W DC max @ Power Source Req. 12.95 W DC max @ Powered Device Draw Environmental 5.2.5 Environmental Specification Description / value Temperature 0˚C - 45˚C (32˚F - 113˚F) Humidity... - Page 89 HelixNet for Arcadia | User Guide 5.3.2 Microphone Pre-Amplifier Specification Description / value Headset Mic impedance: 200Ω (Dynamic) Headset Mic Voltage 1.7V (Electret selectable) Routed to 4-wire output @ 0dBu out: Mic gain 60dB (dynamic) 45dB (electret) Frequency response 300Hz – 10kHz + / -3dB (contoured for intelligibility) Distortion <0.2% THD @ 1kHz Noise-...
- Page 90 HelixNet for Arcadia | User Guide 5.3.4 Power Requirements Specification Description / value Voltage 48V DC Current (Max) 0.09A Power (Max) BTU (Max) 13BTU/hr Unit powered by Powerline Input Voltage ±29.5V DC Input Current (Max) 0.13A Powerline utilization HXII-BP = 1 beltpack Powerline connectivity is not available for Arcadia.
-
Page 91: Network
HelixNet for Arcadia | User Guide Network 5.4.1 Network Protocols (HelixNet v.4) Specification Description / value Ethernet IPv4 Unicast audio and control mDNS (multicast domain name system) Multicast device discovery Layer 3 (OSI model) Routable with mDNS function limitations WavPac Audio codec 5.4.2 Network Ports (HelixNet v.4) - Page 92 HelixNet for Arcadia | User Guide 5.4.4 Recommended Ethernet Switch Features (HelixNet v.4) Required switch features Managed Ethernet Switch – Layer 3 100/1000Base-T ports for endpoints 1000Base IP Trunks between switches QoS Configuration Energy Efficient Ethernet bypass option IGMP Snooping bypass option Page 92...
-
Page 93: Menu Maps
HelixNet for Arcadia | User Guide Menu Maps This chapter describes the menu maps that you can use with HelixNet Digital Partyline with Arcadia. It contains the following sections: 6.1 HRM-4X Remote Station Menu Map 6.2 HKB-2X Speaker Station Menu Map 6.3 HXII-BP Beltpack Menu Map Page 93... -
Page 94: Hrm-4X Remote Station Menu Map
HelixNet for Arcadia | User Guide HRM-4X Remote Station Menu Map Page 94... - Page 95 HelixNet for Arcadia | User Guide Menu 1 (First) Menu 2 > Menu 3 > Menu 4 (Last) > Audio Settings Headset Sidetone Gain Range: 0dB to -18dB Default: -12db Headphone Limit Off + Range: +6dB to -6dB Default: 0db Sidetone Control Tracking Non-Tracking...
- Page 96 HelixNet for Arcadia | User Guide Menu 1 (First) Menu 2 > Menu 3 > Menu 4 (Last) > Gain Range: +12dB to -12dB Default: 0db IFB Dim Level Range: --6dB to -24dB Default: Off Action Trigger Enabled Disabled Default: Enabled Enabled Disabled Default: Disabled...
- Page 97 HelixNet for Arcadia | User Guide Menu 1 (First) Menu 2 > Menu 3 > Menu 4 (Last) > SA Output Mode Channel Assigned Default: Channel Assigned Gain Range: +12 to -12dB Default: 0dB Program Output Unmute Mute Default: Mute Channel Assign Disabled Channel A...
- Page 98 HelixNet for Arcadia | User Guide Menu 1 (First) Menu 2 > Menu 3 > Menu 4 (Last) > Station Preferences Roles Default: HRM – [unique ID Settings Select Role or Local Config] Keyset Keyset 1 – 4 Channel 1 – 12 (or 24) Assign Keysets Talk 1 - 4...
- Page 99 HelixNet for Arcadia | User Guide Menu 1 (First) Menu 2 > Menu 3 > Menu 4 (Last) > Channels Channel 1 Label Press to Edit Channel 2 Max. length for labels = 12 characters Channel 3 Program Listen None List of programs Channel 4 Default: None...
- Page 100 HelixNet for Arcadia | User Guide Menu 1 (First) Menu 2 > Menu 3 > Menu 4 (Last) > Network Preferences Hostname (12 char) DHCP enabled/disabled IP address (enter if required) Subnet mask Gateway Pair to By Name Enabled Station By Address Disabled Default: Enabled...
- Page 101 HelixNet for Arcadia | User Guide Menu 1 (First) Menu 2 > Menu 3 > Menu 4 (Last) > Diagnostics Main PCB Powerlines Powerline 1 Status: [status] DMC: {MAC] HMC: [MAC] MMC: [MAC] Rx rate: [Mbps] Tx rate: [Mbps] Network Status IP Address IP Address...
-
Page 102: Hkb-2X Speaker Station Menu Map
HelixNet for Arcadia | User Guide HKB-2X Speaker Station Menu Map Menu 1 (First) > Menu 2 > Menu 3 > Menu 4 (Last) Roles Select Role or Local Config. Audio Settings Headset Sidetone Gain Range: 0dB to -18dB Default: -12db Headphone Limit Off + Range: +6dB to -6dB Default: 0dB... - Page 103 HelixNet for Arcadia | User Guide Menu 1 (First) > Menu 2 > Menu 3 > Menu 4 (Last) Station Settings Keyset Assign Keyset 1 – 4 Channel 1 – 12 (or 24 depending on license) Keysets Talk 1 - 4 Latching Non-Latching Permanent...
- Page 104 HelixNet for Arcadia | User Guide Menu 1 (First) > Menu 2 > Menu 3 > Menu 4 (Last) Display OLED Brightness High Medium Default: Medium Key Brightness High / Low High / Off Low / Off Off / Off Default: High / Low Screensaver Enabled...
- Page 105 HelixNet for Arcadia | User Guide Menu 1 (First) > Menu 2 > Menu 3 > Menu 4 (Last) Administration Software Current HelixNet Speaker Station Reset Reset to Default Reset Now Reboot Reboot Now Diagnostics Powerlines Powerline 1 Status: [OK or BUSY (according to responses to MME requests)].
-
Page 106: Hxii-Bp Beltpack Menu Map
HelixNet for Arcadia | User Guide HXII-BP Beltpack Menu Map Menu 1 (First) > Menu 2 > Menu 3 (Last) Roles Select Role or Local Config Audio Settings Sidetone Gain Range: 0dB to -18dB Default: -12dB Headphone Limit Off + Range: +6 to -12dB Default: 0dB Headphone Gain 0 - 12dB (increments of 3 dB) - Page 107 HelixNet for Arcadia | User Guide Menu 1 (First) > Menu 2 > Menu 3 (Last) Beltpack Settings Left Keyset Channel assign (1 – 24) Right Keyset: the same as Left Keyset Talk (latch/non latch/disabled) Default: Latch Secondary Talk Action (unassigned/call/control event 1/control event 2) USB flasher...
- Page 108 HelixNet for Arcadia | User Guide Menu 1 (First) > Menu 2 > Menu 3 (Last) Network (HXII-BP Pair to Station By Name powered over Ethernet By Address only) Administration Software Version npl-1.0.x, uboot Software Update npl-1.0.x Reset to Default Reset Now Hardware Main PCB...
- Page 109 HelixNet for Arcadia | User Guide Menu 1 (First) > Menu 2 > Menu 3 (Last) Powerline Status: [OK or BUSY (according to responses to MME requests)]. Note: DMC:[MAC of powerline modem] Line (Partyline) that HMC: [MAC of local blackfin connects beltpack to the processor] network (and which also...
- Page 110 HelixNet for Arcadia | User Guide Menu 1 (First) > Menu 2 > Menu 3 (Last) DHCP (Ethernet only) IP address Gateway Subnet mask Mac address IVP Router (Ethernet only) Keysets 1 & 2 Name: Channel name Talkers: Number of talkers on Partyline Beltpacks: Number of...
-
Page 111: Cabling Reference
HelixNet for Arcadia | User Guide Cabling reference This chapter describes the cables that you should use to connect HelixNet devices. It contains the following sections: 7.1 Introduction 7.2 Ethernet Cable Recommendations 7.3 Microphone Cable Recommendations 7.4 Cable Connections Page 111... -
Page 112: Introduction
HelixNet for Arcadia | User Guide Introduction You can connect beltpacks using: A wide range of standard microphone (intercom) cable types (16 AWG – 26 AWG). CAT5, CAT5e and CAT6 cable types. XLR cable CAT5/6 cable Pin 1 Pin 1 and Pin 2 and shield/drain wire Pin 2 Pin 4, Pin 6 and Pin 8 Pin 3... -
Page 113: Ethernet Cable Recommendations
HelixNet for Arcadia | User Guide Ethernet Cable Recommendations Cable recommendations Category (Cat) Higher Cat numbers will support a higher bandwidth. Therefore, by using a higher Cat number you are future proofing you system to some extent. Example: Cat 5 : up to 1 GB Cat 6: up to 10 GB Use Cat 5e or higher. - Page 114 HelixNet for Arcadia | User Guide Attenuation / Manufacturer Cable type Gauge (AWG) Style 100m Belden 9463f 16 dB Belden 9207 9 dB Belden 1533P Cat5e 11 dB 7.3.1 Quick reference: Cable capacity versus distance Page 114...
- Page 115 HelixNet for Arcadia | User Guide Note: The above graphs are intended as a general guide only. Actual cable performance may vary, depending on the conditions and complexity of the installation. Page 115...
-
Page 116: Cable Connections
HelixNet for Arcadia | User Guide Cable Connections The diagrams on the following pages reference the following labels and notes. Label Manufacturer Part Number Description Belden 8760,9207 18 or 20 AWG twisted pair cable terminated with 3-pin XLR 9463F Middle Atlantic (or CH-1 1 RU shielded chassis equivalent) - Page 117 HelixNet for Arcadia | User Guide Label Note Wire according to table Equipment rack, breakout box chassis and patch panel must be connected to safety earth Connect up to 32 wall plate locations to patch panel with individual CAT 5 cables If multiple wall plates are co-located at a remote location, daisy chain their wiring at the remote location and connect a...
- Page 118 HelixNet for Arcadia | User Guide Page 118...
- Page 119 HelixNet for Arcadia | User Guide Page 119...
-
Page 120: Troubleshooting
HelixNet for Arcadia | User Guide Troubleshooting Issue Solution The Call functionality on my HelixNet Partyline operates at different voltage levels analog beltpack is no longer than analog two-wire Partyline systems. working. Contact Clear-Com for repair options. I cannot pass audio to wired / Two-wire option modules require an external power wireless intercom equipment over supply. - Page 121 HelixNet for Arcadia | User Guide Issue Solution Line 1 (or Line 2) LED is steady There are digital errors or there is cross-talk on that red and one or more Beltpack has Powerline. Look at the Diagnostics->Powerlines- no bars showing up for signal >Powerline 1(or 2) page.
-
Page 122: Important Safety Instructions
HelixNet for Arcadia | User Guide Important Safety Instructions 1. Read these instructions. 2. Keep these instructions. 3. Heed all warnings. 4. Follow all instructions. 5. Do not use this apparatus near water. 6. Clean only with dry cloth. 7. Do not block any ventilation openings. Install in accordance with the manufacturer’s instructions. -
Page 123: Additional Instructions
HelixNet for Arcadia | User Guide Additional instructions 1. The equipment is for use in locations where children are not likely to be present. 2. Do not open the equipment as this will void the safety warranty. 3. The coin-cell battery is not operator replaceable and only to be replace by qualified personnel. -
Page 124: Regulatory Information
HelixNet for Arcadia | User Guide Regulatory Information Manufacturer HM Electronics Inc. Carlsbad California FCC notice This device complies with Part 15 of the FCC rules. Operation is subject to the following two conditions: (1) This device may not cause harmful interference, and (2) This device must accept any interference received, including interference that may cause undesired operation. - Page 125 HelixNet for Arcadia | User Guide Korean notice A급 기기 (업무용 방송통신기자재) 이 기기는 업무용(A급)으로 전자파적합기기로 서 판매자 또는 사용자는 이 점을 주의하시기 바라며, 가정외의 지역에서 사용하는 것을 목 적으로 합니다. The HRM-4X, HKB, HXII-BP-X4 products comply with the following specifications: EN55022 and EN5032 Emissions EN55024...
- Page 126 HelixNet for Arcadia | User Guide Page 126...
Need help?
Do you have a question about the Clear-Com HelixNet Digital Partyline and is the answer not in the manual?
Questions and answers