Table of Contents
Advertisement
Advertisement
Table of Contents

Related Manuals for Snom D120


Summary of Contents for Snom D120
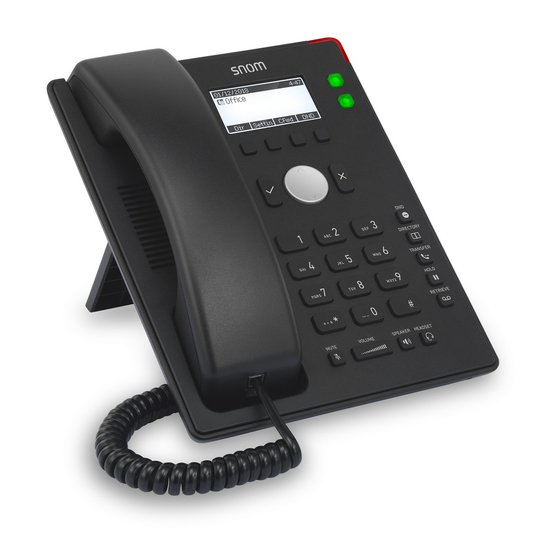
- Page 1 User Manual IP Phone D120...
-
Page 2: Table Of Contents
TABLE OF CONTENTS Copyright, Trademarks, GPL, Legal Disclaimers ............7 Important information ......................8 Safety instructions ......................... 8 SELV (Safety Extra Low Voltage) compliance .............. 8 Standards conformance ......................8 Product specifications ......................9 Disposal of the device ......................9 Cleaning ............................ 9 Setting up the phone ...................... - Page 3 Display layout ........................24 In idle mode ........................24 When the phone is active ....................26 Settings ...........................27 Phone settings .........................27 Settings available in user mode ................27 Settings available in administrator mode ............28 Display backlight and contrast settings ..............29 The phone's web interface ....................31 Opening the web interface ....................31 How the web interface works ..................32 Web settings overriding manual phone settings ...........32...
- Page 4 Using the phone ......................43 Making calls ...........................43 Selecting identity for current outgoing call ...............43 Using different audio devices ..................43 Handset ........................43 Headset ........................43 Speakerphone .......................43 Handset or headset and casing speaker ............44 Using different dialing methods ...................44 Auto dial .........................44 Redialing ........................44 Calling number from call history (missed, received, dialed calls) .....44 Calling number from phone directory ..............44...
- Page 5 Call forwarding ........................54 Making/changing the settings on the phone and turning on call forwarding ..55 Turning off call forwarding ....................56 Turning forwarding of all calls on/off with a programmable function key ..56 Configuring the function keys ..................57 Programming the function keys ..................59 Function key settings on the phone ................59 Function key settings on the web interface ...............61 Selected examples for function key programming ............62...
- Page 6 Hard reboot ..........................81 Reset to factory values ......................81 TFTP Update ..........................82 Manual initialization ......................82 Contacting Snom Support ....................82 Traces .............................83 Appendix 1 - Display Symbols and Icons ..............84 Symbols found in the function key line ................84 Display indications .......................85 Appendix 2 - Status Messages ..................
-
Page 7: Copyright, Trademarks, Gpl, Legal Disclaimers
Snom therefore disclaims all warranties and liability for the accurateness, completeness, and currentness of the information published, except in the case of intention or gross negligence on the part of Snom or where liability arises due to binding legal provisions. -
Page 8: Important Information
Follow the instructions in this manual and other applicable documentation of the device. • If the phone is not supplied with power via an Ethernet cable, use only a power adapter expressly recommended by Snom Technology. Other power supplies may damage or destroy the phone, affect its behavior, or induce noise. •... -
Page 9: Product Specifications
If PoE is not available, you can use a power adapter. The power adapter is not included in the delivery; please order one of the following separately: ◦ EU: Snom A6, Phihong model number PSM10R-050, PN 00004325. UK clip available separately. ◦... -
Page 10: Setting Up The Phone
D120 User Manual Setting up the Phone etting up the phone elivery Content Quick Installation Guide D120 General Public License Base phone unit Footstand Handset Handset cord Ethernet cable Quick Installation Guide, GNU General Public Licence ttaching and detaching the footstand The footstand has four snap-fits, two narrower and longer ones and two wider and shorter ones. -
Page 11: Detaching
D120 User Manual Setting up the Phone 2. Tilt the footstand upwards as shown in step 3 (Fig. 2) and insert the narrower and longer snap- fits into the holes marked (Fig. 1). Please note that you will encounter a slight resistance when inserting the hooks. -
Page 12: Connecting The Phone
D120 User Manual Setting up the Phone onnecting the phone (2, 3) If no PoE available (1, 2) (2, 3) Not included in delivery Optional 5V DC The phone can be operated with Power over Ethernet (PoE) provided via the network cable or, if PoE is not avaible in your network, with one of the separately available power adapters (see "Product... -
Page 13: Initializing And Registering The Phone
For more information, see "Identities/accounts" on page 68. Initialization Snom phones are plug-and-play. Once the phone is connected to your network, it will begin to initialize. Note: Normally the initialization is completely automatic, using DHCP. If the phone... - Page 14 D120 User Manual Setting up the Phone Fig. 1 Fig. 2 Fig. 3 ◦ Press on the navigation key to move up or down the list one item at a time. When all time zones are shown (Fig. 1), you also have the option to jump to the beginning of the next time zone by pressing the function key underneath ◦...
-
Page 15: What To Do If Initialization And Registration Are Unsuccessful
What to do if initialization and registration are unsuccessful Your network or your VoIP provider may require more login data than requested by the Snom phone during the initialization and registration process. This data is entered on the web interface of the phone. -
Page 16: Correcting The Clock
D120 User Manual Setting up the Phone Correcting the clock The phone receives the time and date from your NTP time server. If the time and/or date on the display are incorrect, you may need to set the correct time zone. The timezone setting can be changed on the phone and on the web interface when the phone is in admin mode. -
Page 17: Getting To Know Your Phone
D120 User Manual Getting to Know Your Phone etting to know your phone t a glance The factory settings at a glance: Call LED • Blinking fast: Incoming call Outgoing • Steady light: Busy or missed call identity: • Blinking slowly: Call on hold... - Page 18 "Call history (call lists)" on page 52. Call forwarding. For more information, see "Call forwarding" on page 54. Help menu with phone's and Snom Wiki's IP addresses is replaced by info menu new status information (call forwarding active, passwords not set, missed calls,...
-
Page 19: Led Indicators
D120 User Manual Getting to Know Your Phone ED indicators Call LED The bright-red LED situated at the top of the display indicates incoming, ongoing, held, and missed calls. It will be: • Blinking rapidly when a call is coming in. -
Page 20: Hard Keys
D120 User Manual Getting to Know Your Phone ard keys SmartLabel keys The SmartLabel function keys with LEDs P1 and P2 can be freely programmed on the phone and on the "Function Keys" page of the phone's web interface with all available functionalities. For more information, see "Configuring the function keys"... -
Page 21: Audio Control Keys
D120 User Manual Getting to Know Your Phone Audio control keys • In call: Muting and unmuting the handset or casing microphone • On idle screen: Turning "do not disturb" (DND) on and off for all identities registered on the phone. In DND mode incoming calls do not ring; callers hear the busy signal. -
Page 22: Alphanumeric Keypad
D120 User Manual Getting to Know Your Phone Alphanumeric keypad Input modes and navigation Current audio mode ( , , ) Input modes: 123: Numerals abc: Lower case ABC: Upper case Input mode: numerals letters Delete character to the left of the cursor... -
Page 23: Entering Numerals, Letters, Special Characters, And Symbols
D120 User Manual Getting to Know Your Phone Entering numerals, letters, special characters, and symbols When entering letters and special characters, pause briefly after each character until the cursor has moved forward so that you won't overwrite the last character you entered. Pausing is not necessary when entering numerals. -
Page 24: Display Layout
D120 User Manual Getting to Know Your Phone isplay layout In idle mode When active Info bar/status Confi gured identities Function key line Context-sensitive function key symbols Context information Fig. 1 In idle mode In idle mode, the display presents the following information: Info bar/status line •... - Page 25 Settings menu. See "Settings" on page 27. Forwarding all calls (on/off). See "Call forwarding" on page 54. Help menu with phone's IP address and Snom Wiki's IP address. This key is replaced by the status info key when new status messages are available.
-
Page 26: When The Phone Is Active
D120 User Manual Getting to Know Your Phone When the phone is active The display will inform you of any activity the phone is engaged in (see Fig. 1 on page 23). This information is presented in the form of text or symbols or both. -
Page 27: Settings
D120 User Manual Getting to Know Your Phone ettings A comparatively small number of settings can be adjusted on the phone; many more are available on the phone's web interface. Phone settings Press to open the settings menu on the display. To open submenus and settings, press their number on the alphanumeric keypad or scroll to the setting and press . -
Page 28: Settings Available In Administrator Mode
D120 User Manual Getting to Know Your Phone Settings available in administrator mode In administrator mode, all settings of the phone menu and on the phone's web interface are accessible. 1 Preferences 2 Call Features 3 Identity 4 Network 5 Maintenance 6 Information... -
Page 29: Display Backlight And Contrast Settings
D120 User Manual Getting to Know Your Phone Display backlight and contrast settings Backlight and contrast can be adjusted separately for the times when the phone is active and when the phone is idle. Lowering backlight intensity lowers the energy consumption of the device. The backlight when idle can be reduced to zero bars. - Page 30 D120 User Manual Getting to Know Your Phone 4. Press Contrast. Fig. 5 5. Press the function key underneath the plus or minus symbol in the function key line (Fig. 3 and 4) to increase ( ) or decrease ( ) the contrast.
-
Page 31: The Phone's Web Interface
D120 User Manual Getting to Know Your Phone he phone's web interface When you register the first account during the initialization of the phone, your SIP user name and password will be registered as the HTTP user name and password. If you wish to change them later, you can do so on the phone's web interface >... -
Page 32: How The Web Interface Works
D120 User Manual Getting to Know Your Phone How the web interface works The vertical menu on the left side of the window is always the same, no matter which window happens to be open at the time. Available menu items depend on whether the phone is running in user or administrator mode. -
Page 33: User Mode/Administrator Mode
Getting to Know Your Phone ser mode/administrator mode Snom phones can be operated in administrator or user mode. In administrator mode, all settings are accessible and can be modified; in user mode, a number of settings are not accessible. The factory default is administrator mode. - Page 34 D120 User Manual Getting to Know Your Phone Fig. 3 Fig. 4...
-
Page 35: Directories
D120 User Manual Directories irectories irectory The directory is the built-in directory of the phone. It can hold up to 1000 entries. Entries can be added and edited on the phone and on the web interface. Any changes you make on the web interface will not take effect until you click on "Save" or on "Apply"... -
Page 36: Contact Types
D120 User Manual Directories Contact Types VIP: Calls from numbers with this contact type will ring on your phone even when DND mode is active. You can assign a ringtone to this contact type. If your VIP is also assigned to a group (see below) and if that group has a distinct ringtone, the ringtone assigned to the group will be played. -
Page 37: Adding/Editing Entries On The Phone
D120 User Manual Directories Adding/Editing Entries on the Phone Adding new entry manually 1. Press to open the phone's directory. 2. Press on the navigation key to go straight to <New Item>. 3. Press . 4. Enter the phone number and press . -
Page 38: Deleting An Entry
D120 User Manual Directories 3. Press . The Details screen for the entry will be displayed. 4. Editing a detail. a. Press to select a detail. b. Press . Depending on the selected detail, in some cases, you will see the prompt screen where you can enter or modify text. Edit the data, if necessary, and press to save and to open the next screen. -
Page 39: Editing An Entry
D120 User Manual Directories Calls from entries on the "Deny" list do not ring on the phone. The caller hears the busy signal. ◦ Outgoing Identity: The drop-down list shows all identities configured on the phone. If you select one of the identities for one of the numbers listed in the phone book, all calls to that number initiated from the phone book will show that identity on the callee’s phone. - Page 40 D120 User Manual Directories Click on in a phone number's line if you want to edit the subentry's data (phone number, number & contact type, outgoing identity, and any blue area data applicable to this subentry only). Make changes as necessary and click on "Change".
-
Page 41: Deleting Entry On Web Interface
D120 User Manual Directories Fig. 4 Deleting entry on web interface • Entry with one phone number. Click on in the entry's lines to delete the entry. • Entry with more than one phone number. ◦ Deleting the entry. Click on in the line of the master record to delete the name and all associated phone numbers. -
Page 42: Contacts
D120 User Manual Directories LDAP search on the phone: Enter the first letter of the name you are searching for. Type more letters if the name shown isn't the right one or scroll through the list. Press to dial. Contacts If you want to use an external contacts list, the Contact list and Contact list URI settings are mandatory. -
Page 43: Using The Phone
D120 User Manual Using the Phone sing the phone This section describes the functions of the phone with the factory default settings. If your phone was installed and/or set up by someone else, the default settings may have been changed. Please check with that person or company if the phone does not react as described here. -
Page 44: Handset Or Headset And Casing Speaker
D120 User Manual Using the Phone Handset or headset and casing speaker With dual audio mode activated, other persons present in the room are allowed to listen in to the third party over the phone's casing loudspeaker. 1. Use the method for handset or headset use to dial. -
Page 45: Calling Number From External Directory
Call completion Note: This function depends on whether it is available in your network or not. On Snom phones call completion means that when a called number is busy or not available, you can have your phone call you back as soon as the dialed number is not busy anymore or available again. -
Page 46: Accepting Calls
D120 User Manual Using the Phone Fig. 1 Fig. 2 • Press / to turn off call completion for this call (Fig. 2). • Press / if you wish to dial another number while waiting for call completion (Fig. 2). You can now hang up the handset to return to the idle screen;... -
Page 47: Call Waiting
D120 User Manual Using the Phone Call waiting When you are in a call, another call coming in will be announced visually by the flashing call LED and by the symbol appearing in the function key line (Fig. 1); it will also be announced acoustically by a double beep. -
Page 48: Active Calls
D120 User Manual Using the Phone ctive calls Hold One call on hold Press to put the ongoing call on hold. Held calls are indicated threefold: ◦ By the text on the display. ◦ By the slowly blinking line key. -
Page 49: Conference
D120 User Manual Using the Phone • When the connected call is on-screen, you can transfer it to a third party or terminate it by pressing . • When a held call is on-screen, press to connect to it; if you are currently connected to the second call, it will simultaneously be put on hold. -
Page 50: Transferring Calls
D120 User Manual Using the Phone • Putting one participant on hold. With one of the participants on-screen selected by the preceding arrow (Fig. 2 and 3), press to put this party on hold and to converse with the other party in private. -
Page 51: Terminating Calls
D120 User Manual Using the Phone 3. Press . You may briefly see the message that the transferred call was "disconnected", indicating that it is now ringing on the third party's phone. • Blind transfer of ringing call 1. With a call ringing (Fig. 1), press 2. -
Page 52: Call History (Call Lists)
D120 User Manual Using the Phone all history (call lists) Three call lists of missed, dialed, and received calls are stored on the phone. They contain the number, time and date, and duration of the calls. If the memory allotted to storing the call lists is full, the oldest ones will be overwritten. -
Page 53: Rejecting Or Redirecting Incoming Calls
D120 User Manual Using the Phone Press to add the caller/callee to the phone's directory. See "Editing existing entry" on page 37 for information on adding a name and other data to the new directory entry. Press to delete the call. -
Page 54: Rejecting Anonymous Calls
D120 User Manual Using the Phone • Call forwarding. For further information, see "Call forwarding" on page 54 and 75. • Rejecting anonymous calls: See next subsection. Rejecting anonymous calls With this setting you can have your phone reject calls from phones that are blocking or not transmitting their numbers. -
Page 55: Making/Changing The Settings On The Phone And Turning On Call Forwarding
D120 User Manual Using the Phone Forwarding all calls is off All incoming calls are forwarded Forward when Busy: Forwarding calls ringing while the phone is busy to the number of the phone, extension, or mailbox specified as this function’s target. -
Page 56: Turning Off Call Forwarding
D120 User Manual Using the Phone messages with a higher priority than call forwarding (e.g., firmware update available, reboot required, etc.), they will take precedence over the call forwarding indication. Press to show the Status info screen with all current status messages, including call forwarding. -
Page 57: Configuring The Function Keys
D120 User Manual Configuring the Function Keys onfiguring the function keys See "Opening the web interface" on page 31 on how to open the phone’s web interface. See "How the web interface works" on page 32 on the mechanics of navigating in the windows and changing the settings. - Page 58 D120 User Manual Configuring the Function Keys ◦ Number Enter one phone number or value for the function or, if the function is key event, select an event from the drop-down list. Enter phone numbers exactly the way they need to be dialed, i.e, type the number without spaces or punctuation marks between the digits.
-
Page 59: Programming The Function Keys
D120 User Manual Configuring the Function Keys Fig. 2 After you have clicked Apply, the Save button appears at the top of the window. Click Save to prevent the changes to be lost if there is a power outage or if the phone is disconnected from its power source. - Page 60 D120 User Manual Configuring the Function Keys to open the Key 17 Function menu (Fig. 1). The selected key flashes green. 5. Select the key and press Fig. 1 Fig. 2 6. The default for Context is Active, i.e., all configured identities whose status is "active". If you want to restrict the context to one of the identities, select it from the Context menu (Fig.
-
Page 61: Function Key Settings On The Web Interface
D120 User Manual Configuring the Function Keys 14. Press to save and return to the Key x Function menu. 15. Press briefly to return to the Key x menu, or press for 3 seconds to return to the idle screen. -
Page 62: Selected Examples For Function Key Programming
D120 User Manual Configuring the Function Keys elected examples for function key programming This chapter will show you a few examples for customizing function key settings to your needs and preferences, using the phone's web interface: • First example: Extension monitoring and call pickup via one of the phone's freely programmable and self-labeling SmartLabel function keys with LED •... -
Page 63: Example 1, Extension Monitoring And Call Pick-Up
D120 User Manual Configuring the Function Keys Example 1, Extension monitoring and call pick-up This feature makes it possible to pick up a call ringing on another extension, for example when the other extension is busy or when the user is absent. The prerequisites for this function are: ◦... -
Page 64: Example 2, Changing The Setting Of A Context-Sensitive Key
D120 User Manual Configuring the Function Keys Example 2, Changing the setting of a context-sensitive key In the following example, the setting of context-sensitive key F1 (Fig. 1, the left key underneath the display) will be changed from Settings menu (Fig. 2) to Favorites (Fig. 3). -
Page 65: Example 3, Speed Dialing A Number On A Context-Sensitive Key
D120 User Manual Configuring the Function Keys Example 3, Speed dialing a number on a context-sensitive key In the following example, the setting of context-sensitive key F1 (Fig. 1, the left key underneath the display) will be changed from Settings menu (Fig. 2) to Speed dial (Fig. 3). -
Page 66: Display Options For Smartlabel Keys
D120 User Manual Configuring the Function Keys isplay options for SmartLabel keys A number of settings control the appearance of the SmartLabels on the display; they can be set on the phone and on the phone's web interface. There are separate settings for the idle screen, call screens, and other screens. -
Page 67: Timer Setting For Returning Display Mode To Default
D120 User Manual Configuring the Function Keys Timer setting for returning display mode to default 9. In the SmartLabel options menu, select Return to default mode and press . The preset default is 3 seconds. 10. Use the backspace to delete the character to the left of the cursor, type a different number of... -
Page 68: Customizing The Phone Settings
If you want more information on a web interface setting, click on the radio button with the question mark that you see to the right of each item. It links to a page on snom’s Wiki with detailed information about that particular item. - Page 69 D120 User Manual Customizing the Phone Settings On the web interface Open the web interface and click on an identity in the menu on the left. The configuration window for that identity will open; it contains four tabs, with the left one, Login, visible in the front. To view SIP, NAT, and RTP pages, click on the respective tab;...
-
Page 70: Assigning Ringtones
D120 User Manual Customizing the Phone Settings Any phone allowed to monitor and pick up your calls must also use the same password in this text field. Note: If you want the activity on the monitored phones to be displayed on your idle screen, enable the "Go to Call Monitor on Activity"... -
Page 71: Date And Time Formats
D120 User Manual Customizing the Phone Settings ate and time formats Date and time formats can be set on the phone and on the web interface. The defaults are US time format and 24-hour clock (Fig. 1 and 2). European date and time formats are shown in Fig. 3 and 4, US date and time formats in Fig. -
Page 72: Time
D120 User Manual Customizing the Phone Settings US Date Format Date Setting "On" Setting "Off" March 5, 2012 03/05/2012 05.03.2012 March 12, 2012 03/12/2012 12.03.2012 December 5, 2011 12/05/2011 05.12.2011 December 10, 2011 12/10/2011 10.12.2011 2. Click on "Apply" and "Save". -
Page 73: Language Settings Of Phone And Web Interface
D120 User Manual Customizing the Phone Settings On the phone 1. Press > Preferences > Date & Time > Time Zone. Fig. 1 Fig. 2 ◦ Press to collapse the list to show only selected times zones and/or locations where the phone language is spoken. -
Page 74: Web Interface Language
D120 User Manual Customizing the Phone Settings Setting on the web interface 1. Open Preferences > General Information > Language. 2. Select the language from the drop-down list. 3. Click on "Apply" and "Save". Web interface language 1. Open Preferences > General Information > Web interface language. -
Page 75: Call Forwarding
D120 User Manual Customizing the Phone Settings all forwarding This feature automatically redirects all or certain incoming calls to another phone or a mailbox. If you set call forwarding on the phone, the settings are applied to all configured identities on the phone. On the web interface, the settings are configured separately for each identity. -
Page 76: Call Completion
3. Click on "Apply" and "Save". all completion On Snom phones call completion means that when a called number is busy or not available, your phone will call you back as soon as the dialed number is not busy anymore or available again. The factory default setting is "off". -
Page 77: Call Waiting
D120 User Manual Customizing the Phone Settings Turning off call completion 1. Press > Call Features > Outgoing Calls > 4 Call Completion. 2. Press or scroll down to the setting and press to change it from on to off: Call Call Completion. -
Page 78: Hiding My Caller Id
D120 User Manual Customizing the Phone Settings 4. Select setting with 5. Press to save. Setting on the web interface 1. In the menu on the left, click on the identity whose call waiting settings you want to change. 2. Click on the SIP tab. The setting Call Waiting Indication is the second to last on the page. -
Page 79: Speed Dial
D120 User Manual Customizing the Phone Settings Setting on the phone 1. Press > 2 Call Features > 3 Incoming Calls > 1 Reject anonymous. 2. Press or to change setting from off to on: 1 Reject anonymous. 3. Press briefly to return to the previous menu, press for two seconds to return to the idle screen. -
Page 80: Software Update
3. Click Apply. If you have the changed the setting URL and/or the PnP configuration, a reboot is required before they will take effect. nom Secure Redirection and Provisioning Service (SRAPS) If you want to use Snom's Secure Redirection and Provisioning Service (SRAPS), click Guides in the horizontal menu at the top of https://service.snom.com/ and select Auto-Provisioning. -
Page 81: Troubleshooting
D120 User Manual Troubleshooting roubleshooting eboot In user mode 1. Press 2. Select 4 Maintenance. 3. Select 2 Reboot. 4. When asked whether to "Reboot?", press . 5. Wait for the idle screen to reappear. In admin mode 1. Press 2. -
Page 82: Tftp Update
When automatic initialization via DHCP fails, enter the values for netmask, IP gateway, and DNS server manually after each prompt on the display. ontacting Snom Support If you are not a Snom partner, please contact your seller, visit our knowledge base at http://wiki. snom.com or our helpdesk at https://helpdesk.snom.com/support/home... -
Page 83: Traces
D120 User Manual Troubleshooting races Snom Support may ask you to submit a SIP Trace and/or a PCAP Trace to help them analyze your problem. Performing a SIP Trace 1. Open the phone’s web interface > SIP Trace page. 2. Click Clear to clear the page. -
Page 84: Appendix 1 - Display Symbols And Icons
Turning DND on and off Contacts list Forwarding all calls (turning on/turning off) Presence signaling on/off Retrieving messages from mailbox Settings menu Directory IP address of phone and Snom's web address Redial (dialed calls) Received calls Missed calls Favorites LDAP Directory Next outgoing ID... -
Page 85: Display Indications
D120 User Manual Appendix 1 Confirming a selection or an action Terminating/canceling an action and returning to the previous screen Switching input mode to lower case letters Switching input mode to upper case (capital) letters Switching input mode to numerals Deleting the character to the left of the cursor Available pool of directories, contact lists, etc. - Page 86 D120 User Manual Appendix 1 On idle screen Outgoing identity • Active identities are indicated by the phone symbol. If there is more than one active identity, an arrow precedes the current outgoing • identity. When you call someone, this is your identity for the call.
-
Page 87: Appendix 2 - Status Messages
D120 User Manual Appendix 2 ppendix 2 - Status Messages Whenever there is a current message concerning the status of the phone, the function key will be available. Press the function key or, if it not available, > Information > Status Info, to open the "Status info"... -
Page 88: Appendix 3 - Programmable Functions
(Busy Lamp Field) incoming call ringing on your own extension. These functionalities depend on your PBX; for more information, please check snom's interoperability page and the PBX manual. With Asterisk, generally use this feature rather than extension. Button This is a function key that is connected to your PBX to perform a task specified in the buttons document. - Page 89 These functionalities depend on your PBX; for more information, please check snom's interoperability page and the PBX manual. With Asterisk, generally use BLF rather than this function.
- Page 90 D120 User Manual Appendix 3 This function key can be used for regular calls to an extension that is reached via an IVR or auto attendant and a number of voice prompts where the caller has to make a selection by pressing a key after or during the prompt. If you know which keys need to be pressed in which order in order to reach the desired extension, the entire process can be automated and considerably speeded up.
- Page 91 D120 User Manual Appendix 3 Presence If supported by your PBX, the LED of this function key will reflect the presence status (ringing, busy, available, etc.) of the extension specified in the "Number" text field. The function key can also be used to dial the extension, usually when the destination signals availability.
-
Page 92: Key Events
FW versions lower than 8: Phone's IP address, MAC address, and firmware version. FW 8 and higher: Phone's IP address and the URI to Snom Wiki. IP address, MAC address, and firmware version can be found in Settings > 6 Information >... - Page 93 D120 User Manual Appendix 3 LDAP Directory Allows the user to look up a remote directory while dialing. Once set, this pressed key will open up the Direcory Search window. If LDAP is setup, corresponding matching entries as returned by the sever will be shown. If LDAP is not used and and presence_ lookup_number setting is turned on, the contact matches will be shown.
-
Page 94: Appendix 4 - Gnu General Public License
Appendix 4 - GNU General Public License COPYRIGHT NOTICE AND WARRANTY we want its recipients to know that what they have is not the original, so that any problems introduced by others will not reflect on the original DISCLAIMER authors' reputations. Finally, any free program is threatened constantly by software patents. - Page 95 Appendix 4 in themselves, then this License, and its terms, do not apply to those Each time you redistribute the Program (or any work sections when you distribute them as separate works. But when you based on the Program), the recipient automatically receives a license distribute the same sections as part of a whole which is a work based from the original licensor to copy, distribute or modify the Program on the Program, the distribution of the whole must be on the terms...
- Page 96 Inc., 59 Temple Place, Suite 330, Boston, MA 02111-1307 USA If requested by you, the complete corresponding source code of the Software can be sent by Snom Technology GmbH on a standard data storage medium against the reimbursement of the manufacturing costs of EUR 10.- per unit.
Need help?
Do you have a question about the D120 and is the answer not in the manual?
Questions and answers