
Subscribe to Our Youtube Channel
Related Manuals for Meyer SXI 720


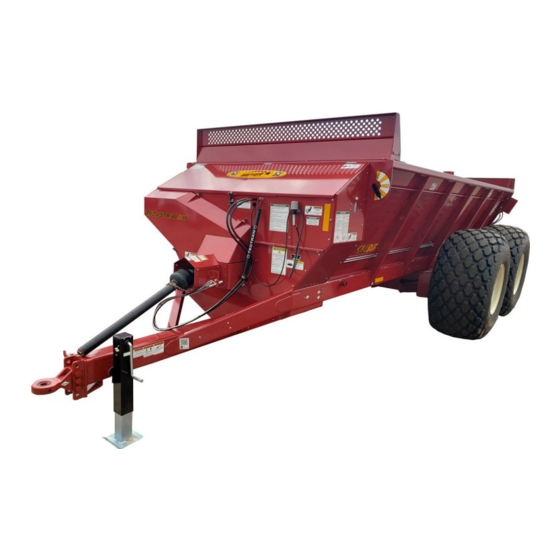
Summary of Contents for Meyer SXI 720
- Page 1 PB-SXIC 720 • 865 Owner / Operator’s Manual & Parts Book Starting 2022 Model Year Including SN SXI21865207,SXI21865250, SXI21865251& SXI21865252 09 / 2022 6990633 (1-13) Printed in U.S.A. © Bobcat Company 2013...
-
Page 2: Important Information
Always use your serial number when requesting information or when ordering parts. HOW TO READ YOUR SERIAL NUMBER EXAMPLE: SXI22865201 Model Type / Model Year / Model / Sequence Of Build Meyer Manufacturing Corporation 674 W. Business Cty Rd A Dorchester, WI 54425 Phone: 1-800-325-9103 Fax: 715-654-5513 Email: parts@meyermfg.com... -
Page 3: Pre-Delivery & Delivery Checklist
Owner’s Registration Form. PRE-DELIVERY CHECKLIST DELIVERY CHECKLIST After the new Meyer Spreader has been completely The following checklist is an important reminder of set-up, check to be certain it is in correct running order valuable information that MUST be passed on to the before delivering it to the customer. - Page 4 Meyer Manufacturing Corporation - 4 -...
-
Page 5: Introduction
Meyer products the finest in the farm equipment industry today. There is no substitute for quality. That is why thousands of people like you have purchased Meyer farm equipment. They felt it was the best equipment to serve their farming needs, now and in years to come. We ask that you follow our policy of “safety first”, and we strongly suggest that you read through the “Owner / Operator’s Manual &... - Page 6 Meyer Manufacturing Corporation - 6 - PB-SXIC...
-
Page 7: Table Of Contents
TABLE OF CONTENTS 1.0 IMPORTANT INFORMATION ........... 2 2.0 PRE-DELIVERY &... - Page 8 FINAL REDUCTION, LH AUGER & THIRD AUGER DRIVE ......64 Meyer Manufacturing Corporation - 8 -...
- Page 9 BODY & SHIELDS ............66 AUGERS .
- Page 10 MAINTENANCE RECORD ............131 Meyer Manufacturing Corporation...
-
Page 11: Manufacturer's Warranty
Except as stated above, Meyer Mfg. Corp. shall not be liable for injuries or damages of any kind or nature, direct, consequential, or contingent, to persons or property. This warranty does not extend to loss of crop or for any other reasons. - Page 12 Meyer Manufacturing Corporation - 12 - PB-SXIC...
-
Page 13: Safety
5.0 SAFETY The Meyer SXI Spreader is manufactured with operator safety in mind. Located on the spreader are various safety signs to aid in operation and warn of danger or caution areas. Pay close attention to all safety signs on the spreader. -
Page 14: Safety Precautions
When towing the implement on public roads, a safety chain of sufficient strength to support the gross weight of the implement must be used. (See Maximum Load Weight Chart in the Transporting Section). The safety chain should be attached per diagram in the Transporting Section. Meyer Manufacturing Corporation - 14 - PB-SXIC... - Page 15 Safety Precautions For Tractor Towed Units: • Do not exceed 20 mph (32 kph). Reduce speed on rough roads and surfaces. • Always install a SMV emblem on pull-type equipment when transporting on roadways and keep clean and bright. • Always yield to oncoming traffic in all situations and move to the side of the road so any following traffic may pass.
-
Page 16: Safety Signs
Do not remove any safety signs. Safety signs are for operator protection and information. FRONT OF SPREADER PART NO. 46-0001-22 PART NO. 46-0001-4 PART NO. 46-0001-5 PART NO. 46-0001-35 Meyer Manufacturing Corporation - 16 - PB-SXIC... - Page 17 FRONT OF SPREADER PART NO. 46-8500-7 PART NO. 46-0001-26 (Located Under Shield) PART NO. 46-0004-2 PART NO. 46-3600-9 PART NO. 46-0001-13 PART NO. 46-3600-2 (Located Under Shield) 1-800-325-9103 PB-SXIC - 17 - www.meyermfg.com...
- Page 18 LEFT SIDE OF SPREADER PART NO. 46-8865-4 PART NO. 46-0001-5 PART NO. 46-8500-7 PART NO. 46-3600-9 RIGHT SIDE OF SPREADER PART NO. 46-9500-4 PART NO. 46-0001-4 PART NO. 46-3600-2 (Located Under Shield) Meyer Manufacturing Corporation - 18 - PB-SXIC...
- Page 19 REAR OF SPREADER PART NO. 46-3600-1 PART NO. 46-3600-2 (Located Under Shield) PART NO. 46-0001-5 PART NO. 46-3600-9 1-800-325-9103 PB-SXIC - 19 - www.meyermfg.com...
- Page 20 FRONT HITCH OF SPREADER PART NO. 46-3600-6 PART NO. 46-0800-6 PART NO. 46-0800-7 Meyer Manufacturing Corporation - 20 - PB-SXIC...
-
Page 21: Shutoff & Lockout Power
5.3 SHUTOFF & LOCKOUT POWER Any individual that will be adjusting, servicing, maintaining, or clearing an obstruction from this machine needs to ensure that this machine stays safely “OFF” until the adjustment, service, or maintenance has been completed, or when the obstruction has been cleared, and that all guards, shields, and covers have been restored to their original position. - Page 22 Meyer Manufacturing Corporation - 22 - PB-SXIC...
-
Page 23: Pre-Operation
6.0 PRE-OPERATION DO NOT allow anyone to operate, service, inspect or otherwise handle this spreader until all operators have read and understand all of the instructional materials in this Owner / Operator’s and Parts Manual and have been properly trained in its intended usage. Verify that the spreader is securely fastened to the tractor / truck. -
Page 24: Light Hook-Up
This will operate signal, tail, clearance and brake lights. NOTE: Depending on make and model of the truck, it may be necessary to install a light converter. (Meyer part #56-0028). The converter allows signal lights and brake lights to operate according to DOT Lighting Standards. -
Page 25: Tractor Drawbar Setup
A (MIN) to the standard 16" or 20” drawbar & PTO relationship will ensure that the PTO drive shaft will not become over- B (MAX) extended. WITH INITIAL HOOK-UP TO YOUR NEW MEYER SPREADER TEST TRAVEL TURNING EQUIPMENT IN BOTH DIRECTIONS OBSERVING THE... -
Page 26: Hitching To Tractor
Always keep all shields and guards in place and securely fastened. Keep hands, feet and clothing away. 6.7.1 Start-Up Enter the tractor or truck and start the engine. Slowly engage the PTO and operate at idle speed. Meyer Manufacturing Corporation - 26 - PB-SXIC... -
Page 27: Shut-Down
6.7.2 Shut-Down Disengage the PTO. Park the tractor / truck on a flat, level surface. Engage the parking brake, stop the engine and exit the tractor or truck. 6.8 OPERATIONAL CHECKS Shutoff and lockout power before performing machine service, adjusting, maintaining, or clearing an obstruction from this machine. Refer to section See 5.3 SHUTOFF &... -
Page 28: Transporting
• Avoid traveling on slopes or hills that are unsafe. • Keep towing vehicle in gear at all times. • Never exceed a safe travel speed (which may be less than 20 MPH.) Meyer Manufacturing Corporation - 28 - PB-SXIC... -
Page 29: Safety Chain
NOTE: Do not use the intermediate support (Item 2) as the attaching point. If you do not have a safety chain, or a replacement safety chain is needed, see your local Meyer dealer and do not operate on public roads until you are able to travel with the safety chain properly installed. -
Page 30: Tractor Towing Size Requirements
This brake system is a one hose system. The single hydraulic hose must be connected to the tractor remote pedal port. Applying The Brakes - Gradually apply the tractor brake pedal to apply the brakes. Releasing The Brakes - Release the tractor brake pedal to release the brakes. Meyer Manufacturing Corporation - 30 - PB-SXIC... -
Page 31: Operation
7.0 OPERATION DO NOT allow anyone to operate, service, inspect or otherwise handle this spreader until all operators have read and understand all of the instructional materials in this Operator’s and Parts Manual and have been properly trained in its intended usage. Before operating the spreader, look in all directions and make sure no bystanders, especially small children are in the work area. -
Page 32: Unloading
Refer to section 5.3 SHUTOFF & LOCKOUT POWER. NOTE: Unloading is best observed from the operator’s seat. 1. Move the tractor / truck and spreader to the unloading area. Meyer Manufacturing Corporation - 32 - PB-SXIC... -
Page 33: Pto Cutout Clutch
2. Mechanical Driven Spreader: When you are ready to begin spreading application on the field, open the rear gate and slowly engage the tractor PTO clutch. This can be done while traveling forward to avoid a heavier application of liquid manure at the edge of the field than desired. -
Page 34: Shear Sprocket
7.3 SHEAR SPROCKET The Meyer Spreader you have received has been equipped with a shear sprocket design on the main auger drive sprockets. The augers are being driven by two allen head grade 8 bolts. The design is such that if the bolts are sheared, another set of holes to install new shear bolts will always be accessible without turning over the machine. -
Page 35: Unhooking The Tractor
7.5 UNHOOKING THE TRACTOR 1. Park the implement on level ground. Put the tractor controls in neutral, set the parking brake, and turn the engine off before dismounting. 2. Place wheel chocks in front and in back of the implement wheels on opposite sides to prevent the implement from rolling after the tractor is unhooked. - Page 36 Meyer Manufacturing Corporation - 36 - PB-SXIC...
-
Page 37: Maintenance
8.0 MAINTENANCE 8.1 LUBRICATION Shutoff and lockout power before performing machine service, adjusting, maintaining, or clearing an obstruction from this machine. Refer to section 5.3 SHUTOFF & LOCKOUT POWER. Fluid such as hydraulic fluid, grease, etc., must be disposed of in an environmentally safe manner. -
Page 38: Daily Lubrication (Every 8-12 Loads*)
Lubricate the inner CV cross kit with about 15 pumps of grease every 8 hours of operation. Lubricate the double yoke with about 10 pumps of grease every 8 hours of operation. Meyer Manufacturing Corporation - 38 - PB-SXIC... - Page 39 (LEFT SIDE) SHIELDS REMOVED FOR ILLUSTRATIVE PURPOSES ONLY. LEFT SIDE GREASE PORTS RIGHT SIDE GREASE PORTS Lubricate (3) chain couplers on the rear drive with new 30 weight oil. The couplers are accessible by opening the front and rear shield. Grease (2) PTO input shaft bearings with approximately 1 pump of grease.
-
Page 40: Monthly Lubrication (Every 260-300 Loads*)
Grease the (2) front drive bearings supporting the first reduction jackshaft with approximately 1 pump of grease. The zerk is accessible by the left front side grease bank of the spreader. Be careful not to over grease. Meyer Manufacturing Corporation - 40 -... -
Page 41: Semi Annual Lubrication
8.1.4 Break-In Lubrication (First 360-500 Loads*) Change oil in the (3) gearboxes. Lubricate the (3) rear gearboxes with Synthetic EP Gear SAE 90/ISO220 oil, capacity approximately 81.2 oz. 8.1.5 Semi Annual Lubrication (865 with brake system only) See Merritor manual for brake component greasing. 8.1.6 Annual Lubrication Change oil in the (3) gearboxes. - Page 42 Crack the fitting until oil comes out, and then re-tighten.) The hydraulic cylinder that the oiler pump is tied into is double acting and must reach 300 PSI of pressure to actuate the pump. Meyer Manufacturing Corporation - 42 - PB-SXIC...
-
Page 43: Adjustments
When replacing oiler brushes into brush holders, use regular 1/2”-20 nuts. Tighten nut finger tight initially as some adjustment may be needed later. For best results, place brush holders over top of roller chains and directly on top of sprockets. Adjust brush holders so oiler brushes are pushed down into the roller chain approximately 1/2”. Carefully tighten up the 1/2”-20 nuts on the oiler brushes. -
Page 44: Front Spinner Drive Belt
Once contact is felt, back off the adjuster bolt on the slack adjuster 1/2 turn or until wheel turns freely without drag. Repeat the same process for the remainder of the brakes. Meyer Manufacturing Corporation - 44 -... -
Page 45: Wheel Bearing Preload
3. Re- torque the spindle nut to the Final Torque. 4. Install cotter pin. If the nut isn’t aligned with the cotter pin hole, back the nut off to the closest position that does. MEYER PART # (HUB #) SEAT BEARINGS (FT. LBS) FINAL TORQUE (FT.LBS) -
Page 46: Brake Bleeding
Check wheel nut torque every 10,000 miles and re-torque as necessary. 8.4.2 Wheel Torque BOLT/STUD SIZE SOCKET SIZE PRESS FORMED BOLT TYPE HEAVY DUTY WHEEL CENTER WHEEL CENTER 1-1/8 / 1-1/2 Flange Nut 378 ft lbs Meyer Manufacturing Corporation - 46 - PB-SXIC... -
Page 47: Tire Inflation
8.4.3 Tire Inflation TIRE SIZE 21.5L-16.1 If tires are to operate for any length of time on roads or other hard surfaces and the draft load is not great, it is advisable to increase the 28L-26 pressure in the tire to the maximum recommendation in order to 425/65 x 22.5 reduce the movement of the tread bars that causes excessive wiping 550/45 x 22.5... - Page 48 - particularly for tubeless tires. • Inflated tires mounted on rims should be stored under conditions noted above, with inflation pressure reduced to 10 PSI. Meyer Manufacturing Corporation - 48 - PB-SXIC...
-
Page 49: Storing The Spreader
LOCKOUT / TAGOUT the machine / spreader when preparing for storage. (See 5.3 SHUTOFF & LOCKOUT POWER on page 21.) Sometimes it may be necessary to store your Meyer spreader for an extended period of time. Below is a list of items to perform before storage. - Page 50 Meyer Manufacturing Corporation - 50 - PB-SXIC...
-
Page 51: Parts Repair And Replacement
Instruction sheets may be provided with your parts order. Otherwise, if available, instruction sheets can be e-mailed or faxed for your convenience. Call Meyer Manufacturing Corporation toll free at 1-800-325-9103 or email parts@meyermfg.com. NOTE: Be environmentally friendly and dispose of any waste materials properly. Recycle when appropriate. - Page 52 Meyer Manufacturing Corporation - 52 - PB-SXIC...
-
Page 53: Cutout Clutch
CUTOUT CLUTCH Section B-B 1-3/4”-20 Spline PB-0010 KEY PART NUMBER QTY DESCRIPTION 918-0511-2-2 Cut-Out Clutch 618-0202-2-3-1 Housing 618-0003-2-1 918-0308-2-2-3 Spring Pack 918-0208-2-3-5 Washer 918-0208-2-3-6 Retaining Ring 918-0208-2-3-7 Sealing Ring 918-0410-2-1-1 Clamp Cone Locking Pin 918-0308-2-2-4 918-0208-2-3-9 Bushing-In Item #2 918-0208-2-3-11 Shim Kit 1-800-325-9103 PB-SXIC... -
Page 54: Pto Drive Shaft
PTO DRIVE SHAFT SXI-P-011 Meyer Manufacturing Corporation - 54 - PB-SXIC... - Page 55 KEY PART NUMBER QTY DESCRIPTION 918-0511 1-3/8” 21 Spline Complete PTO (Standard 720) 918-0512 1-3/4” 20 Spline Complete PTO (Standard 865)(Optional 720) 918-0511-1-1 1-3/8” 21 Spline Yoke (Standard 720) 918-0512-1-1 1-3/4” 20 Spline Yoke (Standard 865)(Optional 720) 918-0511-1-2 Cross & Bearing Kit 918-0511-1-3 Double Yoke 918-0208-1-2...
-
Page 56: First Reduction And Spinner Drive
FIRST REDUCTION AND SPINNER DRIVE Meyer Manufacturing Corporation - 56 - PB-SXIC... - Page 57 KEY PART NUMBER QTY DESCRIPTION 12-0072 Idler Pulley Assembly 814-5013-Z 1/2”-13 Center Lock Nut 12-0071-3 Pulley Spacer 12-0071-2 Idler Pulley 850-5013-5Z 1/2”-13 x 5” Carriage Bolt 12-0072-1 Belt Drive Idler Pivot Weldment 30-0001 1/4”-28 Straight Grease Fitting 914-3602 1-1/2” 4-Bolt Flange Bearing 49-0531 V-Belt 12-0058-2...
-
Page 58: Second Reduction Drive
SECOND REDUCTION DRIVE Meyer Manufacturing Corporation - 58 - PB-SXIC... - Page 59 KEY PART NUMBER QTY DESCRIPTION 910-0533 Jackshaft Weldment 952-0001-1-25 Brush Assembly 33-8000-7 Auger Chain Brush Holder 914-3811 2-1/2” 4-Bolt Flange Bearing 111-0100-100 #100-100 Pitch Roller Chain Including Connector Link See Page 56 Jackshaft Weldment 914-3834 2” 4-Bolt Flange Bearing 33-0038 1-1/2”...
-
Page 60: Third Reduction Drive
THIRD REDUCTION DRIVE Meyer Manufacturing Corporation - 60 - PB-SXIC... - Page 61 KEY PART NUMBER QTY DESCRIPTION 925-0610 Chain Tightener Assembly 925-0610-1 Chain Tightener Weldment 912-0016-1 7/8” Nylon Roller 925-0530-2 Tightener Washer 33-0038 1-1/2” External Snap Ring 29-0036 Die Spring 941-0502 Chain Tightener Rod Weldment 914-0502 3” 4-Bolt Flange Bearing 111-0140-48 #140-48 Pitch Roller Chain Including Connector Link (Standard) 111-0140-59 #140-59 Pitch Roller Chain Including Connector/Offset Link (7.2 RPM Auger) SXIC-7286-7.2...
-
Page 62: Final Reduction, Rh Auger Drive
FINAL REDUCTION, RH AUGER DRIVE Meyer Manufacturing Corporation - 62 - PB-SXIC... - Page 63 KEY PART NUMBER QTY DESCRIPTION 910-0535 Shear Sprocket Welded Assembly 831-5618-1.50-SL 9/16”-18 x 1-1/2” Socket Head Screw (Standard Protection) 831-6318-1.50 5/8”-18 x 1-1/2” Socket Head Screw (Least Protection) 910-0100-1 Shear Plate & Splined Hub Welded Assembly 910-0535-1 Shear Sprocket 910-0100-2 Shear Washer 884-5618 9/16”-18 Top Lock Nut (Standard Protection)
-
Page 64: Final Reduction, Lh Auger & Third Auger Drive
FINAL REDUCTION, LH AUGER & THIRD AUGER DRIVE 23 21 Meyer Manufacturing Corporation - 64 - PB-SXIC... - Page 65 KEY PART NUMBER QTY DESCRIPTION 925-0529 Left Auger Tightener Arm Assembly 33-0038 1-1/2” External Snap Ring 925-0530-2 Tightener Washer 912-0016-1 7/8” Nylon Roller 925-0529-1 Left Auger Tightener Arm Weldment 914-0503 Jackshaft Bearing Assembly 914-0503-2 Jackshaft Bearing 827-3816-.5 3/8”-16 x 1/2” Set Screw 914-0503-1 Jackshaft Bearing Weldment 914-3811...
-
Page 66: Body & Shields
BODY & SHIELDS Meyer Manufacturing Corporation - 66 - PB-SXIC... - Page 67 KEY PART NUMBER QTY DESCRIPTION 924-0575 Left Front Panel See Page 96 Reservoir Two Quart Tank 901-0729-6 Input Mount Plate 956-3804 Jack 925-0518 Left Side Panel Assembly 924-0518-1 Left Side Panel 924-0515-2 Stainless Steel Shield Hinge 802T-2520-.63Z 1/4”-20 x 5/8” Truss Head Machine Screw Zinc 815-2520-Z 1/4”-20 Nylon Insert Lock Nut 924-0504...
- Page 68 BODY & SHIELDS (CONT’D) Meyer Manufacturing Corporation - 68 - PB-SXIC...
- Page 69 KEY PART NUMBER QTY DESCRIPTION 924-0515 Front Top Shield Assembly 924-0515-1 Front Top Shield Weldment 32-0027-2 Rubber T-Latch With End Piece 924-0515-2 Stainless Steel Shield Hinge 802T-2520-.63SS 1/4”-20 x 5/8” Truss Head Machine Screw 815-2520-Z 1/4”-20 Nylon Lock Nut 924-0524-1 Front Transfer Shield 924-0526-1 Rear Transfer Shield (720)
-
Page 70: Augers
AUGERS Meyer Manufacturing Corporation - 70 - PB-SXIC... - Page 71 KEY PART NUMBER QTY DESCRIPTION 926-0534 Left Auger Weldment (720) 926-0528 Left Auger Weldment (865) 925-0512 T-Post Weldment See Page 66 Auger Hold Down Collar 925-3864 Auger Ring Hold Down Nylon Bearing 881-7510-1.5 3/4-10 x 1-1/2” Machine Bolt 822-0075-Z 3/4” Split Lock Washer 926-3701-2-1 Rear Splined Sleeve With Washer Welded Assembly 926-3701-1...
-
Page 72: Spinners & Gearboxes
SPINNERS & GEARBOXES Rear Front Meyer Manufacturing Corporation - 72 - PB-SXIC... - Page 73 KEY PART NUMBER QTY DESCRIPTION 637-0004 Polyurethane Coupling Rod 901-13811 Upper Coupling Hub Weldment 901-0562-2 Right Spinner Tooth 881-6311-1.5Z 5/8-11 x 1-1/2” Machine Bolt 886-6311-Z 5/8-11 Center Lock Nut 901-0564 Lower Spinner Paddle 901-0562 Right Spinner Assembly (Includes Key #'s 1, 2 & 24) 901-0556 Expeller Liner Weldment 914-3834...
-
Page 74: Corner Gearbox
CORNER GEARBOX Meyer Manufacturing Corporation - 74 - PB-SXIC... - Page 75 KEY PART NUMBER QTY DESCRIPTION 19-0063 Benzi Corner Gearbox 119-B-02 Plug 119-B-03 Breather Plug 119-B-04 Rubber Cup 119-B-05 Cover 119-B-06 M12 x 30 Bolt 119-B-58 Sight Glass Level Indicator 119-B-86 Oil Seal 119-B-39 Rubber Cap 1-800-325-9103 PB-SXIC - 75 - www.meyermfg.com...
-
Page 76: Right Spinner Gearbox
RIGHT SPINNER GEARBOX Meyer Manufacturing Corporation - 76 - PB-SXIC... - Page 77 KEY PART NUMBER QTY DESCRIPTION 19-0065 Benzi Right Spinner Gearbox 119-B-02 Plug 119-B-03 Breather Plug 119-B-105 Drain Plug 119-B-58 Sight Glass Level Indicator 119-B-04 Rubber Cup 119-B-05 Cover 119-B-06 M12 x 30 Bolt 119-B-86 Oil Seal 119-B-54 Oil Seal 1-800-325-9103 PB-SXIC - 77 - www.meyermfg.com...
-
Page 78: Left Spinner Gearbox
LEFT SPINNER GEARBOX Meyer Manufacturing Corporation - 78 - PB-SXIC... - Page 79 KEY PART NUMBER QTY DESCRIPTION 19-0064 Benzi Left Spinner Gearbox 119-B-02 Plug 119-B-03 Breather Plug 119-B-58 Sight Glass Level Indicator 119-B-105 Drain Plug 119-B-04 Rubber Cup 119-B-05 Cover 119-B-06 M12 x 30 Bolt 119-B-86 Oil Seal 119-B-39 Rubber Cap 1-800-325-9103 PB-SXIC - 79 - www.meyermfg.com...
-
Page 80: Spindles & O-Beams
SPINDLES & O-BEAMS 14 15 22 15 SXI-P-007 Meyer Manufacturing Corporation - 80 - PB-SXIC... - Page 81 KEY PART NUMBER QTY DESCRIPTION 901-0514 Left O-Beam Assembly (Standard 720) (Includes Key #'s 13, 17, & 22) 901-0514-NH Left O-Beam Assembly Without Hubs (Standard 720) (Includes Key #'s 13, 17, & 901-0514-NHS Left O-Beam Assembly Without Hubs & Spindles (Standard 720) (Includes Key #'s 13, 17, &...
- Page 82 SPINDLES & O-BEAMS (CONT’D) 14 15 22 15 SXI-P-007 Meyer Manufacturing Corporation - 82 - PB-SXIC...
- Page 83 KEY PART NUMBER QTY DESCRIPTION 914-3822 Sealed Spherical Bearing (Standard 720) (720 With Brakes) (720 With Scales) 114-VM-0003 Sealed Spherical Bearing (Hi-Float Package) (Standard 865) (Optional 720) (865 With 2/4 Brake System) 901-0514-1 Left O-Beam Weldment (Standard 720) 901-0503-1 Left O-Beam Weldment (Hi-Float Package) (Standard 865) (Optional 720) 901-0572-1 Left O-Beam Weldment (720 With Scales Only) 901-0704-1...
- Page 84 SPINDLES & O-BEAMS (CONT’D) 14 15 22 15 SXI-P-007 Meyer Manufacturing Corporation - 84 - PB-SXIC...
- Page 85 KEY PART NUMBER QTY DESCRIPTION 881-7510-7Z 3/4-10 x 7” Hex Head Cap Screw 885-7510-Z 3/4-10 Indented Lock Nut M1-10-0004-1-2 O-Beam Inner Bearing Pin 33-0056 Internal Snap Ring 884-1008-Z 1-8 Top Lock Nut 930-3602 Brass Male Connector M1-10-0004-1-1 O-Beam Inner Bearing Torque Collar 114-VM-0002 Plain Spherical Bearing M1-12-0018-1...
-
Page 86: Hub Assembly
HUB ASSEMBLY SXI-P-016 Meyer Manufacturing Corporation - 86 - PB-SXIC... - Page 87 KEY PART NUMBER QTY DESCRIPTION 75-0219 Hub Assembly (Standard 720) (720 With Brakes) 75-0219-SC Hub Assembly (720 With Scales) 75-0213 Hub Assembly (Hi-Float Package) (Standard 865) (Optional 720) 75-0213-SC Hub Assembly (865 With Scales) 75-0208-8 Nut, Castle (Standard 720) (720 With Brakes) (720 With Scales) 75-0213-13 Nut, Castle (Hi-Float Package) (Standard 865) (Optional 720) 75-0208-9...
-
Page 88: Front Grease Hoses
FRONT GREASE HOSES FRONT DRIVE SYSTEM FRONT VIEW FRONT DRIVE SYSTEM TOP VIEW Meyer Manufacturing Corporation - 88 - PB-SXIC... - Page 89 KEY PART NUMBER QTY DESCRIPTION 155-02R7-17-1-1 1/8" x 17" Grease Hose Assembly 155-2GK-NUT 1 per Bulkhead Adapter Nut 30-0001 1per 1/4"-28 Straight Fitting 155-02R7-31-1-1 1/8" x 31" Grease Hose Assembly 155-2GK-NUT 1 per Bulkhead Adapter Nut 30-0001 1 per 1/4"-28 Straight Fitting 155-02R7-44-1-1 1/8"...
-
Page 90: O-Beams & Rear Grease Hoses
30-0019 O-Beam Outer Bearing 1/8” NPT x 2” Nipple (720 Only) 30-0009 O-Beam Outer Bearing 1/8” NPT x 3/4” Coupler (720 Only) 30-0006 O-Beam Outer Bearing 1/8” NPT 90 Degree Fitting (720 Only) Meyer Manufacturing Corporation - 90 - PB-SXIC... - Page 91 1-800-325-9103 PB-SXIC - 91 - www.meyermfg.com...
-
Page 92: Rear Gate
REAR GATE Meyer Manufacturing Corporation - 92 - PB-SXIC... - Page 93 KEY PART NUMBER QTY DESCRIPTION 925-0508 Gate Indicator Weldment 925-0519 Indicator Pipe (720) 925-0510 Indicator Pipe (865) 925-3767 Indicator Linkage Arm Weldment 925-0617 Door Linkage Assembly 901-0587 Door Link Weldment 625-0026 Stake Pin Welded Assembly 901-0793 Door Arm Assembly M6-1-4-0006 Door Link Pivot Weldment See Page 92 Gate Hydraulic Cylinder...
-
Page 94: Standard Hydraulics
STANDARD HYDRAULICS FRONT HOSES FRONT OF SPREADER FRONT PANEL DETAILED VIEW OF CLAMP ASSEMBLY SXI-P-017 Meyer Manufacturing Corporation - 94 - PB-SXIC... - Page 95 KEY PART NUMBER QTY DESCRIPTION 55-0368 1/2” x 202” Hydraulic Pipe (720) 55-0369 1/2” x 242” Hydraulic Pipe (865) 155-2403-08-06 Straight Union 155-6801-06-04 90 Degree Adjustable Elbow See Page 96 Oiler Pump 155-04R17-19-1 1/4” x 19” Hose 155-2603-08-06-06 155-6801-6-8 90 Degree Elbow 155-06R17-40-2 3/8”...
-
Page 96: Oil-Kit
OIL-KIT #4 SAE ORB PORT SXI-P-018 Meyer Manufacturing Corporation - 96 - PB-SXIC... - Page 97 KEY PART NUMBER DESCRIPTION 952-0001-1-33 Holder, Manifold Valve Assembly 952-0001-1-27 Sleeve Nut Brass 952-0001-1-28 5/32” Brass Ferrule 952-0001-1-9 One Way Valve (Schrader Valve) 952-0001-1-11 Bearing, 7/16” Stainless 952-0001-1-10 Screen Flat Oiler .906 Diameter 952-0001-1-5 Spring, Oiler 952-0001-1-8 O-Ring, Oiler Piston 952-0001-1-4 Piston, 2 Groove Alum, Short 952-0001-1-6...
-
Page 98: Pull Type Lights
PULL TYPE LIGHTS (PRIOR TO SN SXI22865201) Meyer Manufacturing Corporation - 98 - PB-SXIC... - Page 99 KEY PART NUMBER QTY DESCRIPTION 56-0037 4 Conductor Trailer Cable (Per Foot) (720) 56-0037 4 Conductor Trailer Cable (Per Foot) (865) 56-0005-4 7-Contact Plug End Only, w/Spring 156-P-1 Cavity Plug 156-C-6FL-TO-1 Weatherpack Female Connector 156-S-18-16-1 Cable Seal 156-T-16-14-F-1 Female Terminal 56-0084 LED AG Module 56-0130-1...
-
Page 100: Truck Mount Lights
TRUCK MOUNT LIGHTS (PRIOR TO SN SXI22865201) Meyer Manufacturing Corporation - 100 - PB-SXIC... - Page 101 KEY PART NUMBER QTY DESCRIPTION 56-0037 4 Conductor Trailer Cable (Per Foot) (720) 56-0037 4 Conductor Trailer Cable (Per Foot) (865) 56-0005-1 4-Contact Plug 156-P-1 Cavity Plug 156-C-6FL-TO-1 Weatherpack Female Connector 156-S-18-16-1 Cable Seal 156-T-16-14-F-1 Female Terminal 56-0037 4 Conductor Trailer Cable (Per Foot) 56-0130-1 Taillight Harness 56-0004...
-
Page 102: Lights
LIGHTS (SN SXI22720221, SXI22720223, SXI22720225 THROUGH SXI22720236) Meyer Manufacturing Corporation - 102 - PB-SXIC... - Page 103 KEY PART NUMBER QTY DESCRIPTION 56-0306-720 Front Power Harness Assembly (720) 56-0306-865 Front Power Harness Assembly (865) 56-0005-4 7-Contact Plug End Only, w/Spring 56-0084 LED AG Module 56-0310X Rear Harness 56-0091-AMP 4" Amber Round LED Turn Lamp 56-0092 Round Grommet 56-0090-AMP 4"...
-
Page 104: Pull Type Lights
PULL TYPE LIGHTS (SN 22720201 TO SXI22720220, SXI22720222, SXI22720224, SXI22720237 & LATER) Meyer Manufacturing Corporation - 104 - PB-SXIC... - Page 105 KEY PART NUMBER QTY DESCRIPTION 56-0307 Maxi-Seal 198" Power Extension Harness (720) 56-0297 Maxi-Seal 246" Power Extension Harness (865) 56-0005-4 7-Contact Plug End Only, w/Spring 56-0284 Maxi-Seal AG Module 56-0306 Maxi-Seal Front Harness To 7-Pin 56-0310 Maxi-Seal Rear Harness No Side Lights 56-0091-AMP 4"...
-
Page 106: Truck Mount Lights
TRUCK MOUNT LIGHTS (SN 22720201 TO SXI22720220, SXI22720222, SXI22720224, SXI22720237 & LATER) Meyer Manufacturing Corporation - 106 - PB-SXIC... - Page 107 KEY PART NUMBER QTY DESCRIPTION 56-0307 Maxi-Seal 198" Power Extension Harness (720) 56-0297 Maxi-Seal 246" Power Extension Harness (865) 56-0005-1 4-Contact Plug 56-0295 Maxi-Seal Front Main Harness With Socket 56-0037 4 Conductor Trailer Cable (Per Foot) 56-0310 Maxi-Seal Rear Harness No Side Lights 56-0090-AMP 4"...
-
Page 108: Truck Mount Body & Shields
TRUCK MOUNT BODY & SHIELDS Meyer Manufacturing Corporation - 108 - PB-SXIC... - Page 109 KEY PART NUMBER QTY DESCRIPTION 925-0619-1 Gearbox Mount Weldment 924-0622 Driveline Shield Weldment 49-0529 Driveline Cover 925-0550-6 Gearbox Mount Plate 901-0733 Truck Frame Mount Bracket Weldment 901-0551 Mount Weldment 924-0528 Drive Shield Assembly 924-0529-1 Drive Shield 925-0550-8 Gearbox Mount Spacer 901-0732 Input Plate Weldment 924-0602...
-
Page 110: Truck Mount Front Drive
TRUCK MOUNT FRONT DRIVE Meyer Manufacturing Corporation - 110 - PB-SXIC... - Page 111 KEY PART NUMBER QTY DESCRIPTION See Page 116 Truck Mount Cut-Out Clutch 910-0098 Sprocket With Bolt Circle 937-0010-1 Coupler Sprocket, 1-3/4” Bore See Page 112 Truck Mount Upper Gearbox 618-0005 Universal Coupler Joint 925-0619-2 Coupler Shaft 618-0002 Universal Coupler Joint See Page 114 Truck Mount Lower Gearbox 1-800-325-9103...
-
Page 112: Truck Mount Upper Gearbox
TRUCK MOUNT UPPER GEARBOX Meyer Manufacturing Corporation - 112 - PB-SXIC... - Page 113 KEY PART NUMBER QTY DESCRIPTION 119-R160-1.35-2 Gearbox 119-B-02 Oil Level / Drain Plug 119-B-03 Breather Plug 119-B-04 119-B-05 119-B-06 M12-30 Bolt 119-B-18 Seal Ring 119-B-20 Seal Ring 1-800-325-9103 PB-SXIC - 113 - www.meyermfg.com...
-
Page 114: Truck Mount Lower Gearbox
TRUCK MOUNT LOWER GEARBOX Meyer Manufacturing Corporation - 114 - PB-SXIC... - Page 115 KEY PART NUMBER QTY DESCRIPTION 119-R160-1.35-1 Gearbox 119-B-02 Oil Level / Drain Plug 119-B-03 Breather Plug 119-B-04 119-B-05 119-B-06 M12-30 Bolt 119-B-18 Seal Ring 119-B-20 Seal Ring 1-800-325-9103 PB-SXIC - 115 - www.meyermfg.com...
-
Page 116: Truck Mount Cut-Out Clutch
TRUCK MOUNT CUT-OUT CLUTCH KEY PART NUMBER QTY DESCRIPTION 918-0233-1 Truck Mount Cut-Out Clutch 918-0223-1-1 Cut-Out Clutch 918-0220-3 Bolt, Hex, M12 x 30mm 918-0220-4 Lock Washer 918-0410-2-1-1 Clamp Cone Bolt Meyer Manufacturing Corporation - 116 - PB-SXIC... -
Page 117: Optional Equipment
10.0 OPTIONAL EQUIPMENT KEY DESCRIPTION PAGE # WEIGH BAR WIRING DIAGRAM (720 ONLY) 720 BRAKE COMPONENTS 720 FOOT CONTROL BRAKE SCHEMATIC 865 FOOT CONTROL BRAKE SCHEMATIC 865 HAND LEVER CONTROL BRAKE SCHEMATIC 1-800-325-9103 PB-SXIC - 117 - www.meyermfg.com... -
Page 118: Weigh Bar Wiring Diagram (720 Only)
WEIGH BAR WIRING DIAGRAM (720 ONLY) SXI-P-009 Meyer Manufacturing Corporation - 118 - PB-SXIC... - Page 119 KEY PART NUMBER QTY DESCRIPTION 58-0022 GT 400 Monitor 58-0016-SP NT 460 Monitor 58-0020 6 Point J-Box 58-0008 6 Point J-Box With Monitor Cable 58-0024 Front Hitch Weigh Bar, 2.875 58-0026 Spindle Load Cell, 2.875 (720) 58-0027 Spindle Load Cell, 3.75 (865) 56-0236 Monitor To Auxiliary Power Cord Assembly 56-0204...
-
Page 120: Brake Components
720 BRAKE COMPONENTS Meyer Manufacturing Corporation - 120 - PB-SXIC... - Page 121 KEY PART NUMBER QTY DESCRIPTION 57-0002 13” R.H. Free Backing Brake Assembly Without Drum 57-0003 13” L.H. Free Backing Brake Assembly Without Drum 57-0002-5 Shoe Assembly 57-0002-3 Brake Shoe Assembly 57-0003-1 Wheel Cylinder Assembly Left 57-0002-1 Wheel Cylinder Assembly Right (Not Shown) 57-0004 13”...
-
Page 122: Foot Control Brake Schematic
720 FOOT CONTROL BRAKE SCHEMATIC Bottom View Axle Routing Meyer Manufacturing Corporation - 122 - PB-SXIC... - Page 123 KEY PART NUMBER QTY DESCRIPTION 55-0212 Female Flat Face Coupler 155-9002-6-8 Straight Adapter With O-Ring 155-2701-LN-06-06 90 Degree Bulkhead With Lock Nut 57-0029-17 Inverted Flare Full Flow Orifice 57-0015 30” Brake Line Assembly 57-0021 41” Brake Line Assembly (SN SXI19720236 Only) 155-04R17-113-1 113”...
-
Page 124: Foot Control Brake Schematic
865 FOOT CONTROL BRAKE SCHEMATIC Bottom View Hydraulic Manifold Side View Front View Back View Meyer Manufacturing Corporation - 124 - PB-SXIC... - Page 125 KEY PART NUMBER QTY DESCRIPTION 155-04R17-110-1 110” Hose 57-0050 Aluminum Header Manifold Block 155-04R17-208-1 208” Hose 155-2701-LN-06-06 90 Degree Bulkhead With Lock Nut 55-0212 Female Flat Face Coupler 155-9002-6-8 Straight Adapter With O-Ring 155-04R17-113-1 113” Hose 33-1016 Grommet 955-3772-SPO Hydraulic Brake Cylinder 155-2501-06-04 90 Degree Fitting 955-3809...
-
Page 126: Hand Lever Control Brake Schematic
865 HAND LEVER CONTROL BRAKE SCHEMATIC Bottom View Hydraulic Manifold Bottom View Front View Meyer Manufacturing Corporation - 126 - PB-SXIC... - Page 127 KEY PART NUMBER QTY DESCRIPTION 155-04R17-110-2 110” Hose 57-0046 Relief Valve Manifold Block 155-04R17-208-1 208” Hose 155-2701-LN-06-06 90 Degree Bulkhead With Lock Nut 155-6400-6-8 Straight Coupler 155-8010-15 Male Tip 1/2” 155-04R17-113-1 113” Hose 33-1016 Grommet 955-3772-SPO Hydraulic Brake Cylinder 155-2501-06-04 90 Degree Fitting 155-2404-06-04 Straight Adapter...
- Page 128 Meyer Manufacturing Corporation - 128 - PB-SXIC...
- Page 129 11.0 SPECIFICATIONS DIMENSIONS / SPECIFICATIONS Industrial SXI720 Industrial SXI720 Industrial SXI865 Industrial SXI865 Trailer Type W/550/ Truck Mount W/ Trailer Type W/ Truck Mount W/ 45 x 22.5 Tires Mount Brackets 28LX26 Tires Mount Brackets CAPACITY Bushels Heaped Gallons/Cu.ft. (struck) 3500/468 3500/468 4200/562...
- Page 130 Optional (2 or 4 wheel) wheel) Safety Chain Optional Optional Truck Mount Drive Options PTO - Direct Std. PTO - Direct Std. Hydraulic - Opt Hydraulic - Opt Variable Speed Auger Drive Call Call Call Call Meyer Manufacturing Corporation - 130 - PB-SXIC...
- Page 131 MAINTENANCE RECORD MODEL NO. ____________________________________ SERIAL NO. ____________________________________ DATE SERVICE PERFORMED DATE SERVICE PERFORMED Manufactured by: Meyer Manufacturing Corporation 674 W. Business Cty Rd A Dorchester, WI 54425 Phone. 1-800-325-9103 Fax: 715-654-5513 Email: parts@meyermfg.com Website: www.meyermfg.com...
- Page 132 Meyer Manufacturing Corporation 674 W. Business Cty Rd A Dorchester, WI 54425 Phone. 1-800-325-9103 Fax: 715-654-5513 Email: parts@meyermfg.com Website: www.meyermfg.com...
Need help?
Do you have a question about the SXI 720 and is the answer not in the manual?
Questions and answers