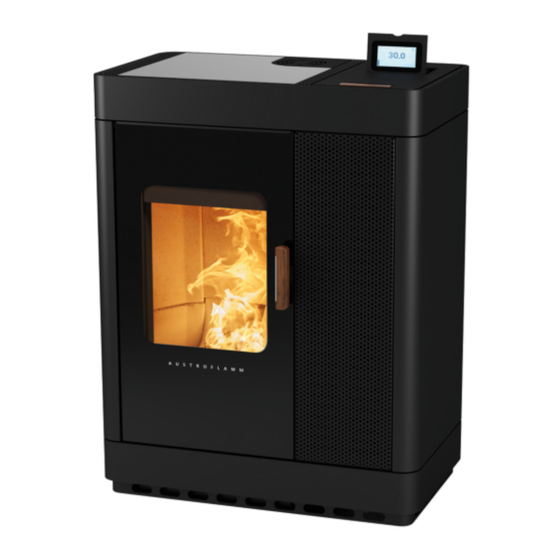
Austroflamm Scotty Duo User Instructions
Hide thumbs
Also See for Scotty Duo:
- Operating manual (272 pages) ,
- Assembly instructions manual (60 pages) ,
- Operating manual (162 pages)

Subscribe to Our Youtube Channel
Related Manuals for Austroflamm Scotty Duo


Summary of Contents for Austroflamm Scotty Duo
- Page 1 Benutzerhandbuch / user instructions/ Istruzioni per l’uso / manuel d’instructions Scotty Duo...
-
Page 3: Table Of Contents
deutsch Inhaltsverzeichnis Wichtige Informationen für den Ofenbetreiber................1 Voraussetzungen für den Betrieb Ihres Kombiofens ..............2 Externe Verbrennungsluftzufuhr ..................... 2 Anschluss an den Kamin ........................ 2 Brennstoff ............................3 Elektrischer Anschluss ........................3 Erstinbetriebnahme, Bedienung des Ofens................... 4 Bedienung des Ofens mittels Touchdisplays .................. 4 Bedienung des Ofens mittels IR-Fernbedienung ................ -
Page 4: Wichtige Informationen Für Den Ofenbetreiber
Politik der ständigen Entwicklung und Aktualisierung des Produkts und kann ohne Vorankündigung Ände- rungen vornehmen. • Alle Maße dieser Bedienungsanleitung sind in mm angegeben. • ACHTUNG: Die Erstinbetriebnahme des Gerätes darf nur durch autorisierte Austroflamm Servicepartner erfolgen. • Ihr Heizgerät ist nicht zur Verwendung als Leiter oder Standgerüst geeignet. •... -
Page 5: Voraussetzungen Für Den Betrieb Ihres Kombiofens
deutsch 2 Voraussetzungen für den Betrieb Ihres Kombiofens 2.1 Externe Verbrennungsluftzufuhr Jede Verbrennung benötigt Sauerstoff. Dieser wird der Umgebung des Heizgerätes entzogen. In modernen Gebäuden ist die Außenhülle sehr dicht. Es strömt daher nicht genug frische Verbrennungsluft nach. In solchen Fällen ist die Zufuhr externer Verbrennungsluft nötig. Auch bei Einsatz von Be- und Entlüf- tungsanlagen im Haus ist das erforderlich. -
Page 6: Brennstoff
deutsch 2.3 Brennstoff Pellets Wir empfehlen die Verwendung von ENplus-A1 zertifizierten Pellets. HINWEIS: Die Verwendung von minderwertigen Pellets oder anderem Material schadet der Funktion Ihres Pellet- ofens und bewirkt den Verlust der Garantie. Bei der Lagerung der Pellets ist unbedingt darauf zu achten, dass diese trocken, kühl und frei von Verschmut- zungen gelagert werden. -
Page 7: Erstinbetriebnahme, Bedienung Des Ofens
Sie den Tankdeckel. 3. Netzkabel einstecken und Kippschalter an der Geräterückseite des Ofens auf „I “ stellen. 4. Am Display erscheint nun das Austroflamm Logo. Danach folgt die Hauptbedienebene mit Temperatur- anzeigen und Tankfüllstand. 5. Vor dem ersten Start muss die Pellet-Förderschnecke befüllt werden. Hierzu öffnen und schließen Sie die Feuerraumtüre (die darauffolgende Frage am Display: „Haben Sie Scheitholz eingelegt?“, bestäti-... - Page 8 Taste für länger als 2 Sekunden wird der Ofen gestartet bzw. gestoppt Funktion – Luftverteilungsgebläse Für Scotty Duo ist optional ein Luftverteilermodul erhältlich. Damit kann ein zusätzlicher Raum via Warmluft be- heizt werden. Die Warmluft wird vor der Feuerraumrückwand abgesaugt.
- Page 9 deutsch Funktion – Füllstandsanzeige Die Füllstandsanzeige informiert Sie über den Füllstand Ihres Pelletbe- hälters. Wenn der Füllstand unter ein bestimmtes Level fällt, wird eine Warnung am Display angezeigt. Die Füllstandsanzeige muss bei jeder Befüllung manuell aktualisiert werden. Ein komplettes Entleeren des Behälters sollte vermieden werden, da die Flamme sonst ungewollt erlischt und Sie vor dem nächsten Pellet-Start die Förderschnecke manuell befüllen müssen.
- Page 10 deutsch Neue Heizzeit erstellen bzw. Heizzeit bearbeiten Legen Sie die Wochentage, den Beginn und das Ende der Heizzeit und die Raumtemperatur entsprechend fest. Speichern Sie die Heizzeit durch Drücken des „Speichern“-Symbols. Danach gelangen Sie automatisch zur Heizzeitenliste zurück. Eine bestehende Heizzeit löschen Sie wie folgt: Markieren Sie die Heizzeit und drücken Sie auf das „Heizzeit löschen“-Symbol.
- Page 11 deutsch Display – Einstellungen Liste scrollen Zurück Durch Drücken der Taste „EINST.“ in der Menüliste gelangen Sie in das Menü „Einstellungen“. Sie können nun in der Liste hinauf bzw. hinunter scrollen. Durch Drücken des gewünschten Menüpunktes wechseln Sie in diese Funktion. Menüpunkt: Zeit / Datum Die Einstellung der Tageszeit ist für die korrekte Heizzeit, die Statistikfunktion und das Protokollieren von Fehlern erforderlich.
- Page 12 deutsch Menüpunkt: Eco-Modus Der ECO-MODUS ermöglicht das automatische AB- und EINSCHALTEN des Ofens unter bestimmten von Ihnen vorgegebenen Temperatureinstellungen. Sie können im Menüpunkt ECO-MODUS die Abschalt- und Neustarttemperatur festlegen. Um ein zu häufiges Starten / Stoppen zu verhindern, sollten die Temperaturgrenzen nicht zu eng gesetzt wer- den.
- Page 13 deutsch Menüpunkt: Anzeigeoptionen Folgende Anzeigeoptionen stehen Ihnen zu Verfügung. Bestimmt die Display Helligkeit Wird für 30 Sekunden nichts am Um sicherzustellen, dass beim während der Bedienung und wäh- Display gedrückt, wechselt die An- Reinigen des Displays keine Funk- rend des Ruhe Modus. zeige auf den eingestellten Ruhe tion ungewollt gestartet wird, drü- cken Sie auf „Start“.
- Page 14 Menüpunkt: Servicefälligkeit Hier sehen Sie, wie viele wartungsfreie Betriebsstunden Ihr Ofen bis zu einem notwendigen Service noch hat. Das Service muss durch einen autorisierten Austroflamm Techniker er- folgen. Menüpunkt: Service-Menü Dieses Menü ist dem Austroflamm Service-Techniker vorbehalten. Menüpunkt: Displaysperre Sie haben die Möglichkeit, Funktionen auf dem Display einzuschränken...
-
Page 15: Bedienung Des Ofens Mittels Ir-Fernbedienung
Installation bzw. Einrichten der Datenverbindung entnehmen Sie bitte der Anleitung zu Ihrem WLAN-Modul bzw. folgen Sie den In- stallations-Anweisungen der Austroflamm PelletControl App. Die erforderliche App „Austroflamm PelletControl“ hier herunterla- den und dann starten: Apple iOS Google Play / Android... -
Page 16: Betriebsarten Des Ofens
deutsch 4 Betriebsarten des Ofens 4.1 Funktionsdiagramm Ihres Kombiofens... -
Page 17: Pelletbetrieb
deutsch 4.2 Pelletbetrieb Automatische Zündung Der Ofen kann mit dem Start/Stopp Button in der Statusanzeige bzw. Heizleistungsanzeige gestartet werden. Optional kann über IR-Fernbedienung oder über die App gestartet werden. Die Entzündung der Pellets erfolgt vollautomatisch und findet in mehreren Phasen statt. Diese Phasen wer- den am Display dargestellt (Kipproststellung –... - Page 18 deutsch Scheitholzstart I Nach Ablauf des Hybridstarts wechselt der Ofen in diese Betriebsphase. Hier wird gewährleis- tet, dass alle Pellets in der Brennmulde verbrennen und das Scheitholz weiter angefacht wird. Wird die Feuerraumtür im Ruhezustand des Ofens geöffnet und wieder geschlossen (und die Frage „Haben Sie Scheitholz eingelegt?“...
-
Page 19: Alarme Und Fehlermeldungen
deutsch 5 Alarme und Fehlermeldungen Alarme werden am Bedienfeld gelb dargestellt. Der Kombiofen kann bei Alarmanzeige weiter benutzt werden. Fehler werden rot angezeigt. Der Kombiofen ist bei Fehleranzeigen nicht betriebsbereit. Warncode, Beschreibung Lösung Fehlercode Brennstoff Füllstand Pellets nachfüllen, Alarm - A001 Füllstandsanzeige wieder auf „VOLL“... -
Page 20: Alarme Und Fehler Zurücksetzen
deutsch 5.1 Alarme und Fehler zurücksetzen Im Falle eines Alarms bzw. Fehlers wird eine gelbe bzw. rote Meldung mit der Beschreibung angezeigt. Um die Alarm-Anzeige zu schließen, tippen Sie auf Das Schließen der Anzeige setzt die Warnung nicht zurück. Um den Alarm zurückzusetzen, muss das Problem gelöst werden. Der Ofen kann aber trotz aufrechter Alarmanzeige weiterhin betrieben werden. -
Page 21: Reinigung Und Wartung
1 x jährlich Aschebox, Tankdeckel); gegebenenfalls ersetzen. Der Ofen und seine Teile sind gemäß obenstehender Übersicht zu reinigen. Lassen Sie Ihren Kombiofen jährlich vor Beginn der Heizsaison von einem Austroflamm-Techniker überprüfen und warten. 6.1 Kipprost Bei Ofenmodellen mit automatischem Kipprost werden bei jedem Ofenstopp die Verbrennungsrückstände am Kipprost in die Aschelade abgekippt. -
Page 22: Reinigung Der Rauchgaszüge
deutsch 6.2 Reinigung der Rauchgaszüge... -
Page 23: Feuerraumtür Schließkraft Einstellen
deutsch 6.3 Feuerraumtür Schließkraft einstellen 6.4 Ascheladentür justieren... -
Page 24: Feuerraumtür Justieren
deutsch 6.5 Feuerraumtür justieren... -
Page 25: Austausch Der Speicherbatterie
Abdeckung Austauschen der Batterie 8 Garantie Für Ihren AUSTROFLAMM-Pelletofen garantieren wir für die einwandfreie Funktion des Korpus 6 Jahre, aller weiteren Bauteile aus Stahl und Guss sowie Elektro- und Elektronikbestandteile 2 Jahre ab dem Erstverkaufsda- tum. Stahl- und Gussteile sowie Elektro- und Elektronikbestandteile, die während der Garantiezeit Material- und/oder Verarbeitungsmängel aufweisen, werden gegen Neuteile ersetzt. -
Page 26: Elektrischer Anschlussplan
9 Elektrischer Anschlussplan Hinweis: Reparaturen an Ihrem Kombiofen dürfen nur von autorisierten Austroflamm-Technikern durchgeführt werden. 9.1 Für Modelle mit permanent drehendem Schneckenmotor E-ANSCHLUSSPLAN – ÜBERSICHT Türkontaktschalter PWM-DC Wechsler RPM / HAL-IC Raumtemperaturfühler Feuerraumtemperaturfühler Differenzdruckmessung Keramikzündung Rauchgasgebläse Sicherheitstemperaturbegrenzer Tankdeckel-Sicherheitsschalter Rostpositionierung... - Page 27 deutsch * DETAILLIERTER E-ANSCHLUSSPLAN – RAUCHGASGEBLÄSE * DETAILLIERTER E-ANSCHLUSSPLAN – SCHNECKENMOTOR * DETAILLIERTER E-ANSCHLUSSPLAN – ROSTMOTOR...
- Page 28 deutsch * DETAILLIERTER E-ANSCHLUSSPLAN – LUFTKLAPPENMOTOR * DETAILLIERTER E-ANSCHLUSSPLAN – DATENKABEL-SPLITTER...
-
Page 29: Technische Daten
deutsch 10 Technische Daten Rauchabgang Zuluft Luftverteilermodul Nennwärmeleistung (NWL) 9,4 kW Teillast-Wärmeleistung 2,8 kW 114 – 255 m³ Raumheizvermögen Wirkungsgrad 90 % CO-Gehalt bei NWL <250 mg/Nm³ Abgastemperatur bei NWL 219 °C Abgastemperatur bei TL (Teillast) 112 °C Abgasmassenstrom bei NWL 5,6 g/s Abgasmassenstrom bei TL 3,8 g/s... - Page 30 Der Endkunde bestätigt, dass er den Ofen nun selbständig in Betrieb nehmen kann. Er bestätigt Weiteres, dass der Pelletofen voll funktionstüchtig und mängelfrei übergeben wird. ------------------ --------------------------- ----------------------------------------- Ort, Datum Unterschrift Betreiber/Kunde Unterschrift Techniker Austroflamm GmbH, Austroflamm-Platz 1, 4631 Krenglbach, Österreich, Tel. 0043/7249/46443, info@austroflamm.co...
- Page 31 english Table of contents Important information for the Stove User ..................1 Requirements for Operating Your Wood-Burning Stove.............. 2 2.1. External combustion air supply ....................... 2 2.2. Connection to the chimney ......................2 2.3. Fuel ..............................3 2.4. Electrical connection ........................3 Initial Operation, Using the Stove ....................
-
Page 32: Important Information For The Stove User
english 1. Important information for the Stove User • The information in this manual is of a general nature. National and European standards, local and building regulations, and fire safety provisions must be observed. • Please read this manual carefully before installing, operating and working on the stove. Keep the manual in a safe place and ensure that it is available at all times. -
Page 33: Requirements For Operating Your Wood-Burning Stove
english 2. Requirements for Operating Your Wood-Burning Stove 2.1. External combustion air supply Every combustion process requires oxygen. This oxygen is extracted from the environment of the heating appli- ance. The exterior shell of modern buildings is very dense. As a result, insufficient fresh combustion air flows in, mak- ing an external supply of combustion air essential. -
Page 34: Fuel
english 2.3. Fuel Pellets We recommend using ENplus-A1 approved pellets. NOTE!: Using inferior quality pellets or other material will impair the functioning of your pellet stove and invalidate the warranty. When storing the pellets, it is essential that they are kept in a cool, dry place and free from contamination. Damp pellets impair combustion and clog the screw conveyor. -
Page 35: Initial Operation, Using The Stove
3. Plug in the power cable and set the toggle switch on the back of the stove to "I ". 4. The display will now show the Austroflamm logo. This is followed by the main operating menu with tem- perature indicators and hopper level. - Page 36 An air distribution module is available as an option for the RUBY model. This allows an additional room to be heated using warm air. The warm air is extracted in front of the rear wall of the firebox. For installation and any other information, please contact your Austroflamm dealer.
- Page 37 english Function- Fill level indicator The fill level indicator informs you of the fill level of your pellet hopper. If the fill level falls below a certain value, a warning is shown on the dis- play. The fill level indicator must be updated manually each time the pel- let hopper is filled.
- Page 38 english Setting a new heating time or editing the heating time Set the weekdays, heating time start, heating time end and room temperature as required. Save the heating time by pressing the "Save" icon. You will then return to the heating time list. To delete an existing heating time, proceed as follows: Highlight the heating time and press the "Delete heating time"...
- Page 39 english Display - Settings Back Scroll list By pressing the “SETTINGS“ button in the menu list the “Settings” menu can be accessed. It is now possible to scroll up or down the list. By pressing the desired menu item, the function is activated. Menu item: Time / Date Setting the time of day is necessary for the correct heating time, the statistics function and for logging errors.
- Page 40 english Menu item: Eco mode The ECO MODE allows the stove to be switched ON and OFF automati- cally at certain temperature settings specified by you. The cut-off and restart temperatures can be set in the ECO-MODE menu item. In order to avoid starting / stopping the appliance too frequently, the temperature limits should not be set too tightly.
- Page 41 english Menu item: Display options The following display options can be selected: Adjusts the display brightness dur- If nothing is pressed on the display To make sure that no function is ing operation and sleep mode. for 30 seconds, the display started unintentionally when clean- changes to the set sleep mode.
- Page 42 Here you can see how many maintenance-free hours of operation your stove still has until a service is necessary. The service must be carried out by an approved Austroflamm technician. Menu item: Service menu This menu is reserved for the Austroflamm service technician.
-
Page 43: Operating The Stove Using The Ir Remote Control
To install or set up the data connection, please refer to the instruc- tions for your WLAN module, or follow the installation instructions of the Austroflamm PelletControl app. Download the required "Austroflamm PelletControl" app here and then start it: Apple iOS... -
Page 44: Operating Modes Of The Stove
english 4. Operating modes of the stove 4.1. Functional diagram of your combi stove... -
Page 45: Pellet Mode
english 4.2. Pellet mode Automatic Ignition The stove can be started with the Start/Stop button in the status display or heat output dis- play.Optionally, it can be started via IR remote control or via the app. Pellet ignition is fully automatic and occurs in several phases. These phases are shown on the display. -
Page 46: Firewood Mode
english Firewood start I Upon elapse of the 'Hybrid start' the furnace switches to this operating phase. Here it is en- sured that all pellets combust in the combustion bowl and that the firewood continues to be inflamed. If the firebox door is opened and closed again when the stove is idle (and the question "Have you inserted firewood?"... -
Page 47: Warnings And Error Messages
english 5. Warnings and error messages Alarms are displayed in yellow on the control panel. The pellet stove can continue to be used when an alarm is indicated. Alarms are displayed in red. The pellet stove is inoperable when an error is displayed. Warning code, Description Solution... -
Page 48: Resetting Warnings And Errors
english 5.1. Resetting warnings and errors In the event of an alarm or error, a yellow or red message is displayed giving details. To close the alarm display, press Closing the display does not clear the alarm. To clear the alarm, a solution to the problem must be found. However, the stove can still be operated in spite of the fact that the alarm indicator is still displayed. -
Page 49: Cleaning And Maintenance
The stove and its components must be cleaned according to the above table. Arrange for your pellet stove to be inspected and serviced annually by an Austroflamm technician before the start of the heating season. -
Page 50: Cleaning Of The Flue Gas Passes
english 6.2. Cleaning of the flue gas passes... -
Page 51: Adjusting The Closing Force Of The Firebox Door
english 6.3. Adjusting the closing force of the firebox door 6.4. Adjust position of ash container door... -
Page 52: Adjusting The Firebox Door
english 6.5. Adjusting the firebox door... -
Page 53: Replacement Of The Storage Battery
Replacing the battery 8. Warranty Our warranty covers the body of your AUSTROFLAMM pellet stove for 6 years, and all other steel and cast iron components and electrical and electronic components for 2 years from the date of first sale. -
Page 54: Electrical Connection Diagram
9. Electrical connection diagram Note: Repairs to your pellet stove must only be carried out by approved Austroflamm technicians. 9.1. For models with a permanently rotating feeder motor MAIN ELECTRIC DIAGRAM Door contact switch PWM to DC Converter RPM / HAL-IC... - Page 55 english *ADDITIONAL COMBUSTION VENTILATOR ELECTRIC DIAGRAM *ADDITIONALFEEDER MOTOR ELECTRIC DIAGRAM *ADDITIONAL GRATE MOTOR ELECTRIC DIAGRAM...
- Page 56 english *ADDITIONAL AIR FLAP MOTOR ELECTRIC DIAGRAM *ADDITIONAL COMMUNICATION SPLITTER ELECTRIC DIAGRAM...
-
Page 57: Technical Data
english Technical Data Flue outlet Suppy air Air distribution module Nominal thermal output (NWL) 9.4 kW Partial-load thermal output 2.8 kW 114 – 255 m³ Space heating capacity Efficiency 90 % CO content at NWL <250 mg/Nm³ Flue gas temperature at NWL 219 °C Flue gas temperature at TL (partial load) 112°C... - Page 58 ------------------ ------------------------------------ ----------------------------------------- Location, date Signature of Operator/Customer Signature of Technician Austroflamm GmbH, Austroflamm-Platz 1, 4631 Krenglbach, Austria, Tel. 0043/7249/46443, info@austroflamm.com...
- Page 59 Indice Informazioni importanti per l'utente della stufa ................1 Premesseal funzionamento della stufa a camino ................. 2 Alimentazione di aria comburente esterna ..................2 Collegamento al camino ......................... 2 Combustibile ........................... 3 Collegamento elettrico ........................3 Avviamento iniziale, funzionamento della stufa ................4 Uso della stufa con il touch-display ....................
-
Page 60: Informazioni Importanti Per L'utente Della Stufa
italiano 1 Informazioni importanti per l'utente della stufa • Le informazioni fornite nel presente manuale sono generiche. Devono essere osservate le norme nazionali ed europee, le norme locali ed edilizie e le disposizioni antincendio. • Le presenti istruzioni devono essere lette attentamente prima di installare, utilizzare o intervenire in qualsiasi modo sulla stufa. -
Page 61: Premesseal Funzionamento Della Stufa A Camino
italiano 2 Premesseal funzionamento della stufa a camino 2.1 Alimentazione di aria comburente esterna La combustione richiede necessariamente ossigeno, che viene prelevato dall’ambiente circostante della stufa. Gli edifici moderni hanno un involucro esterno ermetico. C’è quindi un flusso insufficiente di aria comburente fre- sca. -
Page 62: Combustibile
italiano 2.3 Combustibile Pellet Si raccomanda l’uso di pellet certificati ENplus-A1. AVVERTENZA: L’uso di pellet di scarsa qualità o di altri materiali compromette il funzionamento della stufa e comporta la perdita dei diritti di garanzia. Quando si immagazzina il pellet, assicurarsi che si trovi in un ambiente asciutto, fresco e non sporco. Il pellet umido brucia male e intasa la coclea di caricamento. -
Page 63: Avviamento Iniziale, Funzionamento Della Stufa
3. Inserire il cavo di rete e mettere su "I" il commutatore a levetta che si trova sul retro della stufa. 4. Sul display viene visualizzato il logo di Austroflamm. In seguito appare il livello principale dei comandi con l’indicazione della temperatura e il livello di riempimento del serbatoio. - Page 64 Per il modello Mo Duo/Clou Duo è disponibile quale opzione un modulo diffusore d’aria. In tal modo è possibile ri- scaldare un altro ambiente con l’aria calda. Quest’ultima viene aspirata a monte della parete posteriore della ca- mera di combustione. Per il montaggio e altre informazioni, si prega di fare riferimento a un distributore Austroflamm.
- Page 65 italiano Visualizzazione del livello di riempimento L’indicazione del livello di riempimento informa sullo stato di riempimento del serbatoio del pellet. Se il livello di riempimento scende al di sotto di un determinato livello, sul display compare un avviso. Rabboccare completa- mente il serbatoio e impostare l’indicazione del livello di riempimento nuo- vamente su “PIENO”.
- Page 66 italiano Creare e gestire un nuovo tempo di accensione Definire i giorni della settimana, l’inizio e la fine del tempo di accensione e la temperatura ambiente. Memorizzare il tempo di accensione premendo sul simbolo del pulsante "Salva" In seguito si torna alla lista dei tempi di accensione.
- Page 67 italiano Display - Impostazioni Indietro Scrolla della lista Premendo il tasto "IMPOST." nell’elenco del menu si accede al menu "Impostazioni". Ora è possibile effettuare lo scorrimento verso l’alto o in basso . Premendo il tasto del menu desiderato ci si commuta in questa funzione. Voce di menu: Tempo / Ora L’impostazione dell’ora del giorno è...
- Page 68 italiano Voce di menu: Modalità Eco La MODALITÀ ECO permette di SPEGNERE e ACCENDERE la stufa in determinate condizioni di temperatura preimpostate. Nella voce di menu è possibile definire la temperatura di spegnimento e di riavvio. Per evitare un ciclo di accensione/spegnimento troppo frequente, i limiti di temperatura da impostare non devono essere troppo restrittivi.
- Page 69 italiano Voce di menu: Opzioni di indicazione Sono disponibili le seguenti opzioni. Definisce la luminosità del display Se non si preme il display entro 30 Per garantire di non avviare inde- secondi, l’indicazione si commuta durante il funzionamento e du- sideratamente alcuna funzione du- rante la modalità...
- Page 70 Si ricorda che il servizio di assistenza può essere svolto solo da un tecnico autorizzato di Austroflamm. Voce di menu: Menu assistenza Questo menu è riservato per i tecnici dell’assistenza di Austroflamm. Voce di menu: Blocco del display Permette di bloccare le funzioni del display ("sicurezza per bambini") BASSO Livello di blocco basso.
-
Page 71: Uso Della Stufa Con Telecomando (A Richiesta)
L’installazione e l’allestimento della connessione dati sono indicati nella guida del modulo WLAN; si possono anche seguire e istruzioni sull’installa- zione della app Austroflamm PelletControl. Qui è possibile scaricare l’app "Austroflamm PelletControl" e poi avviarla: Apple iOS Google Play / Android... -
Page 72: Modalità Di Funzionamento Della Stufa
italiano 4 Modalità di funzionamento della stufa 4.1 Diagramma funzionale della stufa combinata... -
Page 73: Modalità Pellet
italiano 4.2 Modalità pellet Accensione La stufa può essere avviata col pulsante Avvio/Arresto nell’indicazione di stato risp. nell’indica- zione della potenza di riscaldamento. Su richiesta, è possibile avviare la stufa con un telecomando a infrarossi o una app. L’accensione del pellet avviene automaticamente e si verifica in varie fasi che vengono visualiz- zate sul display. - Page 74 italiano Avvio legna a ciocchi I Allo scadere dell’“Avvio ibrido” la stufa passa a questa fase di funzionamento. In questo modo si assicura la completa combustione del pellet presente nel braciere e un ulteriore attizzamento della legna a ciocchi. Se la camera di combustione viene aperta quando la stufa è a riposo e viene subito richiusa (ri- spondendo “Si”...
-
Page 75: Allarmi E Messaggi D'errore
italiano 5 Allarmi e messaggi d’errore Gli allarmi vengono visualizzati in giallo sul pannello comandi. In caso di allarmi è possibile continuare a utilizzare la stufa a pellet. Gli errori vengono visualizzati in rosso. In caso di errore la stufa non può funzionare. Codice di al- larme, Descrizione... -
Page 76: Resettare Gli Allarmi
italiano 5.1 Resettare gli allarmi In caso di allarme verrà visualizzato un messaggio giallo, in caso di errore uno rosso con la relativa descri- zione. Per chiudere l’indicazione dell’allarme, premere La chiusura dell’indicatore non resetta l’avviso. Per resettare l’allarme occorre prima risolvere il problema. Nonostante l’allarme, la stufa può... -
Page 77: Pulizia E Manutenzione
La stufa e i suoi componenti devono essere puliti conformemente alla sumenzionata panoramica. Fate controllare e sottoporre a manutenzione la stufa a camino a pellet ogni anno da un tecnico di Austroflamm, prima della stagione di accensione. -
Page 78: Pulizia Delle Canne Fumarie
italiano 6.2 Pulizia delle canne fumarie... -
Page 79: Regolazione Della Pressione Di Chiusura Dello Sportello Della Camera Di Combustione
italiano 6.3 Regolazione della pressione di chiusura dello sportello della camera di combu- stione 6.4 Regolare l’antina cassetto ceneri... -
Page 80: Regolazione Dello Sportello Della Camera Di Combustione
italiano 6.5 Regolazione dello sportello della camera di combustione... -
Page 81: Sostituzione Della Batteria Di Accumulatori
8 Garanzia Per la stufa a pellet AUSTROFLAMM garantiamo un funzionamento ineccepibile di 6 anni per il corpo della stufa e di 2 anni dalla data della prima vendita per tutti gli altri componenti in acciaio e in ghisa, nonché per i componenti elettrici ed elettronici. -
Page 82: Schemi Di Collegamento Elettrico
9 Schemi di collegamento elettrico Avvertenza: Le riparazioni della stufa a pellet devono essere eseguite esclusivamente da tecnici Austroflamm autorizzati. 9.1 Per modelli con motore coclea a rotazione continua SCHEMA ELETTRICO PRINCIPALE Contatto porta PWM a DC convertitore per coclea a rotazione continua RPM / sensore numero giri regolatore dell’aria comburente... - Page 83 italiano *SCHEMA ELETTRICO REGOLATORE DELL’ARIA COMBURENTE *SCHEMA ELETTRICO MOTORE COCLEA *SCHEMA ELETTRICO MOTORE GRIGLIA...
- Page 84 italiano *SCHEMA ELETTRICO MOTORE VALVOLA ARIA *SCHEMA ELETTRICO SDOPPIATORE COMUNICAZIONE...
-
Page 85: Dati Tecnici
italiano 10 Dati tecnici Uscita fumi Aria immessa Modulo diffusore d’aria Potenza calorifica nominale (NWL) 9,4 kW Potenza calorifica a carico parziale 2,8 kW 114 – 255 m³ Volume riscaldabile Rendimento di combustione 90 % Contenuto di monossido di carbonio a potenza calori- <250 mg/Nm³... - Page 86 L’utente finale conferma che a questo punto egli è in grado di mettere in funzione autonomamente la stufa. Egli conferma inoltre che la stufa a pellet è stata consegnata completamente funzionante e priva di difetti. ------------------ --------------------------------- ----------------------------------------- Luogo, data Firma utente/cliente Firma del tecnico Austroflamm GmbH, Austroflamm Platz 1, 4631 Krenglbach, Austria, tel. 0043/7249/46443, info@austroflamm.com...
- Page 87 Sommaire Informations essentielles pour l’exploitant du poêle ..............1 Conditions préalables à l'utilisation de votre poêle à bois ............2 Alimentation en air de combustion externe ..................2 Raccordement au conduit de cheminée ..................2 Combustible ............................ 3 Raccordement électrique ........................ 3 Première mise en service, utilisation du poêle ................
-
Page 88: Informations Essentielles Pour L'exploitant Du Poêle
Toutes les dimensions de ce manuel d'utilisation sont indiquées en mm. • ATTENTION : la première mise en service de l'appareil ne doit être réalisée que par un prestataire de ser- vices agréé par Austroflamm. • Votre poêle ne doit pas servir d'échelle ou d'escabeau. -
Page 89: Conditions Préalables À L'utilisation De Votre Poêle À Bois
français 2. Conditions préalables à l'utilisation de votre poêle à bois Alimentation en air de combustion externe Toute combustion nécessite de l'oxygène. Celui-ci est tiré de l'air ambiant aux environs du poêle. L'enveloppe des bâtiments modernes étant très hermétique, l'air frais ne peut pas pénétrer en quantité suffi- sante pour alimenter la combustion. -
Page 90: Combustible
français Combustible Pellets Nous recommandons l'utilisation de pellets (granulés de bois) certifiés ENplus-A1. REMARQUE : L'utilisation de pellets de mauvaise qualité ou d'un autre combustible nuit au bon fonctionnement de votre poêle à pellets et conduit à une perte de la garantie. Veillez impérativement à... -
Page 91: Première Mise En Service, Utilisation Du Poêle
3. Branchez le câble secteur et mettez l'interrupteur au dos de l'appareil sur « I ». 4. Le logo Austroflamm s'affiche à l'écran, suivi de l'écran de commande principal avec les indicateurs de température et le niveau de remplissage du réservoir. - Page 92 Un kit canalisation, disponible en option pour le modèle RUBY, permet de chauffer une pièce supplémentaire par de l'air chaud. L'air chaud est aspiré à l'avant du panneau arrière de la chambre de combustion. Pour l'installation du kit canalisation et pour de plus amples informations, merci de vous adresser à votre reven- deur Austroflamm.
- Page 93 français Fonction – Indicateur du niveau de remplissage Cet indicateur vous informe sur le niveau de remplissage du réservoir à pellets. Une alarme s'affiche à l'écran lorsque le niveau de remplissage tombe sous un seuil déterminé. L'indicateur doit être mis à jour manuel- lement à...
- Page 94 français Créer / modifier une plage horaire Définissez les jours de la semaine, les heures de début et de fin des périodes de chauffage et la température voulue. Appuyez sur le symbole « Enregistrer » pour sauvegarder la plage horaire. Le retour à la liste des plages ho- raires se fait automatiquement.
- Page 95 français Écran d'affichage – Réglages Faire défiler Retour la liste Appuyez sur la touche « Réglages » de la liste de menus pour afficher le menu « Réglages ». Vous pouvez vous déplacer dans la liste en la faisant défiler. Pour entrer dans une fonction, appuyez sur le point de menu correspondant.
- Page 96 français Point de menu : Mode Éco Le mode ÉCO permet un ARRÊT et un REDÉMARRAGE automatiques du poêle en fonction des températures que vous aurez définies. Le point de menu MODE ÉCO vous permet de définir ces températures d'arrêt et de redémarrage. Pour éviter que le poêle ne s'arrête et redémarre trop souvent, laissez une certaine marge entre ces seuils.
- Page 97 français Point de menu : Options d'anffichage Vous disposez des options d'affichage suivantes. Définit la luminosité de l'écran Après 30 secondes d'inactivité, Pour éviter que le nettoyage de pendant l'utilisation et en mode l'affichage passe automatique- l'écran ne déclenche involontaire- Veille.
- Page 98 Les révisions doivent être réalisées par un technicien agréé par Aus- troflamm. Point de menu : Service technique Ce menu est réservé au technicien de service Austroflamm. Point de menu : Verrouillage de l'écran Vous avez la possibilité de limiter l'accès aux fonctions affichées à...
-
Page 99: Commande Du Poêle Par Télécommande Ir (En Option)
Pour l'installation et la configuration de la connexion de données, veuil- lez consulter le manuel de votre module Wi-Fi ou suivre les instructions d'installation de l'application Austroflamm PelletControl. Téléchargez ici l'application Austroflamm PelletControl, puis ouvrez-la : Apple iOS Google Play / Android... -
Page 100: Modes De Fonctionnement Du Poêle
français 4. Modes de fonctionnement du poêle Diagramme des fonctions de votre poêle mixte. -
Page 101: Mode Pellets
français Mode Pellets Allumage Il est possible de démarrer le poêle avec le bouton Marche / Arrêt dans l'affichage d'état ou sur l'écran Puissance de chauffage. Vous pouvez aussi utiliser la télécommande IR ou l’application pour démarrer le poêle. L'allumage des pellets est entièrement automatique et se déroule en plusieurs phases. Ces phases sont représentées à... - Page 102 français Phase Démarrage bois de chauffage I Phase de fonctionnement suivant la phase Démarrage hybride. Dans cette phase, les pellets du foyer brûlent et le bois de chauffage est attisé. Le poêle passe également en mode « Démarrage Bûches I » si la porte du foyer a été ouverte et refermée alors que le poêle était au repos (et que vous avez répondu «...
-
Page 103: Avertissements Et Messages De Défaut
français 5. Avertissements et messages de défaut Sur le panneau de commande, les alarmes s'affichent en jaune. Vous pouvez cependant continuer d'utiliser le poêle à pellets. Les erreurs s'affichent en rouge. En présence d'une erreur, le poêle à pellets n'est pas opéra- tionnel. -
Page 104: Réinitialiser Les Alarmes Et Erreurs
français Réinitialiser les alarmes et erreurs En cas d'alarme ou d'erreur, le système affiche un message en jaune ou en rouge décrivant le problème. Appuyez sur pour fermer le message d'alarme. Cette fermeture ne réinitialise pas l'alarme. Pour réinitialiser l'alarme, vous devez résoudre le problème. Même en présence d'une alarme, vous pouvez continuer à... -
Page 105: Nettoyage Et Maintenance
Nettoyer le poêle et ses composants conformément au tableau ci-dessus. Faites contrôler et entretenir votre poêle à pellets par un technicien Austroflamm une fois par an, avant le début de la saison de chauffage. Modèles de poêles avec grille autobasculante Sur les modèles de poêles avec grille autobasculante, les résidus de la combustion se trouvant sur la grille bas-... -
Page 106: Nettoyage Du Parcours Des Fumées
français Nettoyage du parcours des fumées... -
Page 107: Régler La Force De Fermeture De La Porte De La Chambre De Combustion
français Régler la force de fermeture de la porte de la chambre de combustion Régler la porte du tiroir... -
Page 108: Ajuster La Porte De La Chambre De Combustion
français Ajuster la porte de la chambre de combustion... -
Page 109: Remplacement De La Pile Mémoire
Conditions d’application de la garantie : 1. Votre poêle à pellets AUSTROFLAMM a été utilisé et entretenu conformément à la notice d’instructions, et il a été installé et mis en service par un technicien de service (le protocole de mise en service doit être parvenu chez Austroflamm au plus tard un mois après la mise en service). -
Page 110: Plan De Raccordement Électrique
9. Plan de raccordement électrique Remarque : Seuls des techniciens autorisés par Austroflamm ont le droit d'effectuer des réparations sur votre poêle à pellets. Pour les modèles avec moteur à rotation continue SCHÉMA ÉLECTRIQUE PRIMAIRE Contact de porte Convertisseur PWM > DC pour vis à rotation permanente RPM / Hall IC pour soufflerie d’air de combustion... - Page 111 français *SCHÉMA ÉLECTRIQUE SOUFFLERIE D’AIR DE COMBUSTION *SCHÉMA ÉLECTRIQUE MOTEUR D’ALIMENTATION *SCHÉMA ÉLECTRIQUE MOTEUR DE LA GRILLE...
- Page 112 français *SCHÉMA ÉLECTRIQUE SERVOMOTEUR À VOLETS D’AÉRATION *SCHÉMA ÉLECTRIQUE CONNECTEUR DE COMMUNICATION...
-
Page 113: Données Techniques
français 10. Données techniques évacuation des fumées air entrant Kit canalisation Rendement calorifique nominal (RCN) 9,4 kW Rendement à charge partielle (CP) 2,8 kW 114 – 255 m³ Volume de chauffe Rendement 90 % Teneur en CO RCN <250 mg/Nm³ Température des fumées RCN 219 °C Température des fumées CP (charge partielle) - Page 114 Le client confirme, qu’il peut mettre le poêle en service de manière autonome. De plus, il confirme que le poêle à pellets est en parfait état de marche au moment du départ du revendeur. ------------------ -------------------------------- -------------------------------------- Lieu, Date Signature utilisateur/client Signature revendeur/technicien Austroflamm GmbH, Austroflamm-Platz 1, 4631 Krenglbach, Österreich, Tel. 0043/7249/46443, info@austroflamm.com...
- Page 115 français...
- Page 116 Typenschild...
Need help?
Do you have a question about the Scotty Duo and is the answer not in the manual?
Questions and answers