Table of Contents
Advertisement
Quick Links
VICTOR COMPANY OF JAPAN, LIMITED
®
is a registered trademark owned by VICTOR COMPANY OF JAPAN, LTD.
®
is a registered trademark in Japan, the U.S.A., the U.K. and many other countries.
© 2004 VICTOR COMPANY OF JAPAN, LIMITED
NETWORK PACK STARTUP GUIDE
KA-DV350U
For Customer Use:
Enter below the Serial No. which is
located on the body. Retain this
information for future reference.
Model No.
Serial No.
LST0207-001A
KA-DV350U
INSTRUCTIONS
This instruction book is made from
100% recycled paper.
LST0207-001A
Advertisement
Chapters
Table of Contents

Related Manuals for JVC KA-DV350U


Summary of Contents for JVC KA-DV350U
- Page 1 Japan, the U.S.A., the U.K. and many other countries. © 2004 VICTOR COMPANY OF JAPAN, LIMITED NETWORK PACK STARTUP GUIDE KA-DV350U For Customer Use: Enter below the Serial No. which is located on the body. Retain this information for future reference.
-
Page 2: Important Safeguards
UNDESIRED OPERATION Information for USA This device complies with part 15 of the FCC Rules. Changes or modifications not approved by JVC could void the user’s authority to operate the equipment. INFORMATION (FOR CANADA) This Class B digital apparatus complies with Canadian ICES-003. -
Page 3: Table Of Contents
Safety Precautions Thank you for purchasing this product. (These instrustions are for KA-DV350U) Before beginning to operate this unit, please read the instruction manual carefully in order to make sure that the best possible performance is obtained. Due to design modifications, data given in this instruction book are subject to possible change without prior notice. -
Page 4: Features
DV350. (For the latest cards for which operation have been confirmed, please consult the person in charge of professional video equipment at your nearest JVC-authorized service agent.) Precautions (cont’d) Streamproducer Operating Environment ● Under the following conditions, the Streamproducer can be used in the required operating environment. -
Page 5: What The Ka-Dv350 Can Be Used For
What the KA-DV350 can be used for Sending camera video/audio by email using CF (Compact Flash) card Sending an image file stored on Recording the camera images a CF card as an e-mail data to a CF card by using the attachment file. -
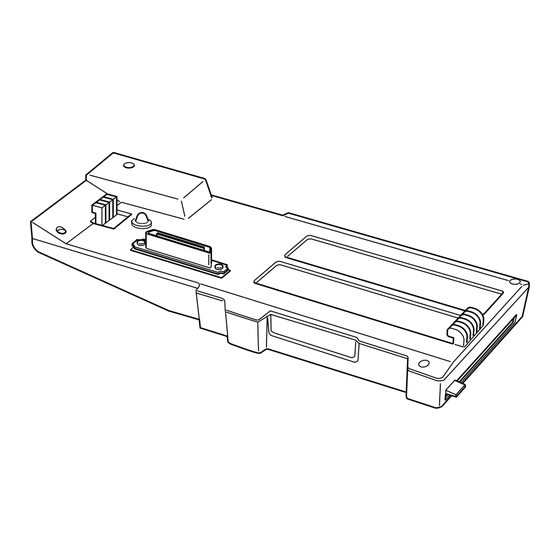
Page 6: Controls, Connectors And Indicators
Controls, Connectors and Indicators Camera connection terminal To connect the DV camcorder (GY-DV300). ☞ See page 9 “How to Attach”) PC card slot To insert a LAN card, Compact Flash card, etc. Access lamp This lamp lights when the card is in use. Guard Guard to prevent the card from being inadvertently... -
Page 7: Confirming Correct Attachment
Confirming correct attachment Use the following procedure to confirm that the KA-DV350 is correctly attached. Card status indicator Memo Memo The card status indicator shown on the right blinks d u r i n g t h e i n i t i a l i z a t i o n operation right after the power is turned on. -
Page 8: Specifications
Specifications Mass : 150 Power supply : Supplied from the GY-DV300 Power consumption : DC 7.2 V Allowable operating temperature : 0 ˚C to 40 ˚C Allowable storage temperature : –20 ˚C to 60 ˚C Allowable operating humidity : 30 % to 80 % RH Provided accessories ●... - Page 9 VICTOR COMPANY OF JAPAN, LTD. ® is a registered trademark in Japan, the U.S.A., the U.K. and many other countries. © 2004 VICTOR COMPANY OF JAPAN, LIMITED NETWORK PACK KA-DV350U LST0196-001A User’s Guide LST0196-001A...
- Page 10 Reference pages and reference items are indicated. Proprietary terms ● All rights reserved by JVC. Unauthorized duplication or reprinting of this manual, in whole or in part, is strictly prohibited. ● Windows is a registered trademark of Microsoft Corporation in the U.S.
-
Page 11: Precautions For Proper Use
Should normal recording fail due to a problem with this unit, JVC will not assume liabilities for any damages that may result from the failure. Caution for using wireless LAN card... -
Page 12: Pc Operating Environment
The operation of this unit has been confirmed under the following PC environment. The following PC environment was available as of January 2004. For details of the latest available operating environment, please consult your nearest JVC-authorized agent. Minimum requirements of PC... -
Page 13: Lcd And Viewfinder Display
Pack but transmission is not available. There is possibility of unit mal- function. Contact your nearest Flashing display JVC dealer. LCD and Viewfinder Display Card status displays CF card warning display CF card warning display Displays CF card status and system errors. - Page 14 Insert a CF card with UPDATE data (Flashing for 3 sec.) into the slot. UPDATE FAILED! Update was not successful. Contact your JVC dealer. COPY GUARD! Signal of recording origin is Input recording signal with no copy protected with copy guard.
-
Page 15: Setup Menus
Setup Menus When attaching Network Pack KA-DV350 to DV Camcorder GY-DV300, NETWORK PACK CONFIG menu and MOVIE CLIP menu are appeared on the GY-DV300 TOP MENU screen. MODE switch: When CAM-A MODE switch: or CAM-B is selected VTR is selected TOP MENU screen TOP MENU screen MEN U... - Page 16 Setup Menus NETWORK MAIN menu indicates default factory setting. Item Setting Description NETWORK SETUP menu HOST NAME none Displays the host name input setting screen. (4 - 64 alphanumerical characters) [Factory setting: none] DHCP Select whether DHCP server is used. OFF : Use this setting when using LAN connection rather than DHCP.
- Page 17 Displays the LEAP PASSWORD input screen. (4 to 32 alphanumerical characters) Set when using the LEAP function. [Default setting: ka-dv-jvc] Displays the HTTP USER NAME input screen. (3 to 8 alphanumerical characters) Set when connecting from the Web browser.
-
Page 18: Encode Setup Menu
Setup Menus ENCODE SETUP menu indicates default factory setting. Item Setting Description FRAME SIZE 320 × 240 Sets the video compression size. 160 × 120 320 × 240 : Sets the image size to 320 × 240 pixels. 160 × 120 : Sets the image size to 160 × 120 pixels. BIT RATE Sets streaming speed (bps). -
Page 19: Movie Clip Setup Menu
Setup Menus MOVIE CLIP SETUP menu indicates default factory setting. Item Setting Description CANCEL Selecting EXECUTE and pressing the SELECT dial DELETE ALL EXECUTE deletes all clip files on the CF card. Protected clip files are not deleted. FORMAT CANCEL Selecting EXECUTE and pressing the SELECT dial EXECUTE starts formatting the card. -
Page 20: Resetting The Network Pack Config Menu Settings
Resetting the NETWORK PACK CONFIG Setup Menus NETWORK PACK CONFIG Check to see that the card status display has changed from a menu screen flashing to constant display. A CK NE T WOR K MA I N Press the MENU button to display the TOP MENU screen. EN CODE S E T MPE G R EC... -
Page 21: Flow Of Preparation
Operations Available with This Unit Controlling the camera with computer CAPTURING 00 : 00 : 00 VIEW STOP CAPTURE MUTE PROPERTY Camera settings and VTR control can be performed using a computer. Distributing the camera images on an internet Using the KA-DV350 to transfer the camera images to a PC. -
Page 22: Setup Of The Gy-Dv300
Setup of the GY-DV300 When using a wired LAN and one PC When using a LAN card, network related settings for KA-DV350 are made using NETWORK MAIN SETUP of the NETWORK PACK CONFIG menu. Settings will be stored in the KA-DV350 memory even when turning the power off. Display the NETWORK SETUP menu screen Memo Memo... - Page 23 Here, HTTP USER NAME is set as an example. Other settings are also made in the same manner. Setup for network settings Memo Memo Example: Changing HTTP USER NAME from jvc to jvc_1234 HTTP USER NAME input setting screen Currently inputted number of characters/ max.number of characters Select HTTP USER NAME in the SERVER SETUP menu NAME screen and press the SELECT dial.
-
Page 24: When Using A Wired Lan And Multiple Pcs
Setup of the GY-DV300 When using a wired LAN and multiple PCs When using a LAN card, network related settings for KA-DV350 are made using NETWORK MAIN SETUP of the NETWORK PACK CONFIG menu. Settings will be stored in the KA-DV350 memory even when turning the power off. Display the NETWORK SETUP menu screen Memo Memo... - Page 25 Here, HTTP USER NAME is set as an example. Other settings are also made in the same manner. Setup for network settings Memo Memo Example: Changing HTTP USER NAME from jvc to jvc_1234 HTTP USER NAME input setting screen Currently inputted number of characters/ max.number of characters Select HTTP USER NAME in the SERVER SETUP menu NAME screen and press the SELECT dial.
-
Page 26: When Using Wireless Lan And One Pc
Setup of the GY-DV300 When using a wireless LAN and one PC When using a LAN card, network related settings for KA-DV350 are made using NETWORK MAIN SETUP of the NETWORK PACK CONFIG menu. Settings will be stored in the KA-DV350 memory even when turning the power off. Display the NETWORK SETUP menu screen Memo Memo... - Page 27 Here, HTTP USER NAME is set as an example. Other settings are also made in the same manner. Setup for network settings Memo Memo Example: Changing HTTP USER NAME from jvc to jvc_1234 HTTP USER NAME input setting screen Currently inputted number of characters/ max.number of characters Select HTTP USER NAME in the SERVER SETUP menu NAME screen and press the SELECT dial.
-
Page 28: When Using Wireless Lan And Multiple Pcs
Setup of the GY-DV300 When using a wireless LAN and multiple PCs When using a LAN card, network related settings for KA-DV350 are made using NETWORK MAIN SETUP of the NETWORK PACK CONFIG menu. Settings will be stored in the KA-DV350 memory even when turning the power off. Display the NETWORK SETUP menu screen Memo Memo... - Page 29 Here, HTTP USER NAME is set as an example. Other settings are also made in the same manner. Setup for network settings Memo Memo Example: Changing HTTP USER NAME from jvc to jvc_1234 HTTP USER NAME input setting screen Currently inputted number of characters/ max.number of characters Select HTTP USER NAME in the SERVER SETUP menu NAME screen and press the SELECT dial.
-
Page 30: Connection
Connection Inserting Caution • Make sure the power of GY- DV300 is off when inserting/ removing a LAN card. Inserting/ removing a card with the unit power on may damage the data storage section of the LAN card itself. • Do not remove the power cable with the power of the GY-DV300 on. -
Page 31: Activating The Web Browser
“ENCODE” users that can view all data but only change the encoding settings, and “BROWSE” users that can only view data. • The default password for each user type is “ka-dv300” for “jvc” users, first 4 characters of the password set for “jvc” users for “ENCODE” users (de- fault is “ka-d”) and fixed password of “ka-dv”... -
Page 32: Formatting The Card
Using the CF Card (Compact Flash) If the CF card is unformatted when performing any of the operations shown below, “NO CF FORMAT” will appear in the LCD screen/viewfinder screen. • Executing DELETE ALL • Recording to the CF card Memo Memo •... -
Page 33: Recording
Using the CF Card (Compact Flash) Recording video on a DV cassette tape and CF card Memo Memo Handle “NO CF FORMAT!” will appear if t h e i n s e r t e d C F c a r d i s n o t REC START/STOP button formatted. -
Page 34: Recording Time On Cf Card
Using the CF Card (Compact Flash) Recording playback signals of a DV cassette tape on a CF card Memo Memo REC START/STOP button “NO CF FORMAT!” will appear if t h e i n s e r t e d C F c a r d i s n o t POWER switch formatted. -
Page 35: Playback
Using the CF Card (Compact Flash) When simultaneously recording the camera image to a DV cassette and CF card, recording event will be registered to the clip list of the CF card each time recording is performed. The clip list is stored with the recorded event number (clip number) and the date/time when the recording was started. -
Page 36: Protecting Recorded Images
Using the CF Card (Compact Flash) To move to another clip during playback To move to the next clip during middle of playback or pausing, press the FWD ( • The playback of the current clip stops and the unit pauses at the starting point of the next clip. -
Page 37: Deleting Images
Using the CF Card (Compact Flash) MOVIE CLIP SETUP of the NETWORK PACK CONFIG menu screen is used to delete all clips on a CF card. Deleting all clips on a CF card NETWORK PACK CONFIG menu screen Turn on the GY-DV300 power. Check to see that the A CK NE T WOR K... -
Page 38: Viewing Camera Images On A Pc
Viewing Camera Images on a PC Memo Memo CH-1 CH-2 PROFESSINAL AUDIO LEVEL ND FILTER IRIS FOCUS For the operating environment of AUTO MANU DV CAMCORDER GY-DV300 PUSH AUTO the PC and details of the version of the viewer software, see “PC Operating Environment”... - Page 39 Viewing Camera Images on a PC Sending video using LAN card while recording on a DV cassette tape Handle REC START/STOP button POWER switch POWER MODE MODE switch CAM-B CAM-A GAIN SHUTTER <GY-DV300 rear panel> LCD screen Turn on the GY-DV300 power. Check to see that the LAN card display is showing on the LCD screen/viewfinder screen.
-
Page 40: Controlling A Camera From A Pc
Controlling a Camera from a PC SYSTEM [2/2] menu screen Set NET REMOTE in the SYSTEM [2/2] menu screen to E M 2 / 2 ] FADE R O F F T A L L Y Set the MODE switch of the GY-DV300. HANDL E ZO OM M ED I U M T E R E C... -
Page 41: Setting The Image Display On A Pc
Controlling a Camera from a PC Clicking ENCODE PARAMETERS on the left of the Streamcorder screen displays the ENCODE PARAMETERS screen for performing video/audio compression settings. Click Setting range indicates default factory setting. Item Setting Description Frame Size 320 × 240 Sets the video compression size. - Page 42 For confirmation, input the new Wep Key again. Factory setting Description leap-user Input the LEAP user name. ka-dv-jvc Input the currently used password. Input the new password. For condfirmation, input the new password again. Changing the KA-DV350 PORT SETUP screen...
-
Page 43: Function Of Simplified Viewer
Function of Simplified Viewer Click the characters “STREAMCAPTURE” on the left of the Streamcorder screen to display the Streamcapture screen as shown below. Video and audio sent from KA-DV350 via LAN can be played back on your PC in the Streamcapture screen or data can be saved to files. -
Page 44: Receiving Camera Images Via Lan
Receiving Camera Images via LAN The images distributed using this function can be received using the Windows Media Player. Set STREAM TYPE in the ENCODE SETUP menu to “for WMP”. Open Windows Media Player. Select [File] [Open URL]. The following dialog box will appear. Set the IP address of the camera. -
Page 45: Distributing Camera Images Via Lan
Receiving Camera Images via LAN The Trigger Mode function can be used to save and transmit video/audio from KA-DV350 to your PC by synchronizing to the button operations of GY-DV300. Synchronizing with the button operations of GY-DV300 Handle REC START/STOP button POWER switch POWER... -
Page 46: Changing The Top Page Of The Web Control Display (Streamcorder)
USER ID : ftp-user PASSWORD : ka-dv Updating the KA-DV350 Version (Streamcorder) The network pack firmware version can be updated. For details concerning version update data, visit the JVC homepage. Caution above to KA-DV350. POWER switch MENU button During update, do not turn the power off or perform menu or camera op- erations. -
Page 47: Checking The Network Communication (Ping Command)
Checking the Network Communication By using the PING command standard to Windows, it is possible to check whether the connection is correct and that communication can be made from the PC to KA-DV350. Launch the command prompt. • For Windows 2000 From the Start button, select [Programs] [Accessories] [Command Prompt]. -
Page 48: Glossary
GY-DV300 to match, close QuickTime and launch again. Memo Memo Setting example> When the server name is “jvc-qtss” and the SDP file name is “unicast- stream”, enter “rtsp://jvc-qtss/ unicast-stream.sdp”. ● LAN (Local Area Network) ● Channel (wireless LAN) A network structured within a relatively small Frequency range used by wireless LAN. - Page 49 Glossary ● IP address Identification number assigned to each computer that is connected to a network. The address is used for communication between network devices. ● Global IP address: Just as different IP addresses are needed on a network, all PCs using the Internet worldwide must use a unique IP address.
- Page 51 States, other countries, and related Conventions. 2.Grant of License (1)Subject to the conditions of the Agreement, JVC grants to You a non-exclusive right to use the Software. You may install and use the Software on a HDD or other storage devices incorporated in Your PC.
- Page 52 You may nevertheless have the benefit of certain rights or remedies pursuant to the applicable law in respect of which liability may not be excluded. In any case, however, JVC's entire liability will be limited to those which apply to the product accompanying the Software.
-
Page 53: Introduction
1. Introduction Streamproducer is JVC’s complete streaming software that allows you to stream in a local network or to the Internet from any one of up to four sources. These sources can be any combination of MPEG-4 movie files or JVC’s Streamcorders, In addition, Streamproducer will also support future products from JVC, such as... -
Page 54: Install/Uninstall Streamproducer
An example with the minimum system requirements An example with the recommended system requirements 3. Install/Uninstall Streamproducer 3.1 Installing Streamproducer Insert the Streamproducer CD-ROM in CD-ROM drive. If your computer is configured to autorun from CD-ROM, the first setup screen, select a language, appears. If this screen does not automatically appear, manually start the installation: from the Windows “Start”... -
Page 55: Uninstall Streamproducer
Click [Streamproducer] on the list of Currently installed Programs and click [Remove] button. A message for confirmation of removing Streamproducer appears. Click [OK] to remove Streamproducer. 4. Running Streamproducer From the Windows [Start] menu, choose [Programs], [JVC], [Streamproducer], Streamproducer. The main window, shown here, appears. Video display windows The Streamproducer desktop has three areas;... -
Page 56: Display Images From Streamcorders
4.2 Display images from streamcorders Streamproducer can record and cast (stream) live images from streamcorders. First you must connect Streamproducer (your PC) with from one to four streamcorders. Up to four streamcorders can be connected at a time; each streamcorder’s image is shown on its own video display window in the Streamproducer desktop. 4.2.1 Connecting to streamcorders.. -
Page 57: Displaying Images From Streamcorders
4.2.2 Displaying images from streamcorders.. Each video display window has its own buttons and operation menu. It is possible to operate up to four video display windows separately by clicking on any of its control buttons. [ Casting ] Click the [Casting] button to start casting (streaming video). See Section 4.4 for more information about casting. -
Page 58: File Playback
The following trigger modes are supported: TRIG – In this mode, you can record to the DV tape in the streamcorder and the PC (running Streamproducer) simultaneously, and both recordings are controlled by the streamcorder’s REC buttons. In this mode, it is necessary to have a recordable tape in the streamcorder. The "NO TAPE"... -
Page 59: File Operations
4.3.2 File operations.. Each video display window has its own set of operation buttons and menus that are independent of each other. It is possible to have up to four video display windows in use simultaneously and independently by clicking on its control buttons or operation menu. -
Page 60: Casting
4.4 Casting ‘Casting’, also referred to as Streaming, is sending the image from any one of the four video sources to remote viewers through a network, such as an Intranet or the Internet. It is possible to cast live video from connected streamcorders or video from selected files. -
Page 61: Receiving The Video Stream From Streamproducer
5. Receiving the video stream from Streamproducer You can receive and view the cast video stream from the Streamproducer by using Windows Media Player anywhere in the world. Version 7.1 (for Windows 2000) and 8.0 (for Windows XP) of Windows Media Player can be used. Start Windows Media Player and choose [Open URL…] from the [File] menu. -
Page 62: Option Dialog
The following information is available by clicking on the ‘Connections’ tab. Internet URL Shows the internet URL that users who want to receive the cast video must use for Windows Media Player. For details on the process of receiving the casting image, refer to Section 5 “Receiving the video stream from Streamproducer”. -
Page 63: Stream Format File Generator
7. Stream Format File Generator Stream Format File Generator is the software to generate the Stream format files needed for the setting of multi casting by Windows Madia Server. Select [Stream Format File Generator] from the [Tool] pull-down menu of Streamproducer to start it. For detail operations, please read the Stream Format File Generator’s Help. - Page 64 Unable to hear the sound. Turn the [Sound] button on of the video display window. Unable to start the application. Restart your PC once. The Application may not be installed correctly. >> Install the application again. ( See "3. Install/Uninstall Streamproducer" about install. )
Need help?
Do you have a question about the KA-DV350U and is the answer not in the manual?
Questions and answers