
Related Manuals for JVC KA-DV5000


Summary of Contents for JVC KA-DV5000
- Page 5 CH-1 CH-2 AUDIO INPUT CH-1 CH-2 BACK L NORMAL SPOT L STRETCH COMPRESS NORMAL CH-1 AUDIO SELECT AUTO CH-2 MANUAL NETWORK KA-DV5000 PACK POWER OPEN EDITSEARCH MONITOR FILTER 5600K 3200K 5600K 5600K 1 64 / ND POWER SHUTTER STATUS SUPPLY...
- Page 6 OPEN EDITSEARCH MONITOR FILTER 3200K 5600K 5600K 5600K 1 64 / ND STATUS SHUTTER LCD BRIGHT DISPLAY MENU AUDIO LEVEL PULL OPEN REAR FRONT AUTO IRIS FULL AUTO BLACK LOLUX CH-1 CH-2 CH-1 CH-2 MODE BACK L STRETCH AUDIO INPUT AUDIO SELECT NORMAL NORMAL...
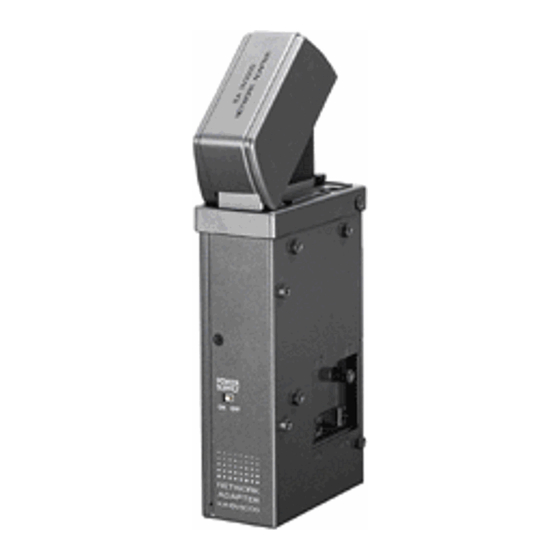
- Page 8 POWER SUPPLY ON OFF NETWORK NETWORK PACK PACK KA-DV5000 KA-DV5000...
- Page 9 is a registered trademark owned by VICTOR COMPANY OF JAPAN, LTD. is a registered trademark in Japan, the U.S.A., the U.K. and many other countries. © 2002 VICTOR COMPANY OF JAPAN, LIMITED LST0103-001A LST0103-001A...
- Page 10 When attaching Network Pack KA-DV5000 to DV Camcorder GY-DV5000, network related menus are added to the GY-DV5000 menu screen. This User’s Guide explains settings for the network related menus, operation for recording streaming data to a CF (Compact Flash) memory card and operation for sending streaming data using a LAN card. When a LAN card is connected, menu screen settings for the Network Pack and GY-DV5000 can be operated from your PC.
- Page 11 Contact your nearest JVC dealer. No colors will be shown on the viewfinder. When attaching Network Pack KA-DV5000 to DV Camcorder GY-DV5000, NETWORK PACK CONFIG menu and MOVIE CLIP menu are added to the GY-DV5000 TOP MENU screen. NETWORK PACK CONFIG...
- Page 12 NETWORK SET Displays menu screen for network related settings such as DHCP, IP address, subnet mask, etc. ( page 11) ENCODE SET Displays menu screen for setting video and audio compressions. 320 × 240 PIX SIZE Sets the video compression size. 160 ×...
- Page 13 Menu screen settings can be made regardless of whether a card is inserted. Settings will be stored in the KA-DV5000 memory even when turning the power off. STATUS SHUTTER MENU SHUTTER STATUS EDITSEARCH MONITOR FILTER 3200K 5600K 5600K 5600K 1 64...
- Page 14 When using a LAN card, network related settings for KA-DV5000 are made using NETWORK SET of the NETWORK PACK CONFIG menu. Settings will be stored in the KA-DV5000 memory even when turning the power off. STATUS SHUTTER MENU SHUTTER STATUS...
- Page 15 Create HTML on the PC using a commercially available HTML editor, etc. Save the created HTML file under the name of “index.html”. Use a commercially available FTP program on the PC to upload index.html created in step 2 above to KA-DV5000. FTP program settings IP Adress : 192.168.100.101 (Input the actual IP address used.)
- Page 16 Example of IP address and subnet mast settings when using LAN is shown below. ●Operation is only guaranteed for Windows 2000, Windows XP Home Edition or Windows XP Professional. ●Internet Explorer 5.0 or later ●Windows Media Player 7.01 or later EDITSEARCH EDITSEARCH MONITOR...
- Page 17 DHCP WLAN AD HOC MODE OFF WLAN ESS ID abcdef WLAN CH IP ADDRESS 192. 168. 100. 102 NETMASK 255. 255. 255. 000 EDITSEARCH EDITSEARCH OPEN OPEN 3200K 3200K FILTER FILTER MONITOR MONITOR 5600K 5600K .3 .3 5600K 5600K 5600K 5600K .4 .4 / ND...
-
Page 18: Power Supply
● “NO CF FORMAT!” will appear if the in- Insert a CF memory card into the Network Pack. serted CF memory card is not formatted. Turn on the GY-DV5000 and KA-DV5000 power. Format the card in the MOVIE CLIP SET Check to see that the menu screen. - Page 19 ● “NO CF FORMAT!” will appear if the in- Insert a CF memory card into the Network Pack. serted CF memory card is not formatted. Turn on the GY-DV5000 and KA-DV5000 power. Format the card in the MOVIE CLIP SET Check to see that the menu screen.
- Page 20 ● MOVIE CLIP will not appear during card Insert an already recorded CF memory card. initialization (flashing display). Turn on the GY-DV5000 and KA-DV5000 power. Check to see that the (When the power is turned on, TOP MENU screen Set the MODE switch to “VTR”. (Light the VTR indicator.) Make sure GY-DV5000 is not in operation.
- Page 21 ● When executing FORMAT in the MOVIE Insert an already recorded CF memory card. CLIP SET menu screen, protected clips Turn on the GY-DV5000 and KA-DV5000 power. will also be deleted. Check to see that the ● Protected clips will not be deleted even...
- Page 22 POWER switch VTR trigger button Insert a LAN card into the Network Pack. Turn on the GY-DV5000 and KA-DV5000 power. Check to see that the LAN card display is showing on the LCD screen/viewfinder screen. Set the MODE switch to “CAM”. (Light the CAM indicator.) Insert a recordable DV cassette tape.
- Page 23 No LAN card is inserted when the display appears. Turn off the power and insert a LAN When operating Streamproducer and making network connection with KA-DV5000, card. Then, turn the power back on. sending of streaming video/audio data will start from the LAN card.
-
Page 24: White Bal
It is also possible to playback video and audio from KA-DV5000 on your PC in the STREAMCAPTURE screen in realtime (live display) as well as save data to files. However, note that video and audio from KA-DV5000 can be played back only on one PC at a time. - Page 25 Click each button to perform operation. OTHERS [1/2] menu screen ● Set NET REMOTE in the OTHERS [1/2] menu screen to ON. When set to OFF, the VTR cannot be controlled from the Streamcorder screen. GY-DV5000 state Clicking VTR control icon MODE switch Previous mode STOP...
- Page 26 Clicking PORT SETUP on the left of the Streamcorder screen displays the PORT SETUP screen for performing port settings. Screen selection Clicking the OK icon will confirm the inputted setting. RTSP The RTSP port can be set. (1 to 32767) HTTP (for WEB Browser) The HTTP port for WEB browser can be set.
- Page 27 Clicking STREAMCAPTURE on the left of the Streamcorder screen displays the Streamcapture screen shown below. Video and audio sent from KA-DV5000 via LAN can be played back on your PC in the Streamcapture screen or data can be saved to files.
- Page 28 The Cast function can be used to send video/audio from KA-DV5000 to another PC. <Sending method> <Receiving sent video> Display the video to send in the video display window of the Video sent using the Cast function can be received using Win- Streamcapture screen and click the CAST-CAM button.
- Page 29 When there is a system error, network error, unit malfunction, etc., KA-DV5000 displays the error on the GY-DV5000 LCD screen or viewfinder screen. Warning display <LCD screen or viewfinder screen> <File system related> CF REMAIN 60SEC! Remaining time became less than 60 Stop recording and replace with a new (Flashing for 3 sec.)
- Page 30 By using the PING command standard to Windows, it is possible to check whether the connection is correct and that communication can be made from the PC to KA-DV5000. Launch the command prompt. ● For Windows 2000 From the Start button, select [Programs] → [Accessories] → [Command Prompt].
- Page 31 ● Setting for encrypting the flow of data during wireless communication. Following settings are available: None (Open System): No encryption. Setting will be unavailable and throughput will be improved. However, there is the risk of infor- mation leakage. 40blt WEP: Encryption is performed using 40-blt encryption key.
Need help?
Do you have a question about the KA-DV5000 and is the answer not in the manual?
Questions and answers