Table of Contents
Advertisement
There were some errors in the instruction manual. We apologize for this and correct them as follows.
Turning the Power On and
Page 10
Standby Mode
• If the power cord is unplugged from the wall socket for more
than an hour, the internal clock, program, etc. of the main unit
may require resetting. When this occurs, please set the clock
(and timer functions) again.
Programming Playback Using
Page 17
Main Unit Controls
1
Load CDs into the trays of the 3-CD changer.
• Only tracks on the CDs loaded in the 3-CD changer can be reg-
istered into the program (i.e., tracks on a CD loaded in the CDR
cannot be selected for playback).
• "CD READ DISC" will be shown in the information display as
the unit reads the information from each disc.
Page 18
Programming Playback Using
the Remote Control
1
Load CDs into the trays of the 3-CD changer.
• Only tracks on the CDs loaded in the 3-CD changer can be reg-
istered into the program (i.e., tracks on a CD loaded in the CDR
cannot be selected for playback).
• "CD READ DISC" will be shown in the information display as
the unit reads the information from each disc.
Page 27
Program Edit Recording
1
Load CDs in the 3-CD changer
ERRATA
INCORRECT
CORRECT
• If the power cord is unplugged from the wall socket for more
than a few seconds, the internal clock, program, etc. of the main
unit may require resetting. When this occurs, please set the
clock (and timer functions) again.
1
Load CDs into the trays of the 3-CD changer.
• Only tracks on the CDs loaded in the 3-CD changer can be reg-
istered into the program (i.e., tracks on a CD loaded in the CDR
cannot be selected for playback).
• "CD READ DISC" will be shown in the information display as
the unit reads the information from each disc.
Note
• To close a tray, press the 0 button for the tray number that is
open. If you press the 0 button for a tray number other than that
for the tray that is open, the program may not be played correctly.
1
Load CDs in the 3-CD changer
Note
• To close a tray, press the 0 button for the tray number that is
open. If you press the 0 button for a tray number other than that
for the tray that is open, the program may not be played correctly.
Advertisement
Table of Contents

Related Manuals for JVC XL-R5010BKC


Summary of Contents for JVC XL-R5010BKC
-
Page 1: Standby Mode
There were some errors in the instruction manual. We apologize for this and correct them as follows. INCORRECT Turning the Power On and Page 10 Standby Mode • If the power cord is unplugged from the wall socket for more than an hour, the internal clock, program, etc. - Page 2 There were some errors in the instruction manual. We apologize for this and correct them as follows. INCORRECT Page 29 Setting the Unit for High-speed Recording Turn the MULTI JOG control or press the (menu) button on the remote control to select “HIGH”...
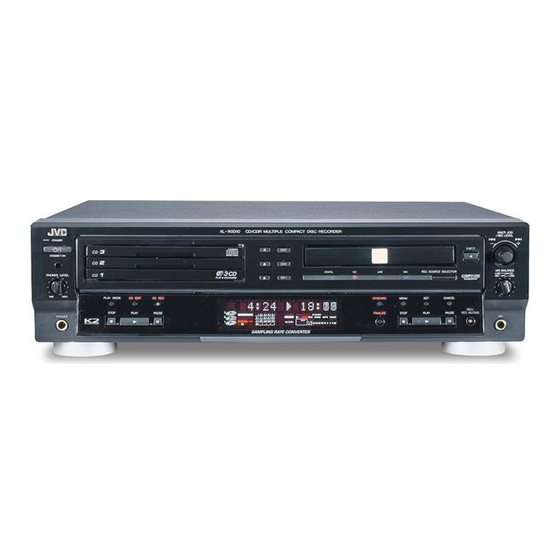
- Page 3 CD/CDR MULTIPLE COMPACT DISC RECORDER COMBINE ENREGISTREUR CHANGEUR DE CD/CDR XL-R5010BK STANDBY/ON CD REC CD EDIT FINALIZE DISPLAY STANDBY PLAY C O N T R O L MODE REPEAT STANDBY/ON • FADE SYNCHRO REC MUTING PHONES LEVEL PHONES PITCH PITCH– RM–SXLR5010A REMOTE CONTROL XL-R5010...
- Page 4 Warnings, Cautions and Others / Mises en garde, précautions et indications diverses (For U.S.A) CAUTION RISK OF ELECTRIC SHOCK DO NOT OPEN CAUTION: TO REDUCE THE RISK OF ELECTRIC SHOCK DO NOT REMOVE COVER (OR BACK) NO USER SERVICEABLE PARTS INSIDE REFER SERVICING TO QUALIFIED SERVICE PERSONNEL.
- Page 5 For Canada/pour le Canada CAUTION: TO PREVENT ELECTRIC SHOCK, MATCH WIDE BLADE OF PLUG TO WIDE SLOT, FULLY INSERT. PRECAUTION: POUR EVITER LES CHOCS ELECTRIQUES, INTRODUIRE LA LAME LA PLUS LARGE DE LA FICHE DANS LA BORNE CORRESPONDANTE POUSSER JUSQUAU FOND. 1.
- Page 6 Caution: Proper Ventilation To avoide risk of electric shock and fire and to protect from damage, position the main unit as follows: Front: Open space with no obstructions. Sides: At least 3cm of space on each side. Top: At least 5cm of space between the top of the unit and the nearest object.
-
Page 7: Table Of Contents
Table of Contents Introduction ... 1 Precautions ... 2 Features ... 2 Connections ... 3 Analog Connections ...3 Digital Connections...4 Components... 5 Main Unit ...5 Display Window...7 Using the Remote Control... 8 Remote Control ...8 Inserting the Batteries ...9 Using the Remote Control...9 Power STANDBY/ON Operations ... -
Page 8: Precautions
9) Unplug the power cord from the wall socket during electrical storms. 10) If water should find its way inside the unit, unplug the power cord from the wall socket and consult the nearest JVC dealership. 11) Do not install the unit in a poorly ventilated location. Installation 1) Do not place the unit on or next to an amplifier. -
Page 9: Connections
RIGHT RIGHT Note • The COMPU LINK-4 feature is only supported by other JVC products also equipped with the COMPU LINK feature. Please check the manual(s) of your JVC product for compatibility. • Before selecting the COMPU LINK-4 MODE switch position (CDR or TD), turn off the power and disconnect the power cord from the wall socket. -
Page 10: Digital Connections
• Make sure the optical cable (not supplied) can be connected to the amplifier, etc. before purchasing it. • Do not bend the optical cable at a sharp angle. CD player, etc. To OPTICAL OUTPUT terminal LINE... -
Page 11: Components
Components Main Unit STANDBY STANDBY/ON PHONES LEVEL PLAY MODE CD EDIT CD REC STOP PLAY PAUSE PHONES Description (For details, refer to page in parentheses.) STANDBY/ON button and STANDBY lamp Press to turn the power on or to put the unit in standby mode. When the unit is in standby, the STANDBY lamp is lit. - Page 12 CD Control Operation Buttons PLAY MODE: Press repeatedly to select one of the play modes for the 3-CD changer. (see page 16, 17) CD EDIT: Press to select either Listening Edit or Program Edit recording mode. (see page 26, 27) CD REC: Press to perform synchronized recording of the currently selected CD in the 3-CD changer.
-
Page 13: Display Window
(see page 12) PLAY MODE indicators Light according to which play mode has been selected. CD PLAYER indicator Lights when the 3-CD changer is selected for play. Information display Displays track, time, and operation information. -
Page 14: Using The Remote Control
2 MULTI JOG Control (menu) Button Press to select menu operations. Pitch 0 Button Press to restore playback speed of the CD player to normal. STANDBY/ON Button Press to turn the power of this unit on or to put it in the standby mode. -
Page 15: Inserting The Batteries
Note In this manual, procedures using buttons on the front panel of the unit are depicted by the name of the button in capital letters with the button illustration immediately after it. Procedures using the buttons on the remote control are depicted by the button illustration with the name of the button in small letters and parentheses imme- diately after it. -
Page 16: Power Standby/On Operations
Function Operation The function is set to 3-CD changer. The CD PLAYER indictor is shown in the dis- play window. If one of these buttons is pressed when a CD is in the... -
Page 17: Listening To Cds
This automatically starts playback of the disc in the cur- rently selected tray. • The currently selected tray is indicated by the red “ appearing to the immediate right of the CD icon in the display window. CD PLAYER DIGITAL HIGH SPEED AUTO TRACK 44.1 –... -
Page 18: Cdr Playback Operations
Stopping CD playback To stop playback at any time • Stop playback of a disc in the 3-CD changer by pressing the CD Control STOP 7 button. The total number of tracks and playing time is shown in the information display. STOP •... -
Page 19: Using The Remote Control To Control Playback
3-CD changer and starts playback of the disc in the selected tray. • When the CD function is selected, the CD PLAYER indicator is shown in the display window. When the CDR function is selected, the CD RECORDER indicator is shown. -
Page 20: Direct Playback Of A Specific Track
Direct Playback of a Specific Track CD playback can be started from a specific track by pressing the corresponding number button(s) on the remote control. STANDBY/ON CD REC CD EDIT FINALIZE DISPLAY PLAY C O N T R O L MODE REPEAT •... -
Page 21: Skipping Tracks
REPEAT ALL setting (for repeating all of the CDs loaded in MULTI JOG control the 3-CD changer) can only be set when the main unit is set to 3- CD changer (CD PLAYER indicator is shown in display window). MULTI JOG REC LEVEL –... -
Page 22: Random Playback
Random Playback When in the 3-CD changer stop mode (CD PLAYER indicator is shown in the display window), press the PLAY MODE button (main unit/remote control) repeatedly until “CD RANDOM” is shown in the information display. The RANDOM indicator will be shown in the PLAY MODE section of the display window. -
Page 23: Programming Playback Using Main Unit Controls
Press the PLAY MODE button when the unit is in the CD stop mode. • The CD PLAYER indicator is shown in the display window, PROGRAM indicator is shown in the display window, and if no program has been registered, “PG NO PROGRAM” is shown in the information display. -
Page 24: Programming Playback Using The Remote Control
Press the CD Deck Selection button to place the unit in the CD mode. • The CD PLAYER indicator is shown in the display window. Press the PLAY MODE button. • The PROGRAM indicator is shown in the display window, and if no program has been registered, “PG NO PROGRAM”... - Page 25 Select and enter a track number (1-99) using ¢ (reverse) or (forward) buttons, and then press the SET button. 1. Select the track. 2. Enter the selection. Repeat Steps 5 and 6 to program up to a maximum of 32 steps. •...
-
Page 26: Recording Onto Cd-R/Rw Discs
Recording onto CD-R/RW Discs Notes on Recording • Do not use CD-R or CD-RW discs with dust and/or scratches on the surface as this may cause the recording to sound rough and may cause skipping when played backed. It may even cause the unit to malfunction. -
Page 27: Manual Recording
Analog recording level adjustment When recording analog signals, and the main unit is recording or stopped in the recording pause mode, after pressing the MENU button on either the main unit or remote control, the recording level can be adjusted using the MULTI JOG control on the main unit. The recording level is shown in the information display as “REC LEVEL - **”... - Page 28 • ** MIX (combined) source recording is only possible in analog. • If a source has already been selected, the corresponding lamp will light and the selection will be shown in the display window. • When playback is stopped and the CDR is selected, press the DISPLAY button on the remote control repeatedly to show the recording time remaining on the disc.
-
Page 29: Synchronized Recording Of 3-Cd Changer Playback
AUTO TRACK function off • Manual track marking offers you the flexibility of placing track marks anywhere you like in the recording. • Manual track marking is not possible when the AUTO TRACK function is on. To add track marks automatically STANDBY STANDBY/ON DIGITAL... - Page 30 • Recording starts from the first track of the CD. Remaining play time of Remaining recording time on track being recorded CD-R or CD-RW CD PLAYER 9 10 DIGITAL CD-R CD REC 44.1 • When a digital CD is recorded, its signals are recorded in their original form.
-
Page 31: Disc Dubbing
Select a disc and start playback. Example: When planning to record a track on CD1 Insert a recordable CD-R or CD-RW disc in the CDR disc tray. • The disc is read. While the disc is playing back the track you want to record or if that track is being paused, press CD REC (main unit/remote control). -
Page 32: Listening Edit Recording
The track is not stored in the memory, and operation moves on to the next track. Recording time remaining on the CD-R/RW disc(pre-calculated) CD PLAYER SYNCHRO LISTENING EDIT HIGH SPEED AUTO TRACK 9 10 DIGITAL... -
Page 33: Program Edit Recording
When "ADD FINALIZE?" is shown in the information window: • No response (no input) assumes that finalization is to be per- formed, or you can press the SET button (main unit/remote con- trol) to confirm that finalization is to be done. Press the CANCEL button (main unit/remote control) to keep the disc unfinalized. -
Page 34: 3-Cd Changer To Cdr Recording Options
If tracks have already been programmed for the CDs, “LAST P-PG OK?” is shown in the information display. Press the SET button on either the remote control or the main unit or press the PLAY button on the main unit to record the same programmed tracks. Recording starts. -
Page 35: Setting The Unit For High-Speed Recording
Setting the Unit for High-speed Recording High-speed recording is only possible for digital recording from the 3-CD changer to the CD. STANDBY STANDBY/ON DIGITAL PHONES LEVEL PLAY & EXCHANGE PLAY MODE CD EDIT CD REC STOP PLAY PAUSE PHONES 1 3,5 STANDBY/ON CD REC CD EDIT... -
Page 36: Synchronized Recording From External Sources
Turn the MULTI JOG control or press the (menu) button on the remote control and choose the setting “TR SPACE ON” or “TR SPACE OFF”. • Press the CANCEL button (main unit/remote control) to cancel the procedure and return to the normal display. Pess the SET button. -
Page 37: Mixed Input Recording
Setting the START or START&STOP function for synchronized recording from an external source If the signal is going be recorded from CD, MD or DAT player, it is possible to set the unit to perform synchronized start and stop. This only applies for recording sources that are connected to the DIGI- TAL IN (DIGITAL IN OPTICAL) terminal. - Page 38 • Select “CD + LINE” to mix and record a CD loaded in the 3-CD changer with the signals from an external source via the LINE IN terminal. • Select “CD + MIC” to mix and record a CD loaded in the 3-CD changer with the signals from a microphone plugged into the MIC jack.
-
Page 39: Special Recording Edit Operations
Special Recording Edit Operations Skipping a Recorded Track on a CD-R or CD-RW (Track Skip) Occasionally, there may be tracks on a disc that are partial, repeated, or are otherwise unwanted. Before a CD-R or CD-RW is finalized, it is possible to enter a skip marker for that track in the PMA (Program Memory Area). -
Page 40: Erasing All Tracks (Disc Erase Function)
Press the SET button (main unit/remote control). • “ERASE (start track) – (last track)?” is flashed in the informa- tion display. (Initially, the start track and last track are both the last track number recorded on the CD-RW.) • Press the CANCEL button (main unit/remote control) if you do not wish to perform this procedure. -
Page 41: Finalizing A Disc
Finalizing a Disc Finalizing a disc marks the final process in recording on a CD-R or CD-RW disc. In this process, a TOC (Table Of Contents) is written to the disc. When this procedure is completed, it will be possible to play the CD-R or CD-RW disc on CD players compatible with CD- R and/or CD-RW discs. -
Page 42: Bypassing The Fs Converter (Sampling Frequency Converter*) For More Efficient Digital Recording
Press the SET button again to confirm the operation. • “UNFINALIZE” is shown in the information display as the unfinalizing procedure is performed. The procedure takes a lit- tle over a minute, and the level meter is used to indicate approx- imately how much time is remaining until unfinalization is complete. -
Page 43: Setting Up Synchronized Start Recording For External Digital
Setting Up Synchronized Start Recording for External Digital Sources (CD, MD, and DAT only) When performing digital synchronized start recording of an exter- nally connected digital source, synchronized start recording begins when a digital signal is encountered in the record pause mode. However, if the recording source is connected to the DIGITAL IN (DIGITAL IN OPTICAL) terminal, it is also possible to set this unit to start and stop recording when you are recording a single track. -
Page 44: Setting The Clock
Setting the Clock Setting the Present Time STANDBY STANDBY/ON DIGITAL LINE PHONES LEVEL PLAY & EXCHANGE PLAY MODE CD EDIT CD REC SYNCHRO STOP PLAY PAUSE FINALIZE PHONES 3,6,8 Set the timer immediately after turning on the power to the main unit for the first time. - Page 45 When the power to the unit is on, press the MENU button one time. - TRACK ERASE is shown in the information display. - Using the MULTI JOG Control, change the infor- mation display to “CLOCK/TIMER”. - Press the SET button. - Press the MENU button twice.
-
Page 46: Timer Operations
Timer Operations Timer Play (wake-up play) Before proceeding with timer programming, make sure that the present time has been set correctly. (see page 38) • With the exception of the MENU and SET buttons, the timer settings must be made using the controls on the front panel of the main unit. - Page 47 Press the SET button. • “PLAY” is displayed. MULTI JOG REC LEVEL – Time Time forward backward 7. Turn the MULTI JOG control 8. Press the SET button. until “AM 8:15” is displayed. “PLAY” is displayed. • If “REC” flashes rather than “PLAY”, turn the MULT JOG con- trol until “PLAY”...
-
Page 48: Timer Recording (Unattended Recording From A Broadcast Receiver Or Other Source)
Timer Recording (Unattended Recording from a Broadcast Receiver or Other Source) STANDBY STANDBY/ON DIGITAL PHONES LEVEL PLAY & EXCHANGE PLAY MODE CD EDIT CD REC STOP PLAY PAUSE PHONES Perform steps 1 to 13 of the Timer Play (wake- up play) procedure. (see page 40) When “PLAY”... -
Page 49: Compu Link Function
Accessory connecting cables Amplifier CD player The COMPU LINK functions provided with JVC products come in the form of COMPU LINK-4, COMPU LINK-3 or COMPU LINK-1. They are compatible, and the difference between them is that COMPU LINK-3 has the functions of COMPU LINK-1 with some additional functions as well. -
Page 50: Cd And Cdr Messages
CD and CDR Messages Note: Items with ( ) marks are confirmation displays CD Messages Message CD * NO DISC (* indicates the There is no disc in the selected tray. disc tray number) CD * DISC NG (* indicates the Disc related trouble has occurred and the disc in disc tray number) the selected tray cannot be played. - Page 51 Message NO R/RW DISC DISC FULL TNO FULL CANNOT REC UNLOCK SCMS PROTECT NOT AUDIO IN NOT REC MUTE SHORT REMAIN CANNOT FIN NO RW DISC CANNOT ERASE CANNOT UNFIN DAO DISC SKIP FULL Significance The disc inserted is a CD for computer data. Recording and erase functions are not pos- sible.
-
Page 52: Scms (Serial Copy Management System)
Due to copyright and other considerations, the following restriction is now in place for CD-R and CD-RW discs onto which the digital signals of CDs have been copied. SCMS (Serial Copy Management System) The digital quality of CDs and other digital media can be recorded to CD-R and CD-RW using the CDR function of this unit. -
Page 53: Troubleshooting
Troubleshooting Symptom No sound. The time display flashes in the dis- play window. Play fails to start Specific parts are not played properly. Recording is not possible Timer fails to start. No remote control operations. If the unit fails to operate properly even when the remedial action suggested above has been taken: This unit uses a microcomputer to perform a large number of operations. -
Page 54: Main Specifications
Main Specifications The unit’s specifications and exterior are subject to change without notice due to improvements. CD Player Section System Compact disc digital audio system Pitch control ±12% Signal-to-noise ratio 97dB Dynamic range (1 kHz) 93dB Frequency response 20 - 20kHz...