
Related Manuals for Polimaster PM1704A


Summary of Contents for Polimaster PM1704A
- Page 1 SPECTROSCOPIC PERSONAL RADIATION DETECTORS PM1704A models PM1704A PM1704A-M PM1704A-GN PM1704A-GNM OPERATIONS MANUAL http://www.polimaster.com © 2013-2015 Polimaster Ltd. All Rights Reserved...
-
Page 2: Table Of Contents
Contents READ THIS FIRST .................. 3 PRECAUTIONS ..................4 1. GENERAL DESCRIPTION ..............5 1.1. Specifications ..........................6 1.2. Display and control buttons ....................7 1.3. Clip installation/removal ....................... 9 1.4. Battery installation ......................... 10 1.5. Setting current date/time ....................11 1.6. -
Page 3: Read This First
READ THIS FIRST Thank you for purchasing this Polimaster product. Before operating the unit, please read this guide thoroughly, and retain it for future reference. Spectroscopic Personal Radiation Detectors (SPRDs) PM1704A are designed to detect, search, locate and identify gamma emitting... -
Page 4: Precautions
PRECAUTIONS Avoid severe mechanical shocks and submerging the instrument in water. Do not store the instrument with the battery installed. The battery may leak once depleted causing severe damage to the instrument and voiding the warranty. Keep the instrument at least 4 inches from radio emitting sources to avoid false positives. -
Page 5: General Description
1. GENERAL DESCRIPTION PM1704A (hereinafter referred to as the “instrument/s”) is a new family of extremely sensitive, small and power safe Spectroscopic Personal Radiation Detectors. When the instrument is ON it continuously monitors radiation in the environment and compares it to a normal background and threshold set by the user. -
Page 6: Specifications
1.1. Specifications The table below summarizes the basic specifications of and major differences between four PM1704A models: Gamma Gamma-neutron PM1704A PM1704A-M PM1704A-GN PM1704A-GNM Detectors Spectroscopic gamma CsI(Tl) detector (Eu) neutron detector Geiger Muller detector ... -
Page 7: Display And Control Buttons
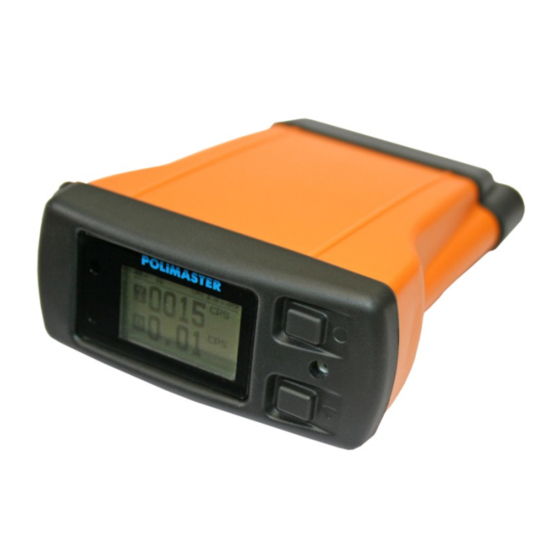
280 g 300 g 1.2. Display and control buttons An external view of the instrument is presented below: This section describes the instruments’ front panel and LCD screen using as an example the PM1704A-GN model switched on and in Search mode. - Page 8 The instrument’s front panel bears: two control buttons located on the top panel of the instrument: MODE/SET button “” (1), and SELECT button “” (2). These buttons perform different functions depending on the mode used. sound alarm speaker (3), LCD screen (4), luminance sensor (5), light alarm indicator (LED) (6).
-
Page 9: Clip Installation/Removal
1.3. Clip installation/removal The instrument (except the basic PM1704A model) has a clip and may be fasten to the user’s belt. The clip may be removed using a screwdriver or similar tool, and easily replaced later, as shown in the pictures below:... -
Page 10: Battery Installation
1.4. Battery installation The PM1704A series is shipped without the battery installed. To install the battery, unscrew the two fasteners located on the both sides of the unit (using a coin, turn the fastener anti-clockwise to unlock them), and remove the battery compartment cover (see picture below). Then insert... -
Page 11: Setting Current Date/Time
The instrument is now ready to use. 1.6. Selecting battery type The PM1704A series can be powered by either regular alkaline or rechargeable NiMh batteries. Therefore, after the first time the instrument is turned on, the user has to select the proper battery type in... -
Page 12: Operation
When a radioactive source is detected (the calculated threshold is exceeded), the instrument’s visual, audible and/or vibration alarms are triggered. As the PM1704A moves closer to the radiation source, the frequency of audio and/or vibration signals increases thus enabling the user to determine the direction of the source location. -
Page 13: Getting A New Background
If the value of the count rate exceeds the upper measuring limit of the instrument, an overload message is displayed. The analog bar on the bottom of the display on PM1704A and PM1704A- M models in Search mode indicates the relative value of the alarm level compared to the upper count rate limit of the detector. -
Page 14: False Alarms
To increase the value of a particular digit of the threshold value, press and hold the MODE/SET button until an up-arrow appears above the digit. By pressing the upper button again, the value of the specific digit will increase. To decrease the value of a particular digit of the threshold value, press the SELECT button until a down-arrow appears below the digit. -
Page 15: Autocalibration
µrem/h, mrem/h, rem/h, however the instruments LCD indication is "mR", "R", " R/h", "mR/h", "R/h". PM1704A models allow the user to set up two independent gamma thresholds in Measurement mode that trigger distinguishable sound and vibration alarms when exceeded. -
Page 16: Setting New Thresholds
To deactivate the alarm temporarily (default setting is 1 min.), press any button. Similarly, the PM1704A-GN and PM1704A-GNM models continue to search for neutrons in Measurement mode, as described above. Thus any neutron alarms will go off even in Measurement mode. To deactivate the alarm temporarily (default setting is 1 min.), press any button. -
Page 17: Resetting Statistics (Restarting Measurement)
2.5.1. Establishing proper count rate For PM1704A, as for the majority of SPRDs, it is very important to have count rate readings on the display within a certain interval, between 100 cps and 500 cps (marked on the analog scale at the bottom of the screen... -
Page 18: Acquiring Spectra
2.6. Radioisotope Identification PM1704A identifies the exact type of radioactive source that triggered an alarm. There are two options to do that: one is directly in Search mode, by going to the Search mode menu and selecting “Identify”. This will commence a procedure similar to the one described in section 2.5.2, and... -
Page 19: Selecting The Library And Setting Up Identification Parameters
2.6.1. Selecting the library and setting up identification parameters Which isotopes can be identified by the PM1704A series depends on which library is loaded into the instrument memory using the User Software. Several isotope libraries, including custom ones, can be used in the instrument. -
Page 20: Displaying Peaks Information
DISABLED, then it will not run the identification process automatically. 2.6.2. Displaying peaks Information The PM1704A series is capable of displaying more detailed information about identified radioisotope peaks. To do so, return to the Spectra Acquisition menu and select PEAKS. The instrument will display the... -
Page 21: Setting New Thresholds
PM1704A models allow the user to set up two independent gamma DE thresholds in DE measurement mode that trigger distinguishable sound and vibration alarms when exceeded. This allows the user to use one threshold as a WARNING indicator, and the second threshold as a DANGER indicator. -
Page 22: Setup
3. SETUP Setup mode allows the user to change the instrument’s parameters and customize its operation for the given environment. To begin the setup process, press the MODE/SET button until the SETTINGS mode is displayed on the LCD, then press the MODE/SET button to enter Settings mode. -
Page 23: Communication With Computer
PM1704 DATA – contains all stored spectra and history data; PM1704 INFO – contains service information. To start “PM1704A Built-in Software”, go to the new PM1704 SOFT drive and run the PM1704АSW.exe application. The User Guide for “PM1704А Built-in Software” can be also found in the same folder. -
Page 24: Maintenance
5.1. Energy Calibration Check Polimaster recommends performing an energy calibration check of PM1704A at least every 3 month to guarantee proper spectroscopic calibration and correct isotope ID functioning of the unit. It is also recommended to perform this operation after a long storage or transportation of the instrument before the first field use. -
Page 25: Manual Energy Calibration
5.2. Manual Energy Calibration Each PM1704A is extensively tested and calibrated before it is released to the field from the factory. Performing Manual Energy Calibration may overwrite the factory calibration and lead to the instrument malfunctioning if not done properly. - Page 26 Expose the instrument to the source. Make sure that the average gamma count rate is in range 100 – 500 CPS and the message «COUNT RATE: OK» is shown: After that, press the instrument’s upper button to start spectra acquisition. Wait for no less than 600 seconds and then press the instrument’s upper button.
-
Page 27: Troubleshooting
Use only fresh, high quality alkaline batteries. The PM1704A is an extremely low power device and as such, the unit should be allowed to stand without the battery for 1-2 minutes to allow internal circuits to discharge.
Need help?
Do you have a question about the PM1704A and is the answer not in the manual?
Questions and answers