
Related Manuals for Polimaster РМ1605


Summary of Contents for Polimaster РМ1605
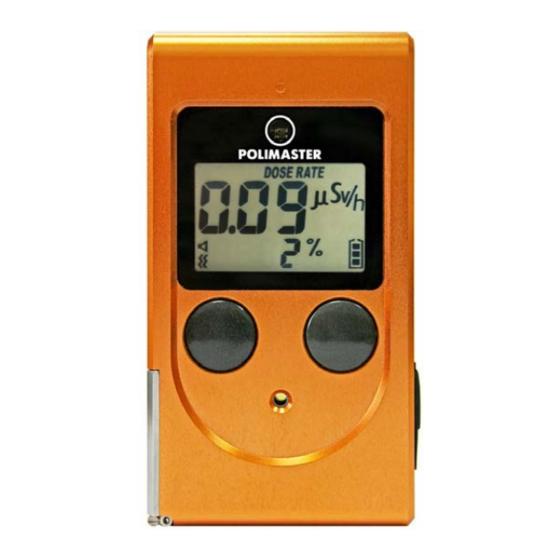
- Page 1 Р М Р М...
- Page 2 PM1605 Software as of the time of this Software Guide publication. Documented Software and its settings are subject to change with no substantial effect on its functionality. Polimaster reserves the right to change Software in such a way not mentioning it in Software Guides.
-
Page 3: Table Of Contents
..................30 RAPHICAL HISTORY DISPLAY MODE ....................33 ISTORY RECORDS SETTING ........................33 ISTORY EXPORT ........................ 34 RINTING ISTORY ........................34 ISTORY RESET INSTRUMENT OPERATION..................... 35 ......................35 EASUREMENT MODE ____________________________________________________________________________________ © 2015 Polimaster and its licensors. All rights reserved www.polimaster.com... -
Page 4: Introduction
Using the software with any other instruments can lead to unpredictable results. “РМ1605 Software” software (further – software) developed by the Polimaster company, enables operational control over radiation situation and output on the PC display of the data read in the real time mode by detector of the connected instrument. -
Page 5: Software Application Field
3. Read/record operation settings of the connected instrument: • DE and DER threshold values; • History saving/recording interval; • Measurement units; • Enable/disable different alarm types. 4. Save measurement history on PC (history export); ____________________________________________________________________________________ © 2015 Polimaster and its licensors. All rights reserved www.polimaster.com... -
Page 6: Software Is Intended For
6. Read/record operation settings of the connected instrument: • DER and DE thresholds values; • History saving/recording interval; • Measurement units; • Reset of the accumulated DE; • Enable/disable different alarm types. ____________________________________________________________________________________ © 2015 Polimaster and its licensors. All rights reserved www.polimaster.com... -
Page 7: System Requirements
Hardware and software requirements for proper “РМ1605 Software” operation: 1. PC with compatible operating systems: • Microsoft Windows 7, 32-bit, 64-bit, • Microsoft Windows 8, 64-bit. 2. USB – cable. ____________________________________________________________________________________ © 2015 Polimaster and its licensors. All rights reserved www.polimaster.com... -
Page 8: Software Installation
In the new window Setup wizard will ask you to select a different folder to install the software, or agree with the proposed folder. Default folder is C:\Program Files\Polimaster\РМ1605\. ____________________________________________________________________________________ © 2015 Polimaster and its licensors. All rights reserved www.polimaster.com... - Page 9 Click the Next button to continue installing the of the “РМ1605 Software”. In the new window choose the Next button to confirm the Installation. It will start the installation process of the software: Start the “РМ1605 Software” installation: ____________________________________________________________________________________ © 2015 Polimaster and its licensors. All rights reserved www.polimaster.com...
- Page 10 After successful driver installation will appear the following message “Installation completed successfully”. Click the Close button to finish installation of the “PM1605 software”. ____________________________________________________________________________________ © 2015 Polimaster and its licensors. All rights reserved www.polimaster.com...
- Page 11 PC. The user can restart the computer immediately (click the Yes button) or later (click the No button). 8. The “РМ1605 Software” is successfully installed. ____________________________________________________________________________________ © 2015 Polimaster and its licensors. All rights reserved www.polimaster.com...
-
Page 12: Working With Program
Windows menu or on the desktop. To launch the software after the installation: - choose the Start menu item - choose the Main menu line Start > Programs > Polimaster > 1605; - or click the quick-start icon on the desktop. - Page 13 For proper program exit select one of the following ways: Select Device menu of the main program window and click Exit command or use the standard Close button Disconnect the USB cable from the PC. ____________________________________________________________________________________ © 2015 Polimaster and its licensors. All rights reserved www.polimaster.com...
- Page 14 Simple graphic interface of the main program window represents a set of commands and tools for PC user to interact with the connected instrument and work with measurement results. ____________________________________________________________________________________ © 2015 Polimaster and its licensors. All rights reserved www.polimaster.com...
-
Page 15: Main Program Window Structure
7. Refresh and Apply buttons are located under the Tool bar. Detailed description of all the commands and functions of the main program window and toolbar is given further in the Guide. ____________________________________________________________________________________ © 2015 Polimaster and its licensors. All rights reserved www.polimaster.com... -
Page 16: Main Program Window Menu
• About - information on Software version and the EULA; • Check for updates – check for updates manually; • Check for update on startup – check for updates automatically. ____________________________________________________________________________________ © 2015 Polimaster and its licensors. All rights reserved www.polimaster.com... -
Page 17: Tool Bar
Device status tab can be opened from the Device menu of the Main program window, Device status line, or from the corresponding tab on the Tool bar. The Device status tab of the toolbar contains following items: ____________________________________________________________________________________ © 2015 Polimaster and its licensors. All rights reserved www.polimaster.com... - Page 18 Sievert, when not – in Roentgen. 3. Sound and Light tab The Sound and Light tab of the toolbar contains following items: Sound Alarm enabled - switches on/off the instrument sound alarm; − ____________________________________________________________________________________ © 2015 Polimaster and its licensors. All rights reserved www.polimaster.com...
- Page 19 - Attention Dose Threshold - first accumulated dose alarm threshold value; - Danger Dose Threshold - second accumulated dose alarm threshold value; 6. History settings tab The History settings tab of the toolbar contains following items: ____________________________________________________________________________________ © 2015 Polimaster and its licensors. All rights reserved www.polimaster.com...
- Page 20 Configuration menu tab. It gives the possibility to choose necessary instrument functions with the help of software tools, and other functions hide and make inaccessible. The Configuration tab allows selecting necessary menu items to be displayed in the instrument. ____________________________________________________________________________________ © 2015 Polimaster and its licensors. All rights reserved www.polimaster.com...
- Page 21 ____________________________________________________________________________________ © 2015 Polimaster and its licensors. All rights reserved www.polimaster.com...
-
Page 22: Software/Instrument Settings
To switch to another language it is necessary to select the Language item of the Help menu and change the language. Changes will take effect only after restarting the software. ____________________________________________________________________________________ © 2015 Polimaster and its licensors. All rights reserved www.polimaster.com... -
Page 23: Information About The Software Updates Availability
There is the possibility to check manually the availability of the updates. ____________________________________________________________________________________ © 2015 Polimaster and its licensors. All rights reserved www.polimaster.com... -
Page 24: Thresholds Setting
Set DER (DE) “Danger” value must be higher than DER (DE) “Attention” value. Otherwise the DER (DE) “Attention” value will be equated with the DER (DE) “Danger” value. ____________________________________________________________________________________ © 2015 Polimaster and its licensors. All rights reserved www.polimaster.com... -
Page 25: Reset Statistics
Value of the accumulated equivalent dose (DE) and the accumulation time are read from the instrument and are displayed on the screen of the Device Status tab in the measurement mode. ____________________________________________________________________________________ © 2015 Polimaster and its licensors. All rights reserved www.polimaster.com... -
Page 26: Measurement Units
Using the Indication tab you can choose between R and Sv, selecting or clearing the check box Display in Sievert, and then clicking the Apply button. Switching of the units dimension is provided by the program automatically. ____________________________________________________________________________________ © 2015 Polimaster and its licensors. All rights reserved www.polimaster.com... -
Page 27: History Mode
− press History button in the Main program window; − choose corresponding line of the Device menu; − use the key combination Ctrl + H. Following window will appear: ____________________________________________________________________________________ © 2015 Polimaster and its licensors. All rights reserved www.polimaster.com... -
Page 28: History Events
• DER threshold exceeding “Danger”; • DER overload; • DE threshold exceeding “Attention”; • DE threshold exceeding “Danger”; • DE overload; • Coefficient n changing; • Alarm type changing; ____________________________________________________________________________________ © 2015 Polimaster and its licensors. All rights reserved www.polimaster.com... - Page 29 • Low battery indication. Software provides the possibility to sort and filter the history events in the table: in ascending/descending chronological order, events name and type grouping, date/time filtering (From - To). ____________________________________________________________________________________ © 2015 Polimaster and its licensors. All rights reserved www.polimaster.com...
-
Page 30: Graphical History Display Mode
DER and DE changing values (axis Y) for a period of time (axis X). When you aim with the cursor to the certain point of the diagram, the characteristics of the given point are displayed. ____________________________________________________________________________________ © 2015 Polimaster and its licensors. All rights reserved www.polimaster.com... - Page 31 M1). When you move the cursor in any direction across the diagram field, holding down the left button, marker To will be displayed (indicated on the graph as M2). Marker M1 can only move on the diagram points! ____________________________________________________________________________________ © 2015 Polimaster and its licensors. All rights reserved www.polimaster.com...
- Page 32 By double clicking the history line in the tabular mode, you can switch to graphical history display mode, with the marker M1 located at the point with the same time and measured values as selected in the table. ____________________________________________________________________________________ © 2015 Polimaster and its licensors. All rights reserved www.polimaster.com...
-
Page 33: History Records Setting
As appears and allows you to save the history to a file of the selected type. It is necessary to name the file and to save it in the specified folder, after that it can be opened using any program for the spreadsheets viewing. ____________________________________________________________________________________ © 2015 Polimaster and its licensors. All rights reserved www.polimaster.com... -
Page 34: Printing History
To reset the instrument history you can choose the item Clear History of the Device menu or the Action tab item of the same name, and then confirm the action by clicking Yes in the dialog box. ____________________________________________________________________________________ © 2015 Polimaster and its licensors. All rights reserved www.polimaster.com... -
Page 35: Instrument Operation
(in percent), the accumulated dose and the time of its accumulation. When the instrument is in the DER measurement mode, program displays the photon radiation dose equivalent rate measurement mode, as well as the screen of the Device status ____________________________________________________________________________________ © 2015 Polimaster and its licensors. All rights reserved www.polimaster.com... - Page 36 For detailed instructions on carrying out the measurements, please, consult the relevant chapters and sections of the Instrument Operation Manual. Thank you for choosing the Polimaster products! ____________________________________________________________________________________ © 2015 Polimaster and its licensors. All rights reserved www.polimaster.com...
Need help?
Do you have a question about the РМ1605 and is the answer not in the manual?
Questions and answers