Advertisement
Quick Links
Advertisement

Related Manuals for dg casa 95200-DSR


Summary of Contents for dg casa 95200-DSR
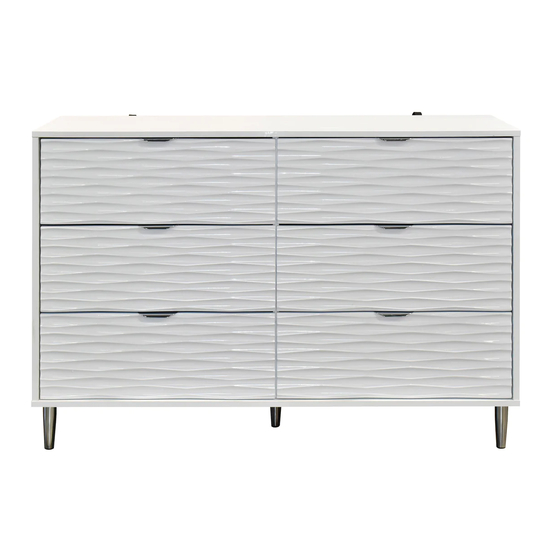
- Page 1 95200-DSR 3 + 3 DRAWER CHEST...
- Page 2 MAX : 66 lbs MAX : 11 lbs...
- Page 3 IMPORTANT INFORMATION Seller and Manufacturer disclaim all and any liability for property damage, personal injury, or loss, direct, indirect, or incidental, resulting from the incorrect assembly, inadequate maintenance, improper use, or neglect of this product. NOTICE Keep these assembly instructions for future reference. Do not use this produ ct if there are missing, damaged, or broken parts until repairs are made and/or factory replacement parts are installed.
-
Page 4: Hardware Required
HARDWARE & TOOL PARTS HARDWARE REQUIRED: MINIFIX X 39 PCS CAM 12/15 X 41 DOUBLE MINIFIX WOOD DOWEL (O6 X 30) X 1 PCS X 89 PCS UNITAR SCREW (6.3 X 40) CSK SCREW (3.5 X 15) CSK SCREW (M4.7 X 38) X 2 PCS X 24 PCS X 24 PCS... - Page 5 3 + 3 DRAWER CHEST PARTS A ..Side Panel....x 1 B ..Side Panel....x 1 C ..Partition Panel..x 1 N ..Drawer Front...x 1 D..Top Panel....x 1 O ..Drawer Front...x 2 E ..Bottom Panel...x 1 P ..Drawer Front...x 2 F ..Back Support ..x 2 Q..Drawer Side (L)..x 6 G..Front Support..x 4 R..Drawer Side (R)..x 6...
- Page 6 3+3 DRAWER CHEST ASSEMBLY - STEP 1 Wood Dowel (O6x30mm) x 89 Insert all wood dowel in each panel as shown. Note: Make sure all the dowel are insert into all panel without missing any hole.
- Page 7 3+3 DRAWER CHEST ASSEMBLY - STEP 2 L-Mounting Bracket Minifix Pan Head Screw (M4 X16) x 39 Insert Minifix on each panel and insert Pan Head screw with L-Mounting Bracket on Top Panel then use a screw driver to tighten up all. Note: Do not over tighten the Minifix it will cause issues when assemble all panel.
- Page 8 3+3 DRAWER CHEST ASSEMBLY - STEP 3 Euro Screw (6 x 9) Drawer Slide (300mm) x 24 x 6 SETS Attached drawer slide on Side panel A and B also Partition panel C then insert Euro screw and tighten using a screw driver. Note: Make sure to insert the euro screw into the right hole so the drawer slide is in correct position.
- Page 9 3+3 DRAWER CHEST ASSEMBLY - STEP 4 Csk Screw (M4.7 X 38) x 24 Attached drawer side R to drawer back S and use Csk screw and tighten it with a screw driver and repeat for drawer side Q. IMPORTANT: Fully tighten all Csk screw on all 6 drawer.
- Page 10 3+3 DRAWER CHEST ASSEMBLY - STEP 5 Insert the Drawer bottom Z first and then next insert the Drawer support T. IMPORTANT : Make sure panel T and Drawer bottom Z were inserted onto drawer back for all 6 drawer.
- Page 11 3+3 DRAWER CHEST ASSEMBLY - STEP 6 Cam (12/15) x 12 Attach Drawer Front M,N,O,P on the drawer and insert Cam (12/15) on each side of the drawer side and tighten it with screw driver. Note: Make sure to refer the picture were shown how to position the Cam correctly.
- Page 12 3+3 DRAWER CHEST ASSEMBLY - STEP 7 Csk Screw (3.5 X 15) Drawer Slide (300mm) x 24 x 6 Sets Attach Drawer slide (300mm) and make sure the drawer slide is in right position as shown then use ph1 screw driver to tighten Csk screw (3.5 X 15). Note: Repeat the same step for all 6 drawer and make sure to put the drawer slide in the right position.
- Page 13 3+3 DRAWER CHEST ASSEMBLY - STEP 8 Unitar Screw (6.3 X 40) Attach Partition panel C to Bottom panel E, then insert Unitar screw and tighten it with a Hex wrench. Note: Make sure do not over tighten the unitar screw.
- Page 14 3+3 DRAWER CHEST ASSEMBLY - STEP 9 Cam (12/15) Attach Front Panel L to bottom panel E and insert Cam (12/15) on each hole then tighten it with screw driver. Note: Make sure to refer the picture were shown how to position the Cam correctly.
- Page 15 3+3 DRAWER CHEST ASSEMBLY - STEP 10 Cam (12/15) Attach Front leg I to side panel A and insert Cam (12/15) then tighten it with screw driver, repeat the step for Front leg J and side panel B. Note: Make sure to refer the picture were shown how to position the Cam correctly.
- Page 16 3+3 DRAWER CHEST ASSEMBLY - STEP 11 Double Minifix Insert Double minifix on the Partition panel C as shown. Note: Make sure the end of the double minifix is balance on left and right side.
- Page 17 3+3 DRAWER CHEST ASSEMBLY - STEP 12 Cam (12/15) Attach Front support G on Partition panel C and Bottom support H , attach Back support F and insert Cam (12/15) then tighten it with screw driver. Note: Make sure to refer the picture were shown how to position the Cam correctly.
- Page 18 3+3 DRAWER CHEST ASSEMBLY - STEP 13 Cam (12/15) Attach Side panel B along side Front panel K and insert Cam (12/15) then tighten it with screw driver. Note: Make sure to refer the picture were shown how to position the Cam correctly.
- Page 19 3+3 DRAWER CHEST ASSEMBLY - STEP 14 Cam (12/15) Attach Front support G on Partition panel C, attach Back support F and insert Cam (12/15) then tighten it with screw driver. Note: Make sure to refer the picture were shown how to position the Cam correctly.
- Page 20 3+3 DRAWER CHEST ASSEMBLY - STEP 15 Cam (12/15) Attach Side panel A and Front leg I and insert Cam (12/15) then tighten it with screw driver. Note: Make sure to refer the picture were shown how to position the Cam correctly.
- Page 21 3+3 DRAWER CHEST ASSEMBLY - STEP 16 Nail leg Put the nail leg on the bottom parts and use a hammer to knock it. IMPORTANT: Make sure to put all the nail leg on the bottom parts because it will cause the 3 + 3 drawer chest to be unstable if missing a piece of the nail leg.
- Page 22 3+3 DRAWER CHEST ASSEMBLY - STEP 17 Insert the Backply Y1 and Y on back side of the 3 + 3 drawer chest and push it down. IMPORTANT: Make sure to put the backply according to the groove at the back side.
- Page 23 3+3 DRAWER CHEST ASSEMBLY - STEP 18 Cam (12/15) x 10 Attach Top panel D then insert the Cam (12/15) and tighten it with a screw driver. Note: Make sure to refer the picture were shown how to position the Cam correctly.
- Page 24 3+3 DRAWER CHEST ASSEMBLY - STEP 19 Backply Stopper Csk Screw (M3.1 x 20) x 12 x 12 Insert the Backply stopper on the backply Y1 and Y then use the Csk screw (M3.1x20) and tighten it with screw driver. IMPORTANT: Fully tighten all Csk screw to make sure the backply does not move.
- Page 25 3+3 DRAWER CHEST ASSEMBLY - STEP 20 Carefully insert the drawer one by one in the 3 + 3 drawer chest by referring the picture.
- Page 26 3+3 DRAWER CHEST ASSEMBLY - STEP 21 Pan Head Screw Wall Plug (25mm) (M4 X 52) Drill a hole and insert the wall plug first then insert the Pan head screw from the inside through the L-mounting bracket then tighten it with screw driver.
- Page 27 ASSEMBLY COMPLETE Enjoy your new 3 + 3 Drawer Chest!
Need help?
Do you have a question about the 95200-DSR and is the answer not in the manual?
Questions and answers