Advertisement
Quick Links
Instruction Sheet
取扱説明書
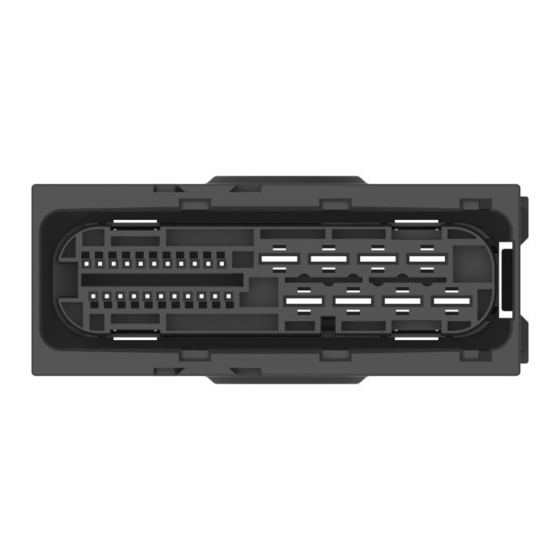
Unsealed 025/250 30Position CONNECTOR
非防水 025/250 30 極 コネクタ
1. Product Descriptions and Part Numbers
製品名称及び び び び 型番
製品名称及
製品名称及
製品名称及
1.1 Connectors
コネクタ
Part Numbers 型番
1.2 Contact
コンタクト
Part Numbers
型番
928999-1
1241406-1
©2012 Tyco Electronics Japan G.K.,
a TE Connectivity Ltd. Company
All Rights Reserved
TE logo is a trademark.
型番
型番
型番
2134869-1
2134873-1
2134874-1
Description
品名
Micro Quad lock System Contact
025 端子
MCP 6.3 Contact
250 端子
* Trademark
タイコエレクトロニクス ジャパン合同会社、TE Connectivity Ltd. グループ
Other products, logos, and company names might be trademarks of their respective owners.
Description 品名
Plug Housing Assembly 30Position
プラグハウジングアッセンブリ 30 極
Retainer 30Position
リテーナー 30 極
Cover Assembly 30Potiion
カバーアッセンブリ 30 極
Fig.1
Fig.2
408-78010
24 APR 12 Rev A
Applicable Wire
適応電線
AVSS
2
0.3-0.5mm
AVSS
2
3.0mm
1 of 20
LOC B
Advertisement

Related Manuals for TE Connectivity 025/250


Summary of Contents for TE Connectivity 025/250
- Page 1 408-78010 Instruction Sheet 取扱説明書 24 APR 12 Rev A Unsealed 025/250 30Position CONNECTOR 非防水 025/250 30 極 コネクタ 1. Product Descriptions and Part Numbers 製品名称及び び び び 型番 製品名称及 型番 製品名称及 製品名称及 型番 型番 1.1 Connectors コネクタ Part Numbers 型番...
- Page 2 Instruction Sheet 取扱説明書 408-78010 1.3 Components View 製品の構成 Plug Assembly プラグ・アッセンブリ 250 Female Contact 250 メス端子 Retainer リテーナー 025 Female Contact 025 メス端子 Wire Cover ワイヤーカバー Fig.3 Rev A 2 of 20...
- Page 3 Instruction Sheet 取扱説明書 408-78010 2. CUSTOMER RECEIVING INSPECTION 顧客の の の の 受入検査 顧客 受入検査 顧客 顧客 受入検査 受入検査 Tyco conducts inspections according to their quality control regulations to maintain an over all lot control. In addition, the customers should conduct receiving inspections based on the specific customer drawings.
- Page 4 Instruction Sheet 取扱説明書 408-78010 (4) When removing the contact reel from the machine, fasten the end of the contact strip onto the edge of the reel with use of proper string or wire. Fig 6. 圧着機から一時取り外されたリールは、その先端の端子を適切な紐や針金によってフランジに結び、 リールがほどけない様にして下さい。 Tie strip end with a wire neatly. 結ぶ...
- Page 5 Instruction Sheet 取扱説明書 408-78010 4.1.2 Notes for Stripping Wire End 端末加工上の注意 Wire end must be stripped without cut or damage of wire strands. 芯線に傷・切断・切欠き等がないように注意して下さい。 Cut off Damaged Nick 傷 切断 切欠き Defective Defective Defective Intact and Normal 不良 不良 不良 Acceptable 正常...
- Page 6 Instruction Sheet 取扱説明書 408-78010 4.3 Storage and Handling of Crimping Products 圧着端子の保管及び取扱いについて (1) Store the products in a clean, dry area cover with proper sheet or paper when placed in an open area until the next day. 乾燥した清潔な場所に保管して下さい。また、長期間にわたり露出状態で放置することは 避けて下さい。 (2) Care should be taken for tangle and deform of contacts in case of the leads should be in bands.束ねる場合は、端子のからみ・変形のない様に十分注意して下さい。...
- Page 7 Instruction Sheet 取扱説明書 408-78010 5.HARNESS MAKING ハーネス ハーネス製造作業 製造作業 ハーネス ハーネス 製造作業 製造作業 5.1 Insertion Female Contact into Housing メス端子のハウジングへの挿入 (1) Insert the contacts into the housing with same direction as shown in Fig. 7 The insertion finished when you hear click sound and contact stops. Please check the direction of contacts without pushing in by force, when it is hard to insert.
- Page 8 Instruction Sheet 取扱説明書 408-78010 5.2 Retainer Final Lock (Secondary Lock) ダブルロック(二重係止)作業 (1) After all cavities are filled by inserted Contacts or Cavity Plugs properly, insert Retainers into Housing to deep end and complete Final Lock condition. 全てのメス端子を挿入した後、リテーナーを確実に奥まで押し込み、本係止状態にします。 これで端子のダブルロックが完了です。 Before Retainer Insertion / ダブルロック作業前 (Retainer) 押...
- Page 9 Instruction Sheet 取扱説明書 408-78010 5.3 Retainer Release Procedure ダブルロックの解除方法 In case of Female Contact insertion or extraction, Retainer is pulled out (see Fig.9). It is impossible to insert or extract the contacts with Retainer final lock condition. メス端子を挿入する場合や引き抜く場合は、リテーナーを引き抜きます(Fig.9 参照)。本係止状態では、挿 入、引き抜きはできません。 (1) Pull out the retainer by a tool then.
- Page 10 Instruction Sheet 取扱説明書 408-78010 5.4 Female Contact Extraction メス端子の引き抜き方法 (1) Confirm Retainer is pulled out. In case of Final Lock condition, it is necessary to pull out retainer (see Fig.9 ). It is impossible to extract the contacts under Final Lock condition. リテーナーが引き抜かれていることを確認します。万一、本係止状態になっている場合は、リテーナーを...
- Page 11 Instruction Sheet 取扱説明書 408-78010 5.5 Wire Cover Attach Operation ワイヤーカバーの取付け When harness inserted operations and installation of the retainer(final lock condition) is completed, After confirming the slider position of the female connector and lever lock position of wire cover are correct, the wire cover is installed in the female connector in following(1)~(3) processes.
- Page 12 Instruction Sheet 取扱説明書 408-78010 (1)Bend wire harness to specified direction. ワイヤーハーネスを引出方向に曲げる。 (2) Insert the back side lock of the lever assembly into hole for latch at plug assembly. カバーの後端をプラグハウジングに差し込む。 Lock ロック Lock ロック Lock insertion hole ロック挿入箇所 (3)It turns centering on a plug and close an opposite lock. 差込を軸に回して反対のロックを閉じる。...
- Page 13 Instruction Sheet 取扱説明書 408-78010 5.6 Removal operations Wire Cover ワイヤーカバーの取外し (1) The removal of the wire cover, Please push a lock of the cover in the direction of the arrow while pushing the wire exit side of the wire cover to the under and release the lock. ワイヤーカバーの取り外しは、ワイヤ...
- Page 14 Instruction Sheet 取扱説明書 408-78010 5.7 Wire Harness Control ハーネス製品の管理 5.7.1 Handling 取扱いについて Do not apply too much force or shock against connector or harness. コネクタや電線に無理な力を加えたり、衝撃を与えたりしないように十分注意して下さい。 5.7.2 Wire tie up and taping 電線の結束やテーピングについて The operation be conducted carefully so that too much force is applied against the wires. 束ね位置は電線に無理な力がかからないように注意して下さい。...
- Page 15 Instruction Sheet 取扱説明書 408-78010 6 6 6 6 ..Connector mating and unmating operation コネクタ コネクタの の の の 嵌合及 コネクタ コネクタ 嵌合及 嵌合及 嵌合及び び び び 離脱作業 離脱作業 離脱作業 離脱作業 6.1 Connector Mating コネクタの嵌合 (1)Check contact latching condition, proper wire tie up position, and Retainer is in final lock condition.
- Page 16 Instruction Sheet 取扱説明書 408-78010 Turn the lever until it clicks (the lever lock detent), it is completion. レバーを回転させて、『カッチ』と音がする(レバーがディテントにロックする位置)まで回転させると、 レバープリセットの完了です。 Detent Lock ディテントロック The lever is being operated Completion of lever pre-setting レバー操作前 レバープリセット完了 Fig.16 NOTE Please do not forcibly push the lever lock. When abnormality is discovered, please be sure to exchange with the new item.
- Page 17 Instruction Sheet 取扱説明書 408-78010 (4) The boss of the male connector and slot position of the female connector are adjusted, straight push in the direction of ① until it clicks. メスコネクタ(レバープリセット状態)をオス コネクタのボスとメス コネクタのスロット位置を合わせ① の方向に『カッチ』と音がするまで真直ぐ押し込んで下さい。 Female Connector Slot メス コネクタ スロット Lever pre-setting Male connector boss condition...
- Page 18 Instruction Sheet 取扱説明書 408-78010 (5) ① Furthermore push the female connector and turn the lever to the direction of ②, after female connector is temporary retention state. Rotate the lever as arrow direction, until it clicks. It is completion if it can’t insert further. Don’t apply overpower, if you can’t insert into the male housing, and check the items of (1) to (4).
- Page 19 Instruction Sheet 取扱説明書 408-78010 6.2 コネクタの離脱 Connector unmating (1) Please push the lever lock of the female connector in the direction of ①, and release the lever lock. Please turn the lever in the direction of ② after releasing the lever lock. メス...
- Page 20 Instruction Sheet 取扱説明書 408-78010 (3) After putting the female connector in temporary retention state, please pull out the female connector and the wire cover straightly. When in cannot pull out, without pulling unreasonably, please verify that the lever position is temporary retention position. メス...
Need help?
Do you have a question about the 025/250 and is the answer not in the manual?
Questions and answers