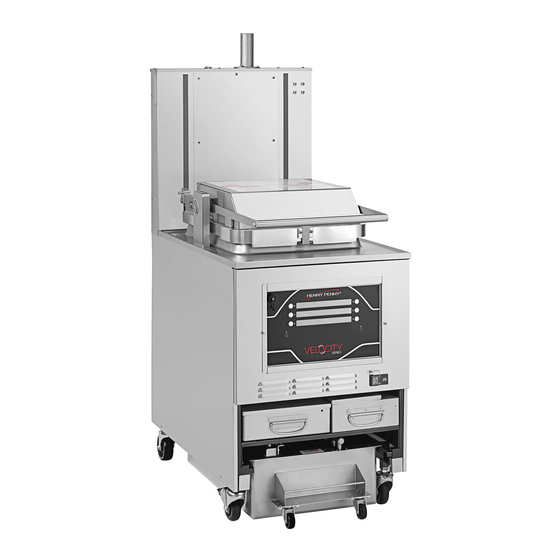
Henny Penny Velocity PXE 100 Kit Instructions
Bulk oil instructions including selector valve and controls
Hide thumbs
Also See for Velocity PXE 100:
- Operation manual (113 pages) ,
- Operator's manual (80 pages) ,
- Service manual (168 pages)
Advertisement
Quick Links
Subject: Bulk Oil Instructions including Selector Valve and Controls
Date: 05/06/22
Document Number: FM08-886
Model: Velocity PXE 100 and OXE 100
Summary
Use these instructions to install a bulk oil system on a Velocity fryer in the field. Use the below parts list to
verify you have all the kit parts before beginning the installation.
Part Numbers
Part #
Description
FP01-312
EXTEND-10 SAE MORB TO 10 FORB
FP01-311
EXTEND-8 SAE MORB TO 8 FORB
FP01-313
EXTEND-8 SAE MORB TO 8 45 FLARE
FP01-232
FITTING-90 ¾-16 SAE TO 7/8-1
159513
BRACKET-SELECT V REAR MTG
MS01-528
LOCTITE THREAD- LOCK #242 (Blue)
159501
WELD ASSY-SELECTOR V MTG BRKT
SC01-057
SCREW 1/4-20 X 1/2 HEX HD
FP01-280
FTG-SAE 12, SAE 12 FLARELESS
90506-001
VALVE-CHECK SAE 12-3 PSI
FP01-281
FTG-SAE 12 TO 3/4 NPT
MS01-749
LOCTITE PIPE SEALANT .20 OZ (white)
FP01-097
TEE-3/4 NPT FEMALE PIPE BI.
FP02-039
NIPPLE-3/4 X 6 LG-BI
FP01-216
TEE-1/2 X 1/2 X 3/4 FI
FP01-205
ELBOW-1/2 IN NPT MALE 45 FLARE
FP02-063
NIPPLE-3/4 NPT X 3.5 LG BI
FP01-279
ELBOW 10 SAE 3/4 NPT F
159119
STUD ASSY-BRACKET ADJ
SC03-010
SCREW
77523-001
12-in. FLEX TUBE
77523-002
18-in. FLEX TUBE
SC06-013
U-BOLT
NS04-005
NUTS
NS04-004
NUTS
153074-001
HARN-SELECT VLV TO CNTRL
153233-001
HARN-BULK1, 2 DTF1, 2-20AWG
SC04-003
SCREW
EF02-156
GROMMET-SPLIT
184374
ASSY-BULK OIL DISPOSE POT
184375
ASSY-FRONT HOSE DISCONNECT
184390
ASSY-BULK FILL AND DISPOSE
184394
ASSY-BULK OIL TERMINAL BLOCK
152726
COVER-WIRE ROUTE
171456
VALVE-SELECTOR-3 PORT
Page 1 of 21
Kit Instructions
Quantity
1
2
2
1
1
1
1
4
1
1
1
2
1
1
1
2
1
1
2
6
4
1
2
8
2
1
1
2
1
1
1
1
1
1
1
Advertisement

Subscribe to Our Youtube Channel
Related Manuals for Henny Penny Velocity PXE 100


Summary of Contents for Henny Penny Velocity PXE 100
- Page 1 Subject: Bulk Oil Instructions including Selector Valve and Controls Date: 05/06/22 Document Number: FM08-886 Model: Velocity PXE 100 and OXE 100 Summary Use these instructions to install a bulk oil system on a Velocity fryer in the field. Use the below parts list to verify you have all the kit parts before beginning the installation.
- Page 2 Kit Instructions Procedure Assemble Selector Valve NOTE: Build the selector valve subassembly for later use in the instructions. 1. Attach x1) FP01-232 - FITTING-90 ¾-16 SAE TO 7/8-1 and x1) FP01-312 - EXTEND-10 SAE MORB TO 10 FORB to Port 0 of selector valve and tighten snug as shown. 2.
- Page 3 Kit Instructions 11. Apply MS01-749 - LOCTITE PIPE SEALANT to x1) FP01-205 - ELBOW-1/2 IN NPT MALE 45 FLARE and attach to the opposite end of last tee oriented as shown below. 12. Apply MS01-749 - LOCTITE PIPE SEALANT to a second FP01-205 - ELBOW-1/2 IN NPT MALE 45 FLARE and attach to the middle of final tee and orient as shown below.
- Page 4 Kit Instructions Install the Selector Valve 15. Attach middle elbow of plumbing assembly to selector valve as shown. 16. Attach x1) 159119 - STUD ASSY-BRACKET ADJ to each mounting bracket as indicated using x2) NS04-005 - SERRATED FLANGED LOCKNUT1/4-20 on each bracket. DO NOT TIGHTEN. 159119 Install the Plumbing Lines 17.
- Page 5 Kit Instructions After: There will still be a check valve attached on the rear pot inlet. 19. Attach x1) 184374 - ASSY-BULK OIL DISPOSE POT onto the front nozzle of the pot. NOTE: The Jib Plug and Play may need to be removed to allow space for this step and reconnected after the completion of this step.
-
Page 6: Check Valve
Kit Instructions 20. Turn the rear pot port/check valve so it is oriented as shown below. Check Valve 21. Attach x1) 184390 - ASSY-BULK FILL AND DISPOSE on the frame rail using x2) SC03-010 - SCREWS. There are pilot holes already in the frame to attach this sub-assembly. ASSY-BULK FILL AND DISPOSE SC03-010 Page 6 of 21... - Page 7 Kit Instructions 22. Turn the check valve on the output side of the JIB from pointing toward the front of the unit to the top of the unit. Check Valve JIB pump 23. Attach x1) 77523-001 - 12-in. FLEX TUBE from the rear pot nozzle to the closest port on the 184374 - ASSY-BULK OIL DISPOSE POT Rear Pot Nozzle 12-in.
- Page 8 Kit Instructions 24. Attach x1) 77523-001 12-in. FLEX TUBE on fill side of the 184390 - ASSY-BULK FILL AND DISPOSE. 25. Attach a second, x1) 77523-001 12-in. FLEX TUBE on the check valve on the JIB pump. 12-in. FLEX TUBE 12-in.
- Page 9 Kit Instructions 27. Attach x1) 77523-002 18-in. FLEX TUBE onto the dispose side of the 184390 - ASSY-BULK FILL AND DISPOSE. 18-in. FLEX TUBE ASSY-BULK FILL AND DISPOSE 28. Attach pump to manifold plumbing to the front port on the Selector Valve. 29.
- Page 10 Kit Instructions 30. Using the flex line attached to the fill side of the 184390 - ASSY-BULK FILL AND DISPOSE, attach the opposite end to the top, rear facing elbow on the selector valve. Rear elbow of the selector valve 12-in.
- Page 11 Kit Instructions 32. Using the flex line attached to the 184374 - ASSY-BULK OIL DISPOSE POT, attach the opposite end of the flex line to the elbow on top of the selector valve that faces the rear of the unit. Top elbow of the selector valve 12-in.
- Page 12 Kit Instructions 34. Connect the flex line of the 184365 - ASSY-FRONT HOSE DISCONNECT to the selector valve port toward the center of the unit. ASSY-FRONT HOSE DISCONNECT’s Flex Line ASSY-FRONT HOSE DISCONNECT 35. Use the 77523-002 - 18-in. FLEX TUBE attached to the bulk dispose port earlier to connect on the outer port in the selector valve.
- Page 13 Kit Instructions Install and Route the Wiring 36. Route the drain pan connector switch through the frame rail members and around the selector valve and connect to larger plug. Drain Pan Connector Switch 37. Mount x1) 184394 - ASSY-BULK OIL TERMINAL BLOCK inside rear of heater wire raceway using two x2) NS04-004 NUTS.
- Page 14 Kit Instructions 38. Make Bulk Oil terminal connection on the board with x1) 153233-001 HARN-BULK1, 2DTF1, 2-20AWG and then route the wires through the top grommet as shown. Connector Connector Top Grommet 153233-001 Page 14 of 21...
- Page 15 Kit Instructions 39. Make Bulk Oil terminal connections with 153233-001 HARN-BULK1, 2DTF1, 2-20AWG as shown. HARN-BULK1, 2DTF1, 2-20AWG 40. Make connection between the selector valve wire and x1) 153074-001 HARN-SELECT VLV TO CNTRL on the panel as shown. 41. Once one end of 153074-001 HARN-SELECT VLV TO CNTRL is connected use the opposite end to place the connector through the top grommet.
- Page 16 Kit Instructions 42. Once the connector is through make the connection on the control board as shown below. HARN-SELECT VLV TO CNTRL HARN-SELECT VLV TO CNTRL Page 16 of 21...
- Page 17 Kit Instructions 43. Secure the grey selector valve wire by placing x1) EF02-156 - GROMMET-SPLIT on each side of the wire. Then slide x1) 152726 - COVER-WIRE ROUTE between the inner portion of the wire and GROMMET-SPLIT. 44. Use x2) SC04-003 SCREWS to secure the cover-wire route. GROMMET-SPLIT SC04-003 COVER-WIRE ROUTE...
- Page 18 Kit Instructions 45. Route the gray selector valve wire through the top grommet. Gray Selector Valve Wire Top Grommet 44. Once the gray selector valve wire is through make the connection shown below. Gray Selector Valve Wire Gray Selector Valve Wire Page 18 of 21...
- Page 19 Kit Instructions 45. Secure wires with zip ties where needed. 46. Reattach the side panels and place the ATO and condensate boxes back in the proper location. 47. After completing the hardware installation, you will need to enable these features in the control. Connect main circuit breaker or cord at wall outlet to supply power.
- Page 20 Kit Instructions 51. Press and hold the Menu button to activate the MAIN menu. Press the menu button again and select 4. PROG. Type 123 and select 3. SPCL PROG. 52. Use the left or right arrows to navigate through the options and change the settings to match the oil system for the store.
-
Page 21: Warranty
For further information, please contact Technical Services using one of the following options: Email: technicalservices@hennypenny.com Call: U.S. and Canada: +1-800-417-8405 Global: +1-937-456-8405 Text: +1-937-456-8405 Live chat via the Henny Penny website, extranet, or customer support website. Page 21 of 21...
Need help?
Do you have a question about the Velocity PXE 100 and is the answer not in the manual?
Questions and answers