
Related Manuals for Van Der Stahl V-300 Series


Summary of Contents for Van Der Stahl V-300 Series
- Page 1 Printed MAR 2011 1st Edition 1.01E VACUUM SEALER V-300 SERIES OPERATING INSTRUCTIONS www.vanderstahl.com...
- Page 2 V-300 Series Operating Instructions Ver1.01E...
- Page 3 Set the heating time according to the material and thickness of the film. As a result of research to further improve the V-300 series, some details in the operating instructions may differ from your actual machine. For operating problems or product information, please contact your local dealer .
-
Page 4: Table Of Contents
V-300 Series Operating Instructions Ver1.01E Table of contents About V-300 …………………………………………………………………………………………… 5 Specifications ………………………………………………………………………………………… 5 Package contents …………………………………………………………………………………… 6 Replacement parts …………………………………………………………………………………… 6 Proper use of the sealer …………………………………………………………………………… 7 Warning-caution label location and content …………………………………………………… 7 Operating precautions ……………………………………………………………………………… 8 For safety operation……………………………………………………………………………………………………………………………... -
Page 5: About V-300
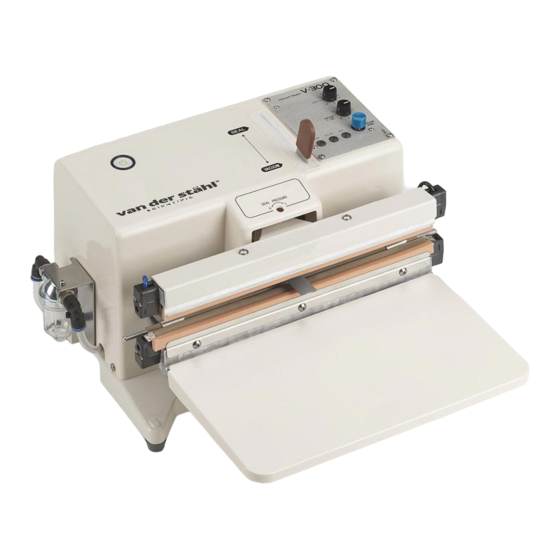
V-300 Series Operating Instructions Ver1.01E About V-300 The model V-300 and V-300-10D vacuum sealer is provided with a vacuum pump for reducing the air in the pouch prior to sealing. Compared with conventional sealers, the additional function or removing air from the package can increase the life of food and prevent oxifation of metal parts, as well as protecting parts against scratching each other in the pouch. -
Page 6: Package Contents
Routine maintenance parts, which will need to be replaced after extensive use, are sold individually as detailed below. Also the maintenance parts kits that includes all the consumable parts are available. Replacement parts can be purchased through Van der Stahl Scientific. Replacement parts sales unit... -
Page 7: Proper Use Of The Sealer
Film thickness limits for the V-300 series are described below. The machine cannot seal bags which are thicker than that indicated. The machine may malfunction if you try to exceed the limits of the machine. -
Page 8: Operating Precautions
Do not use parts other than those specified Warning When replacing parts, always use only specified parts sold through Van der Stahl Scientific. We are not responsible for malfunctions caused by the use of unspecified parts. - Page 9 V-300 Series Operating Instructions Ver1.01E Do not modify the machine Warning Modification of the FA series or the use of unspecified parts may not only lead to damage of the machine, but there is also a risk of danger to the operator.
-
Page 10: For Smooth Operation
V-300 Series Operating Instructions Ver1.01E For smooth operation ● Heating time should be set at a minimum Set sealer so that an acceptable seal is completed in the least amount of heating time. Excessively long heating times (increasing the heat setting unnecessarily) will damage the teflon, glass tape and other consumables, as well as result in heating element breakage. -
Page 11: Other Safeguards
●The V-300 series is an impulse sealer Do not become alarmed if the sealing area does not become hot after the power switch is turned to the ON position. The machine has not malfunctioned. -
Page 12: Major Parts And Function
V-300 Series Operating Instructions Ver1.01E V-300 Series Operating Instructions Ver2.01E 7 Major parts and function Power indicator lamp V-300 Turns on when the power is turned on. Vacuum indicator lamp Turns on while vacuuing. Heating indicator lamp Turns on while heating. -
Page 13: Proper Use Of The Sealer
V-300 Series Operating Instructions Ver1.01E V-300 Series Operating Instructions Ver2.01E 8 Proper use of the sealer Use only as described in this manual. There is a risk of danger and malfunctions may result if the machine is used not in accordance with this 8-1 Setting the machine Place the machine on a flat, horizontal working table. -
Page 14: Set The Sealing Condition
V-300 Series Operating Instructions Ver1.01E 8-5 Set the sealing condition Set the heating and vacuuming time with the timer unit. The sealing condition will vary depending on the pouch/ film material, thickness and size. Reset the sealing condition everytime you change the pouch/ film. -
Page 15: Place A Bag To The Sealing Area
V-300 Series Operating Instructions Ver1.01E 8-7 Place a bag to the sealing area Hold the bag with both hands at the sealing position. Slid the upper film of the bag toward you so the bag opens and make it easy to insert the nozzle. -
Page 16: Allow Sufficient Cooling Time
V-300 Series Operating Instructions Ver1.01E 8-10 Allow sufficient cooling time Cooling time is important when using an impulse Heat indicator lamp sealer. After the film is heated, the film must cool with the frame and pressure lever in the closed position. -
Page 17: When Air Flushing Is Desired
V-300 Series Operating Instructions Ver1.01E 9 When air flushing is desired The V-300 not only removes the air, but can flush it as well. It is as simple as reversing the air hose lines on the vacuum pump. The procedure for changing the hose connection is explained in below. -
Page 18: Replacing The Routine Maintenance Parts
Always unplug the power plug before replacing parts. There is a danger of electrocution if it has Warning been done without unplugging. Always use only specified parts sold through Van der Stahl Scientific. Unspecified parts may Warning cause malfunction of the machine. -
Page 19: Sliding The Teflon Sheet
V-300 Series Operating Instructions Ver1.01E 11-1 Sliding the Teflon sheet Essential tools: Scissors, a Philips screwdriver Replace when: The Teflon sheet burns, or when the seal becomes messy. Teflon sheet is either sold individually or included in Slide off the Teflon sheet the maintenance parts kit. - Page 20 V-300 Series Operating Instructions Ver1.01E Teflon sheet Lower heating element (for V-300, V-300-10D) Heating element Remove the Teflon sheet. (Refer to “9-1 Sliding the Teflon sheet.”) Loosen the screw A of both electrodes with a Philips screwdriver, and remove the terminal covers.
-
Page 21: Replacing The Glass Tape And Sarcon Sheet
V-300 Series Operating Instructions Ver1.01E 11-3 Replacing the glass tape and Sarcon sheet Essential tools: Scissors, A Philips screwdriver Replace when: The heating element breaks often, the Sarcon sheet seal becomes messy, etc. Electrode The glass tape and Sarcon sheet are either sold individually or included in the maintenance parts kit. -
Page 22: Clean The Filter And Replacing The Filter Element
V-300 Series Operating Instructions Ver1.01E 11-5 Clean the filter and replacing the filter element Essential tools: Monkey wrench or pliers Replace when: The vacuuming is weak or the machine does not vacuum. The vacuumed contents are stuck in the filter element. -
Page 23: Replacing The Nozzle
V-300 Series Operating Instructions Ver1.01E 11-6 Replacing the nozzle Frame cover Essential tools: Philips screwdriver Replace when: The vacuuming is weak or the machine does not vacuum. The nozzle is stuck with the foreign object Remove the frame cover and table. -
Page 24: Adjusting The Seal Pressure
V-300 Series Operating Instructions Ver1.01E 12 Adjusting the seal pressure The optimum seal pressure varies depending on the film/pouch material and thickness. When using the machine for the first time or the sealing is not clean after changing the pouch, please adjust the seal pressure. -
Page 25: Electric Diagram
V-300 Series Operating Instructions Ver1.01E V-300 Series Operating Instructions Ver2.01E 13 Electric diagram 110V, 220V Source White AC110V Green AC220V Black Micro switch (Heating) Gray Gray Yellow Power switch White Black Yellow Triac Brown (Blue for Micro switch White Brown... -
Page 26: Common Problems And Solutions
Carefully follow the directions in the operating instructions when replacing parts. Please consult Van der Stahl Scientific if after referring to the chart, the problem cannot be resolved. Please refer any questions regarding replacement of parts not listed in the operating instructions or adjustment of such parts to Van der Stahl Scientific. - Page 27 V-300 Series Operating Instructions Ver 1.01E Problems related to vacuuming Problems Check Solutions Contents may have lodged somewhere Have the contents been accidentally between the nozzle and the vacuum pump. vacuumed? Check and clean the contents. Is there any stuff stuck in the filter? Clean or replace the filter.
- Page 28 V-300 Series Operating Instructions Ver1.01E...
-
Page 29: Exploaded Vies And Parts List
V-300 Series Operating Instructions Ver1.01E Exploded View Spare Parts list When ordering spare parts, please consult the exploded view diagram/spare parts list on the following pages and provide both the part name and code number to your local dealer. - Page 30 V-300 Exploded View G Type V-300 55-a 59-b 59-a 55-b 59-c...
- Page 31 G Type V-300 ●Specify the part number and product name when ordering. ●Specify the part name if there is no part number. ● The parts with # mark are common parts with V-300 series. Parts Code Parts name Sales Unit...
- Page 32 V-300-10D Exploded View G Type V-300-10D 59-b 59-a 55-a 55-b 59-c...
- Page 33 G Type V-300-10D ●Specify the part number and product name when ordering. ●Specify the part name if there is no part number. ● The parts with # mark are common parts with V-300 series. Parts Code Parts name Sales Unit...
- Page 34 1652 Plum Lane, Redlands, CA 92374 Y5990E MAR 2011 1st Edition 800-550-3854 www.vanderstahl.com V-300 Series Operating Instructions Ver1.01E...
Need help?
Do you have a question about the V-300 Series and is the answer not in the manual?
Questions and answers