Van Der Stahl MS-350 NP Operating Instruction
Microcomputer-controlled sealer for sterilizable bags
Hide thumbs
Also See for MS-350 NP:
- Operating instuructions (40 pages) ,
- Operating instructions manual (48 pages)

Related Manuals for Van Der Stahl MS-350 NP


Summary of Contents for Van Der Stahl MS-350 NP
-
Page 1: Operating Instructions
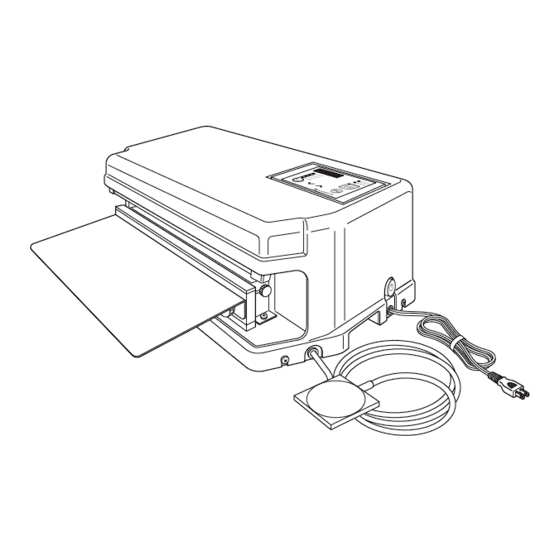
Printed JAN 2014 3rd Edition 3.01E MICROCOMPUTER-CONTROLLED SEALER FOR STERILIZABLE BAGS MEDICAL POUCH SEALER MS-350 NP Series Operating Instructions F TYPE... - Page 2 MS-350 NP Operating Instructions Ver 3.01E...
- Page 3 Set the heating time according to the material and thickness of the film. As a result of research to further improve the MS-350 NP series, some details in the operating instructions may differ from your actual machine. For operating problems or product information, please contact your local dealer or Fuji Impulse.
-
Page 4: Table Of Contents
MS-350 NP Operating Instructions Ver 3.01E Table of Contents Specification ……………………………………………………………………………………………… 5 Accessories ………………………………………………………………………………………………… 5 Replacement parts ………………………………………………………………………………………… 6 Proper use of the sealer ………………………………………………………………………………… 6 Warning-caution label location and content ………………………………………………………… 7 Operating precautions …………………………………………………………………………………… 8 For safety operation …………………………………………………………………………………………………………………………… 8 For smooth operation ………………………………………………………………………………………………………………………... -
Page 5: Specification
MS-350 NP 1500 525x465x200 ※ MS-350 NP is available in 110V, 220V, 230V or 240V - please check the silver machine label adhered on the rear side of fame cover to ensure your machine’s voltage. Accessories Please make sure that all of the accessories described below are included. -
Page 6: Replacement Parts
Film thickness limits for the MS-350 NP series are described below. The machine cannot seal bags which are thicker than that indicated. The machine may malfunction if you try to exceed the limits of the machine. -
Page 7: Warning-Caution Label Location And Content
MS-350 NP Operating Instructions Ver 3.01E Warning-caution label location and content Warning - Caution labels are placed in locations where there is a danger of injury to a person or damage to the machine. Label location details are illustrated below. Please check them before beginning operation. -
Page 8: Operating Precautions
Do not modify the machine Warning Modification of the MS-350 NP series or the use of unspecified parts may not only lead to damage of the machine, but there is also a risk of danger to the operator. Please do not tamper with the machine. - Page 9 MS-350 NP Operating Instructions Ver 3.01E Do not use parts other than those specified Warning When replacing parts, always use only specified parts sold through Fuji Impulse. Not responsible for malfunctions caused by the use of unspecified parts. If the power switch automatically turns to the OFF...
-
Page 10: For Smooth Operation
MS-350 NP Operating Instructions Ver 3.01E For smooth operation ● Heating temperature should be set at a minimum Set sealer so that an acceptable seal is completed at the lowest heating temperature. Excessively high heating temperatures will damage the Teflon, glass tape and other consumables, as well as result in heating element breakage. -
Page 11: Other Safeguards
Run test trials to find the optimum sealing condition, especially when trying to find the tightest seal possible. The Fuji Impulse MS-350 NP series is an impulse sealer ● Do not become alarmed if the sealing area does not become hot after the power switch is turned ON. -
Page 12: Major Parts And Function
MS-350 NP Operating Instructions Ver 3.01E Major parts and function Frame cover Control unit 1. Set the seal condition according to the film being used. 2. Set the auto-cycle interval. 3. Turn ON or OFF the auto cycle interval mode. -
Page 13: Proper Use Of The Sealer
MS-350 NP Operating Instructions Ver 3.01E Proper use of the sealer Use only as described in this manual. There is a risk of danger and malfunctions may result if the machine is used not in accordance with this manual. Setting the machine Install the machine on a flat, secure working place. -
Page 14: Power Switch On
MS-350 NP Operating Instructions Ver 3.01E Power switch ON Turn ON the power switch located on the side of the machine. The digital display on the control panel will light up. (The number initially displayed is the counter.) Push to turn ON Select the operation mode The "Auto cycle START/STOP"... - Page 15 MS-350 NP Operating Instructions Ver 3.01E Set the heating temperature ・ Activate the "heating temperature" mode. Use ▲/▼ arrows to set the heating temperature. The line graph of the heating temperature [Setting range : 140-400 ºF] when the heating time is set 0.0 sec.
- Page 16 MS-350 NP Operating Instructions Ver 3.01E Setting the different modes MODE DIGITAL DISPLAY Power ON ....Temperature is displayed in real time. TEMP. DISPLAY PUSH - FIRST TIME DECREASE VALUE INCREASE VALUE ....HEATING TEMP. PUSH - SECOND TIME DECREASE VALUE INCREASE VALUE ....
-
Page 17: Adjust The Seal Pressure
MS-350 NP Operating Instructions Ver 3.01E Adjust the seal pressure The pressure adjusting nut is adjusted to the position "S", which stands for the standard, at the time of factory shipment. Please perform sealing at the position “S” in general. -
Page 18: Finishing Sealing
MS-350 NP Operating Instructions Ver 3.01E ● ABORT CYCLE button To stop the operation after the machine started working, push the “ABORT CYCLE” button. The lever will return to the initial position. The set value will not be erased even if the “ABORT CYCLE” button is pressed. -
Page 19: Safety Devices And Error Messages
MS-350 NP Operating Instructions Ver 3.01E Safety devices and error messages When pinching the fingers to the sealing ● area When the foreign objects such as fingers are caught in the sealing area, the microswitch located under the pressure lever is not activated and the pressure lever returns to the initial position. -
Page 20: Replacing The Routine Maintenance Parts
MS-350 NP Operating Instructions Ver 3.01E 10 Replacing the routine maintenance parts Daily maintenance or replacement of parts at an early stage can prevent the machine from being damaged, and keeps the machine at the optimum condition. Replace parts according to the following directions in order to maintain your machine in optimum operating condition. -
Page 21: Preparation
MS-350 NP Operating Instructions Ver 3.01E 10-1 Preparation ● Before replacing parts... When replacing parts, lift up the pressure lever for easier replacement. Pressure adjusting nut How to lift up the pressure lever Pressure adjusting nut Loosen the M5x10 frame cover fixing screws, fastening screw and remove the frame cover. -
Page 22: Replacing The Teflon Center-Dry Tape
MS-350 NP Operating Instructions Ver 3.01E 10-3 Replacing the Teflon center-dry tape Essential tools: Scissors, Philips screwdriver Replace when: The center-dry tape breaks, burns, or Non-adhesive area when the seal becomes messy, etc. The Teflon center-dry tape is sold individually. Adhesive area Remove the old center-dry tape, starting from the edge. - Page 23 MS-350 NP Operating Instructions Ver 3.01E Remove the Teflon center-dry tape referring to “10-3 Replacing the Teflon center-dry tape.” Remove the heating element referring to “10-5 Replacing the heating element.” Disconnect the temperature sensor connector. Remove Screw A-1, Screw A-2, and Screw B to remove the temperature sensor fixing plate and remove the temperature sensor.
-
Page 24: Replacing The Heating Element
MS-350 NP Operating Instructions Ver 3.01E 10-5 Replacing the heating element Electrodes that mount the heating element consist of Electrode mounding bracket parts as in the right illustration. Electrode plate Electrode plate spring Essential tools: A Philips screwdriver Electrode cover... -
Page 25: Replacing The 38Mm-Width Glass Tape And Sarcon Sheet
MS-350 NP Operating Instructions Ver 3.01E 10-6 Replacing the 38mm-Width glass tape and Sarcon sheet Essential tools: Scissors, A Philips screwdriver Replace when: The heating element breaks often, the seal becomes messy, etc. The glass tape and Sarcon sheet are either sold 360mm individually or included in the maintenance parts kit. -
Page 26: Replacing The Silicone Rubber (White)
MS-350 NP Operating Instructions Ver 3.01E 10-7 Replacing the silicone rubber (white) Essential tools: Alcohol (Ethanol) Replace when: The seal becomes messy, etc. Silicone rubber (white) The silicone rubber is either sold individually or included in the maintenance parts kit. -
Page 27: Replacing The Microswitch
MS-350 NP Operating Instructions Ver 3.01E 10-9 Replacing the microswitch Essential tools: A Philips screwdriver Replace when: The problems listed on "13 Common problems and solutions" occurs. The microswitch is sold individually. Always unplug the power cord from the Warning outlet when replacing the microswitch. -
Page 28: Adjusting Each Part
MS-350 NP Operating Instructions Ver 3.01E 11 Adjusting each part 11-1 Adjusting the seal pressure Seal pressure is adjusted at the time of factory shipment so the optimum seal pressure can be achieved at the position of S (standard). “H” on the lable indicates “high”, and L is for “low”. -
Page 29: Adjust The Depth Of Seal Position
MS-350 NP Operating Instructions Ver 3.01E 11-2 Adjust the depth of seal position 1 Loosen the white plastic screws (5x10) on both sides of the seal receiving plate. 2 Seal gauge The seal (position) guide can be slid back and White plastic forth to adjust the depth of the pouch insertion. -
Page 30: Electric Diagram
MS-350 NP Operating Instructions Ver 3.01E 12 Electric diagram 110V MS-350 WIRING DIAGRAM Gray Gray Microcomputer control unit Yellow Black Black Black White Gray Black Transformer TRIAC Gray Electrode Heating element Temperature sensor Power cord Microswitch Earth black Yellow Terminal strip... - Page 31 MS-350 NP Operating Instructions Ver 3.01E 220V MS-350-NP(220V) WIRING DIAGRAM Microcomputer control unit White White Yellow Black Black Black White Grey Black White Transformer TRIAC Grey Electrode Heating element Temperature sensor Microswitch Temperature sensor Power module Earth cord Transformer Yellow...
-
Page 32: Common Problems And Solutions
MS-350 NP Operating Instructions Ver 3.01E 13 Common problems and solutions If you are experiencing problems with the machine, please refer to the chart below. Carefully follow the directions in the operating instructions when replacing parts. Please consult your dealer or Fuji Impulse if after referring to the chart, the problem cannot be resolved. - Page 33 MS-350 NP Operating Instructions Ver 3.01E Problems Check Solutions Is the heating element broken? Replace the heating element. Polish the metal area where the Bad connection between the heating electrode and heating element element and electrode. contact using the sand pater.
-
Page 34: Error Message And Solutions
MS-350 NP Operating Instructions Ver 3.01E 14 Error message and solutions Error number Check Solutions ▼ This error is displayed when the microswitch → Is the microswitch damaged ? is damaged. Replace the microswith or please consult your local dealer. ▼ When the lever remains to be in the closed →... - Page 35 MS-350 NP Operating Instructions Ver 3.01E...
-
Page 36: Password Function
MS-350 NP Operating Instructions Ver 3.01E 15 Password function Password function is installed to control the sealing parameters. When the password is registered, those who do not know the password cannot change the sealing parameters such as heating temperature, heating time, cooling temperature as well as the auto-cycle interval time. - Page 37 MS-350 NP Operating Instructions Ver 3.01E Enter the 4-digit password. a The display show "0000" on the screen, and the leftmost digit will start flashing. b Select the desired number by pressing the UP or DOWN arrow button. Confirm the setting by pressing the SET button.
-
Page 38: How To Change The Password
MS-350 NP Operating Instructions Ver 3.01E 15-3 How to change the password Turn ON the power switch while holding the SET button. Input the current 4-digit password. a The display show "0000" on the screen, and the leftmost digit will start flashing. -
Page 39: Exploded View / Parts List
MS-350 NP Operating Instructions Ver 2.10E Exploded view / parts list When ordering spare parts, please consult the exploded view diagram / spare parts list on the following pages and provide both the part name and code number to your local dealer. - Page 40 MS-350 NP Exploded View F Type MS-350 NP...
- Page 41 MS-350 NP Parts List F Type MS-350 NP ● Please indicate the part name and number in be below list when placing your order. ● Please specify the model name of your sealer and parts name when no code no. is listed. Sales Sales Parts Code Parts Name Parts Code Parts Name Unit Unit 495701 Touch switch (with harness) 3M 1 pc. 490100B Pressure lever 1 pc. 30020 Lever fastening bolt (with nut, washer) 2pcs/set 24068 Rubber feet (with screw) 4pcs/set 490300 Lever returning spring...
- Page 42 Y6602 JAN 2014 3rd Edition MS-350 NP Operating Instruction 3.01E...
Need help?
Do you have a question about the MS-350 NP and is the answer not in the manual?
Questions and answers