
Related Manuals for Caple W16135


Summary of Contents for Caple W16135
- Page 1 U n d e r c o u n t e r W i n e C a b i n e t I n s t r u c t i o n M a n u a l W I6 135 W I6 135G M W I6 136 Contact Caple on 0117 938 7420 for spare parts or www.caple.co.uk...
-
Page 2: Table Of Contents
Fitting A Kitchen Plinth Wine Bottle Stacking Installation Dimensions Installing The Top Fixing Bracket Using The Foot Sliders Care and Maintenance Troubleshooting Recommended Temperatures Caple Contact Details Instruction manual Wi6135 Wi6135GM Wi6136 Please keep this instruction manual for future reference... -
Page 3: Introduction
Thank you for choosing this Caple Wine Cabinet. To ensure that you get the best results from your new wine cabinet, we strongly suggest that you read this instruction manual thoroughly before use. If treated with care, your Caple product should give you years of trouble-free use. -
Page 4: Safety Instructions
- If the supply cord is damaged, it must be replaced by a Caple service agent or a similarly qualified person in order to avoid a hazard. - This product is not designed for commercial use, it is a household appliance only. - Page 5 I M P O R T A N T Caple cannot be held liable for any non compliance with these instructions. E L E C T R I C A L S H O C K H A Z A R D - Read all instructions before using the wine cabinet.
- Page 6 - When positioning the appliance, ensure the supply cord is not trapped or damaged. - This appliance can be used by children aged from 8 years and above and persons with reduced physical, sensory or mental capabilities or lack of experience and knowledge if they have been given supervision or instruction concerning use of the appliance in a safe way and understand the hazards involved.
- Page 7 - Do not use electrical appliances inside the storage compartments of the appliance,unless they are the type recommended by the manufacturer. Symbol ISO 7010 W021 Warning; Risk of fire / flammable materials Instruction manual Wi6135 Wi6135GM Wi6136 Please keep this instruction manual for future reference...
-
Page 8: Environmental Protection
Registration can also be completed online by visiting www.caple.co.uk. Ensure you keep your warranty card safe, you may need to show it to Caple Service together with proof of purchase. If you fail to show your warranty card you will incur all repair charges. -
Page 9: Installation
I N S T A L L A T I O N B E F O R E U S I N G YO U R W I N E C A B I N E T › Remove the exterior and interior packing. I M P O R TA N T: Before connecting the wine cabinet to the power source, let it stand upright for at least 12 hours. - Page 10 (ground) pin from the plug. Any questions concerning power and/or grounding should be directed toward a certified electrician or Caple service. WA R N I N G : Incorrect earthing can result in the risk of electric shock.
-
Page 11: Operating Your Wine Cabinet
O P E R A T I N G Y O U R W I N E C A B I N E T Please use the cabinet within ambient temperatures between 16-32ºC, if the ambient temperature is higher or lower than this, it will cause the temperature to fluctuate in the cabinet, possibly preventing it from reaching 5-18ºC. -
Page 12: Control Panel
C O N T R O L PA N E L “ Indicator light illuminates to signify the cooling mode is currently in operation ” TO U C H C O N T R O L K E YS Switches the interior light ON/OFF To switch the appliance ON/OFF (press and hold this buttons for approximately 3 seconds) This button controls the upper compartment temperature zone. - Page 13 I N T E R N A L L I G H T In order to reduce energy consumption, the LED light within this wine cabinet will automatically switch off after 10 minutes. If you would prefer the LED light to remain on continuously, this is possible.
-
Page 14: Using The Shelves
Visit our Caple website to view a ‘How to video’ on this. www.caple.co.uk ple website to view a 'How to video' on this. www.caple.co.uk Scan the QR code below to access the ‘How to video’... -
Page 15: How To Change The Door Opening
H O W T O C H A N G E T H E D O O R O P E N I N G This appliance has reversible doors but is delivered with a right hinged door. The left hand hinge kit comes with the unit (in the box), should you wish to reverse the hinge on your unit follow the directions below: 1. - Page 16 1. Open the door to 90 degrees, take out 2 screws (2) from lower door axis (3), remove the door (4), then pull out the door and door axis (Fig. A). 2. Put the door down safely and take out the plug (12) from top of door frame, unscrew 1 screw (11) at bottom and remove the door limit device (10), then install the door limit device (10) at top of door frame, please use spare plug (12) to block the hole at top of door frame.
-
Page 17: Installing The Handle
Remove the door gasket on the drilled holes side to install the handle. (see below drawing). Fix the handle to the screws and push the gasket back into place. Visit our caple website to view a ‘How to video’ at WWW.CAPLE.CO.UK Scan the QR code below to access the ‘How to video’... -
Page 18: Installing The Full Height Plinth Grille
I N S T A L L I N G T H E F U L L H E I G H T P L I N T H G R I L L E Take out the full height plinth grille and the brackets from the accessories box. Fix the brackets to the cabinet with screws provided and fix both sides of the grille to the brackets with the 2 supplied screws as shown in below diagram. -
Page 19: Fitting A Kitchen Plinth
F I T T I N G A K I T C H E N P L I N T H odel is also supplied with a slot on plinth grille if the previous method/grille is not preferred. This model is also supplied with a slot-on plinth grille if the previous method/grille is not mm vent slot is required in the plinth to ensure air is able to ventilate correctly. -
Page 20: Wine Bottle Stacking
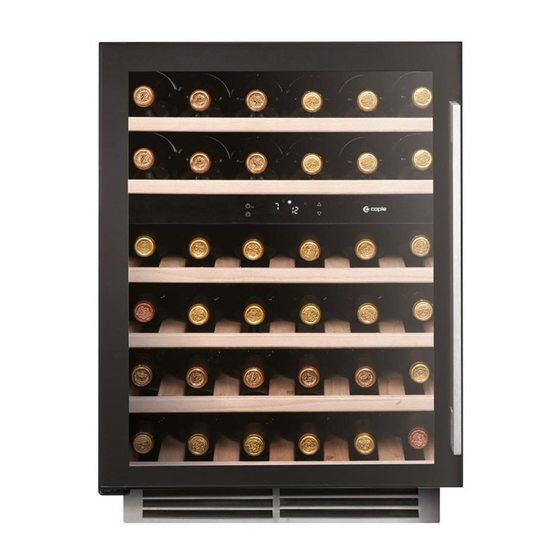
W I N E B O T T L E S T A C K I N G Stores max. 46 Bordeaux style bottles 750ml. N OT E : If you wish to store other style bottles i.e champagne, the maximum storage capacity will be less than as shown above. -
Page 21: Installation Dimensions
I N S T A L L A T I O N D I M E N S I O N S Instruction manual Wi6135 Wi6135GM Wi6136 Please keep this instruction manual for future reference... -
Page 22: Installing The Top Fixing Bracket
I N S T A L L I N G T H E T O P F I X I N G B R A C K E T This bracket will keep the product secure and help prevent it moving when in use. After installing the wine cabinet, please open the door, adjust the fixing bracket and fix this into the work surface with three screws using a screwdriver. -
Page 23: Using The Foot Sliders
U S I N G T H E F O O T S L I D E R S If you want to adjust the height over 820mm, please install the product using the foot sliders provided. These are provided to help prevent the feet catching on the floor when sliding the appliance into the aperture. -
Page 24: Care And Maintenance
C A R E A N D M A I N T E N A N C E C L E A N I N G YO U R W I N E C A B I N E T ›... - Page 25 M O V I N G YO U R W I N E C A B I N E T › Remove all items. › Securely tape down all loose items (shelves) inside your appliance. › Turn the adjustable leg up to the base to avoid damage. ›...
-
Page 26: Troubleshooting
The door was reversed and not properly installed. The gasket is dirty. The shelves are out of position. If the above table has not solved the problem please contact Caple Service by phone on 0117 938 7420 or by email service@caple.co.uk 26 Instruction manual Wi6135 Wi6135GM Wi6136... - Page 27 D E F R O S T I N G / C O N D E N S AT I O N Your wine cabinet is designed with an “Auto-cycle” defrost system. When the RUN cycle is OFF, the refrigerated surface of the wine cabinet (interior rear wall) defrosts automatically. The defrosted water is channelled into a drain pan which is located at the back of the cabinet next to the compressor from where it evaporates.
-
Page 28: Recommended Temperatures
R E C O M M E N D E D T E M P E R A T U R E S R E C O M M E N D E D S TO R A G E T E M P E R AT U R E S : R E C O M M E N D E D D R I N K T Y P E T E M P E R AT U R E... - Page 29 NOTES: Instruction manual Wi6135 Wi6135GM Wi6136 Please keep this instruction manual for future reference...
- Page 30 NOTES: 30 Instruction manual Wi6135 Wi6135GM Wi6136 Please keep this instruction manual for future reference...
- Page 31 NOTES: Instruction manual Wi6135 Wi6135GM Wi6136 Please keep this instruction manual for future reference...
-
Page 32: Caple Contact Details
Caple Service Fourth Way Avonmouth T: 0117 938 1900 Bristol E: service@caple.co.uk BS11 8DW www.caple.co.uk...
Need help?
Do you have a question about the W16135 and is the answer not in the manual?
Questions and answers