Table of Contents
Advertisement
Quick Links
Advertisement
Table of Contents

Related Manuals for Hybrid HMH 230


Summary of Contents for Hybrid HMH 230
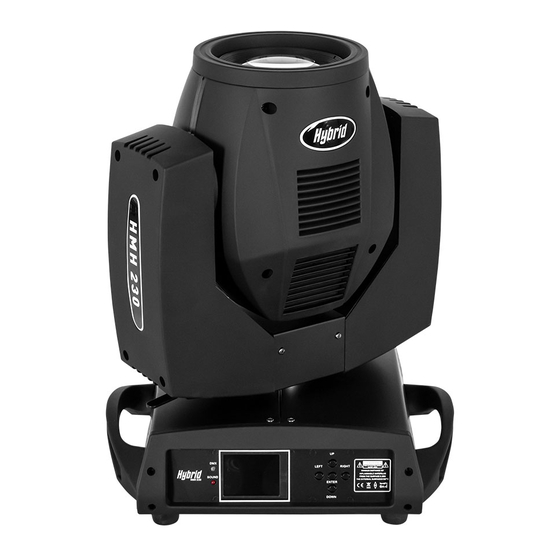
- Page 1 HMH230 BEAM User Manual Please read the instruction carefully before use...
-
Page 2: Safety Instruction
1. Safety Instruction Please read carefully the instruction manual, which includes important information about the installation, usage and WARNIN maintenance. Please keep this User Guide for future consultation. If you sell the unit to another user, be sure that they also receive this instruction manual. Important: Damages caused by the disregard of this user manual are not subject to warranty. - Page 3 Examine the power wires carefully; replace them immediately if there is any damage. Unit’s surface temperature may reach up to 85℃. Don’t touch the housing bare-handed during its operation, and allow about 15 minutes for cooling the unit down before replacing bulb or maintenance as it could be very hot. Avoid any inflammable liquids, water or metal objects entering the unit.
- Page 4 Do not operate in dirty or dusty environment; do clean the fixture regularly. Do not touch any wire during operation as there might be a hazard of electric shock. Avoid power wires twist other cables. The minimum distance between light output and the illuminated surface must ...
-
Page 5: Technical Specification
2. Technical Specification DMX Channels: 15 and 18 channels Control mode: DMX, Master slave, Sound active TFT display easy to control One gobo wheel:17 gobos+Open One color wheel:13 colors+Open Smooth 0~100% dimming and variable strobe speeds ... - Page 6 3. Description 3.1 Control Panel Button: LEFT Return to the top level and adjust the field RIGHT Adjust the field ENTER To confirm the selected functions To go backward in the selected functions DOWN To go forward in the selected functions LED: DMX input present...
-
Page 7: Main Function
4.1 Main Function... -
Page 8: Dmx Address
DMX Address To select DMX Address, press the ENTER button to show the DMX ADDRESS on the display. Use the UP/DOWN button to adjust the address from 001 to 495(18CH)/498(15CH). Once the address has been selected, press the ENTER button to setup, to go back to the functions without any change press the LEFT button again. - Page 9 Sound Mode Master ON/OFF Lamp ON/OFF (Manual control the lamp ON or OFF) Channel Mode 15CH /18CH (Choose 15channels or 18 channels)
- Page 10 Display Screen Brand ( Means show the Hybrid on the panel when never operation) Display Screen ON ( Means show the DMX address on the panel when never operation) Display Screen OFF ( Blackout the panel when never operation)
- Page 11 Test Mode (For testing all function by manual ) Setup Mode...
-
Page 12: Pan Inverse
Pan Inverse To select Pan Inverse, press the ENTER button to show the PAN INVERSE on the display. Use the DOWN/UP button to select the Inverse (pan inversion) or Normal (normal) mode. Once the mode has been selected, press the ENTER button to setup, to go back to the functions without any change press the LEFT button again. -
Page 13: Control By Universal Dmx Controller
Info (Show the information of the light as following) Lamp Time (the display show the number of working hours of the lamp.) Total Time (the display will show the number of working hours of the unit.) DMX Clr (Professional person make all channels of the unit will return to their standard position.) SysRst (all channels of the unit will return to their standard position.) 5. - Page 14 At last unit, the DMX cable has to be terminated with a terminator. Solder a 120-ohm 1/4W resistor between pin 2(DMX-) and pin 3(DMX+) into a 3-pin XLR- plug and plug it in the DMX-output of the last unit. Connect the unit together in a “daisy chain” by XLR plug cable from the output of the unit to the input of the next unit.
- Page 15 5.2 Address Setting If you use a universal DMX controller to control the units, you have to set DMX address from 1 to 512 so that the units can receive DMX signal. Press MENU button to enter menu mode, select DMX Functions, press ENTER button to confirm, use UP and DOWN button to select DMX Address, press ENTER button to confirm, the present address will blink on the display, use UP and DOWN button to adjust the address from 1 to 512, press ENTER button to store.
- Page 16 204-239 Pulsation from slow to fast 240-247 Strobe from slow to fast 248-255 Open Open Color 1 9-12 Color 2 13-16 Color 3 17-20 Color 4 21-24 Color 5 25-28 Color 6 29-32 Color 7 33-36 Color 8 37-40 Color 9 Color 41-44 Color 10...
- Page 17 60-63 Gobo 1 shaking from slow to fast 64-67 Gobo 2 shaking from slow to fast 68-71 Gobo 3 shaking from slow to fast 72-75 Gobo 4 shaking from slow to fast 76-79 Gobo 5 shaking from slow to fast 80-83 Gobo 6 shaking from slow to fast 84-87...
- Page 18 18 Channels mode Channel Function Value 0-255 0-540 degree 0-255 16bit Pan Fine 0-255 0-270 degree Tilt 0-255 16bit Tilt Fine Pan/Tilt Speed 0-255 From slow to fast 0-255 Dimmer From dark to light 0-255 16bit Dimmer fine None 8-15 Open 16-131 Strobe from slow to fast...
- Page 19 Gobo 2 10-12 Gobo 3 13-15 Gobo 4 16-18 Gobo 5 19-21 Gobo 6 22-24 Gobo 7 25-27 Gobo 8 28-30 Gobo 9 31-33 Gobo 10 34-36 Gobo 11 37-39 Gobo 12 40-42 Gobo 13 43-45 Gobo 14 46-48 Gobo 15 49-51 Gobo 16 52-55...
- Page 20 190-193 Stop Anti-clockwise rotation from slow to 194-255 fast 0-255 None None 0-255 Focus Focus from far to near 0-255 Frost Frost function 0-255 Pan/Tilt marco P/T marco P/T M speed 0-255 Speed from slow to fast 0-129 None 130-139 Lamp on 140-199 None 200-209 Reset Function...
-
Page 21: Troubleshooting
6. Troubleshooting Following are a few common problems that may occur during operation. Here are some suggestions for easy troubleshooting: A. The unit does not work, no light and the fan does not work 1. Check the connect power and main fuse. 2. -
Page 22: Maintenance And Cleaning
7. Maintenance and Cleaning Maintenance: Ballast A.As the pictures shown above, please replace the cable or cable joints immediately once they’ve turned yellow. B. Do maintain the fixtures every two months and make sure that all the screws and terminals have been locked firmly to make sure the normal performance of the fixtures.
Need help?
Do you have a question about the HMH 230 and is the answer not in the manual?
Questions and answers